Quick Links
Key Takeaways
- A clean workspace is essential for building a PC. Avoid static electricity by working on a wooden floor or using antistatic methods.
- A Phillips-head screwdriver is the most important tool you'll need. Consider a long-shaft screwdriver and a magnetic head for convenience.
- Use screw holders and containers to keep your screws organized. Wash and repurpose small containers like yogurt pots or egg boxes.
If you're getting ready to build a PC, you'll need some basic tools and components—but what are the tools and equipment every PC builder needs?
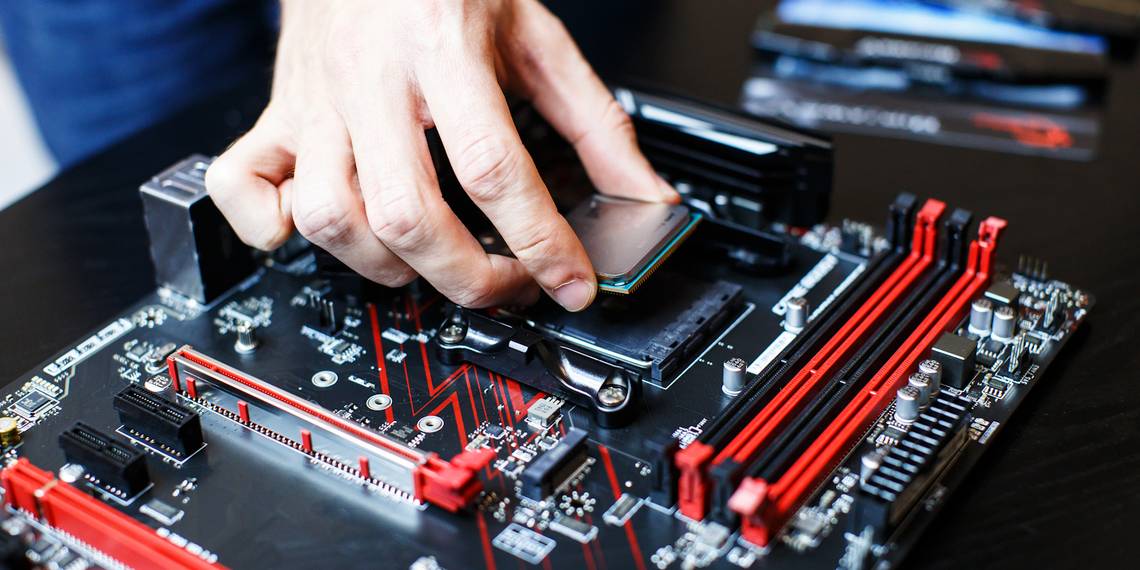
0. A Clean Workspace
It's important to have space to work while you build. Look for a flat surface at an appropriate height so you're not bending over and hurting your back, with good clear overhead lighting. Some parts are small or hard to seat correctly, and it'll be much easier if you can see what you're doing.
However, you should avoid working on a carpet or a rug, which can generate static electricity, especially if you're wearing fluffy socks, potentially harming your components. Static electricity frying your hardware isn't guaranteed, but why take the risk when it can be avoided easily? Work on a wooden floor, work barefoot, buy an antistatic wristband, ground yourself by touching the metal of your PC case, or even combine some of these antistatic methods to protect your hardware. There are even antistatic bench mats or antistatic floor mats, but the latter is definitely overkill for a home PC build.
The best surfaces are a wooden desk or coffee table, or you could use your kitchen counter as long as there's enough room and you aren't too near the sink.
1. Screwdriver Set
The most essential tool for building a computer is a Phillips-head screwdriver. Specifically, you want a Phillips No. 2, which is the go-to for most PC-building-related screws, which you'll need for tightening the screws on most components to hold them in place. Almost any Phillips No.2 will do the job, but in my experience building PCs, there are a couple of extra considerations.
You'll want a regular-length Phillips head screwdriver, but a long-shaft screwdriver is also incredibly handy for those difficult-to-reach places. You might also consider a short-shaft screwdriver, too. Years ago, I bought the iFixit Mako Precision Bit Set. Its range of swappable screwdriver heads always comes in handy, not just for PC building! Finally, consider a magnetic head, which is extremely useful when you're trying to position a screw at an awkward angle.

In addition, give serious thought to picking up a flat-head screwdriver. While most screws you'll encounter will use a Phillips head, there are always one or two with a flat head, and you don't want to find yourself attempting to tighten up expensive PC hardware with a butter knife.
2. Screw Holders
Building a PC always requires lots of screws of different shapes and sizes. You'll want some containers to hold your screws, keep them separate, and, most importantly, avoid losing any of them. Any small container will do so if it's stable; I've used old yogurt pots, egg boxes, cream cheese boxes, and more over the years. Just make sure to wash them first!
3. Long-Nose Pliers/Hemostat
When it comes to tightening certain screws, a pair of long-nose pliers or hemostat pliers are extremely useful, especially if a screw decides to leap to freedom and falls into your PC case.
If you can, choose a pair with silicone tips, as this will protect your PC case, motherboard, and other components from unwanted scratches.
4. Head Torch

I've built numerous PCs over the years and fixed plenty more. Having a handy head torch available always makes the job easier, even if you're in a well-lit space. That's because even if it's well-lit, you'll be peering into a PC case, which will inevitably block some precious light and obscure your view.
Now, you might say, "Why don't I just bring a lamp over to the table?" Well, you could, but when it comes to PC building, you want to keep your workspace as clear as possible, and sticking a light to your forehead is the easiest way of shedding light on the situation without creating clutter.
You don't have to get anything fancy; a basic rechargeable head torch will do the job just fine.
5. Zip Ties or Velcro Ties
Once your components are placed in your case, you need to manage the cables to keep everything neat and tidy and to make sure you're not obstructing any airflow.
To do this, you'll need zip ties, velcro ties, or twist ties. These will let you tie down cables to points inside your case and bundle cables together for easier management.
PC Building Optional Tools
Wait, you only need five tools to build a PC?
That's right; those five tools should guide you happily through any PC build. In fact, with some experience, you can build a PC from scratch with just a Phillips No. 2 screwdriver—but having some extra tools on hand never hurt anyone, which is why there are some extra bits you might want to consider. However, these are all optional, so don't stress if you don't have them.
Thermal Paste

If you buy a new CPU or a new CPU cooler, it will probably come with a small tube of thermal paste (your CPU cooler may even have thermal paste applied already). However, if you are building using second-hand components, you'll need to supply thermal paste (you may also need some isopropyl alcohol for second-hand components—check out the next entry in the list).
You may also want to consider having thermal paste on hand, as the paste that comes with some CPUs or coolers is not of the best quality. The thermal paste helps transfer heat from your CPU to the cooler, so using a quality paste can help prevent your computer from overheating.
Some popular quality thermal pastes are Arctic Silver 5, Thermal Grizzly Conductonaut, or Noctua NT-H1.
Rubbing Alcohol
If you're adding new thermal paste to your CPU, you'll need to remove the old thermal paste first. Thermal paste hardens over time and becomes crusty and less effective.
Fortunately, removing old thermal paste is very easy. You can use rubbing alcohol to remove it. Just dip a Q-tip in the rubbing alcohol and gently rub at the old thermal paste to remove it.
5mm Hex Nut Driver
Your trusty Phillips-head screwdriver is really all you need for a PC build. However, you might consider keeping a 5mm hex nut driver around for good measure, as it's handy for checking if the motherboard standoffs are secure.
If you already own a larger screwdriver or toolset, you may find a 5mm hex nut driver or driver attachment in there, so check that out first before buying a new one.
A Working Computer
Finally, one of the most useful things you can have on hand when building is a working PC for troubleshooting purposes.
Once you connect all your components, your new PC should be able to POST (power-on self-test). POST shows your components are communicating with each other, and the machine can access the BIOS, which is the system firmware that runs straight after your computer boots, helping the operating system load.
However, sometimes, you'll connect your components, and the PC won't POST. When this happens, you can listen out for beep codes, check the motherboard error lights, or motherboard LCD screen to figure out the problem. Thankfully, there are several ways to fix a PC that won't POST.
This is where your working PC comes in. You can swap out components one at a time for components from your working PC because they are known to be functional. If you swap out your new RAM for your old RAM and the new PC now posts, for example, you are likely dealing with a faulty or incorrectly seated RAM stick.
In truth, the first five items are all anyone needs to successfully build a PC, beginner or not. A clean workstation is always a plus, and having something to hold your screws is also ridiculously useful. Most of all, just remain calm while building your PC; although it seems complicated, it's basically advanced Lego.