How do you share music on Skype? The usual way is to click the + icon, browse for the file and send it.
Wouldn't it be great to be able to actually play a tune to someone while you chat, altering the volume so that you can discuss it? I'm not talking about playing the track in the background and letting your friend hear it through your microphone, rather actually sending the audio to them through Skype with your voice. In fact, it might not even be music you share. You could be playing a video game, or plan to record a professional-sounding podcast with a theme tune, clips and more.
What is most surprising about all of this is that it's achievable, and simple as long as you're using the right app…
Meet VoiceMeeter
Donationware audio app VoiceMeeter is the tool you will need to achieve this piece of online collaboration Zen. Available via VB-Audio Software, the app is a virtual audio mixer with three inputs (two hardware, one software) and three outputs and mixes these through two buses.
Movie soundtracks, Internet radio, microphone and MP3 can be mixed and pushed to audio outputs (speakers, headphones), a VOIP client (Skype, Google Hangouts, and others) or even a recording application.

VoiceMeeter is equipped with Virtual Audio I/O and this enables it to be used as your system's main audio device, much as if it was a hardware mixer. MME, Direct-X, KS, WaveRT and WASAPI audio interfaces are all supported, and VoiceMeeter can be installed on Windows XP, Vista, 7, and Windows 8 32-bit and 64-bit versions.
As you've probably guessed, VoiceMeeter is capable of much more than enhancing collaboration over VOIP apps, but we'll keep it simple and show you just how that can be achieved.
Setting Up VoiceMeeter
To start sharing audio through a Skype call, you'll need to configure VoiceMeeter correctly. After installation, load the app and connect any headphones and microphones. Launch Skype too, and make sure you have a media player ready for testing an audio track to share.
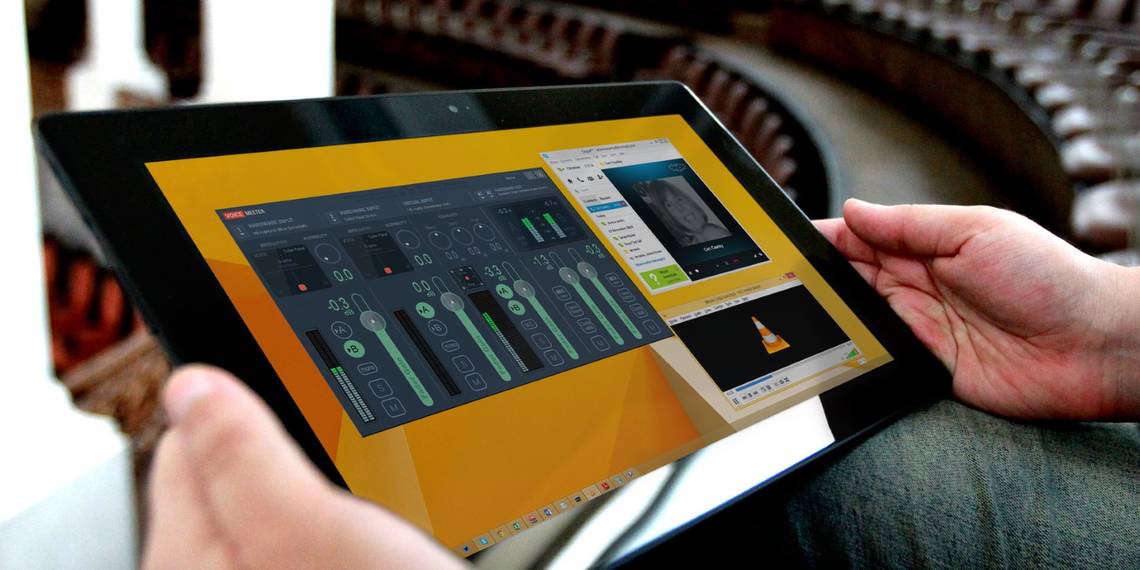
On the VoiceMeeter interface you will see four panels, Hardware Input 1, Hardware Input 2, Virtual Input and Hardware Out, which has two outputs. The application lets you mix the first three input channels together, thus producing a fourth that can be monitored using speakers or headphones and piped through to your Skype or other VOIP client.
Select Your Monitoring Device

Starting with the fourth panel, Hardware Out, click A1 and select your headset, choosing the KS option if possible. A hierarchy exists for selecting a device: for the best results, select those prefixed with KS. If this isn't available, choose WDM; failing this, MME. Not all audio systems will support the KS option, so WDM is the most common choice.

With your headset/speaker selected, open Control Panel > Hardware and sound > Sound and select the Playback tab. Select your audio playback device and then open Properties. In the Advanced tab, use the drop down to select the Default Format, the audio sample rate which will determine the quality of the audio that your Skype contact will hear. Similarly, if you're using an app like Audacity to record the conversation, the quality of the recording will rely on the bitrate you select.

On the Sound control panel, you should also switch to the Communications tab and select Do nothing. This will prove useful for ensuring microphone inputs work correctly when a VOIP call us received.
Add Your Microphone

Hardware Input 1 is where your microphone should be selected, and with your headphones on, you should hear yourself speaking in real time! Open Control Panel > Hardware and sound > Sound > Recording and open the Listen tab.

Here, you will need to ensure that Listen to this device is NOT checked, in order to avoid problems with VoiceMeeter. While you're in this section, switch to the Levels tab. Here you can adjust the overall sound of the mic device if your voice seems too quiet.
At this stage, VoiceMeeter is sending audio from Hardware Input 1 direct to Output A1, using Bus A.
Make VoiceMeeter Your Default Playback Device
Continuing with the setup means setting VoiceMeeter as your default audio device. This can be done by opening Control Panel > Hardware and sound > Sound > Playback, selecting the VoiceMeeter Input virtual device and clicking Set Default.
By doing this, we enable every sound played on your computer to be routed through the Virtual Input panel of the VoiceMeeter mixer.

With your headphones on, open an MP3 in your preferred media player and check the audio is coming through.

You should note that the Virtual Input is multichannel, able to handle eight channels. You can configure this by opening Control Panel > Hardware and sound > Sound > Playback, selecting VoiceMeeter Input and clicking Configure.
At this stage, you should have your microphone and Windows audio running through Bus A, and output to your headset.
Skype Meets VoiceMeeter
To proceed, you'll need an extra app installed to help VoiceMeeter put the audio where you want it to go. Head to www.vb-cable.com and download the VB-AUDIO Virtual Cable, another donationware tool.
After installation visit Control Panel > Hardware and sound > Sound and check the Playback and Recording tabs where you'll find two new virtual devices, CABLE Input and CABLE Output.
VoiceMeeter's basic configuration is now in place, so it's time to bring Skype into the mix.

Once signed into the VOIP client, open Tool > Options and switch to the Audio settings tab. Against Microphone, select VoiceMeeter Output, and ensure the Automatically adjust microphone settings checkbox is cleared.
In the Speakers field, set CABLE Input as the device, again clearing the checkbox.
Also, set the volume settings for Microphone and Speaker to maximum. Note that you can leave the PC speakers set as the ringing device.
Click Save when you're done, and switch back to VoiceMeeter. In Hardware Input 2, select CABLE Output as the source. While you're here, you should also set Hardware Input 1 to Bus B, and Hardware Input 2 to Bus A. This will avoid any issues with echoing. Should you enjoy the sound of your own voice when on Skype, however, activate Bus A on Hardware Input 1.
Your setup should now look something like this:

Talking & Playing Music on Skype
With all of that done, you're now ready to begin making Skype calls to single or multiple contacts. While you talk, you'll be able to play audio clips on your computer that will be sent through VoiceMeeter and mixed into your microphone audio, and then into the virtual input you set up in Skype.
At the other end, the sound quality is at least as good as when you're speaking, and you have control over the volume of the clip using the fader gain control on the Virtual Input panel.
The beauty of this setup is that it isn't limited to Skype. You can pipe your system audio through other VOIP systems on your computer. I discovered VoiceMeeter when looking for a way to reducing post-production on my Google Hangouts-based podcast (I didn't want to spend too much time adding a theme tune or audio clips) and the app suits this purpose perfectly.
Tips for Using VoiceMeeter Successfully
Now that you have VoiceMeeter set up to send system audio through Skype along with your voice, you'll need to make sure that your settings are retained. You can save the configuration by opening Menu > Save Settings, making sure to make a copy of the saved XML file should you need to reinstall the application.

Problems with audio on a correctly set up installation of VoiceMeeter can often be resolved using the Restart Audio Engine option at the top of the Settings menu.
Various settings not covered in this guide are available in VoiceMeeter, such as the Intellipan feature (for moving your voice around the stereophonic space) and the equalizer for Virtual Input devices. Spend some time investigating these if you're unfamiliar.
As far as Skype goes, we've only tested this with the classic desktop version, which as you should know is far superior to the clunky Windows 8 Modern version.
Finally, be aware that once set as your default audio device, system volume can only be adjusted through VoiceMeeter. This means that your usual hardware buttons for volume will not work – you'll have to launch the app and adjust the volume on screen. A small price to pay for piping MP3 and other system audio to your Skype collaborators, we think you'll agree!
Have you found other ways of including audio from MP3 files, movies, games or videos in your Skype calls? Do you have details of a better app than VoiceMeeter? Let us know in the comments.
Image Credit: PlaceIt