It doesn't matter whether you're trying to cut the cord or just adding an extra way of consuming content into your living room setup, you're sure to find lots of set-top boxes and streaming sticks vying for your attention.
The field can increasingly be boiled down into the "big five." They are Roku, Android TV, Apple TV, Amazon Fire, and Chromecast.
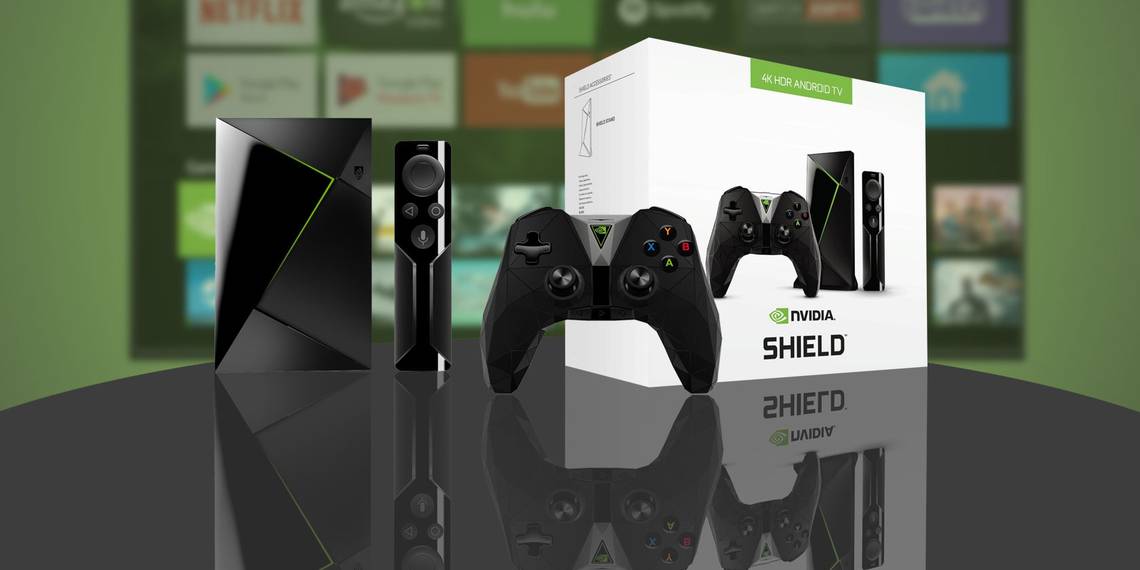
Several set-top boxes are powered by Android TV. One of them is the Nvidia Shield TV. It's arguably the best device on the market for aspiring cord cutters.
Although the interface is simple to understand, if you really want to fulfill the device's potential, you may need a little help.But fear not, as we've got you covered.
In this guide we're going to steer you through setting up and using your Nvidia Shield TV.
In Brief: A Summary of Steps
Here's an easy-to-digest guide to getting started. If you don't want to spend hours fiddling with your new toy, simply follow these steps:
- Connect your Nvidia Shield TV to your television
- Follow the on-screen initial setup guide
- Customize the Settings menu
- Add adoptable storage
- Customize the home screen and hide apps you don't want
- Add a Bluetooth mouse
- Install your favorite apps
Everything listed above is covered in detail in this guide, so keep reading to find out more.
What's in the Box?
So, you've just unwrapped your new Nvidia Shield, and you're feeling a bit confused. Where do you begin?
Before we dive into the guide itself, let's take a quick look at what you can expect to find in the box:
- Nvidia Shield TV set-top box
- Remote control
- Gaming controller
- Power lead for the set-top box
- USB charging cable for the gaming controller
- Supporting literature

Unlike the 2015 version of the device, the TV remote does not have a charging lead. It uses two CR2032 coin cell batteries instead. They are included with the remote.
Connect the Nvidia Shield TV to Your Television
To begin, you need to connect your Nvidia Shield to your television. The back of the device has five ports: power, two USBs, an HDMI, and ethernet.

Use an HDMI cable to connect the HDMI port on your Nvidia Shield with the HDMI port on your television. Your TV's HDMI port needs to be HDCP-compatible.
Note: Nvidia does not include an HDMI cable in the box. Make sure you use HDMI 2.0 for maximum performance.
Next, plug the power adapter into the power socket. Unlike some smaller streaming devices, you cannot power your Shield using a TV's USB port; you need to connect it to the mains.

Lastly, connect the ethernet port to your router using a high-quality ethernet cable. If your router is in a different room, don't worry. You can also connect to the web using your home's Wi-Fi network.
When you're ready, turn on your TV and use the Input button on your TV's remote control to switch to the correct HDMI channel. You should see the Nvidia logo on your screen.
First-Time Setup
The first time you turn on your Nvidia Shield TV, the device will guide you through the initial setup wizard.
Firstly, you'll have to choose a language. If you bought the device in an English-speaking country, English will be the default setting. Press the Select button on your Shield's remote to continue.
If you didn't use an ethernet cable, the device will ask you to connect to your Wi-Fi network on the next screen. Again, use your remote to make your selection and enter your password.
Next, you'll see a "Connecting to Google" message displayed on your screen. When prompted, enter your Google Account credentials. Doing so will give you access to your apps, recommended music and videos, your cloud-based saved games, and more. It is possible to skip this step, but doing so will severely limit your Nvidia Shield's usefulness. It is not recommended.
The device will continue to initialize for a few more seconds. To complete the process, click Continue when presented with Nvidia's terms and conditions.
You should now be looking at the device's home screen. Officially, it's called the Lean Back Launcher.
Fine-Tune the Settings Menu
It's worth spending a few minutes in the Settings menu to get your Shield TV setup exactly the way you want it. You should do this before you start doing fun stuff like adding apps and playing games.
If you've spent any time using Android smartphones, the Settings menu will be immediately familiar. However, there are some fundamental differences. We've covered the differences in more detail in an article elsewhere on the site.
Here are the settings you definitely need to change before you start using your Nvidia Shield. To access the menu, use your control to scroll to the bottom of the home screen and press Select on the Settings icon.

Display and Sound
The Display and Sound sub-menu has a couple of important settings. Firstly, make sure you set Resolution to your TV's highest supported output.
Secondly, click on Power control and toggle the sliders next to CEC TV on and CEC TV off. It lets you TV immediately jump to the correct HDMI input channel when it detects the Shield being used.

If you're confident enough, have a look at the Advanced Settings menu as well. You will find options to adjust your screen's over-scan, set up surround sound, and decide whether you want to disable the Shield's own volume control (useful if you don't want to pop your eardrums accidentally!).
System
Open the System menu and go to Processor Mode. Make sure you enable Max Performance. There's no tangible benefit to using the underpowered Optimized mode.

Storage and Reset
The most interesting menu option is Storage and Reset. You can use it to set up your Nvidia Shield so you can access it over your local network, use network drives, and most importantly, expand the device's disk space by adding adoptable storage.
To access your device over your network, head to Storage and Reset > Shield Storage Access > Over Local Network and slide the toggle into the On position. The device will issue you with an on-screen username and password. Make a note of them; you'll need them to establish a connection from your PC or Mac.

If you use a NAS drive, you can make your Shield TV recognize it by going to Settings > Storage and Reset > Shield Storage Access > Network Storage. You Shield should automatically recognize the drive. If it doesn't, select Manually add network storage from the list of options.
We'll look at adoptable storage in more detail below.
Using Adoptable Storage
The Shield TV comes in two forms. There's the 16 GB regular version and the 500 GB Pro version. Those with a Pro device might not need adoptable storage. However, if you have a 16 GB model, it's a lifesaver.
Adopted storage lets your Shield treat external storage as part of its own hard drive. All you need is a USB-based external memory device. A USB stick will work, but an external hard drive is more appropriate.
Make your choice carefully; when you format an external drive as adopted storage, it becomes encrypted to your Shield. You will not be able to use it on other devices without reformatting it again.

If you need to be able to use your drive elsewhere, do not make it into adopted storage. If you plug it in like a regular USB drive you'll still be able to access files and folders, but you won't be able to use it to install apps or games on.
To set up adopted storage, plug in your USB device and go to Settings > Storage and Reset > Shield Storage Access and click on your external drive. On the next screen, choose Set up as internal storage. Finally, select Move now.
Customize the Home Screen
On the Lean Back Launcher, you'll see three rows of content. The top row features recommendations from apps you have installed on your device. The suggestions might be games, apps, videos, music, and more.
Thankfully, it doesn't have to be the pseudo-advertisement it sounds like. You can hide any apps from the Recommendations row and thus build a great feed of the content you care about from apps you enjoy using.
To hide some apps' content from the row, go to Settings > Preferences > Home Screen > Recommendations row and slide the toggles alongside the apps you don't want to see.

You can further customize the Shield TV's home screen by changing the order the apps appear in. You can even sort them by most recently used.
To make the tweaks, go to Settings > Preferences > Home Screen > Apps and Games row.
Hide Apps You Don't Use
Because the Nvidia Shield TV runs Android TV, it comes pre-installed with all the Google apps. Depending which video and music subscriptions you have, you might not find all of them useful.
A lot of Shield users just move the apps they don't use to the end of the row, but there's a smarter way.
Go to Settings > Device > Apps and locate the apps you don't want. You will find them in the System Apps section.

Click on the app in question and select Disable from the list of options. It will still be on your device, but you won't see any reference to it. To reverse the decision, click on Enable.
The only way to delete stock apps is to root your Shield. Sadly, it's not as easy rooting an Android smartphone and the instructions for doing so are way beyond the scope of this guide.
Add Your Bluetooth Devices
The Shield can work with almost any device that supports Bluetooth. That covers obvious peripherals such as a mouse and keyboard, but also the latest generation of Xbox and PlayStation games controllers, webcams, and more.
Note: You should definitely add a mouse and keyboard. A USB one will suffice. They will be extremely useful when working with sideloaded apps.

To add a Bluetooth device, go to Settings > Remote and accessories > Add accessory. The Shield TV will automatically scan for any devices within range and guide you through the pairing process.
Add Apps to Your Nvidia Shield TV
The tedious part is over. Now it's time to install some apps on your Nvidia Shield so you can start enjoying the content.
There are four different ways to install apps. Keep reading for a detailed look at all the methods.
Google Play Store
We begin with the most obvious method: using the device's built-in Google Play Store app. Graphically, it's vastly different to the smartphone and web versions, but it functions in a broadly similar way.
Open the app. On the left-hand side of the screen, you'll see four menu items. Highlight Home and press Right on your remote. This will let you explore the store's various categories. Alternatively, if you already know which app you want, press the Microphone button on your remote and you can perform a voice search.
If you want games, highlight the appropriate option in the left-hand panel and again press Right. Like with regular apps, the games are organized into categories.
The other two menu items are less important. My Apps lets you know if any apps need an update, and Settings is self-explanatory. You can edit parental controls and options relating to auto-updates and purchase authorization.
To install an app, press Select on its menu item and choose Install.
Nvidia Games Store
In addition to the official Google Play Store, Nvidia also offers its own games store. It's like Steam, but specifically designed for Nvidia Shield devices. You'll find it in the Games row.
Some games within the store are free for members; others have a cost for both members and non-members. A subscription costs $7.49/month.
Navigating the app is similar to the Google Play Store. Categories are visible in the left-hand panel, and you can press Right on your control to browse the content within each one.
To buy an app, open the app's store page and click on the price. You will need to sign in with either a Facebook, Google, or Nvidia account.
GameStream
If your PC has a Nvidia graphics card, you can cast games from your machine and play them on your Shield TV.
On your computer, you need to install GeForce Experience. Within the app, go to Settings > Shield and enable the GameStream feature.

Then, on your Shield, open the Nvidia Games Store, scroll down to GameStream PCs. As long as the two devices are on the same Wi-Fi network, the Shield will automatically find your PC.
Once you've made the connection, you PCs games will be shown in your library.
Download: GeForce Experience
Web
The next method relies on the web version of the Google Play Store. Even though many apps are not optimized for the Android TV operating system, you can still install the smartphone or tablet version using this approach.
Use a web browser to navigate to the app you want to download. On the app's listing page, click Install.

A new window will pop up. Click on the drop-down menu, and you will see all the Android devices connected to your Google Account. Select your Nvidia Shield and click Install.
The app might take a few minutes to show on your device. You'll find it at the end of the Apps row on the Lean Back Launcher.
Sideload Apps
Finally, if a compatible version of the app you want isn't available via Play Store or the Nvidia Games Store, you can sideload it.
Before attempting to sideload a file, you need to make a tweak in the Shield settings. Go to Settings > Personal > Security and restrictions and slide the toggle next to Unknown sources into the On position.

Next, you need to find the APK file of the app you want. If you've installed Chrome on your Shield, use the browser to search the web. Alternatively, you can put the APK file on a USB stick and plug it into your set-top box.
Click on the file's name and choose Install to complete the process.

Note: Because non-compatible apps haven't been optimized for Android TV, the regular remote will not be sufficient to navigate through them. You either need to use the gaming controller or a USB mouse.
Troubleshooting
Occasionally, things will go wrong with your device. We've detailed five of the most common ways to troubleshoot your Nvidia Shield TV below.
Your Remote / Gaming Controller Doesn't Work
Typically, a problem with the remotes can be narrowed down to two things: the batteries or the syncing.
If your remote control's batteries are dead, you need to buy two new CR2032 coin cell batteries and insert them into the device. Use a paperclip to press the release button of the battery compartment; it's on the rear of the control. If the gaming controller's batteries are dead, use the supplied USB cable to charge them.

If the batteries aren't the problem, try re-syncing the controls with your set-top box. On the home screen, navigate to the bottom of the page and go to Shield Accessories > Pair an accessory. Press Select on your remote or the Nvidia button on your gaming controller to finalize the pairing.
GameStream Is Not Casting Games
Some anti-virus programs are known to cause problems with the GameStream process. Try briefly disabling your software and see if the issue resolves itself. If it does, add GeForce Experience to your software's whitelist.
Sadly, if you run Kaspersky internet Security and Anti-Virus, AVG internet Security, ESET nod32 Anti-Virus, Panda Cloud Anti-Virus, or ASUS GameFirst, you might have to completely uninstall the app.

If your anti-virus isn't the cause of the issues, make sure both the Shield TV and the PC are both on the same Wi-Fi network, that neither the app nor the software has pending updates, and that the Shield is connected to a 5GHz Wi-Fi band.
Lastly, try clearing the Nvidia Games Store's cache by going to Settings > Apps > Nvidia Games > Clear Cache.
Upgrade Fails to Install
Sometimes, an upgrade file becomes corrupted. If it happens, the installation process of the upgrade will fail.
To remedy the problem, download a file explorer from the Google Play Store. You can find the pending upgrade at Local\NVIDIA\App\OTA. Delete the file and restart your device. After booting, the Shield will prompt you to download a new upgrade file from Nvidia's servers.

The Device Won't Wake Up
If your device is awake, you will see a green light on the top of the box. If you don't see the light and pressing buttons on your remote is having no impact, it may be stuck in Sleep Mode.
The only solution is to perform a power cycle. Remove the power lead from your device, wait 10 seconds, and plug it in again.
Audio and Video Issues
If your screen is blank or you do not hear any audio output, try working through some of these common solutions:
- If you're using a monitor, does it support audio output?
- Try a different HDMI port on your TV.
- If you're using headphones, make sure you're not listening to audio in AC3 or Dolby – they aren't supported.
- Are you using a DVI/VGA adapter? If so, does it support audio? Many don't.
- Try using an HDMI cable that's shorter than three meters.
- Ensure your television has an HDCP-compatible HDMI port. Many apps require it.
- Make sure you're viewing the correct HDMI input channel.
Enjoy the Experience
If you have been following the guide carefully, you should now have a Nvidia Shield TV device that's fully customized to your needs and includes all the apps and games you want to use. Now it's time to kick back and enjoy the fruits of your labor. Just don't forget to stock up on drinks and snacks first!
We hope you've found this setup guide useful. Of course, there's lots more to enjoy if you're an advanced user, but most beginners should now have a good feel for what the device is capable of.
If you have found any part of this guide confusing, or you want help with a specific issue, we'd love to try and help. You can leave all of your queries and questions in the comments below, and we'll do our best to assist you.