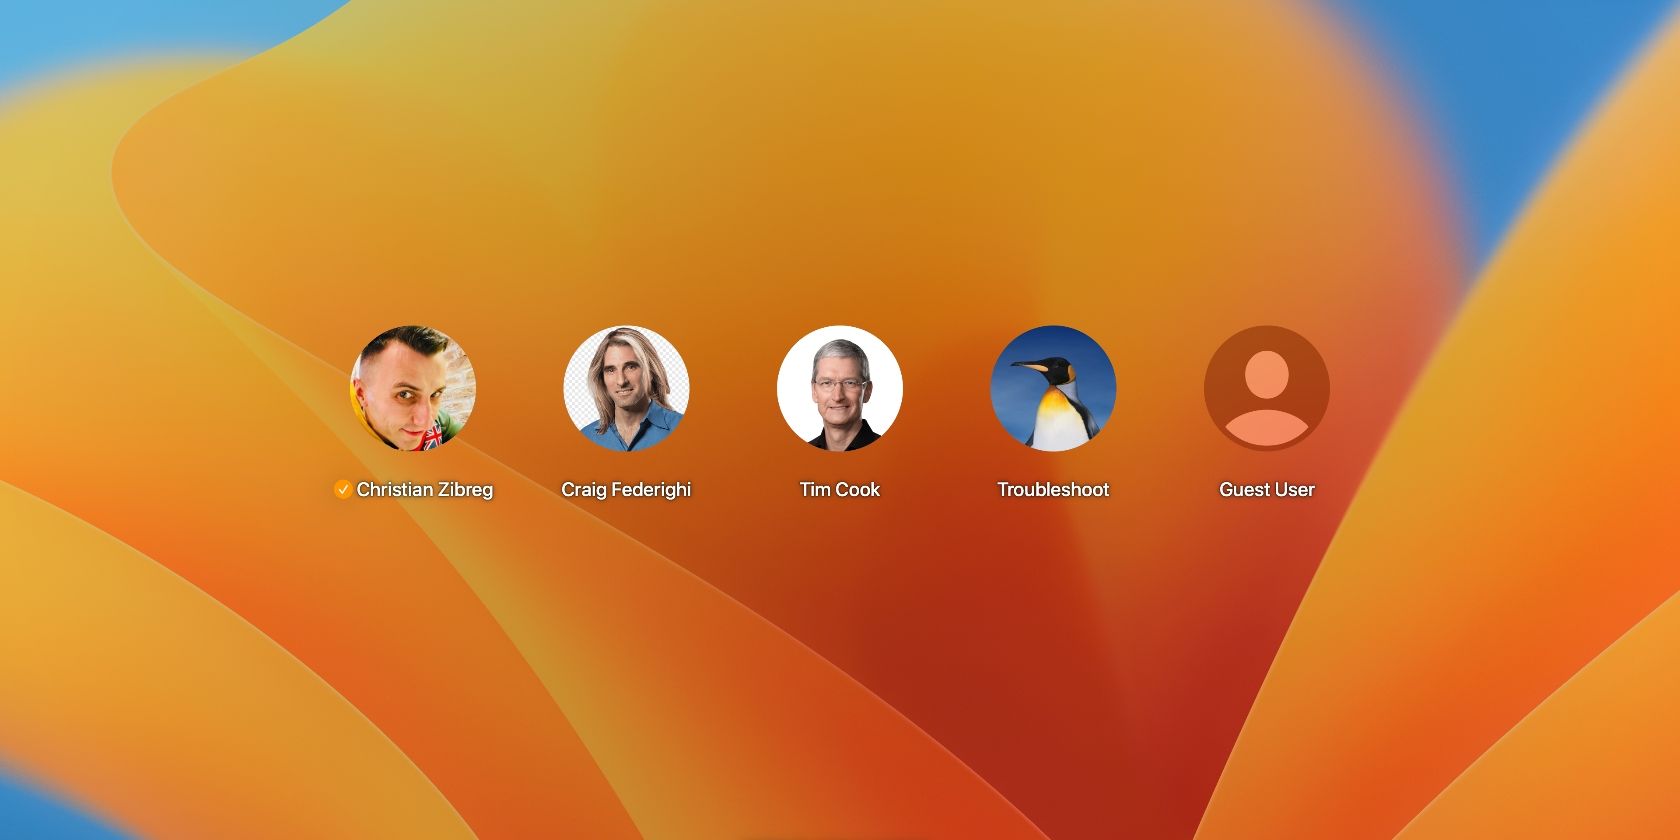
Having a shared computer for the entire family is convenient, but trouble arises if you don't isolate each person's data from other family members.
Data leaks, lost files, accidental purchases—a lot can go wrong if everyone shares the same account. Creating multiple user accounts is the best way to personalize the experience for every user of your Mac.
But how does it all work? What types of user accounts does macOS support? And how do you convert one account type into another and delete users you no longer need? Follow along with us to find out.
How to Set Up Multiple User Accounts on a Mac
Your account creation options are in System Settings (previously System Preferences). Keep in mind you must have administrative privileges to perform the tasks described in this article.
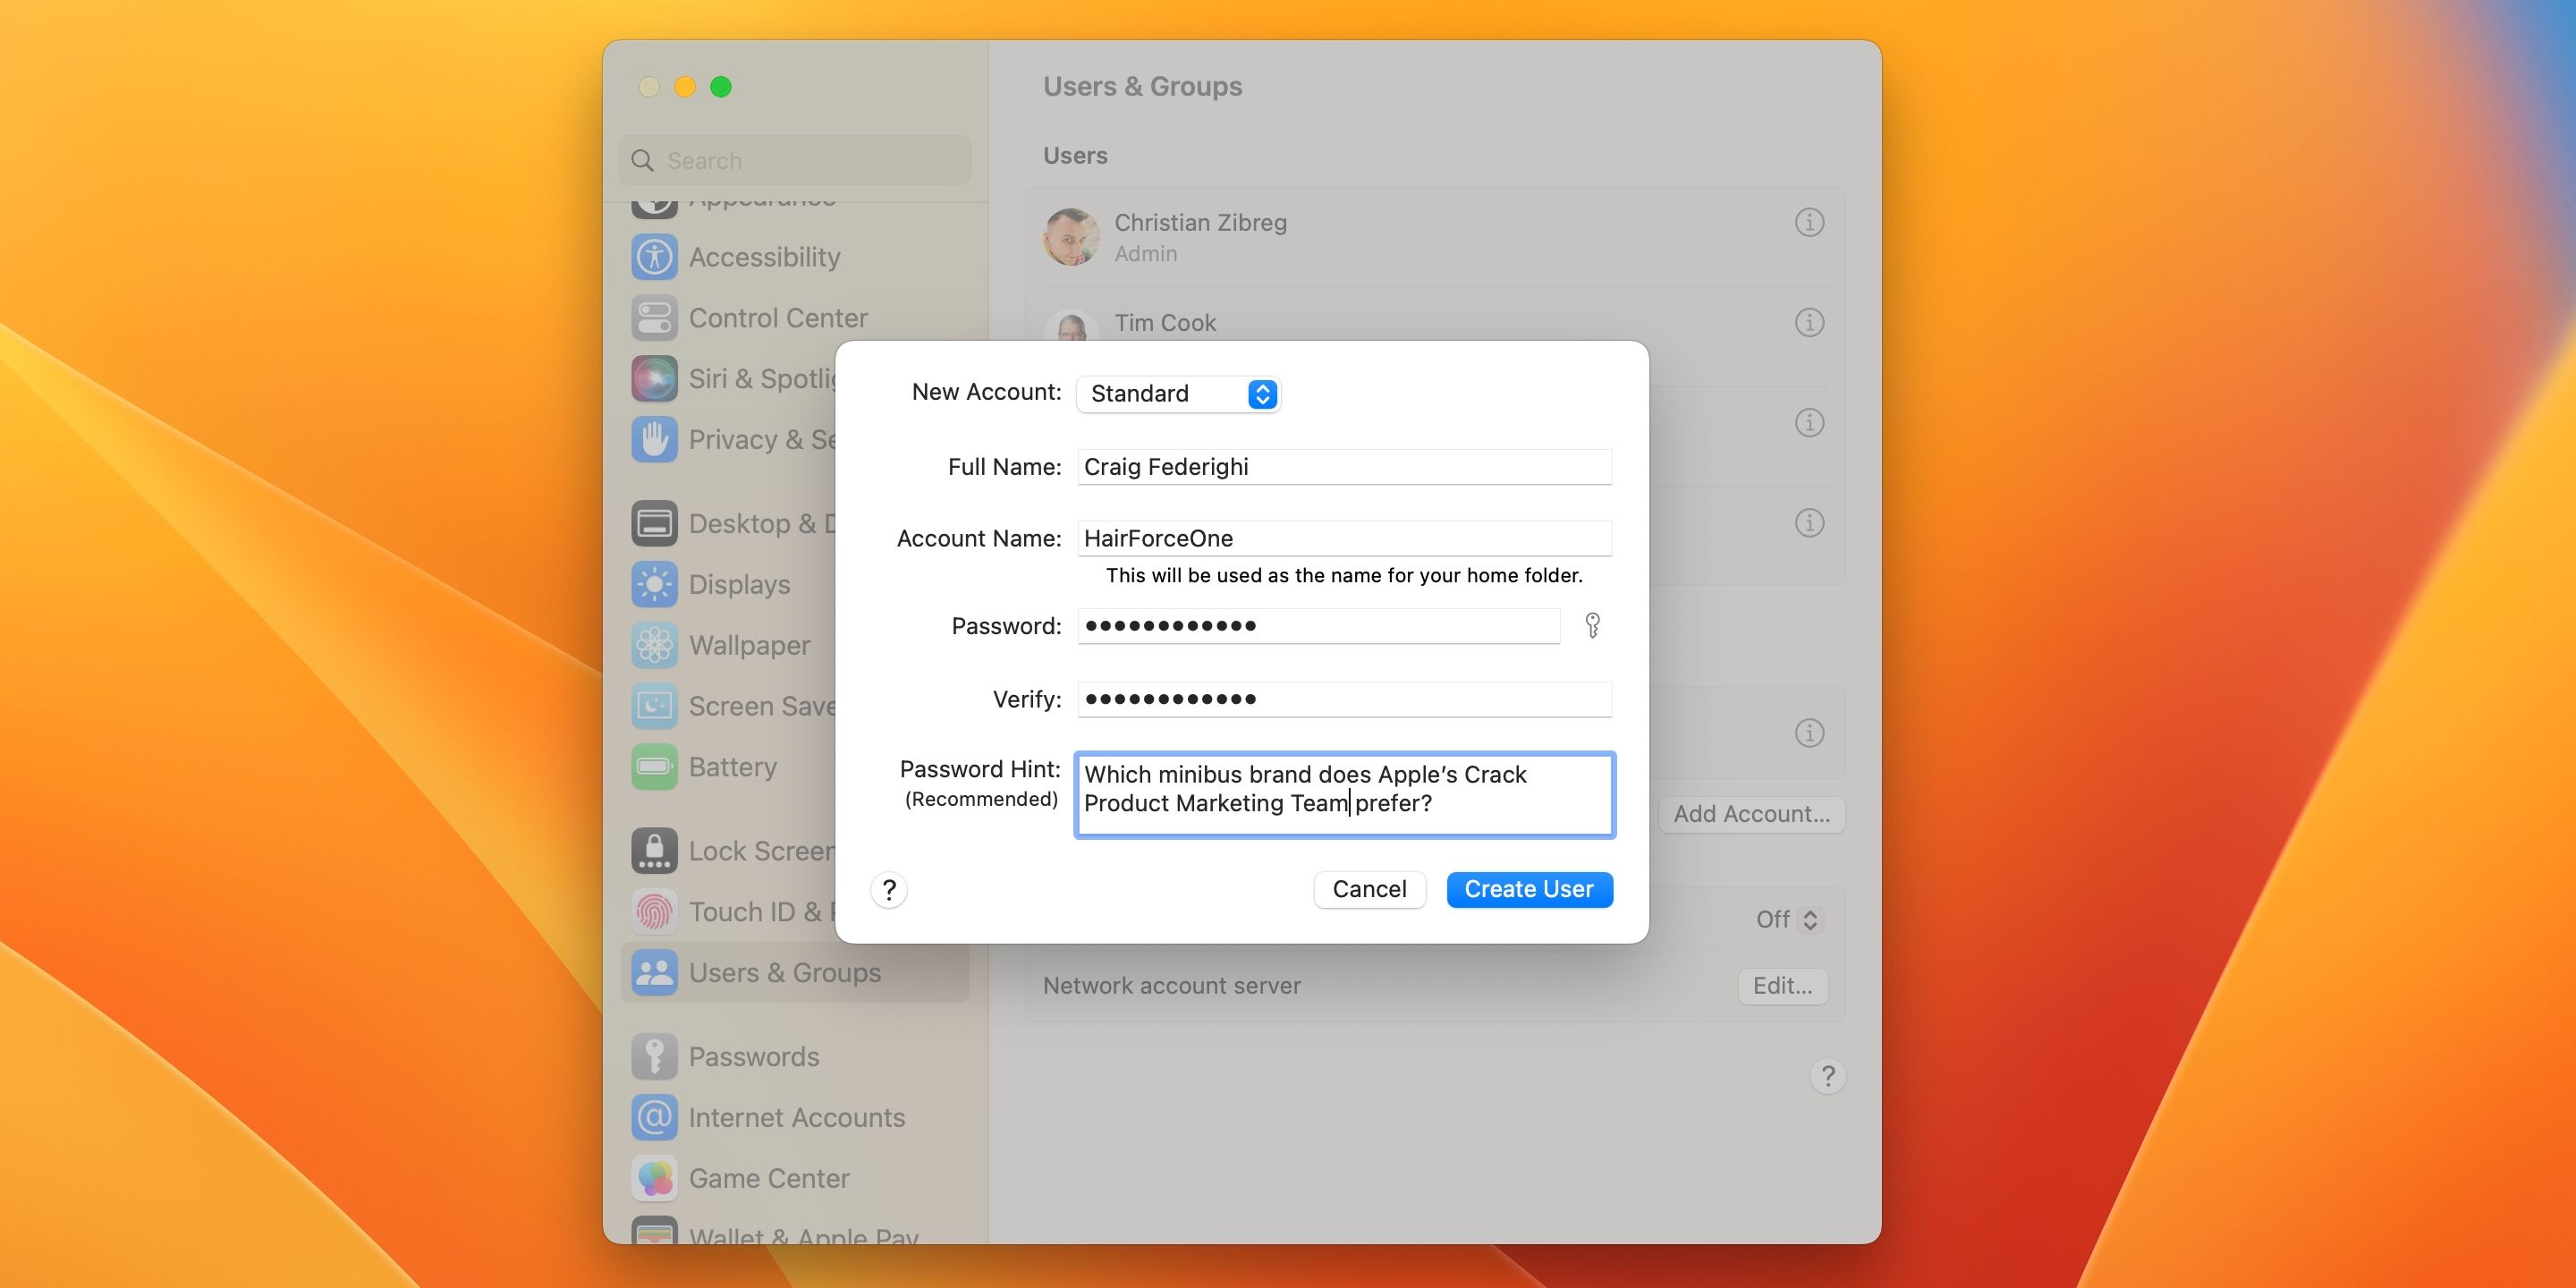
Follow these steps to create a new macOS user account:
- Click System Settings from the Apple menu.
- Select Users & Groups in the sidebar.
- Click the Add Account button on the right, enter your admin password, and hit Unlock.
- Click the New Account menu and choose Administrator, Standard, Sharing Only, or Group.
- Fill in the Full Name (your first and last name) and Account Name (your username) fields, then set a password in the Password and Verify fields (optionally, write a password hint).
- Hit Create User.
- Repeat the above steps to create additional user accounts.
You'll find your newly-created account listed underneath the Users section.
Every user account gets a private Home subfolder within the Users folder of the startup disk. Depending on the activity, each user account will consume more or less disk space.
To reduce space-hogging duplicates, give everyone access to shared music and movies. If you're low on disk space, consult our tips and tricks to free up storage space on your Mac.
Changing Account Type in macOS
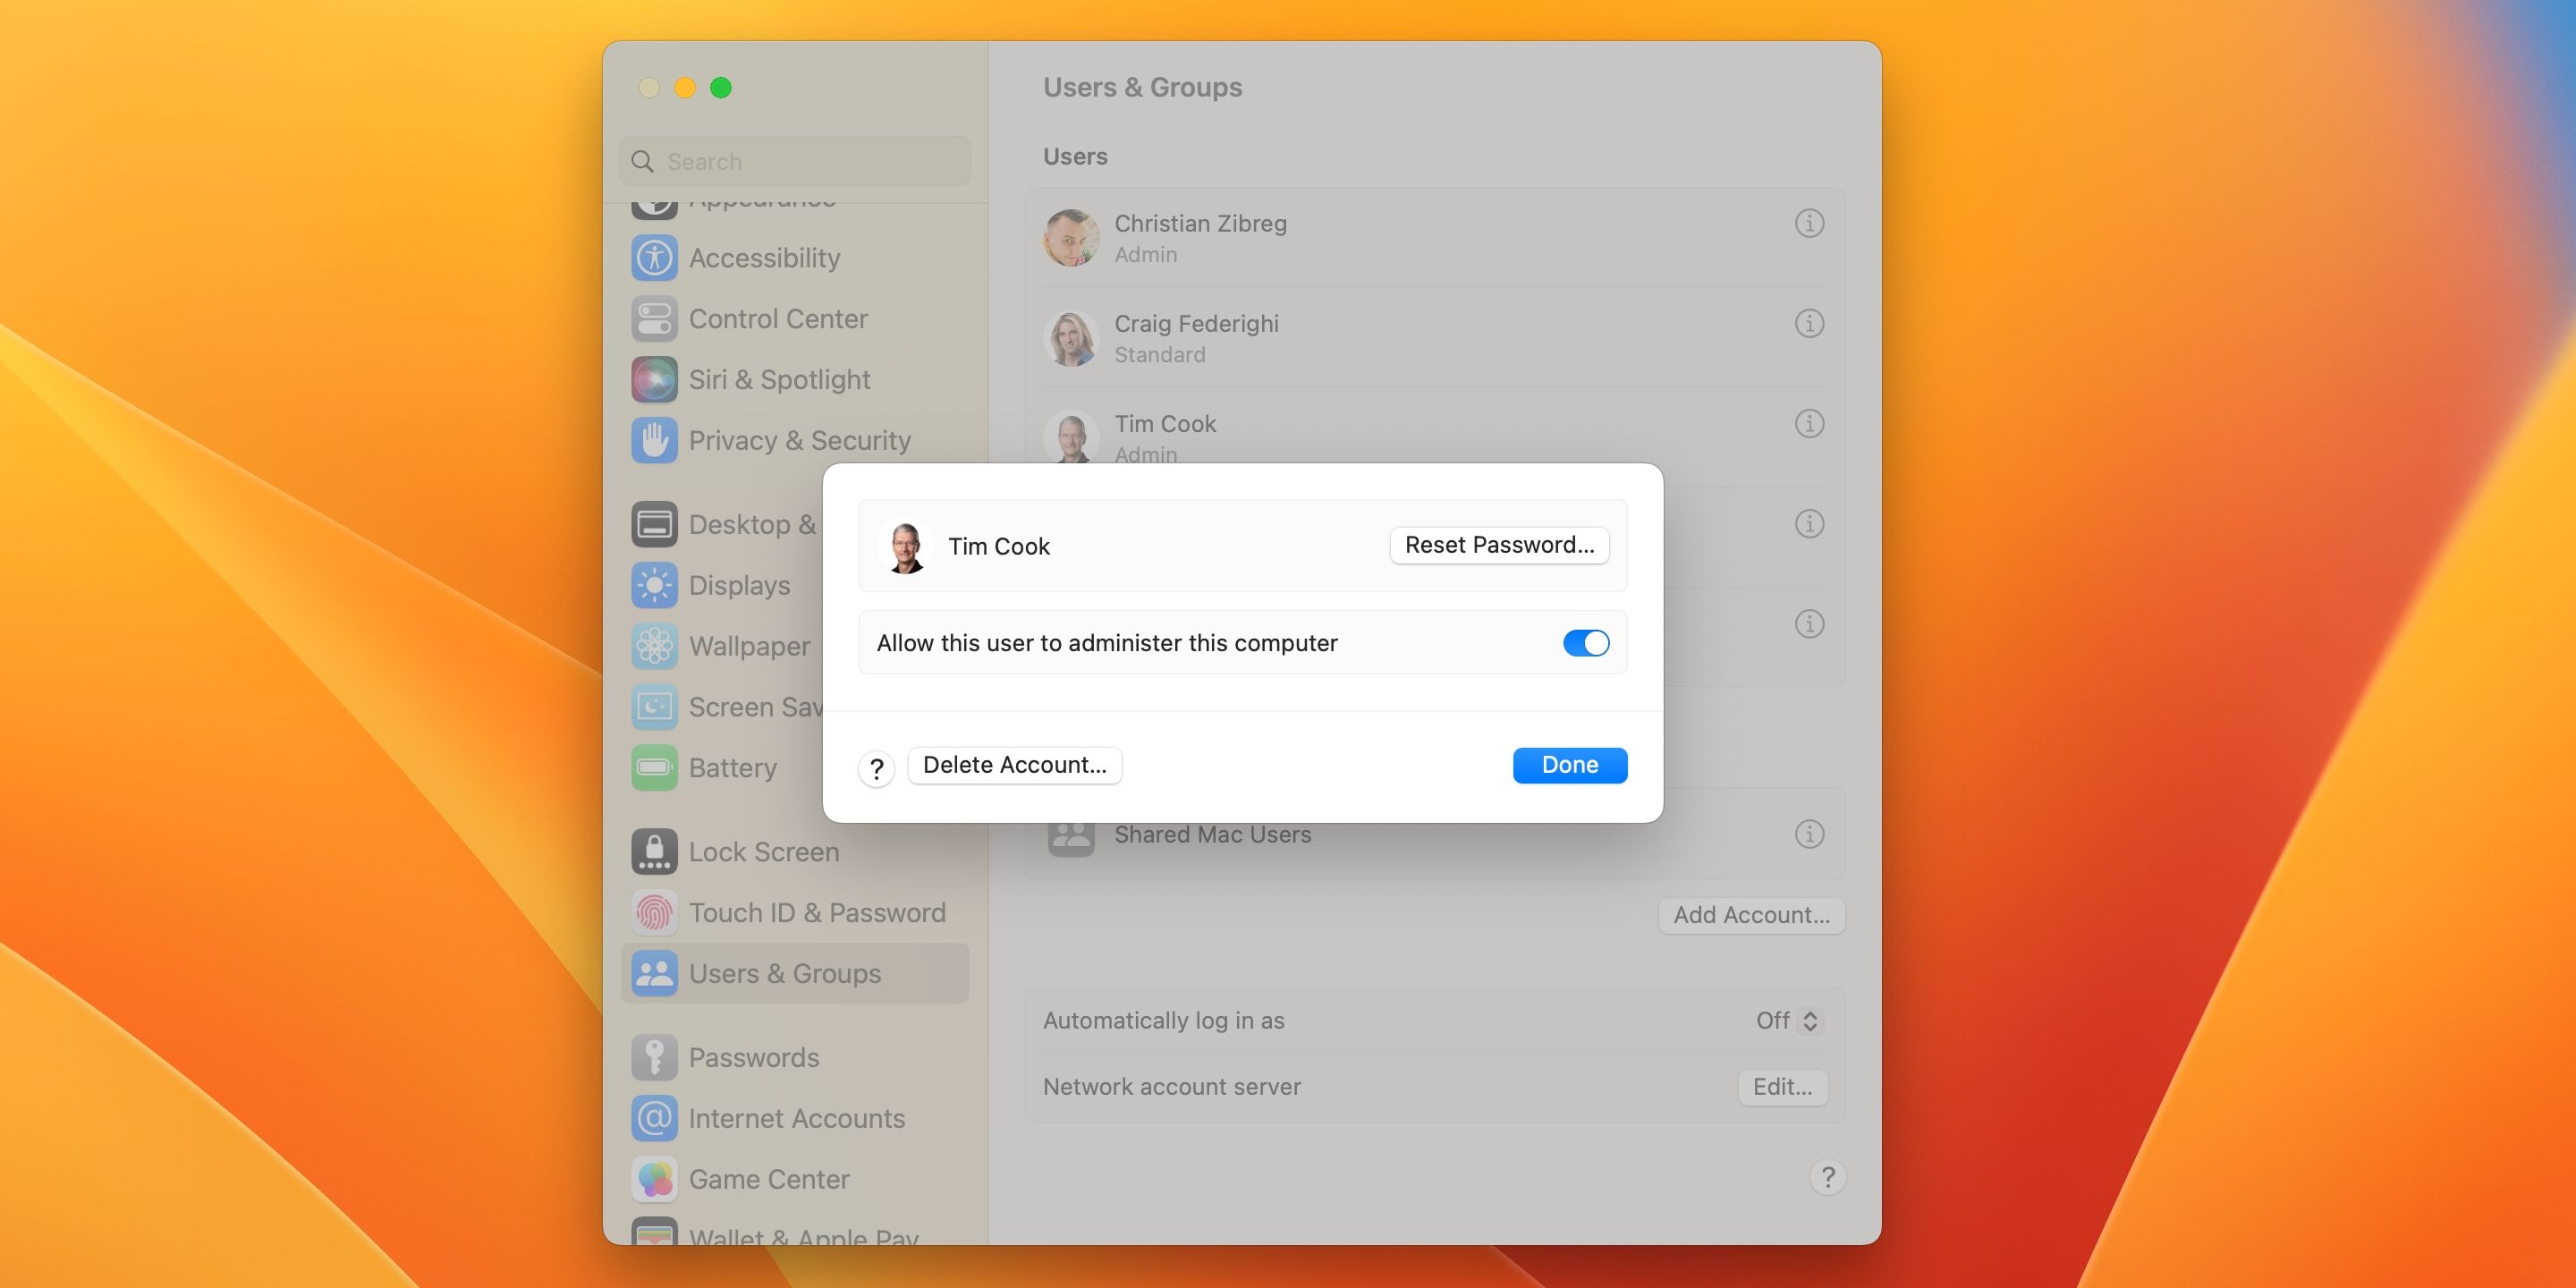
You can turn administrative privileges for any user account on or off.
Imagine you want to turn a standard account into an administrator:
- Click System Settings in the Apple menu.
- Select Users & Groups in the sidebar.
- Click the Info (i) button next to the desired account on the right, then turn on the Allow user to administer this computer option and hit Done.
- Restart your computer for the changes to take effect.
To make this a managed account, you must first log into it and then set up your Mac's Screen Time feature, which allows you to control which features and content children can access.
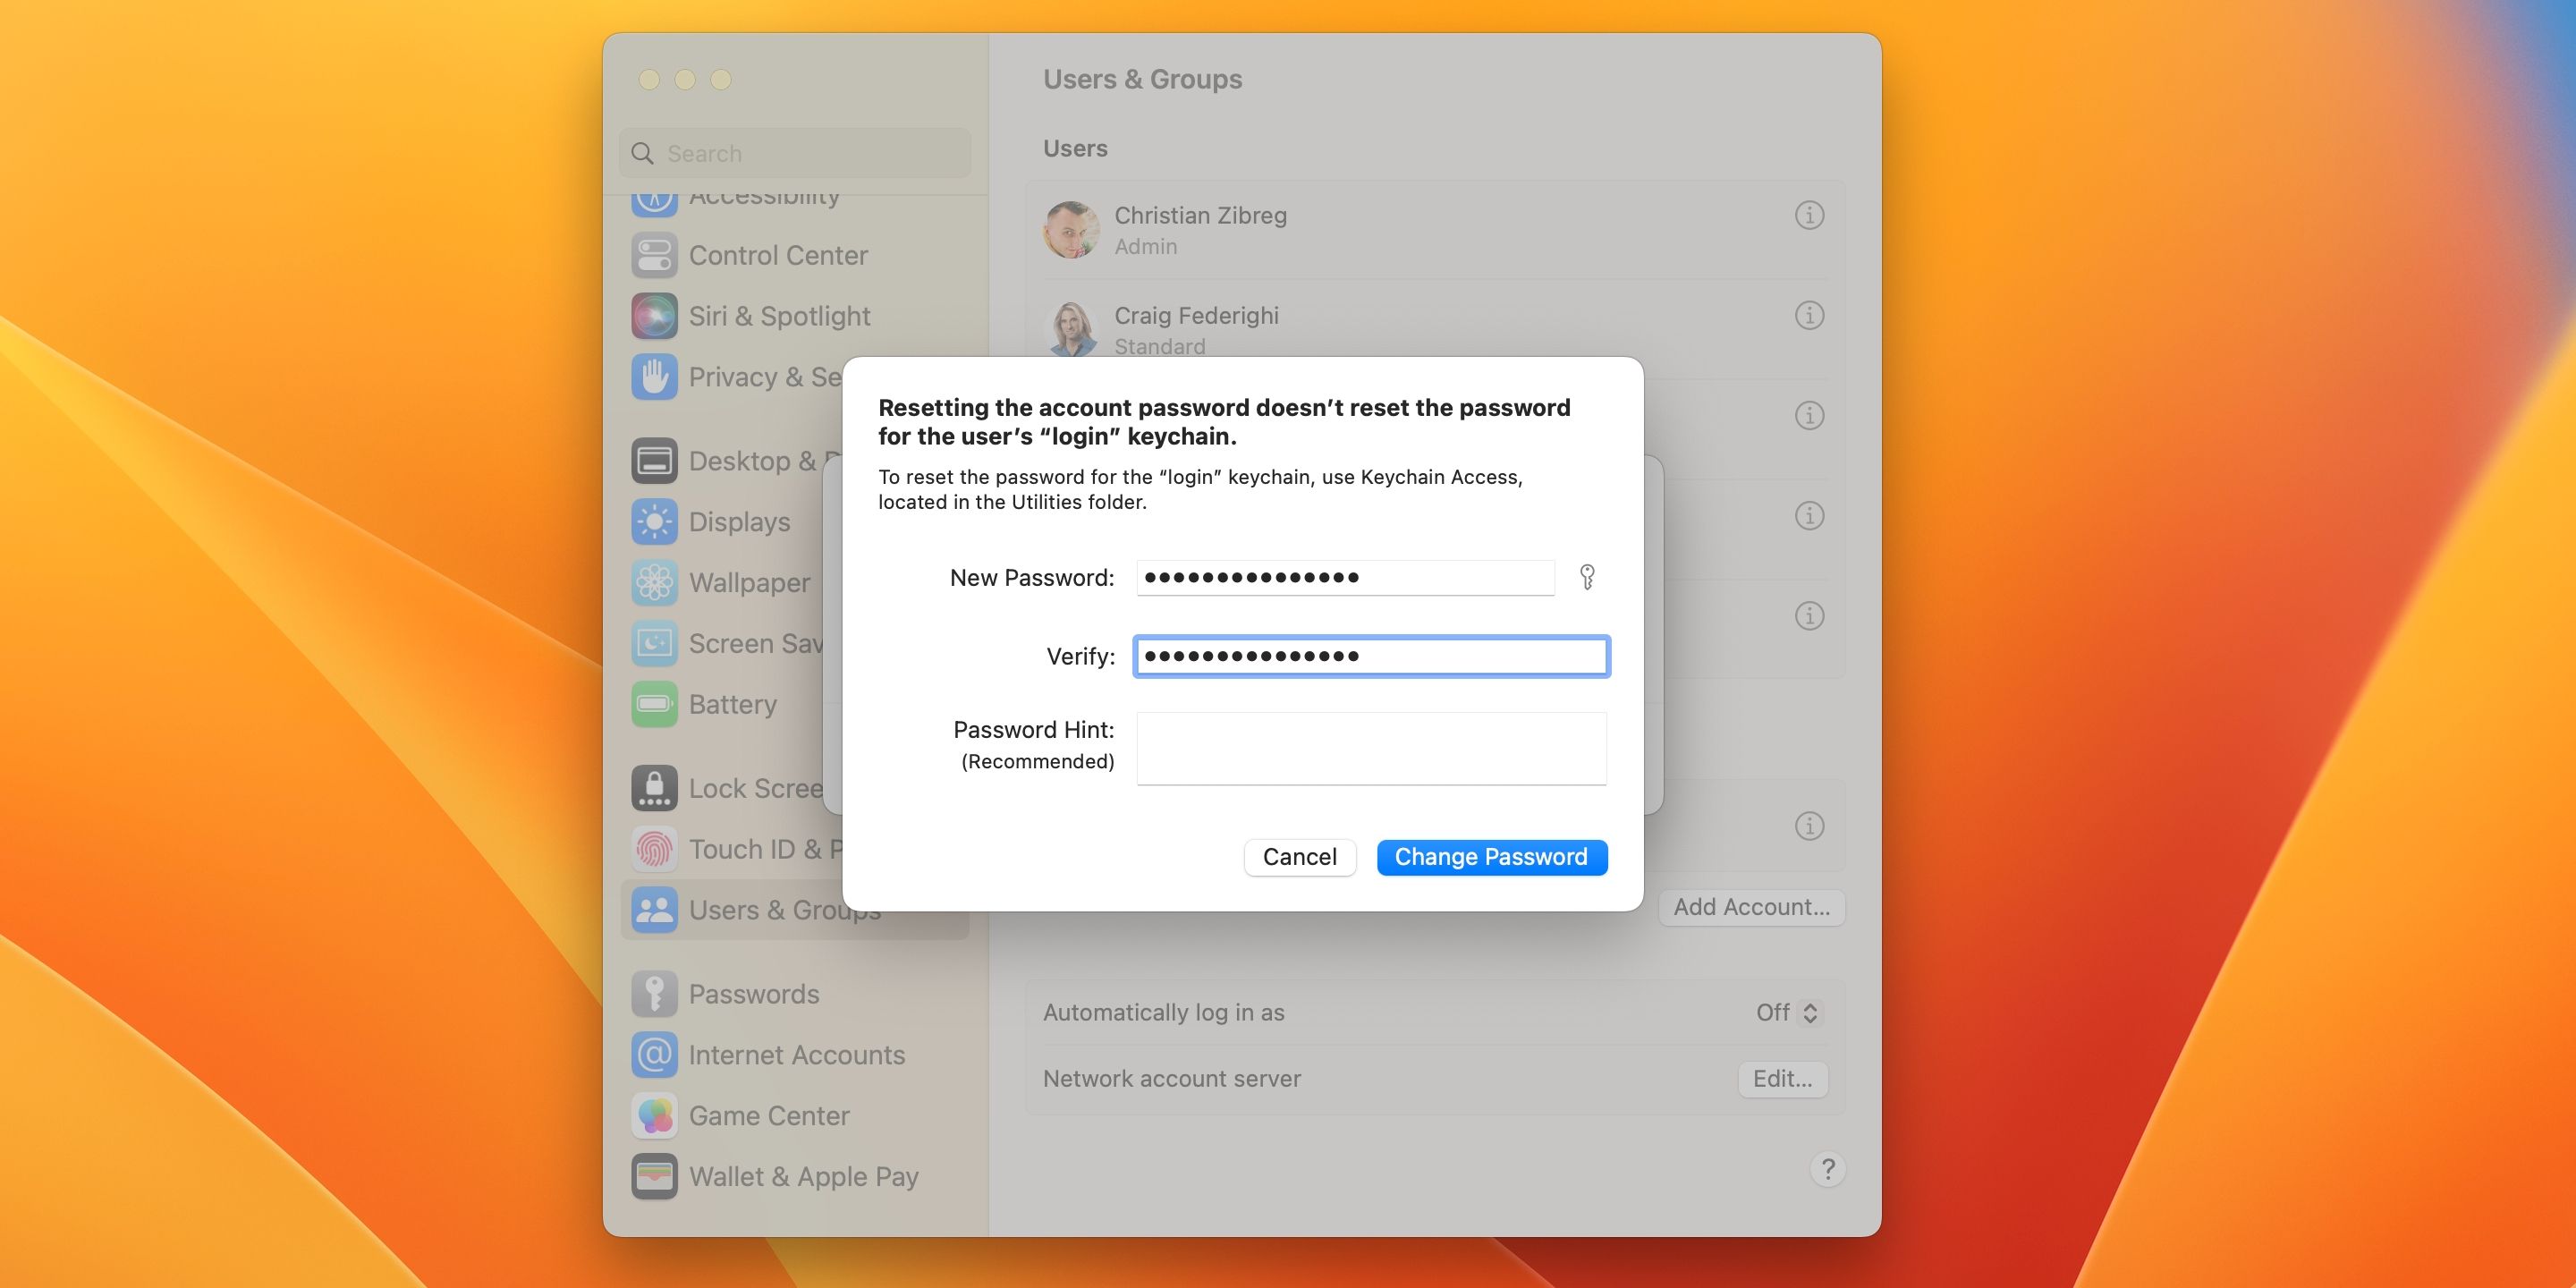
If a user can't recall their account password, you can reset it for them as an administrator.
To do so, click the Info (i) button next to a desired account (if required, provide your admin password) and hit the Reset Password button, then enter a new password in the Password and Verify fields, and click the Change Password button to save the changes.
Adjusting Your macOS Login Options
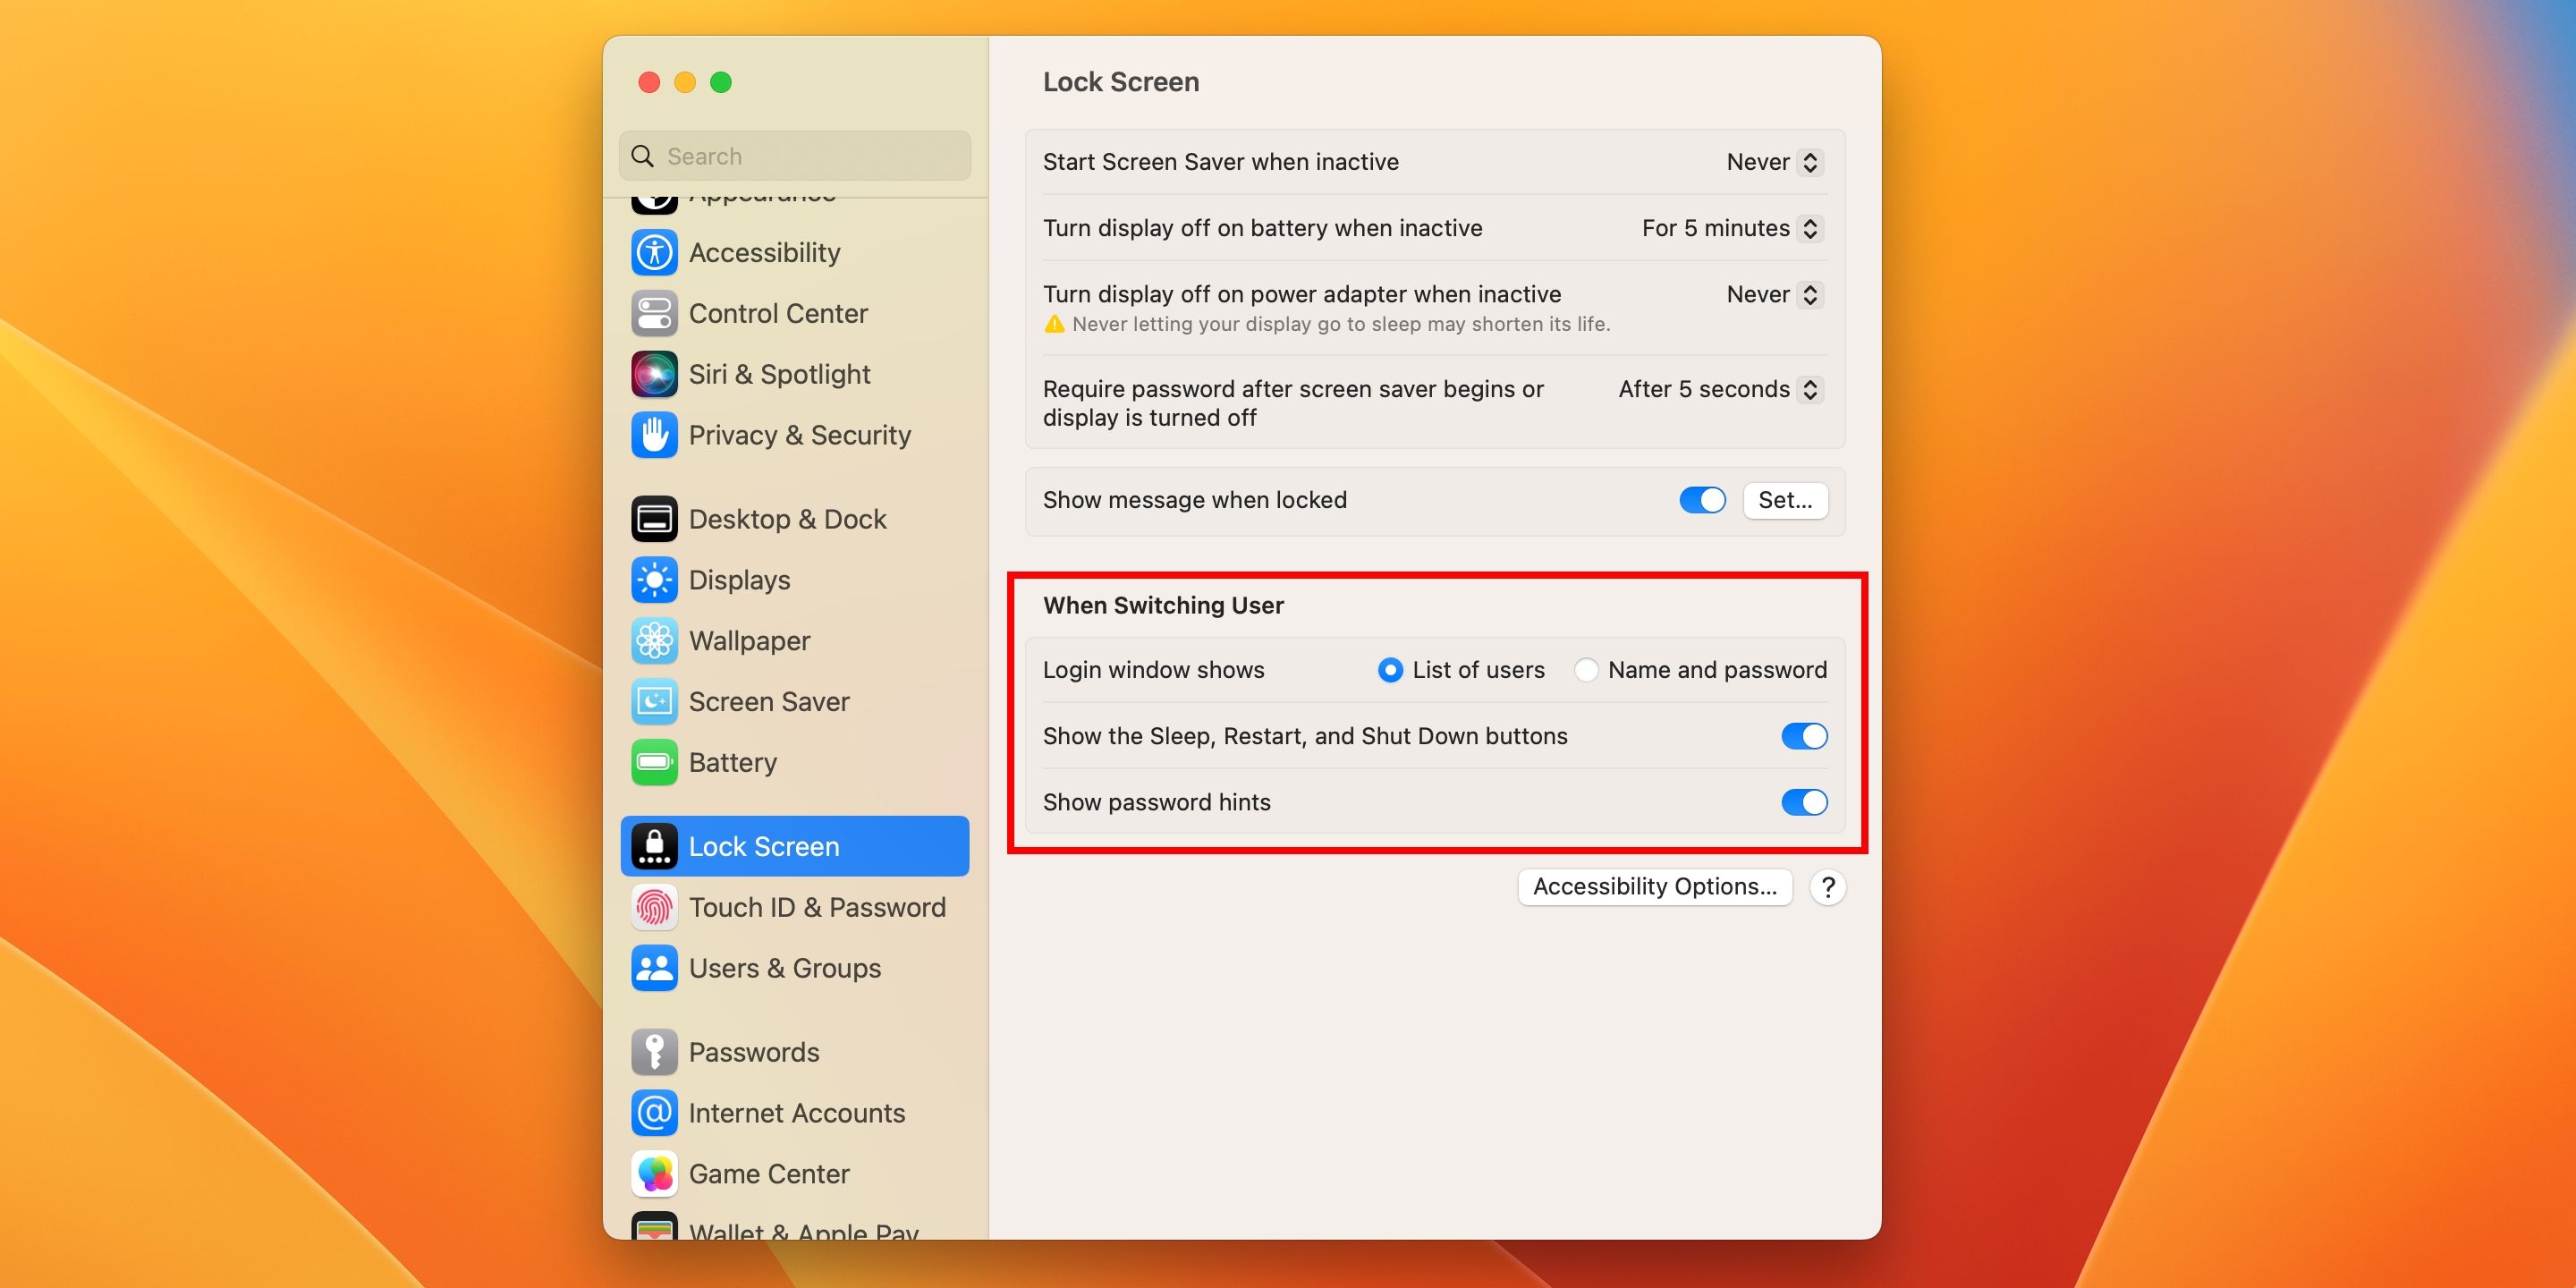
To choose what's available on the login screen, go to System Settings > Lock Screen. You can decide how user accounts will be displayed and adjust other login screen settings.
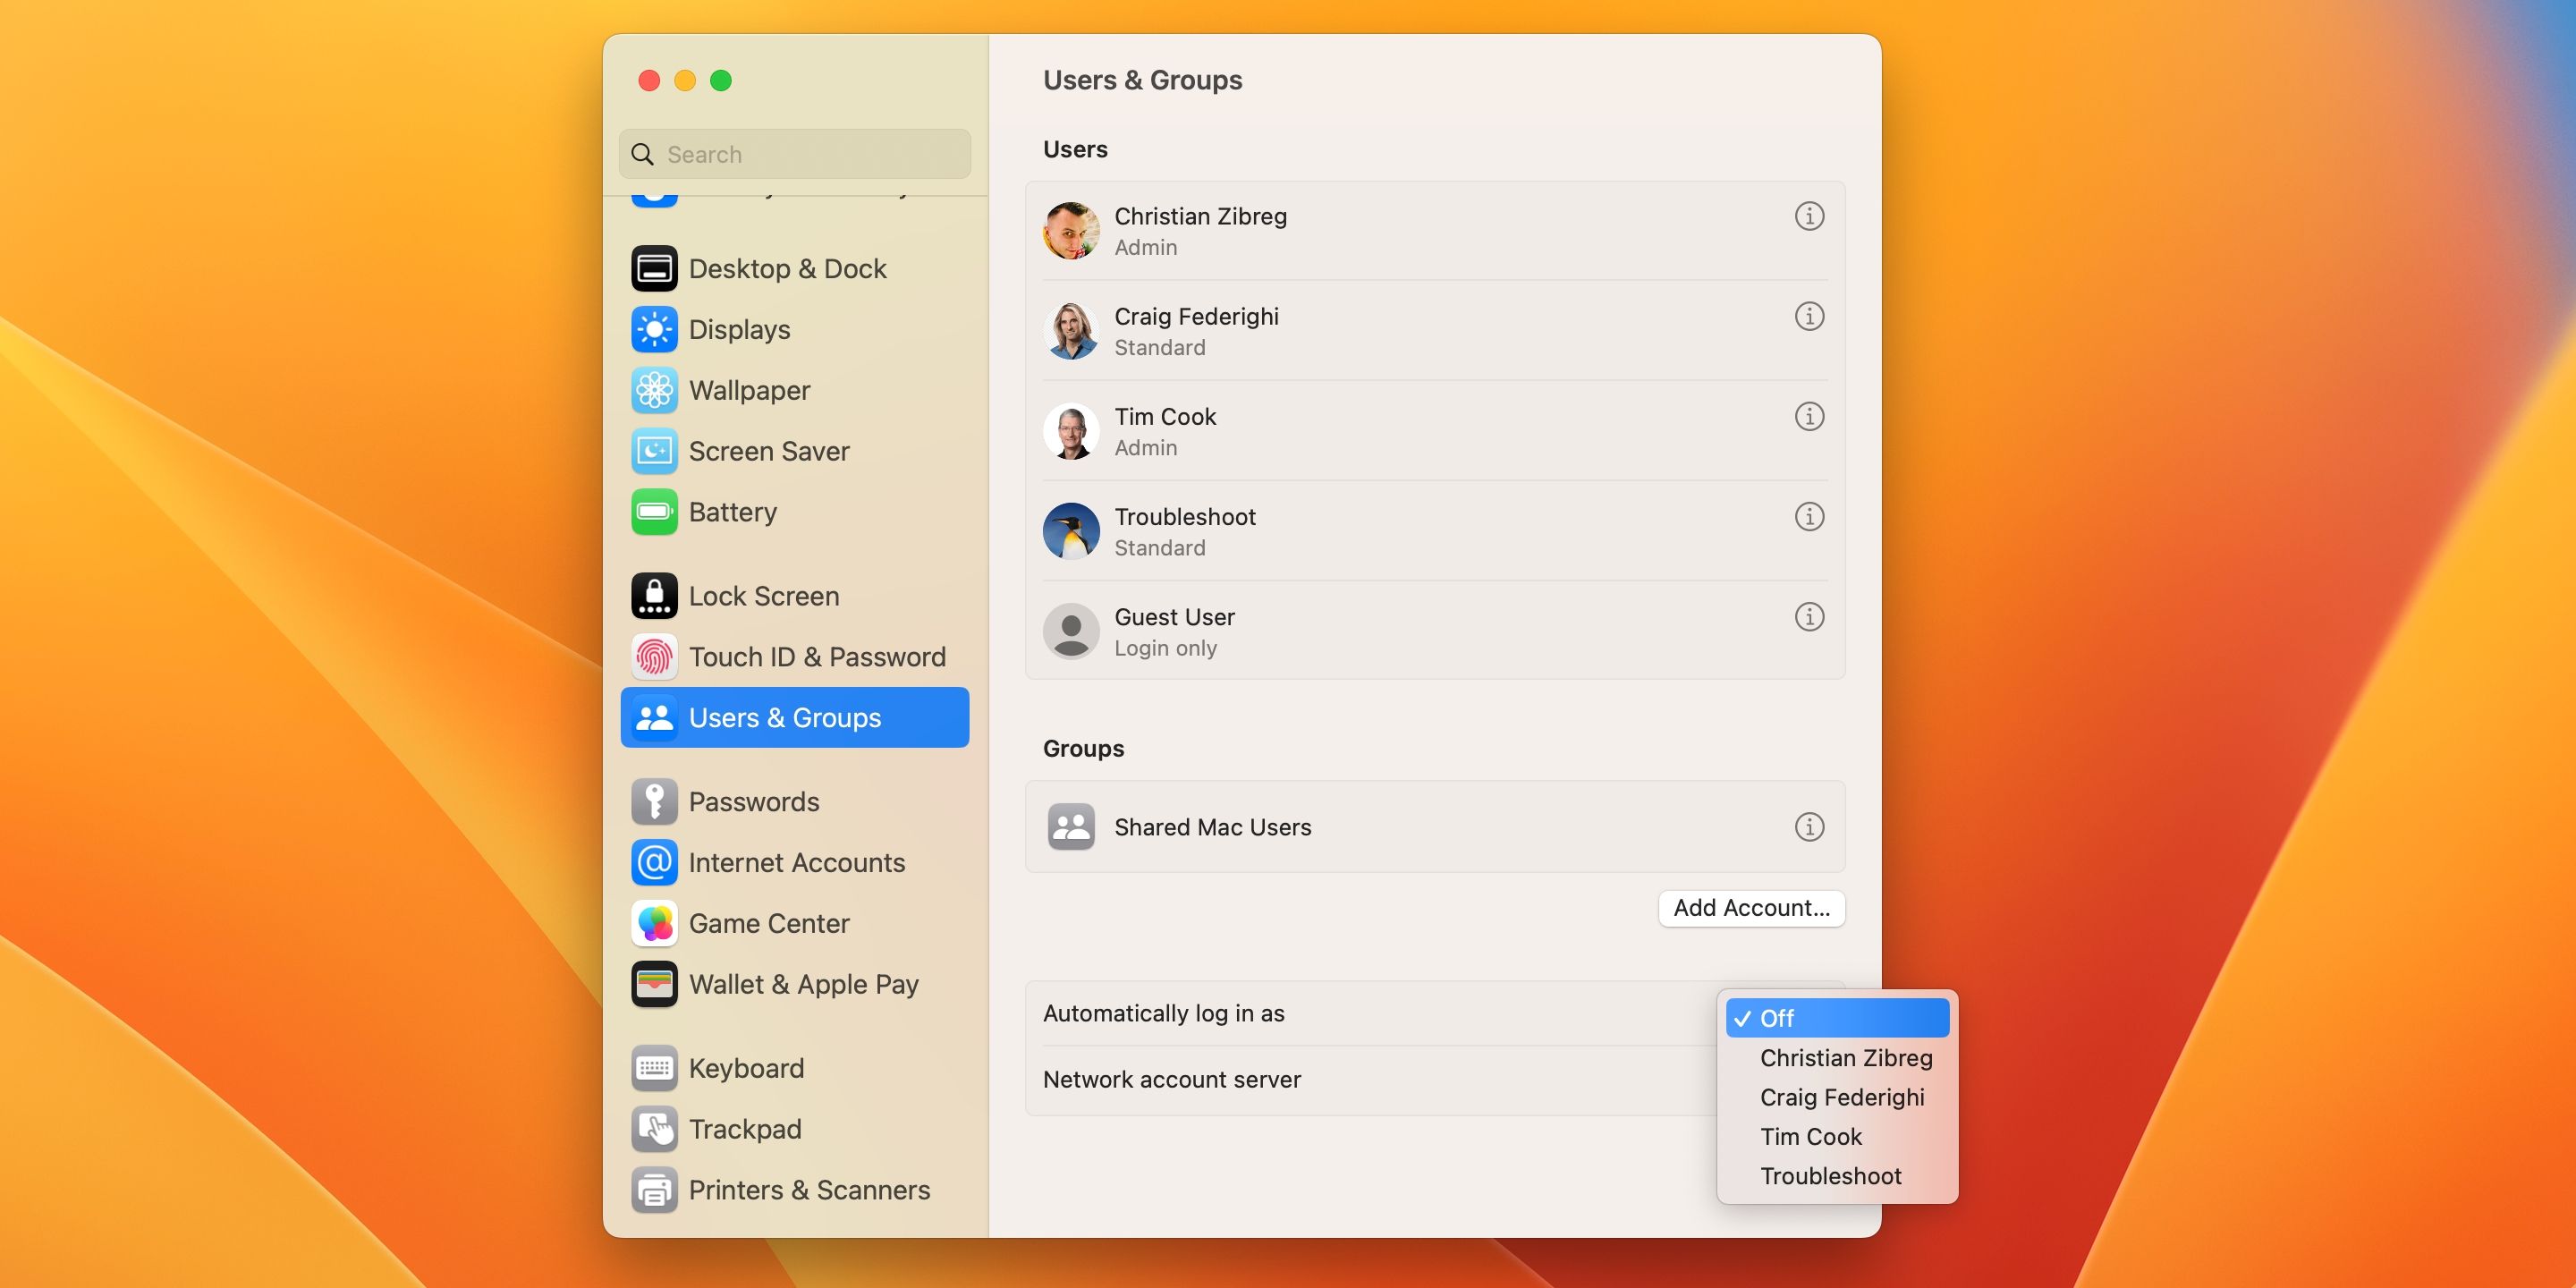
To configure the auto-login option, go to System Settings > Users & Groups, click the menu next to Automatically log in as, and choose an account to log in automatically.
For security reasons, we don't recommend setting your Mac to log into an admin account automatically.
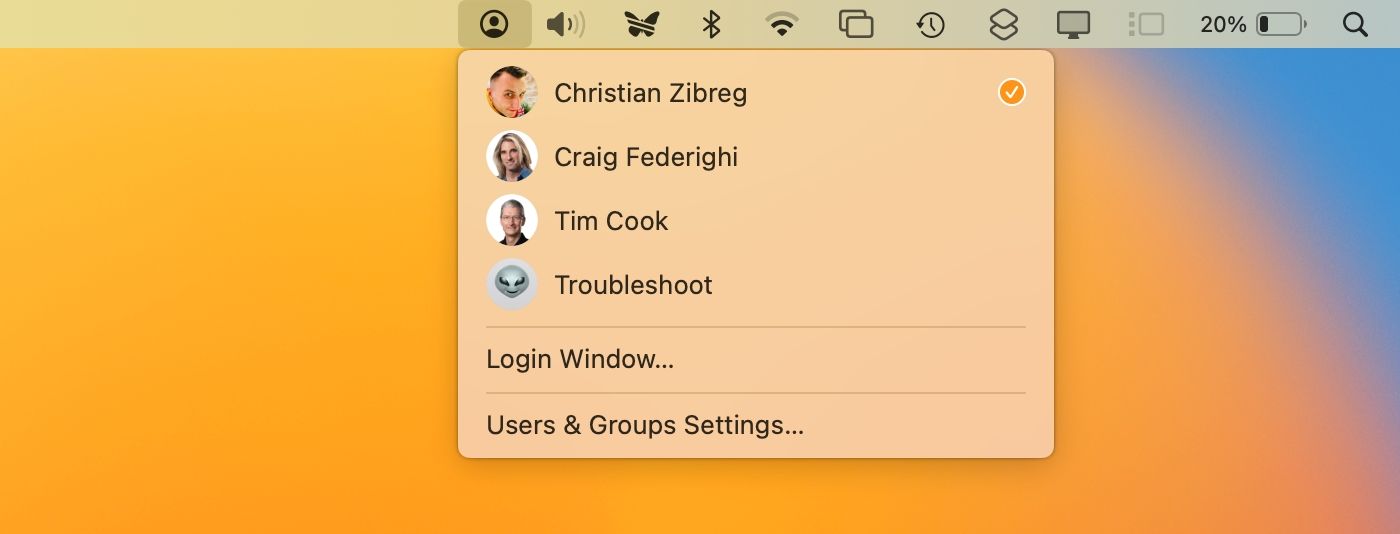
To enable fast user switching, go to System Settings > Control Center, scroll down to Fast User Switching, and enable the Control Center and menu bar options below it.
Now, you can quickly switch between user accounts without logging out of your own one by selecting an account from the menu bar or your Control Center.
5 Types of User Accounts in macOS
macOS supports several flavors of user accounts:
- Administrator: As the first user on your Mac, you're an administrator with extensive privileges to manage system folders, apps, other users, etc. You're advised to create a spare admin account for yourself. It'll come in handy for troubleshooting issues and resetting the password of your usual admin account when you can't log into it.
- Standard: Standard accounts can personalize the Mac experience without too many restrictions but are prohibited from messing with other users' data.
- Managed: Suitable for children, these are standard accounts with parental restrictions configured to limit their screen time, restrict apps and websites, etc.
- Guest: A password-less account that auto-deletes all files after logging out. The Guest account is excellent for allowing friends to use your computer to quickly check their email and the like without having access to other users' files or settings.
- Sharing Only: This account cannot log into your Mac or change settings. Instead, it's used for screen sharing or giving someone remote access to your shared files.
Avoid deleting the administrative account you created when setting up your Mac, as that can prove disastrous.
Enabling the Guest Account in macOS
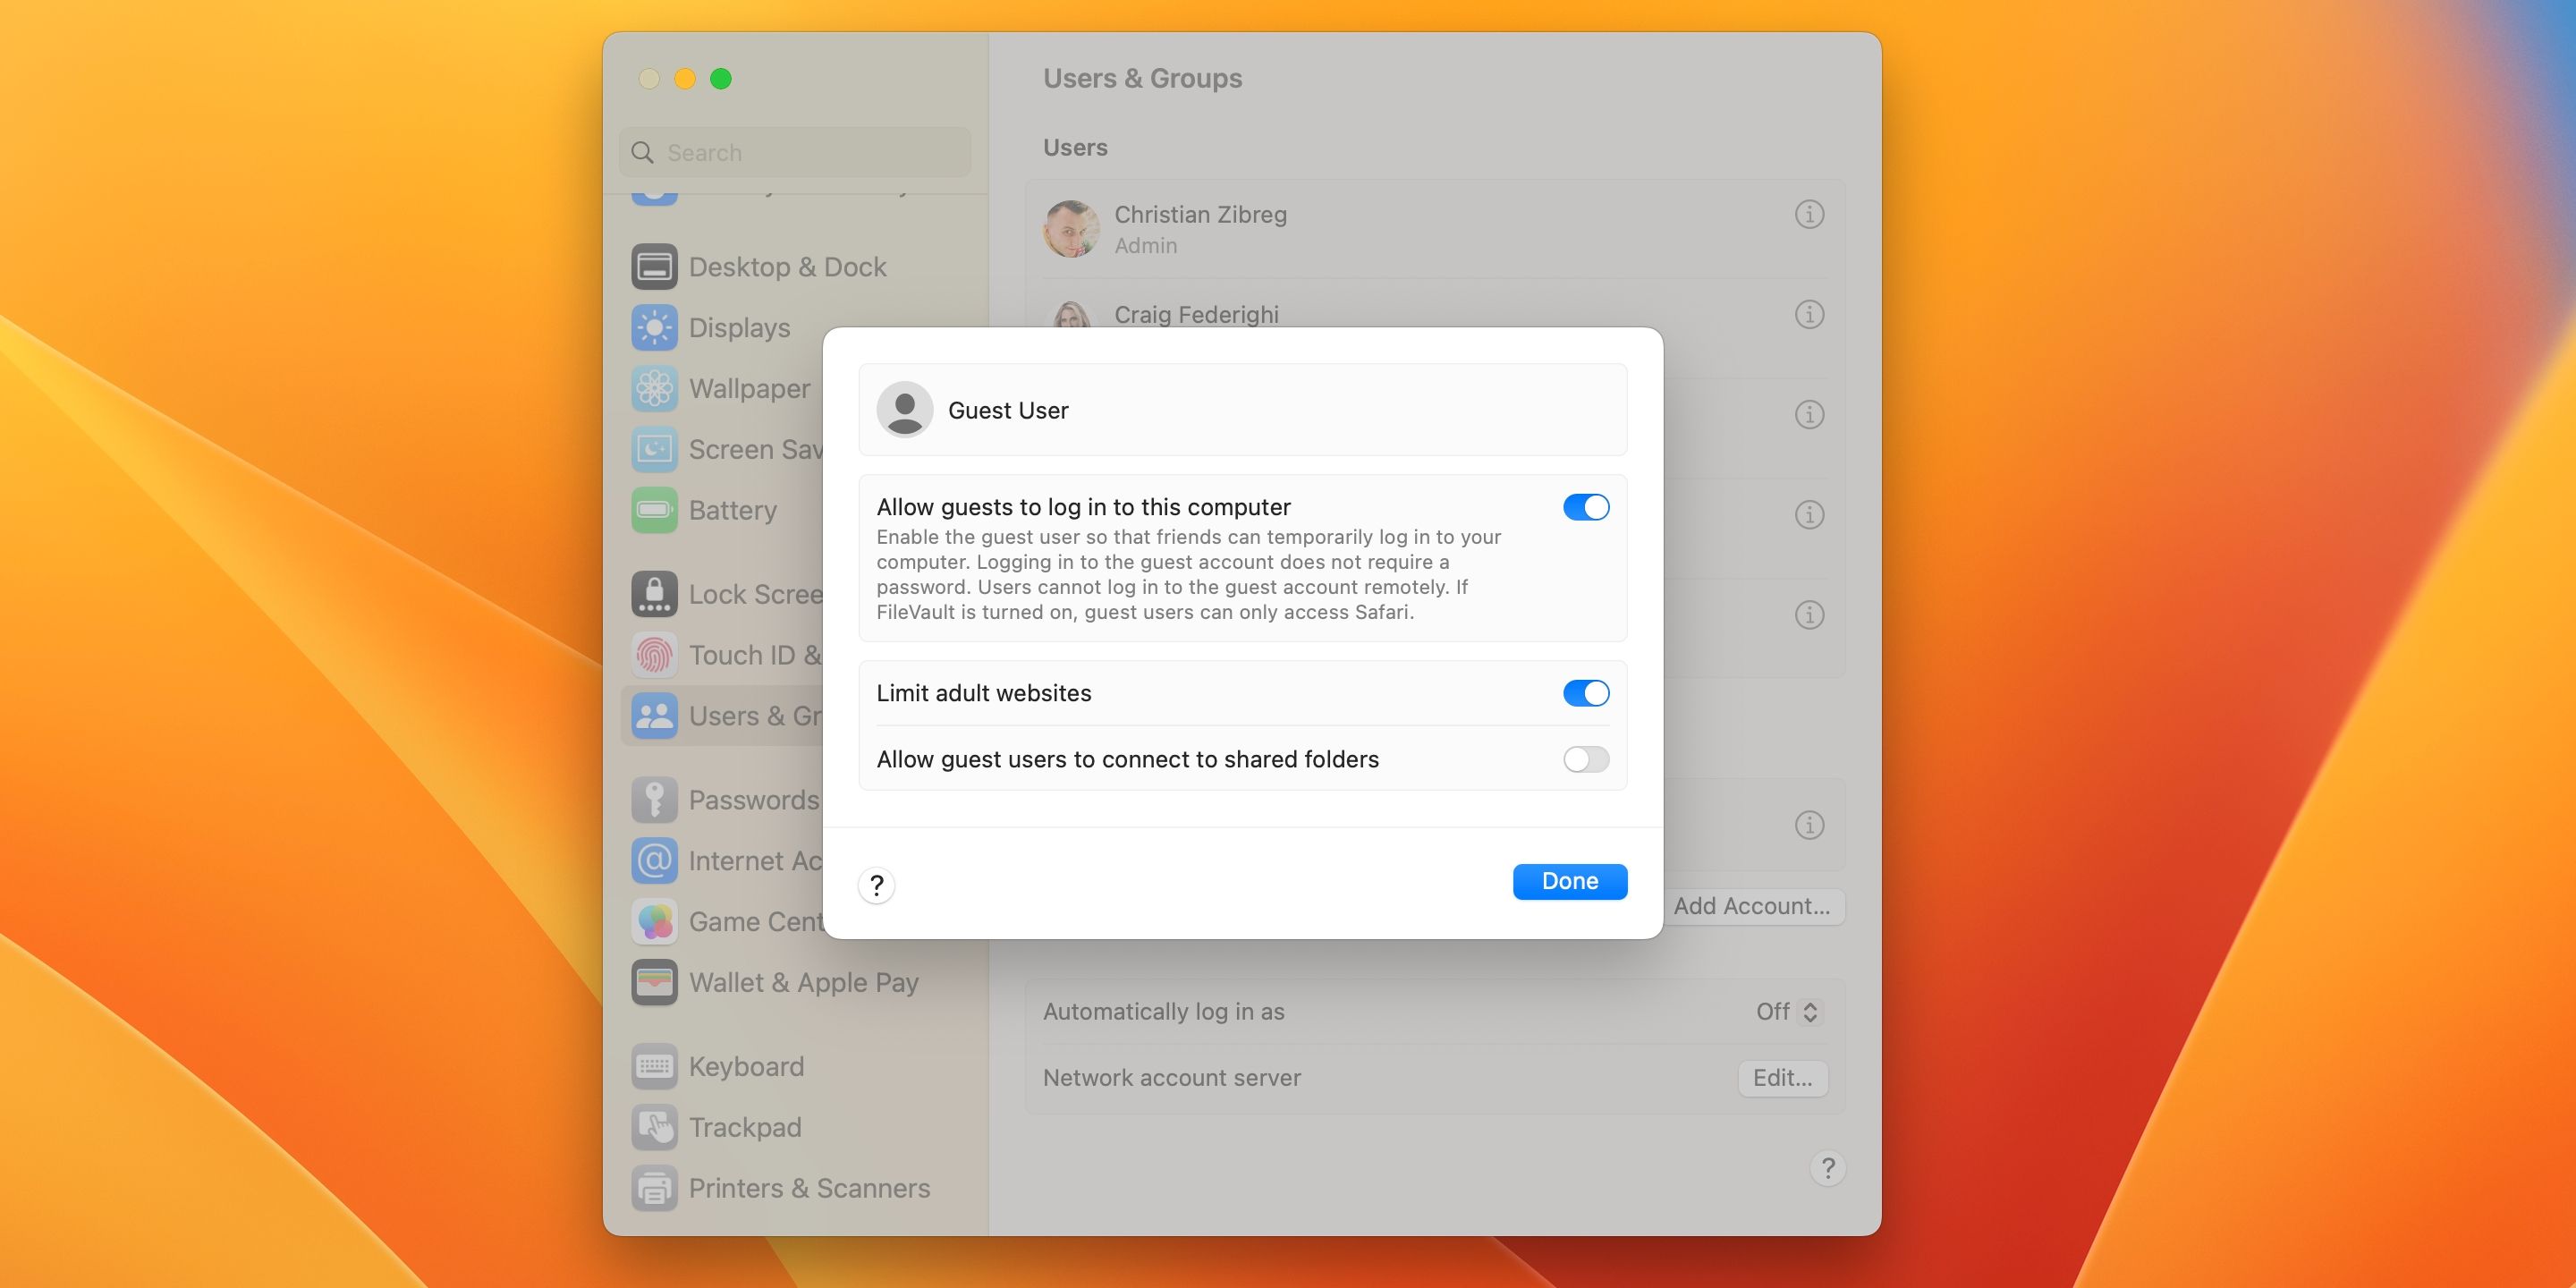
The Guest account is off by default. To enable it, go to System Settings > Users & Groups and click the Info (i) button next to Guest User. Then, tick the box next to Allow guests to log in to this computer. Check out Apple's website for more info on configuring the Guest account.
How to Delete a User Account on Your Mac
If you no longer need a particular user account, you can delete it instead of letting it use up your Mac's resources. Here's what you need to do:
- Choose System Settings from the Apple menu.
- Click Users & Groups in the sidebar.
- Click the Info (i) button next to the desired account.
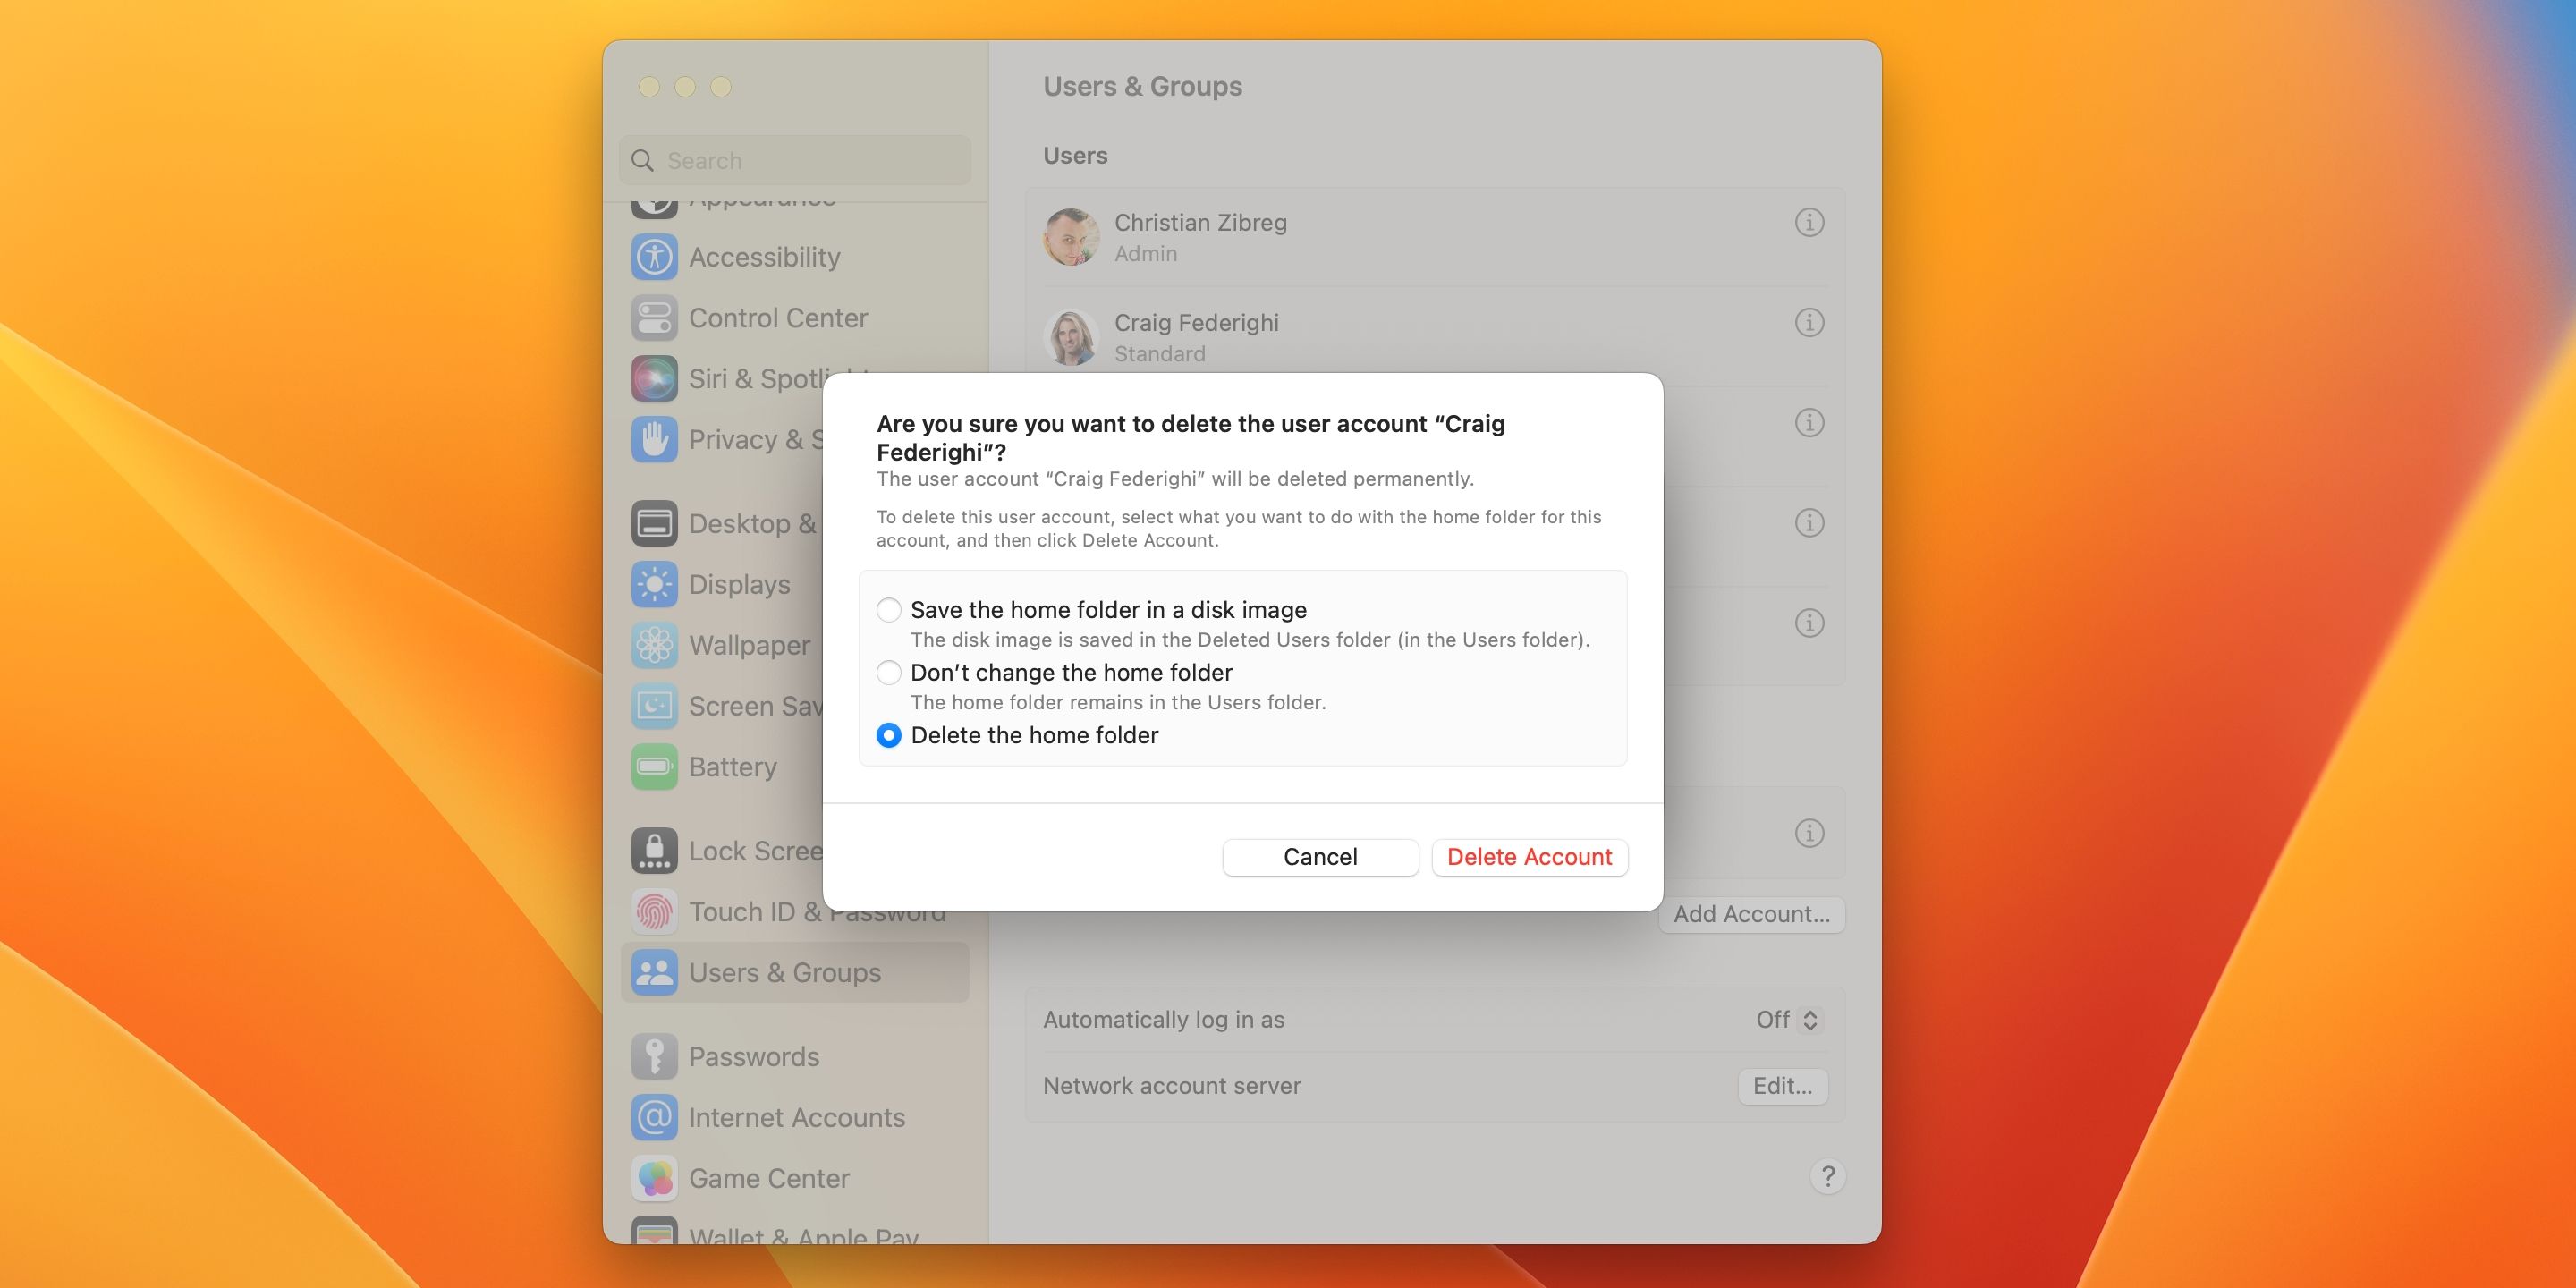
- Hit the Delete Account button, provide your admin password, and click Unlock.
- Choose what to do with the account's home folder and click Delete Account.
If the account name appears grayed out, it indicates that this user is already logged in. You won't be able to delete the account until they log out.
Use Multiple Accounts to Share Your Mac
Some folks are very protective of their Mac and consider it their "territory." If you count yourself in that group, you might be hesitant to let anyone use your machine, even for a little while.
However, sharing computers is sometimes inevitable, whether you're doing it to reduce tech expenses or to help someone in need.
With the ability to create, manage and delete multiple user accounts in macOS, Apple makes it a cinch to control which part of your Mac and the data you share with others.

