<firstimage="https://www.makeuseof.com/wp-content/uploads/2010/12/homeserver.jpeg">

For a number of years now I've been running Microsoft Windows Home Server on a spare machine I had, as it's a great way to use up all the spare hard drives that I find lying around the house. It has served me well as a networked storage device and streaming media server, as well as providing me with automated nightly back-ups (of my Windows systems at least).
However, the Home Server team recently announced that they would not be including the disk pooling technology in the next release, so I've been looking for an alternative. Amahi Home Server - a Linux based solution - might just be the answer.
First off, let me explain why anyone would even need a server for their home.
In the modern home, there are sometimes a lot of media and computing devices. At one point last year, my home network consisted of:
- An Xbox 360 and Playstation.
- A network connected LCD TV in the living room.
- 2 laptops.
- 2 desktops.
- 1 iPad and 2 iPhones.
- A number of guests who would bring their machines round.
Admittedly, that is a lot for anyone - but even with just a few connected systems, they all need to access shared media (movies, music and such) and all could benefit from a backup every now and again. A home server can provide:
- A central place to store files and media and well as stream those on your home network.
- A central backup location for computers.
- Printer sharing.
- Much, much more.
We covered setting up a home media server with Linux or Windows, or as a UPNP device for streaming media, but nothing that really ties it all together in one package.

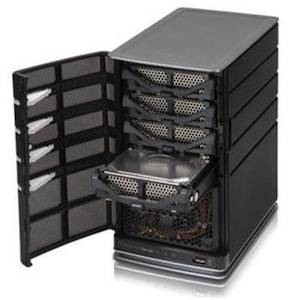
Of course, all that media storage means lots of hard drives, and this is where Microsoft Home Server really excelled. Normally, when you add a hard drive to a computer you must partition it, assign drive letters (like C: for your system, D: for data). Not so with "drive pooling" technology. With pooled storage, you simply throw another hard drive in and tell the computer "here, use that as you wish".
Curiously, Microsoft announced that this amazing functionality would be GONE from the next version of Windows Home Server - the excuse being given that "business users simply don't have need of it". At that point, I officially began searching for a suitable replacement, and would like to show you what I found.
Amahi Home Server
Before we begin, I must tell you that it is no surprise that this alternative is based upon Linux, and as such will require a degree of "fiddling" to get things right, and even such simple tasks as adding a hard drive can become confusing with a mountain of disinformation that the Linux community provides - but let's take that journey together, and let me guide you through the basics of getting your server up and running.
Since I approached this with zero experience of Linux, I think you can too. In future articles, I'll show you exactly how you can accomplish more advanced tasks like setting up a printer, adding hard drives, setting up backup etc.

Quick Install Guide
I find the guide on the Amahi page rather lacking, so here's a quick summary.
- Download the Fedora 12 DVD (more download links). Boot from the DVD - the install is fairly basic with help at every step.
- I assume you are setting this up on a dedicated machine, so select "use entire drive" when it asks how you'd like to set up the drives. You will lose all data currently on the drive.
- When you reach the "software repositories" install stage, stop and click on the "Add additional software" button.
- Enter Repository Name: Amahi and Repository URL: http://f12.amahi.org
- You will need to be plugged into your network, with the Internet on.
- Walk through the rest of the install and select to sync with network time.
When you first log into Fedora, there will be some icons on your desktop. Click the one labelled Install Amahi and you'll be off. You'll also need to create your free account at amahi.org, and note down your network settings to create an install code. If you don't know the network settings for your network you can read the tutorial here to find out. Most home networks have their routers on 192.168.0.1 or 192.168.1.1, so enter this where it says "Gateway". The field is simply where you can make up an address for your Amahi server - it defaults to 192.168.0.10, but I changed mine to .101 just because I have a lot of devices and thought it might conflict. If you only have a few systems, sticking with .10 is fine.

You'll then be given a short code to enter into the Amahi installer on your server desktop. After you've entered your code and run through the installer, you'll need to restart.
After restarting the server and other computers on the network, everything is basically set up. I was able to log into the machine remotely at http://hda, so theoretically you could now disconnect the monitor and put the server in the cupboard.
The installer mentions turning off the DHCP function on your router, but in my case that wasn't necessary. You may need to log into your router or cable modem if you're having problems, but try without first.
Exploring the full range of features available in the server is subject matter for a future article, but suffice to say the server is now operational, so you should start to add some media files to the network shares. Should you feel adventurous, there's a support forum on the Amahi site, and a directory of apps you can enhance your server with.
If you're already running a home server, tell us about it and your experiences in the comments.