<firstimage="https://www.makeuseof.com/wp-content/uploads/2011/06/uparrow.jpg">
When you're an online writer, you really have to spend a lot of time taking screenshots. This need also extends well beyond the online writing world. Maybe you need to create a web-based manual for work and you need to capture screenshots for it, or maybe you are a teacher trying to create an online how-to guide for your students to use at home.
There are a lot of important reasons why people need to take screenshots and then upload them to the web for online publication. Here at MUO, I think we're really covered the gamut when it comes to screenshots, such as Ben's list of the 4 best screenshot and screencast tools, Ann's list of tools for high quality screenshots, or the list of Chrome snapshot plugins by Simon.
Believe it or not, there is another tool that you may want to consider if you want to shave even more time off your screen capturing efforts. Imagine being able to hit a couple of keys, draw a rectangle on your screen, and then have that area captured and automatically uploaded to your website or blog? In almost a single step you've cut four or five steps from the typical screenshot process. This is possible by using a cool little app called UpScreen [No Longer Available].
One Quick Setup For Fast Screenshots
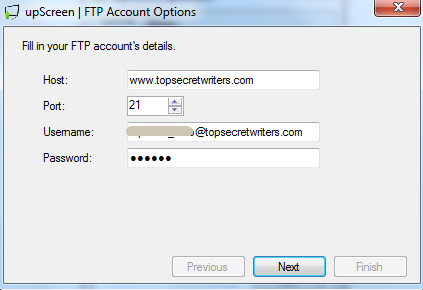
UpScreen is just an executable file. Download it and place it wherever you want to launch it from. The first time you launch the app, you'll need to set up where the screenshots will get uploaded to via FTP.
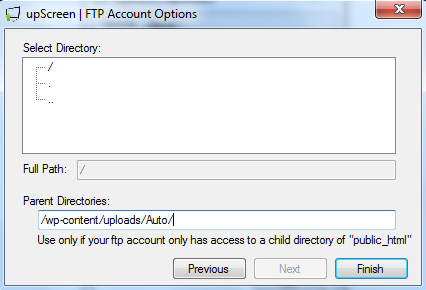
If you can, stick to using "www" in front of your domain rather than "ftp" so that the preview window, which I'll show you in a bit, will work correctly. So long as you list port 21 the server will know to access the FTP account. Ideally, you should create a special FTP account for this purpose. In this example I created an FTP account and assigned it to an "auto" folder inside the wp-content/uploads/ area of my blog.
If you do assign the FTP account to a subdirectory structure inside the "public_html" directory, you'll have an opportunity in the next step of the setup to tell the application what that directory is. Make sure you type the right one so that the preview feature of the screenshot app works right.
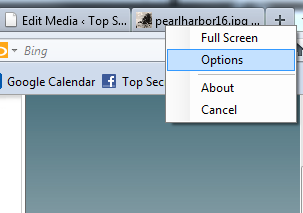
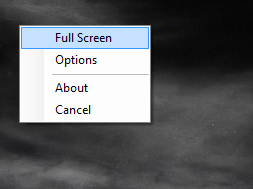
Now, when you run the application, you will see crosshairs show up on the screen. You can now draw the area that you want to take a shot of, and the application will capture it and upload it. But if you would rather take a full screenshot or check your FTP settings, right-click anywhere on the screen and you'll see the menu appear.
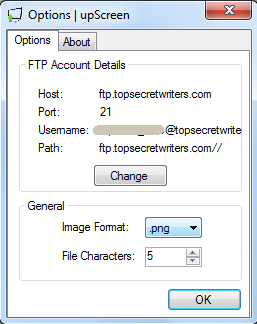
Options is where you can re-configure FTP settings if you want to, or you can alter what image format you want the screenshots saved to. The five characters refer to the 5 random characters assigned to the screenshot name. You can assign more characters if you think you'll be taking lots of screen captures over time.
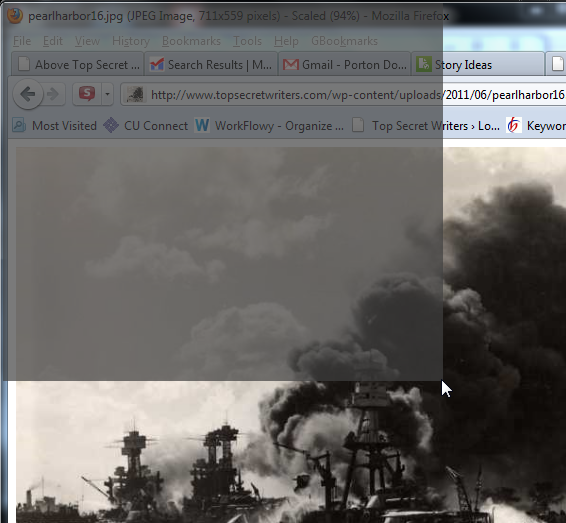
To take a screenshot, just draw the rectangle as shown below. A gray box will appear over the area that you'll be capturing as a new image.
The moment you release the mouse button, two things happen at once. First, the application captures the screenshot of the area you assigned. Second, it immediately connects to your FTP host account and uploads the file. That's it! All of those ftp/upload steps are erased when you use UpScreen to do your screen captures.
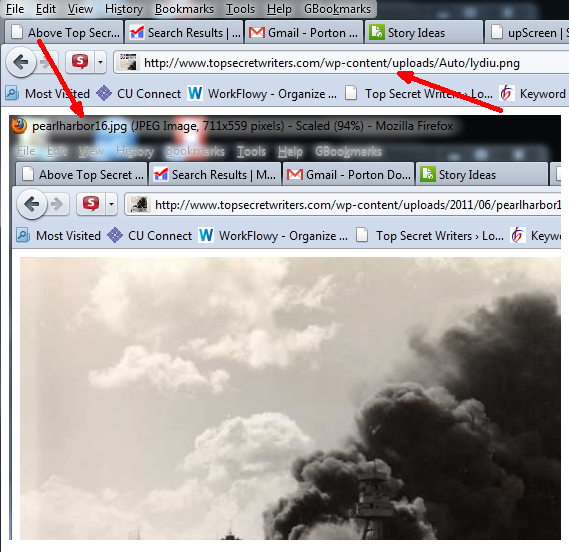
The screenshot I captured above is a screenshot of a Firefox window that I had open, which was displaying an image on my website. UpScreen took a snapshot of the area of my Firefox window that I had boxed, uploaded it to my website, and then displayed a preview of the snapshot as shown above. Now all I have to do is use that image link anywhere in my blog posts that I like.
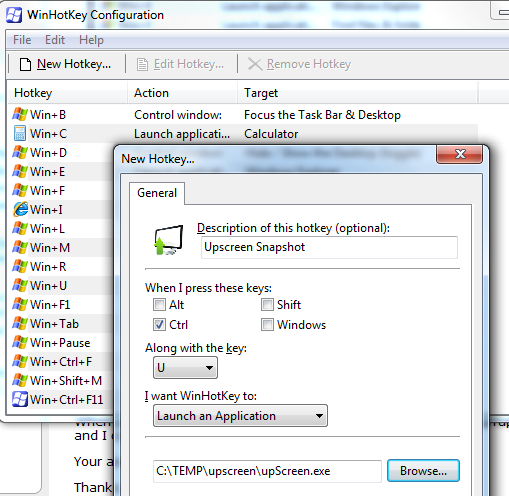
Now, all this is well and good, but what good is it to have an executable you have to keep launching in order to do screenshots? The solution for this is to assign a hotkey to launch the app whenever you want to do a screenshot upload. There are lots of ways to create HotKeys in windows - I prefer to use the WinHotKey app.
Here, I've defined Control-U as the hotkey to take a snapshot using UpScreen. That's all there is to it.
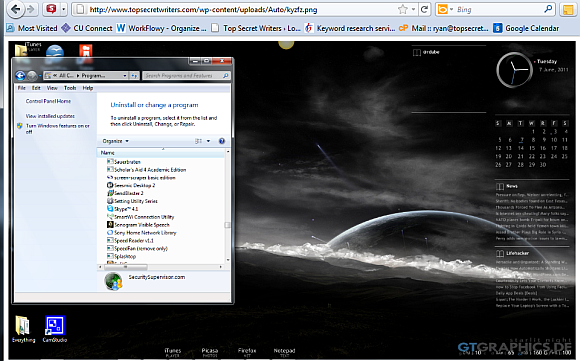
A few final things you should know about Upscreen - taking a full desktop screenshot is as simple as running the app, right-clicking, selecting "Full Screen" and then double-clicking anywhere on the desktop.
Here is my full desktop snapshot instantly uploaded to my website using UpScreen. This procedure took me just about 5 seconds and it was instantly on my site.
You can also take a quick snapshot of a single window by double-clicking on the title bar of that window. UpScreen will capture the window, upload, and then display a preview of your uploaded picture in your web browser.
UpScreen is good for anyone that does a lot of screenshots, but it's really worth its weight in gold if you do a lot of "how-to" articles that require constant screenshots. The ability to cut several steps out of the process can really save a lot of time in the long run.
Give UpScreen a shot and see if you find it as convenient as I do. What do you like about it and what would you change? Share your thoughts in the comments section below.


