Creating your own t-shirt can be a great way to show a little bit of your own personality and can also make for a really thoughtful gift. Screen printing can seem like an overwhelming experience, so we've broken down each step for you.
What You'll Need to Print Your Own T-Shirt
Ready to create your own t-shirt? You'll need a few things before you get started, so collect together:
- A screen printing frame (you can DIY or purchase a screen or kit)
- Squeegee (or a piece of stiff cardboard)
- Photo emulsion and sensitizer
- A lamp with a bright light bulb
- Transparencies
- Inkjet Printer
- Cardboard (or something else) to place inside the t-shirt.
- Fabric Ink (Speedball)
You'll also need a dark space to place your screen with the emulsion until it dries.
Step 1: Prepare Your Design
You can create a design using any design program of your choice. You could even create the design in Word. If you can create a logo in Word, why not create a t-shirt design in Word as well.
You could also just use text for your design, and we have dozens of geeky oneliners and jokes to get you started. Basically, all you need is a design that can be printed, preferably one with large solid lines.
If you want to keep it super simple, you can use a geeky slogan or a simple free vector image downloaded from a site like Pixabay.
As a beginner, it's probably best to start with a solid, one color design. When you first start, layering colors when screen printing is quite a challenge. To keep it super simple, you can also choose a design that will look the same when reversed.
Once your design is ready, print it onto a piece of paper to make sure it's positioned on the page how you want. Then you can print it on your transparency, preferably using an inkjet printer. If you don't have one at home, look into office supplies stores in your area and see if they offer transparency printing services.
Step 2: Create or Purchase a Frame
You can purchase pretty inexpensive screen printing frames or even a screen printing kit that includes the frame, fabric paints, and emulsion.
But if you want this to be a DIY project from A to Z, you can make a frame yourself. You can either purchase the wood and assemble the frame, or you can purchase a cheap canvas. Simply remove the canvas, and keep the frame in place. You will, of course, have to purchase a canvas that is larger than your printed design.
If you're assembling your own frame, 2x2 pieces of wood are probably best, and you can create a square frame at the exact size you want. For an adult sized t-shirt, 16 by 16 is probably best. You can also place pushpins into all four corners of the frame if you want to be able to lay it flat without the screen touching the surface where you're working.
For the fabric you can purchase silkscreen printing mesh, or even give certain fabrics a try like organza or voile. Stretch the fabric of your choice over the frame, and staple it in place.
Step 3: Prepare the Photo Emulsion
Now that your screen is ready, you can prepare the emulsion that you're going to spread over it. The emulsion is made up of a sensitizer and an emulsion. Make sure that you follow the instructions on the bottle---particularly paying attention to light sensitivity. You'll want to perform this step in a dark room or you can use black light to see what you're doing without ruining the emulsion.
And remember, a small amount goes a long way since you'll be spreading it thinly over the screen.
You'll want to work on a surface that you're not worried about dirtying - or better yet, place your screen over a plastic drop cloth or large trash bag. Pour the emulsion onto the screen, and using a squeegee, spread it out over both sides of the screen. You'll need to make sure that the liquid is spread thinly and evenly over the screen, but that you can't see through it.
Using an emulsion scoop coater is a good way to avoid using more of the liquid than you need.
Set aside the screen in your dark space until its dry. It's best to follow the instructions of the emulsion manufacturer when it comes to the drying time, but you can also use a fan to speed up the drying process.
Step 4: Transfer the Image
Once your coated screen is dry, you're ready to transfer your image on to the screen or "burn the image." This is a step that you'll want to do quickly since the emulsion reacts quickly to the light. Or if you can also do this step in the dark room where you let your screen dry, even better.
Lay your printed transparency reversed in the center of the screen. You'll place it on the side of the frame that will lay down on the t-shirt. It's very important to make sure that you lay it backward so that your design isn't reversed when you go to print it.

Next, you'll want to place a very bright light directly over the transparency for about 30 to 40 minutes. (Again check what your emulsion recommends.)
Once the image has been exposed, you can remove the transparency and spray off your screen with water. You can also use a soft toothbrush to make sure that the design is completely transparent, but don't brush too hard. You don't want to remove part of the dried emulsion that you need.
No paint will get through in areas where the green emulsion remains intact. Paint will get through anywhere that coated surface has been scratched or completely removed.
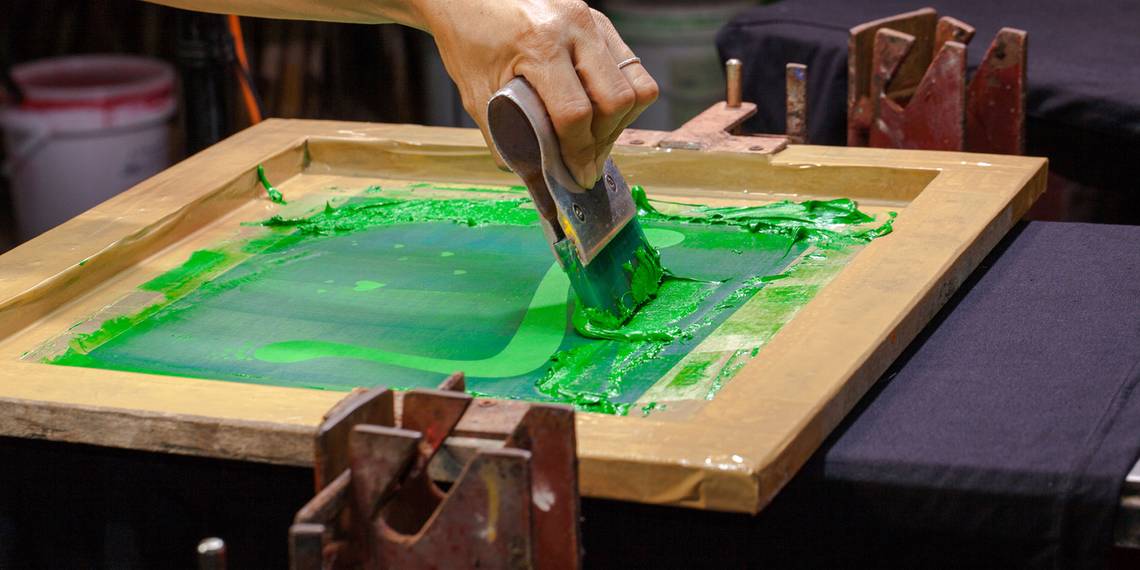
Step 5: Paint, Paint, Paint!
Now it's time to crack the paints open and get to the fun stuff. Lay your frame face down on the t-shirt. The design should be facing up so what you see is not reversed. If you want to make sure that your t-shirt remains wrinkle free as you apply the paint, place a piece of sturdy cardboard inside the shirt.
Place a small amount of paint on the screen above your design. Using a squeegee, holding the frame down, run your squeegee down quickly over the design once or twice to spread the paint onto the t-shirt. Lift the screen off of the t-shirt.
This step is probably the most challenging. It's a bit of a trial and error process to figure out how much paint you should use, how hard to press down with the squeegee etc.
You can create as many t-shirts using the one frame as you need.
Follow the instructions on your paint of choice. This will probably mean you should throw your shirts in the dryer once you're done to make sure the paint doesn't peel after the first wash.
To see the process from beginning to end, check out this video:
Finish Off: Clean Your Frame
If you don't want to purchase or make additional frames, and decide you're done with that design, you can wash off the emulsion and exposed design. To do this, you'll need to pour a little bit of Photo Emulsion Remover and wipe it across the frame on both sides using a cloth or toothbrush.
Next, just wash it off with water, and you can start working on your new design.
Alternatives to Traditional Screen Printing
If the idea of screen printing still overwhelms you, there are other options out there for making your own t-shirts. You could use an embroidery hoop and a fabric like organza or voile. Use mod podge or vinyl stickers to block out your design and then use the embroidery hoop as you would the screen printing frame.
Another, but pricey option is to purchase a die cutting machine, and create and cut your designs out of heat transfer vinyl. It's even possible to create a vinyl stencil or freezer paper stencil and create your geeky t-shirts in a snap.
Image Credit: thaisign/Depositphotos