Microwave ovens have been ubiquitous in kitchens since the 1980s, but more recently, intrepid tinkerers have been taking them apart to harvest them for parts for their own projects. There is a veritable gold mine of parts for DIY home inventors here—from high-powered heavy-duty components that can be used to make a Tesla coil to basic, durable parts for Arduino hobby projects.
Luckily the general setup of a microwave hasn't changed all that much over the years, making the identification and safe removal of parts fairly easy. In this article, we will cover taking apart the microwave safely and show some project ideas various inventors have come up with using the parts.
Before You Get Started
There are three important points we need to go over before you go ahead with the entire process:
- Microwaves are high voltage appliances, and you should never take them apart while plugged in. Furthermore, the color conventions for wiring can vary from country to country. Be sure to know what exactly you are looking at.
- The high voltage capacitor can give you a lethal shock even after the microwave has been unplugged for months. We will show you how to safely discharge these capacitors in this article, but they need to be respected.
- The magnetron inside a microwave can contain beryllium oxide in its ceramic insulators, which can be fatal if it gets into the lungs. Simply removing it is safe, but never try to take one apart. It's not worth it!
Every time you knowingly tinker with high power, it is at your own risk and potentially deadly. In short, be safe! Live to hide ugly technology in your home another day! Now, with that said, let's get started.
Microwave Procured
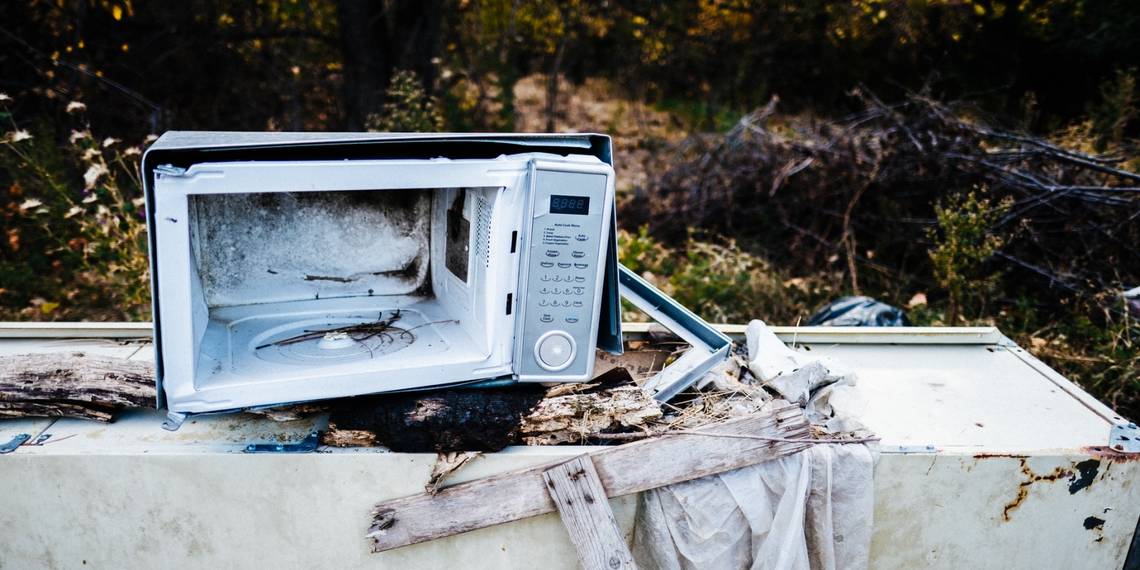
The first step is finding your microwave. You may have an old or replaced unit—in our case, our neighbors were getting rid of theirs and left it in our stairwell. It is worth noting that this disassembly is not suitable for inverter microwaves as they work differently.

You do not need many tools for this disassembly, but this could vary depending on your microwave's design. We found the following tools to be sufficient:
- Phillips screwdriver with insulated handle.
- Pliers with insulated handles.
- Heavy-duty insulated working gloves.

We found the gloves served a dual purpose here: Besides protecting us, they were a nice barrier between our hands and the accumulated years of filth inside the microwave case. We also found it handy to have a small bowl next to me to store all the screws.
Before getting started, check the case to see if it has any useful information on it. Many microwaves have full circuit diagrams available to download online, which is a great way to learn about circuit design, so make sure to note down any model numbers you find. If you are interested in more DIY electronics projects, check out this great resource.
In this instance, the manufacturer kindly put a diagram of the internal electronics on the back of the case.

Just in case you need a reminder this soon, you don't need to understand German to know that something with "Achtung" and "Warnung" on it could potentially be dangerous!
Screw Here, Screw There
Check that the microwave is unplugged.
Check again. We can wait.
Now begin by removing all the screws you can see on the outer casing. You may find that the top part of the casing can be removed first with the screws around the edges, giving you enough access to harvest the parts without totally taking it apart, though some models are harder to break into than others.
Once you have the outer casing off, you should be able to see the components. While the layout may vary, almost all microwaves have the same set of fundamental parts.

- Transformer (commonly referred to as MOT).
- High Voltage Capacitor.
- Fan.
- Compact High Capacity Thermostat (small black circular component).
- Magnetron.
- Relay.
- Front Panel.
The very first thing to locate is the capacitor. In this model, it was part of the fan assembly, though this can vary. Do not touch the contacts of the capacitor under any circumstances! In case the above image is not clear, this is what you are looking for:

If possible, you should discharge the capacitor before removal. In this instance, the capacitor was encased in the fan assembly, so it required removal before discharging.
While wearing your gloves and holding the insulated handle, use your screwdriver or pliers to short both contacts of the capacitor. Hold it there for a few moments, making sure it is definitely touching both contacts. You may see a flash or hear a loud pop, so don't say we didn't warn you!
Magnetron, Move Over!
Magnetrons can be incredibly dangerous; while you are safe from radiation when they are not powered, the ceramic insulators can contain beryllium oxide, which can be fatal when inhaled. If Magneto is the enemy of the X-Men, the magnetron is the enemy of all lungs everywhere.
We will carefully remove it from the case, but only to gain access to the screws holding the transformer. If you can remove the transformer without removing the magnetron, leave it where it is.

Most magnetrons look like this and are attached to the main microwave case with four screws. Carefully remove it, wrap it up, and put it aside to be safely discarded later.
Transformer Time
The high voltage transformer (commonly known as a Microwave Oven Transformer, or MOT) is the real prize in this disassembly. The MOT takes mains AC power (240v here, it may well be different for you) into the primary coil and through electromagnetic induction steps that power up so that between 1,800 and 2,800 volts come out of the secondary coil. The more windings you have on the secondary, the higher the voltage and lower the amps and vice versa.
High voltage transformers can be expensive items to buy for hobby or DIY use, but with careful modification, MOTs can be used to provide a high range of different power requirements.
The MOT is heavy, so it is almost always attached to the bottom of the casing by two or four screws. Carefully remove the wires and screws and pull out your prize.

There are several fantastic projects you can do with this beast, which we will go over later in this article.
Stripping the Rest
Now that you have the bigger components out, slowly remove everything else piece by piece. You may find it easier than we did if you remove all the wiring first.
Don't forget to take the bottom panel out to remove the turntable motor!

Once you have everything out, you should have quite a collection of components:

Depending on how modern your microwave is, your haul may vary a little. In this instance, we came out with:
- 1 x Powerful 240v AC pole motor from the fan.
- 1 x 240v geared motor from the turntable.
- 1 x Small 240v Bulb with fitting.
- 5 x Micro switches.
- 3 x High voltage thermostat switches.
- 1 x 20w 20 ohm resistor.
- 1 x Electric heating element (this particular microwave had a grill function).
- 1 x 12v relay.
- 1 x 240AC to 12v transformer.
- 1 x High voltage transformer.
- Various pieces of high voltage rated wire and the mains lead.
Along with these things, we also got assorted smaller resistors, diodes, capacitors, and an inductor.
We also stripped the front panel of the microwave off as one piece. This contains a motor for the timer along with two more micro switches. This unit is already self-contained and compact and can be put to another use, as you will see later.

Now that you have everything you need, gather the pieces you will not be keeping for disposal. A practical way to do this is to reassemble the outer case with the magnetron inside it and then take the whole unit to your local recycling center for safe disposal. Different places have different rules for appliance disposal, be sure to comply with your local rules and regulations.
Now What?
Now we have all of these parts, what shall we do with them? Some of them are quite specialized and will only be needed in quite specific situations. Some of them, however, can be put to use here and now.
The micro switches we scavenged are momentary, normally open (NO), normally closed (NC), or selector switches which are rated up to 16A 250v (remember, yours may vary depending on your country).

While capable of high voltages, they will also do perfectly fine for smaller-scale projects. Because they are spring-loaded, they could easily be fitted to door and window frames instead of reed switches as part of a DIY home security system. If you are new to working with microcontrollers, they also work perfectly in Arduino beginner projects.

As an added bonus, we found that the wiring that was also salvaged fits perfectly into the holes on a breadboard.
Message Relayed
We have covered using 5V relays with microcontrollers before, and you can apply the same principles to the relay we salvaged.
The relay we stripped from the microwave specifies a 12V coil, though many relays operate at a lower voltage. The relay we stripped, in this case, works perfectly well with only 9V, making it the perfect relay to use in a microcontroller project, and since the relay here is capable of taking up to 250V 16A would be able to sustain use in almost any home automation setting.

You can find data sheets for most components by searching the brand and model number.
A contributor for Instructables has provided a simple guide to connecting a 12V relay to an Arduino.
The Fan
The motor attached to the fan is a pole motor, which runs at 240V AC. It has the advantage of being very powerful while remaining fairly quiet.

This makes it perfect for use as a homemade fume extractor fan, which is something everyone who owns a soldering iron should have.
By modifying this design by John Ward to make use of the fan, you can create a powerful extractor on a low budget.
John estimated that this build cost roughly $90, though, without the fan's added cost and clever reuse of other scavenged parts, this is the perfect budget (and health-conscious) DIY project.
The Front Panel
The front panel of the microwave above was one of the older models with a motor that counts down before turning the micro switch off, though yours may have a newer digital display. This unit could be used as it is as a countdown timer—perfect for reminding you to get up and stretch after a period in front of the computer!
The internal micro switch can also be used to control an appliance. User Koil_1 used a digital timer to create a multi-appliance shut-off timer on Instructables.
Crank up the Power
The turntable motor in a microwave is geared to move very slowly from an AC power source. This means that the high torque motor is capable of generating power when turned manually. In a wonderfully simple project on Instructables, user ahmedebeed555 has created a hand-cranked phone charger using next to no parts!
MOT Time
Earlier in the article, we mentioned that the microwave oven transformer (MOT) was the most valuable part to scavenge from a microwave, and a quick Google search will reveal why. These transformers have been re-purposed to create many weird, wacky, and sometimes downright dangerous inventions—everything from homemade electric arcs and metal melting foundries to spot and welding machines.
YouTube channel TKOR has a series of videos covering most of these projects, and while they are all great ideas, his videos on making a homemade ARC welder give clear instructions on how to make your own welding set up on a small budget.
All in a Day's Scavenging
This article has covered just a few things you can make from an old or broken microwave, and even the smaller parts that have no immediate use are more things in your toolkit for future projects. Scavenging and re-purposing old appliances is a great way to learn about electronics and cuts back on the amount of waste we produce.
Before you go, remember always to use caution when working with high-powered electronics. Also, don't forget to wear protective gear where appropriate to ensure your safety. Electrical accidents are more common than you think.