What do you use your Chromecast for? Perhaps you stream content from YouTube to a non-smart TV, or use it as a mirror for your Android gaming. You might have a Plex server, and enjoy streaming video from your computer or server to your TV.
Perhaps, like me, you get the feeling that even though an increasing number of apps are supporting Chromecast, the device could potentially do just a bit more, beyond its current raft of uses.
Want region blocked content streamed through your Chromecast? With a basic device, this isn't possible, but by rooting the Chromecast, you unlock the ability to make various tweaks, such as changing your DNS (so you can watch BBC iPlayer in the USA, or Hulu in the UK).
Hold On: You'll Need Some Extra Hardware
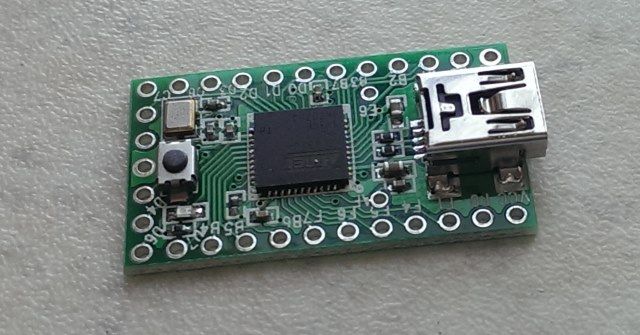
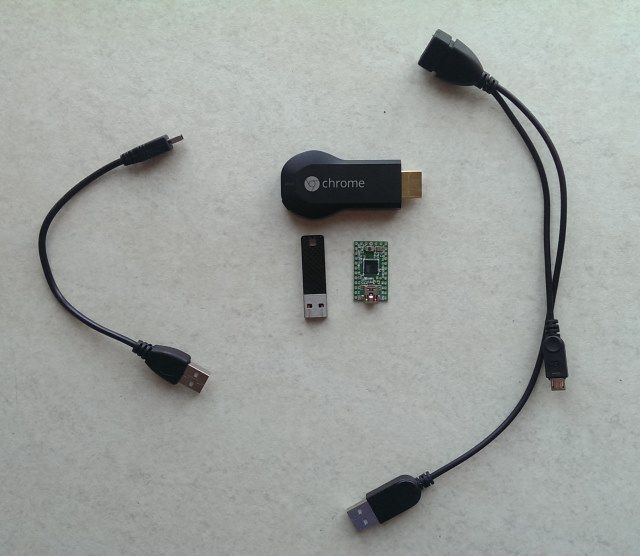
Rooting the Chromecast isn't as easy as rooting an Android smartphone or tablet. It requires some additional hardware, namely a Teensy 2.0 board, an USB OTG cable (with USB power input) and a USB flash drive with at least 1 GB of storage. Use the links to find all of these items on Amazon.
You'll also need to pick up some standard USB cables, a Micro USB with optional power connector and a USB mini. The Teensy 2.0 often ships with this, but if not you should be able to pick one up inexpensively.
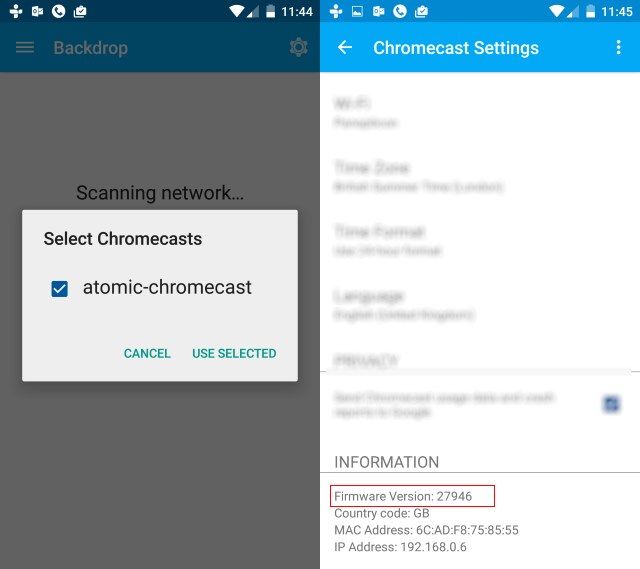
Of course, you'll also need a Chromecast. Unfortunately, not all are compatible with the root method at present. You should have installed the Chromecast app on your Android device, so tap your Chromecast and scroll down to the bottom of the page, looking for the Information section, where you'll see the Firmware listed. If this number is greater than or equal to 19084, then your device cannot be rooted.
Should you be unable to root your device, worry not: pre-rooted devices are available to buy online, such as on eBay.
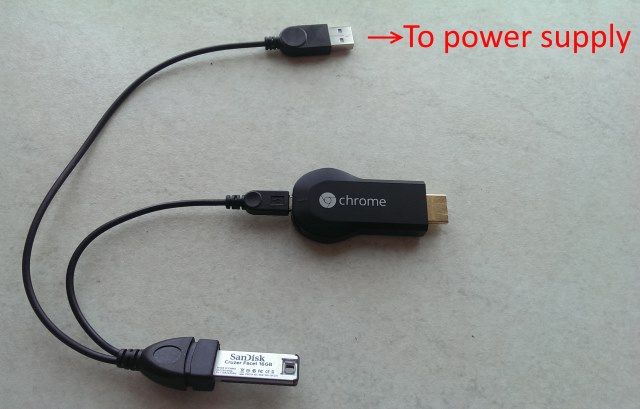
With everything bought, delivered and unwrapped, you should have a collection that looks something like this:
Your hardware is altogether; now it's time to get your software.
Software You Will Need to Root your Chromecast
Additional software is required to root the Chromecast, from custom-developed rooting files to USB flash disk imaging software.
First, head to https://download.exploitee.rs/file/chromecast/HubCap.zip and download the file, saving it in a dedicated folder on your PC.
Second, download https://www.pjrc.com/teensy/teensy.exe to your PC, and save it somewhere equally memorable.
Follow this with a trip to Sourceforge where you should download the Win32DiskImager. With this downloaded, run the file to install it. When opening Win32DiskImager, which is the next step, right-click the icon (or press WIN+Q to open the Search box to find it first, then right-click) and select Run as administrator.
Preparing The Teensy and New Firmware
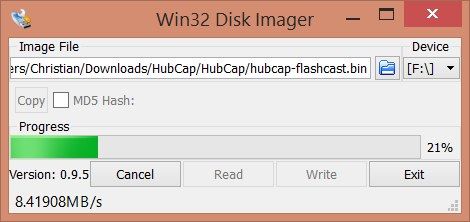
Insert your USB flash device. In Win32DiskImager, ensure the corresponding drive letter is selected, click the folder icon to browse, and find your way to the Hubcap folder, into which the contents of the ZIP file were unpacked. In the bottom-right corner, change the file type from Disk Image .img .IMG to *.*, select hubcap-flashcast.bin and click Open. To begin writing the file to the USB device, click Write, and wait for completion, which will be confirmed in a pop-up box.
Finish this step by expanding the system tray (the area on the Windows desktop where you'll find the clock) and right-click the USB device. Select the Eject option to safely remove the flash drive.
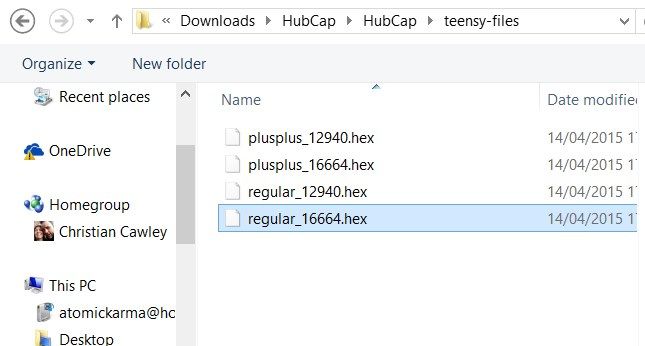
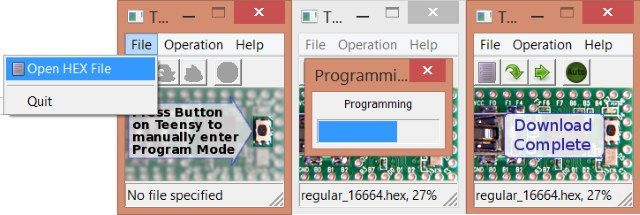
We're now ready to program the Teensy, which is essential in hacking the Chromecast. Connect the Teensy to your PC and run the teensy.exe file you downloaded earlier. In the app, go to File > Open HEX File and browse to the Hubcap directory again, this time finding your way into the teensy-files directory.
Here you will find four files:
Those prefixed "plusplus" are for the Teensy++ while those labeled "regular" are for the Teensy 2.0 device. Select based on the device you have, taking care to choose the file that corresponds to your Chromecast.
For a brand-new, just out of the box Chromecast, select the 12940 file.
If your Chromecast has been used, select 16644.
When you've made your selection, and clicked Open, you'll be ready to hit the button on the Teensy, just below the flashing blue light. The Teensy app will show a different screen, so proceed by clicking the second button from the left, Program.
The Teensy is now programmed! Disconnect, and prepare to root the Chromecast!
Rooting the Chromecast
This is a two step process. The first step uses the Teensy to prepare the Chromecast to receive a new firmware file. The second step is to actually upload the new firmware, from the USB flash drive.
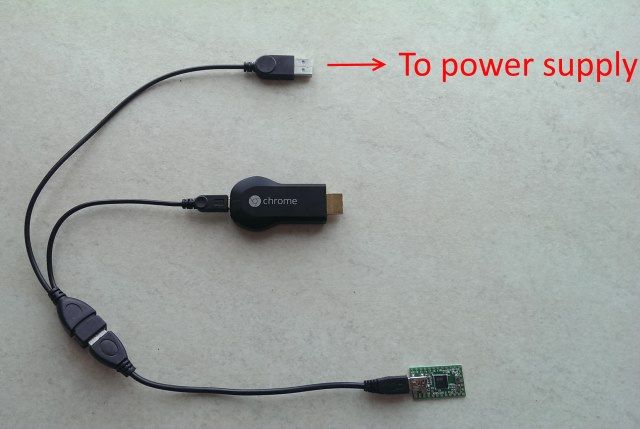
- Connect the Teensy to the mini USB cable (the same one you used to connect it to your PC).
- Plug the standard USB end into the female connector on the USB OTG cable.
- The standard USB end of the OTG cable should connect to a power supply, either your PC or a powered hub; perhaps a power bar with USB ports and surge protection.
- Finally, the micro USB connector should be connected to the Chromecast.
BUT WAIT!
As you make this final connection, do so holding down the reset button on the Chromecast, and leave the button depressed until the Teensy begins to flash. Continue holding the button down until the flashing stops.
You should now replace your Teensy (and its mini USB cable), with your USB flash drive – again, into the female connector on the OTG cable.
Press the reset button on the Chromecast once, and release. The USB flash drive will begin sending information to the Chromecast, rooting it. The Chromecast's white LED will be on throughout, and there is no way to tell when the process has completed, so give it ten minutes.
Once this time is up, disconnect and replace the Chromecast in its usual HDMI slot, ready to use.
Is Your Chromecast Rooted? Verify in the Chromecast Android App
To confirm that your Chromecast has been successfully rooted, open your Chromecast Android app, tap the active Chromecast, and scroll down to confirm the IP address for the device.
On any device connected to the same network, enter this same IP address into the browser, where you will see the Eureka ROM console, where Status can be checked and Settings adjusted.
Did you successfully root your Chromecast? What changes have you made? Let us know this and any questions you may have in the comments.

