Having a growing, popular blog is not something that I'm accustomed to. I've always been in awe of Aibek and his tech staff, and how they always have a backup of MUO on hand whenever anything may go even slightly wrong. As I watch my own Wordpress blog grow in both posts and user comments, I'm starting to eye my growing database with a wary eye. What happens if the server goes down, gets hacked or worse? Shouldn't I be prepared for such a situation with a constant, ready backup of all posts and comments?
This is something that a few MUO writers have covered here over the years. Years ago, Aibek himself wrote about 4 tools that were available back then for backing up your database. More recently, Jeffry wrote about the Updraft Wordpress plugin for backups, and Tim covered a few manual ways to do backups, such as with FTP.
I admit it, sometimes I'm lazy and if it's not simple and easy I just don't have time for it. Plus, I have MySQL databases that are non-Wordpress, so a Wordpress-only plugin won't work for me. After a bit of searching, I finally came across a brilliant free MySQL backup utility called MySQLDumper.
Installing MySQLDumper
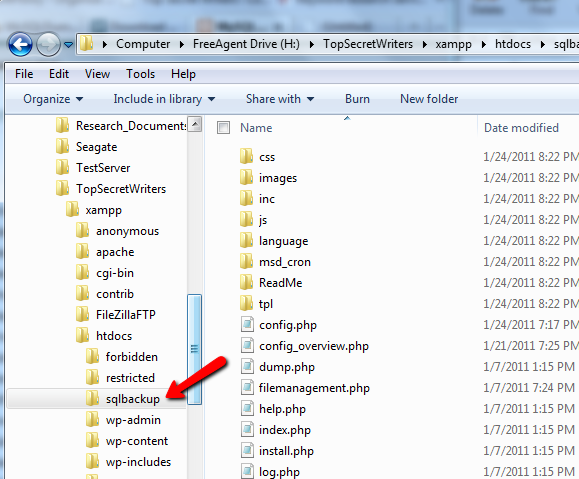
Running MySQLDumper is actually easier than most applications you've installed on your web server. Unlike Wordpress where you have to run an install utility, with MySQLDumper you just extract the Zip files into a subdirectory in your public web folder, and then call the index.html file from your browser. Here, I've copied all files to the "sqlbackup" folder on the web server.
In this example, to access it (accessing my local web server), the address would be "http://localhost/sqlbackup/" If you're installing this on your own web account, just replace "localhost" with your domain.
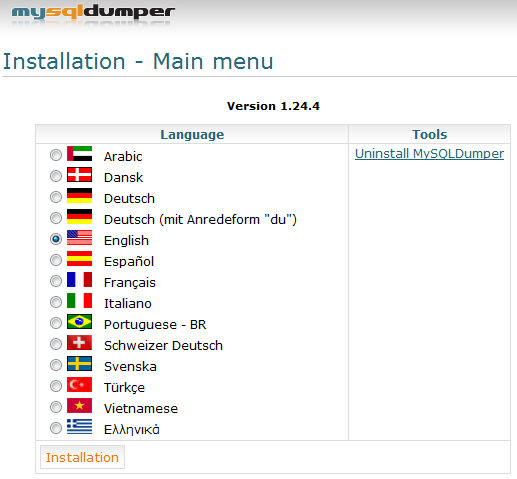
Once you access the index.html file in that folder, the "MySQLDumper Installation" screen comes up. This is actually more of a "configuration" than an installation. Just click your language and click "Installation".
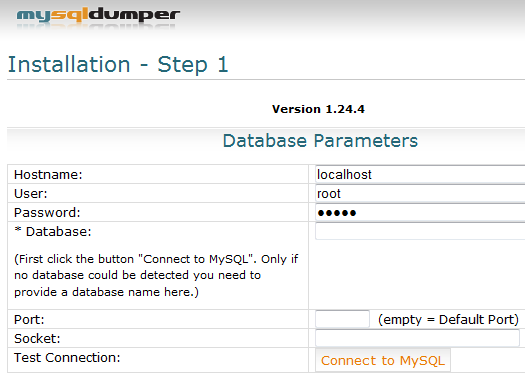
The installation procedure is simply setting up your database access parameters. If you want to use MySQLDumper to back up all of the MySQL databases on your server, then you'll need to give it a user ID and password with access to all tables. You can either create a new user on each table just for doing backups, or give the web application root access.
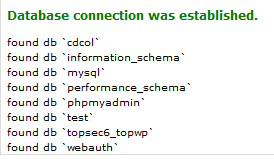
Once you click on "Connect to MySQL", the system will attempt to connect to each of the databases on your server and it will give you a status at the bottom.
That's all there is to it! Once you click Next, you'll find yourself on the main control panel of MySQLDumper.
Using MySQLDumper To Take Database Backups
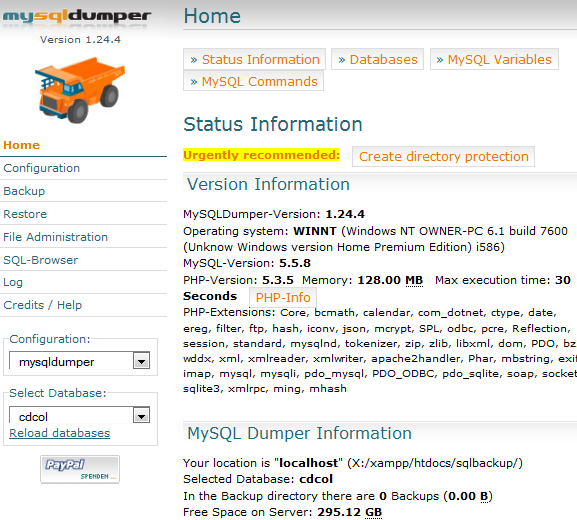
The status of your databases, including space limits and usage, is all displayed on the main page. You can switch selected databases by using the dropdown box at the lower left corner of the screen.
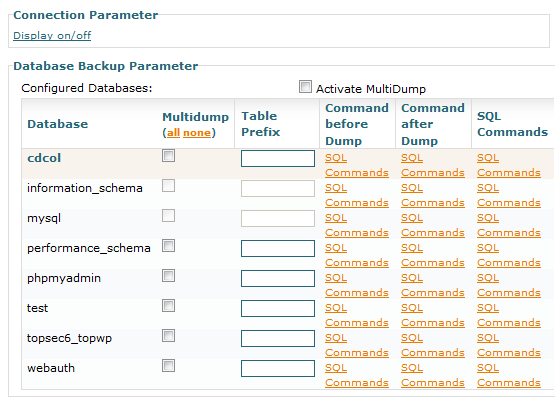
Click on "Configuration" to see an overview of all of the MySQL databases on your system. Here, you can also customize SQL commands for each backup dump for individual databases.
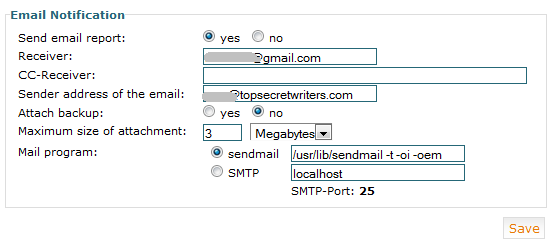
Click on the Email tab inside the configuration area to set up delivery of your backup files via email. If your database isn't too huge, and your email account doesn't have a small attachment size limit, go for it. However, in most cases this will become impractical, especially if you have a very large and growing Wordpress database.
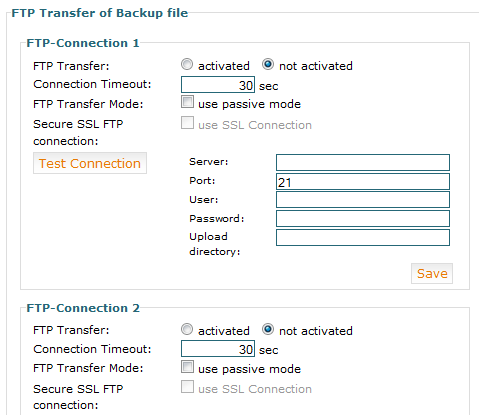
If you have a huge database (or databases), and if you don't want to store all of your backups on the server due to precious limited space, you can FTP the files to a remote location, like a free storage account or a PC you've set up at home as an FTP server just for this purpose. Every time you perform a backup, the file will be FTP'd to the location you've defined.
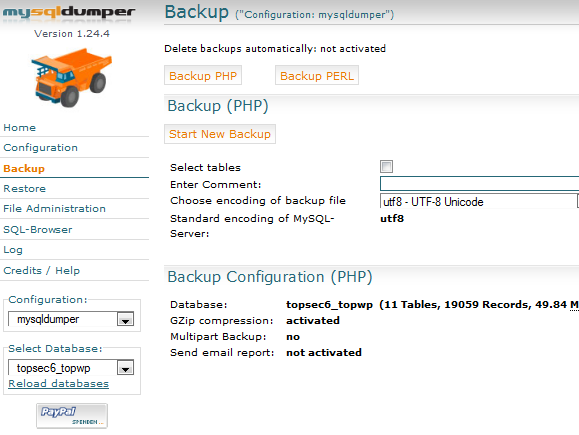
If you want to do a backup, just click on "Backup" from the main screen. Make sure the database that you want to back up is selected in the lower left corner, and then click "Start New Backup."
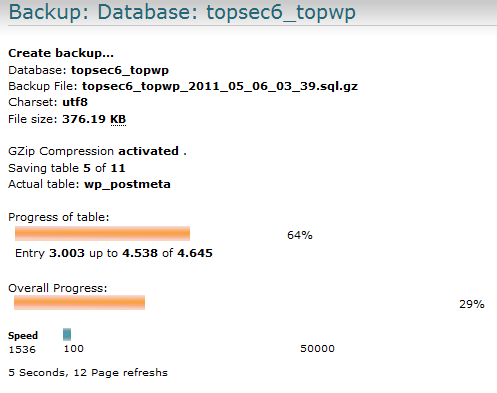
You can watch as the status bars display the progress of the backup procedure. You'll see the table names as they get backed up, the space required of the backup file, and percentage remaining per table and overall.
Once the backup is finished you can find the zipped files stored in the /work/backup/ folder inside the folder where you installed MySQLDumper. This web-based app also has the ability to quickly restore your database from any of your backup files in an instant. It also has a database browser that puts PhpMyAdmin to shame.
What really makes MySQLDumper stand apart from the crowd is it is specifically designed to handle huge databases. According to the website, it does this by getting around PHP script timeout limitations by breaking up the backup into segments, and then calls the script recursively until it completes the entire backup process, no matter how large your database is.
Have you ever given MySQLDumper a try? What do you think? What are your favorite tools to backup and restore your MySQL database? Share your insight in the comments section below.


