There is always a right way to print your documents. Some inkjet models print pages with the printed side on the top, which means you have to manually reverse the print order by hand.
It's not too much of a problem when printing just a few pages, but when you have a ream on your hands, it makes sense to print them in reverse order so that you can collate the bunch neatly.
Let's look at three easy ways to reverse print pages.
1. Set It in Microsoft Word
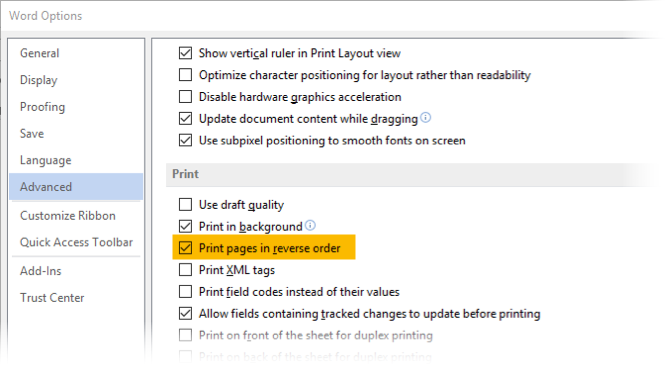
Microsoft Word has a single command that forces the printer to reverse print every print job:
- Open Word, then click Options > Advanced.
- Scroll through and come to the Print section on the right.
- When you want to reverse print a page, select the Print Pages in Reverse Order check box. Click OK and exit the Options screen.
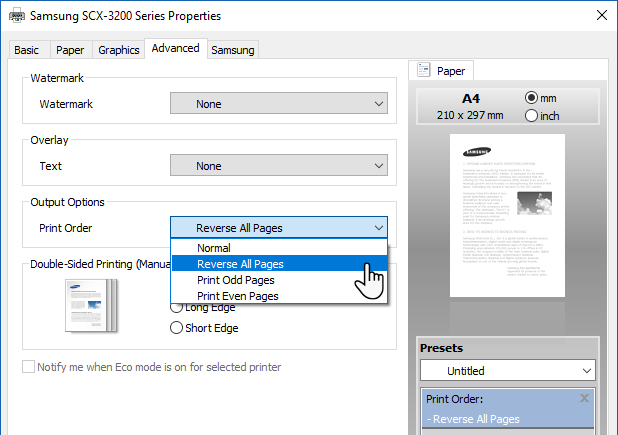
2. Set It in Your Printer Preferences
Most printers will give you fine-tuned control over the process of printing pages. I have a Samsung printer, and the Advanced tab allows for printing in the reverse order. Your printer too will have the option. Here's how you can usually set it:
- Click the Page Setup tab in Printing Preferences.
- Check the Print from Last Page box.
- Click OK.
3. Set It in Any Printer From Any Application
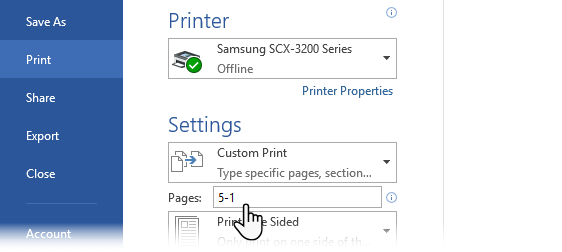
If you can't find a reverse print order command or checkbox in the printer's Preferences or in the application's Print dialog, simply enter your desired page range in reverse order in the Print dialog's Page Range.
For example, if you're printing pages 1 to 5 of a document, enter "5-1" as below, then click Print.
These small tips will help you boost your printing efficiency and collate all your pages in a more organized manner.
Tell us about the one printing tip that helps improve your productivity every day.
Image Credit: Olha Chernova via Shutterstock


