One of the easiest ways to make text stand out in Photoshop is by adding an outline. It's quick and easy, even if you're a Photoshop beginner—it'll likely end up being one of your favorite effects from this point forward.
Subtlety is important. You can create a beautiful effect with the right combination of font, line weight, composition, and form.
In this article, we'll not only show you how to outline text in Photoshop, but we're also going to show you how to outline text in Photoshop the right way, just like the pros.
How to Outline Text in Photoshop
If you have an image that requires text with an outline, the easiest way to do it is by opening the image in Photoshop and adding text to the photo. Once done, you can modify the layer settings of the text to add an outline.
This method uses Layer Styles to create a stroke, which also allows the Type Layer to remain editable. You can also use the steps below to add a stroke to any object on your canvas.
-
To get started, select the Type tool and type in your text. In older versions of Photoshop, this tool is located in the top bar while in the newer versions, you will find it in the left pane.
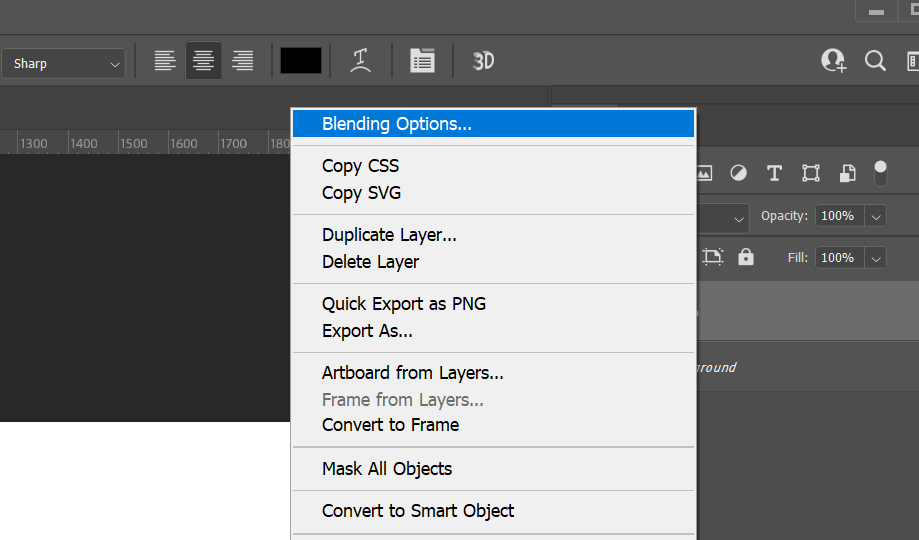
- Once done, right-click on the Type Layer and choose Blending Options from the menu. Or, alternatively, go to Layer > Layer Style > Stroke.
-
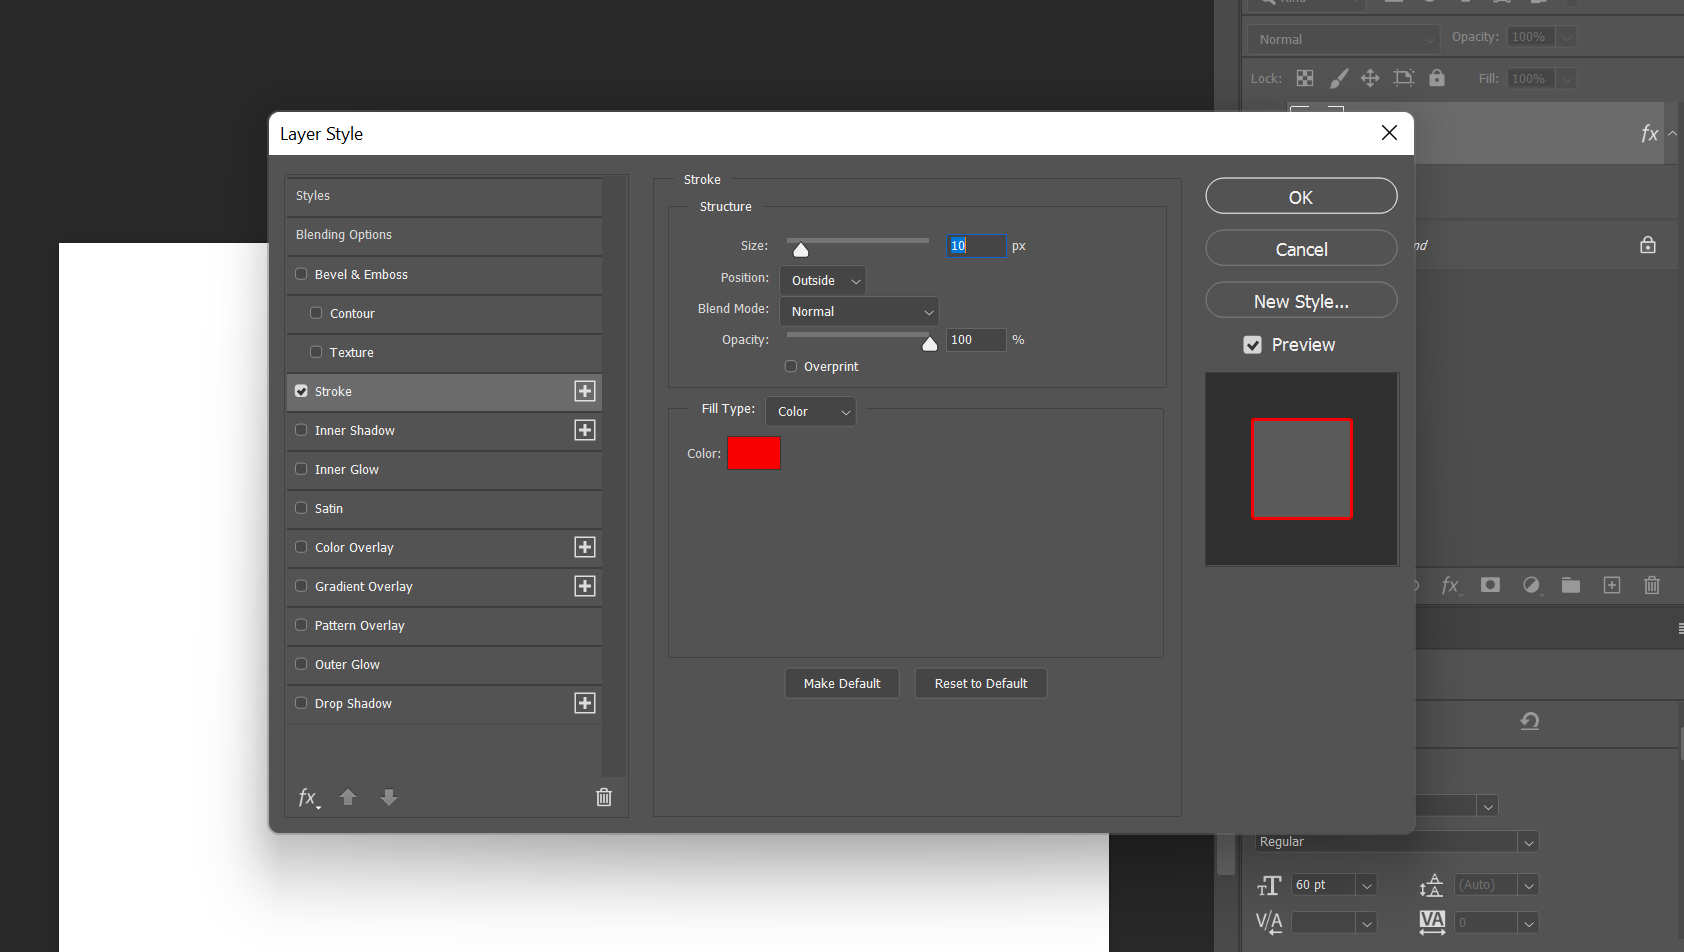
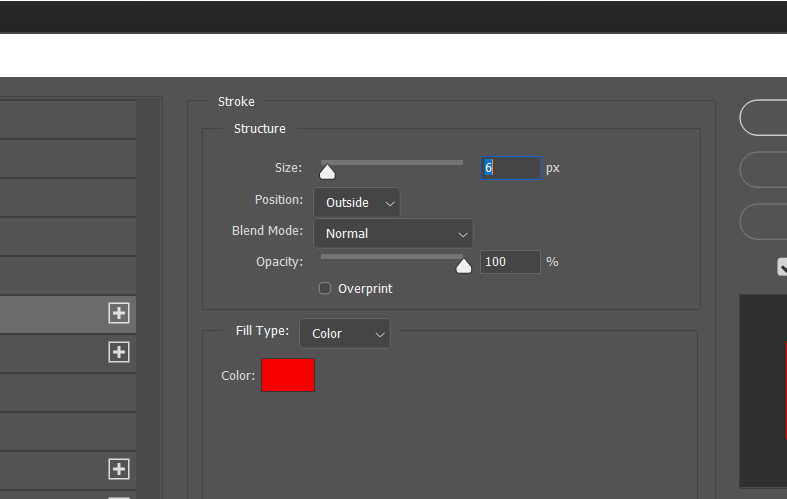
In the Layer Style dialog box, select Stroke under the list of styles on the left. The options under Stroke give you complete control over the appearance of the text border. Set the size or width to your desired line weight by using the slider or by entering your own value manually.
- Next, you'll choose a Position for the stroke. The right position changes the appearance of the effect when text is combined with other layer elements. There are three choices: Inside, Center, and Outside.
- Use the Blend Mode to control how the colored stroke will interact with the colors or layers underneath the stroke. This will impact the final look when you do something like place the text over a colorful image, to name one example. You can also use the Opacity slider to set the transparency of the text border.
- Photoshop strokes can be filled with solid colors, colorful gradients, and patterned borders, as well. If you would like a solid color, click on the color tile to open the Color Picker. Choose your desired hue and hit OK.
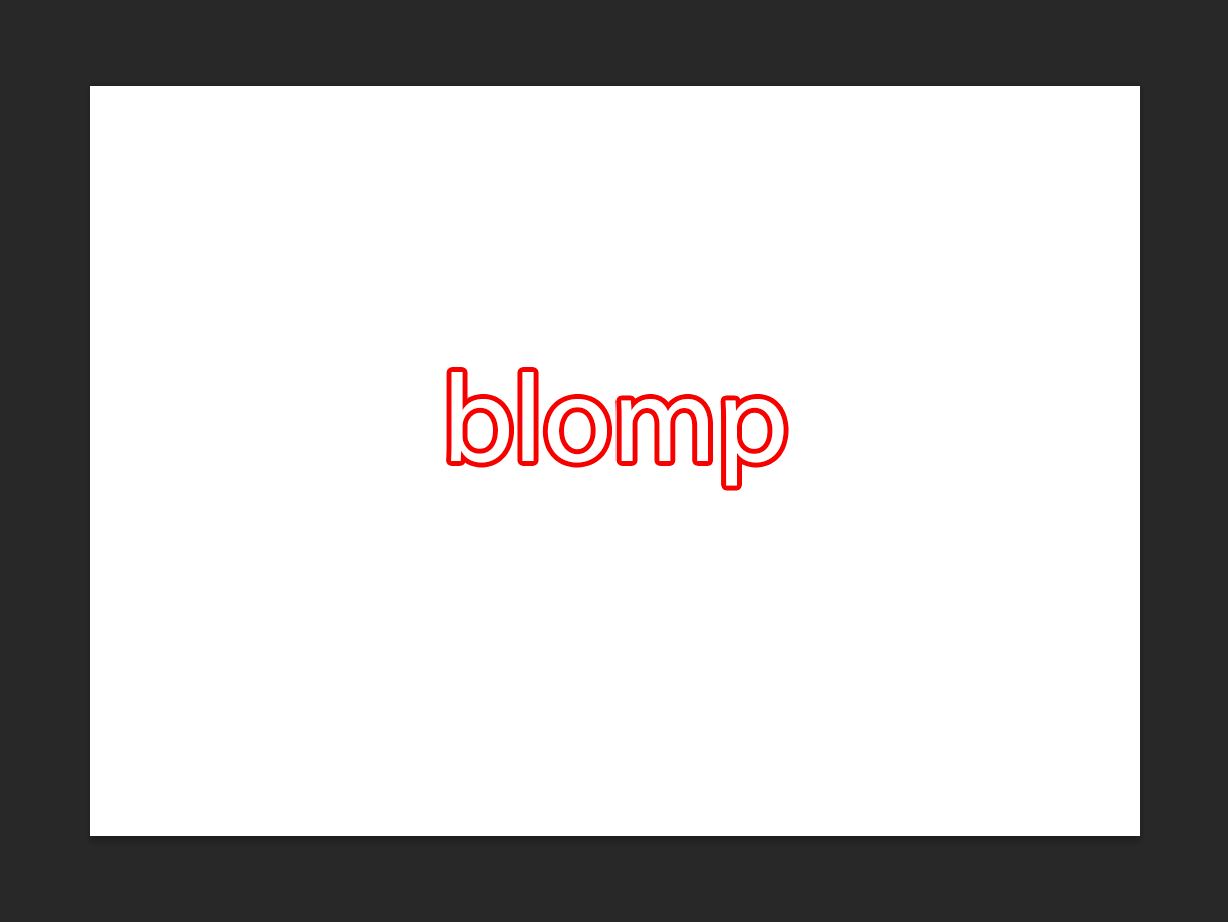
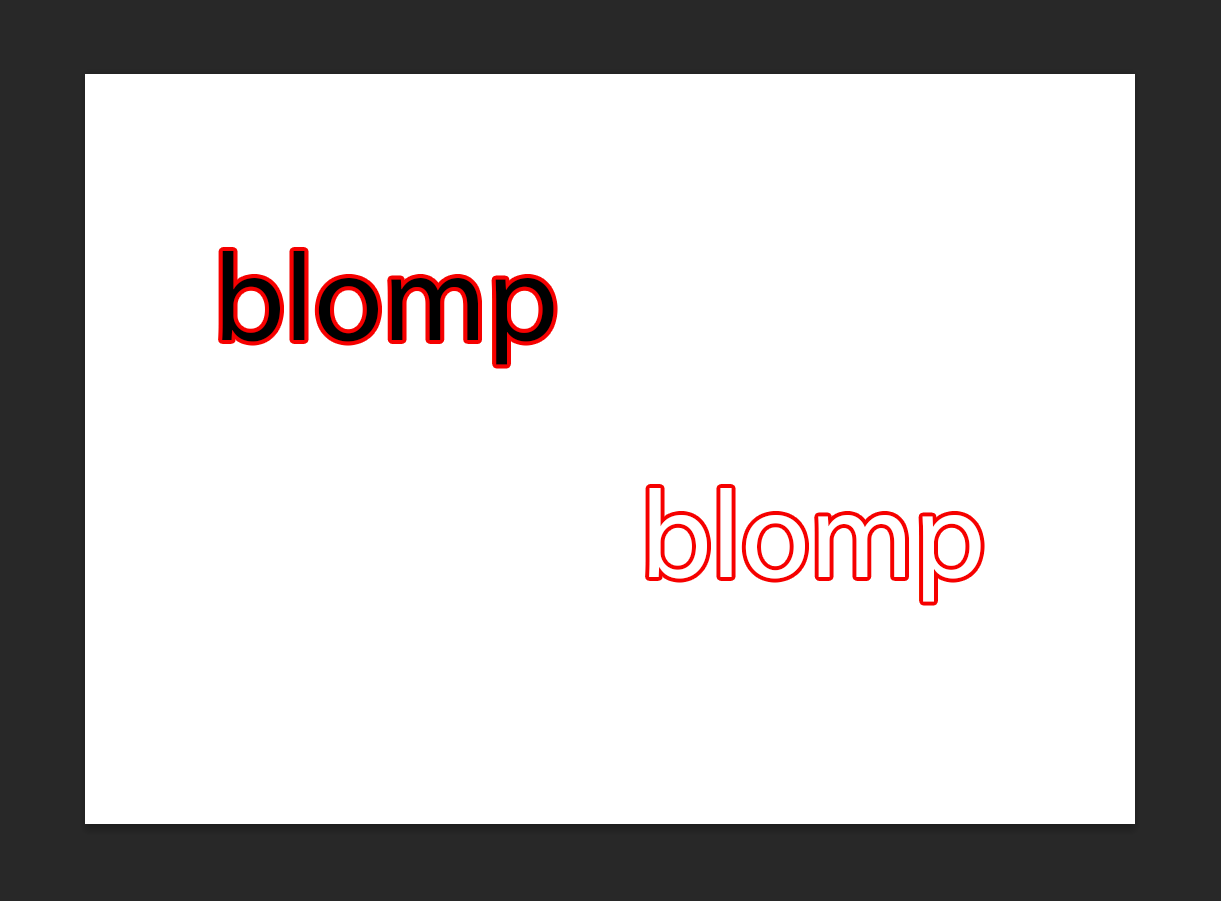
Here's what we've got so far:
If you think it looks bland, don't worry. You can certainly create more colorful outline text in Photoshop—all that you have to do is experiment to find more interesting results. For instance, the screenshot below shows what it looks like when we choose Pattern instead of Color to add a border.
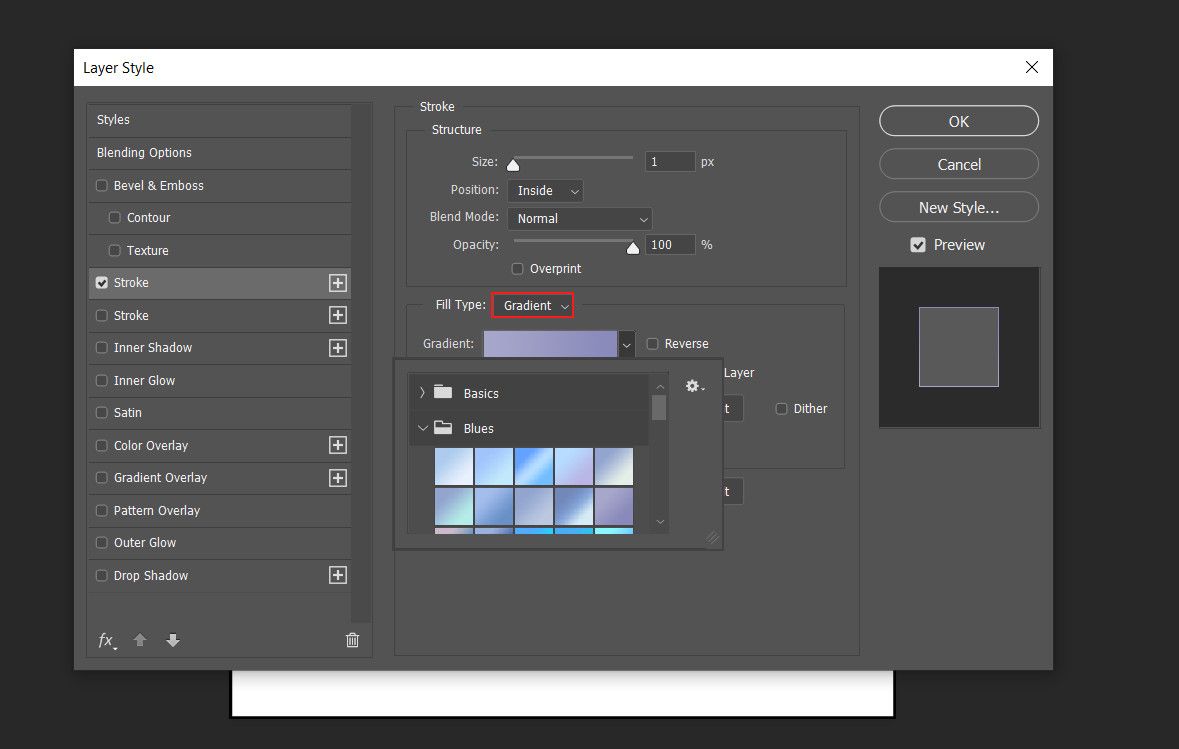
Similarly, if you choose Gradient from the Fill Type dropdown, you will get a shaded outline. This outline is set to gray-black by default. To change it, expand the Gradient dropdown. You will see folders of different colors and within each folder, there are a bunch of options to choose from.
Photoshop allows you to create 3D text, so if you are looking for an out-of-the-box design, it is worth trying.
How to Outline a Font in Photoshop
The text in the above Photoshop text outline image is a simple sans-serif font. Another idea is taking fancier fonts and creating beautifully outlined fonts that appear to be hollow inside. If the font you wish to use is not available in the software already, you can add fonts to Photoshop on both Windows and Mac.
Outline fonts are used everywhere—logos, signs, billboards, you name it. Photoshop as well as other online image editors offer a bunch of free outline fonts that you can experiment with. Once you select a font, you can mix and match them in your own projects.
One way to create your own Photoshop outline text font is to outline any font and then make its insides disappear, leaving only a border around the text, forgoing the fill entirely. You can layer this graphic on top of an image for an attractive, attention-grabbing headline.
-
To begin, start with a blank canvas and type your text. Right-click on the Type Layer and select Blending Options again.
-
Go to Layer Style > Stroke. Select position as Outside. Set the Size slider to any line weight that you want and your Opacity to 100. Click OK.
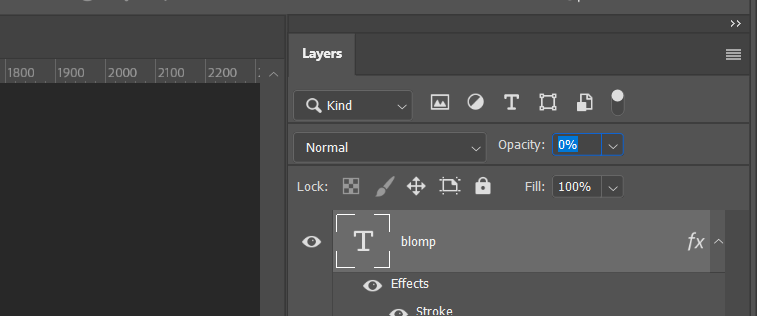
- In the Layers tab, lower the Opacity of the text to 0 percent. Your stroke outline should still be holding strong.
This is a simple example, but there are many ways to get creative with outlined fonts and different effects. As we described in the section above, you can play around with the Fill Types to determine what suits your font the best. In the next section, we explore another possibility: partially outlined text in Photoshop.
How to Outline Only Part of a Text Layer in Photoshop
Whenever the image you are using has two colors and the text color matches one of them, it is best to outline only the text portion that corresponds to the image. Not only will this make the text stand out, but will also give it a different look.
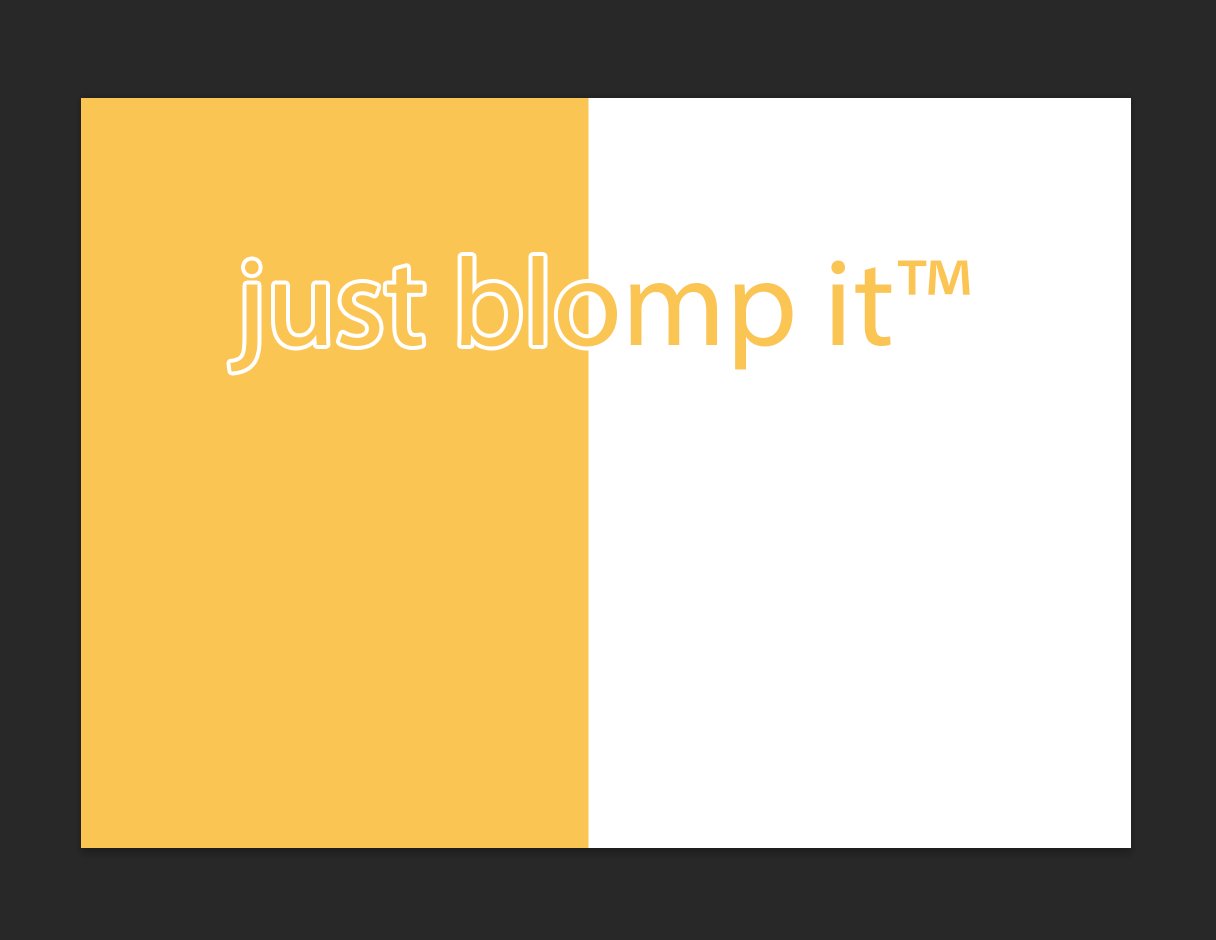
In this example, we'll use this text outline method to create a subtle effect that would be great for any multimedia presentation needing some pizzazz. The final effect should look like this:
- To start, create a new document in Photoshop. Use the Rectangle tool to create a colored background layer. You've got your background color selected already; all that you need to do now is choose the same color for your text layer.
- Type your text layer in, just like before. Half of your text should be over the pigmented portion of the canvas; the other part should be over the other half.
- Now, add your Photoshop text border, ensuring that your Stroke color matches the part of the canvas that is not covered by our yellow rectangle—in this case, plain ol' white. Right-click on the text in your Layers panel, choose Blending Options, and assign your Stroke a line weight and a position.
- Hit OK, and it should look a lot like what we've got going on above.
This basic design template can be modified to suit a variety of projects: flyers, birthday cards, digital scrapbooking, and even web design. You can use it in tandem with our font family outline trick described previously, sticking a photo or two underneath the text layer for a really classy, polished effect.
Text Outlining vs. Text Borders: What's the Difference?
Text outlining and text borders are two different design techniques that can enhance the appearance of text. Text outlining involves creating a line (aka a stroke) around the corners of individual characters in the text to make it stand out. You can adjust the thickness, boldness, and colors of this outline according to your preferences.
On the other hand, a text border surrounds the entire block of the text or individual words with a visible border for decorative purposes. You can even combine both techniques of outlining and bordering to achieve stunning text effects.
How Does Your First Outlined Text Look?
You now know how to add a stroke to text in Photoshop. You can always combine the text with any Layer Styles to add compound effects.
This method is flexible; Photoshop allows you to copy and paste any text that you want into an un-rasterized Type Layer, modifying anything that you need to replace with ease. The Layer Styles stay intact, and the document preview will update itself automatically with the new text that you've just pasted.
Adding outline to text allows you to highlight the boundaries of text, shapes, and even images. It's a really versatile technique, so we urge you not to stop here. You can also make custom shapes and combine them with text effects for something really out-of-this-world.


