Apple Notes is more than an ordinary note-taking app. With all the changes Apple has made over the years, Notes has become a staple for iPhone and Mac users alike.
The simplistic, uncluttered interface of Apple Notes hides some of its best features and organizational capabilities. Here, we'll show you how to organize Apple Notes and take advantage of the built-in features to get your work done faster.
1. Organizing Notes in Folders
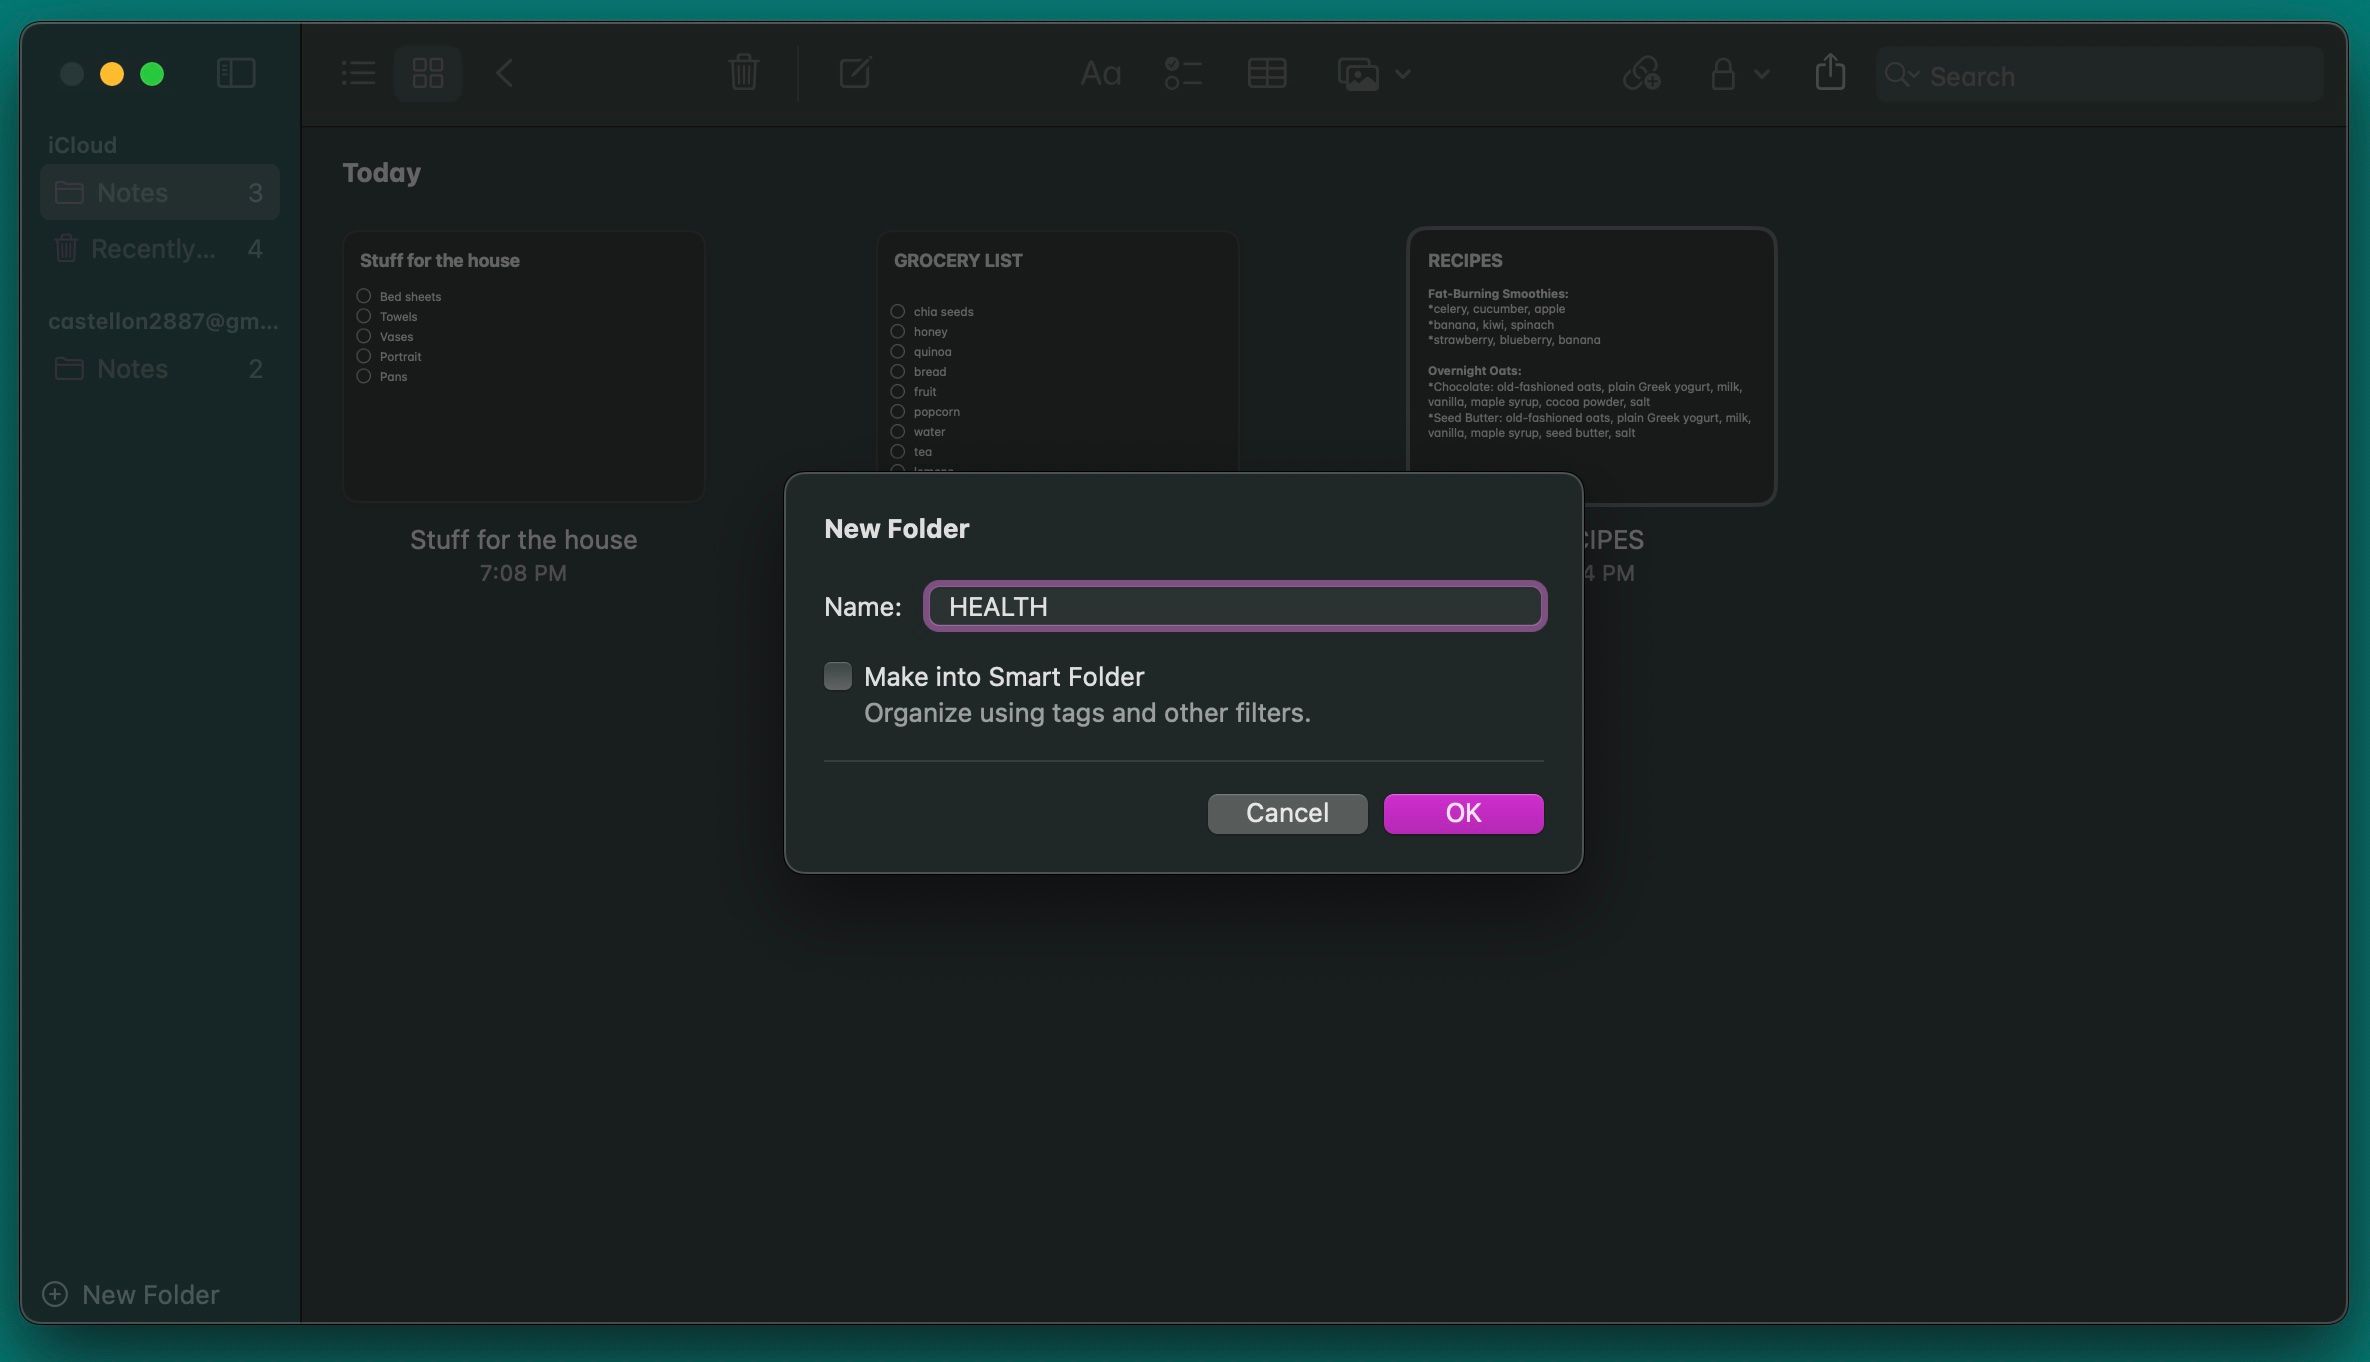
Apple Notes lets you organize your notes into folders so that you can wade through them easily. To create a new folder in Notes on your Mac, go to File > New Folder from the menu bar or click New Folder in the bottom-left corner of the Notes window. Then, type in the folder name, press Return, and drag your notes into the folder.
You can also create a new note within a folder. To do this, click the folder's name first and then click the Compose button at the top of the window. If you don't select a folder, the note you create will go into the default Notes folder.
You can also organize notes on your iPhone with folders. All you need to do is tap the New Folder button in the bottom-left corner of the Folders screen. Name your folder, then tap Save.
Now, tap the three-dot icon at the top-right corner of any notes list, choose Select Notes, and tap the ones you'd like to move. Then, tap Move at the bottom-left corner and choose the folder you created
2. Start Using Smart Folders
As we showed you before, you can quickly and easily move your notes to any folder you create, but if you have a lot of notes, moving them around can be time-consuming.
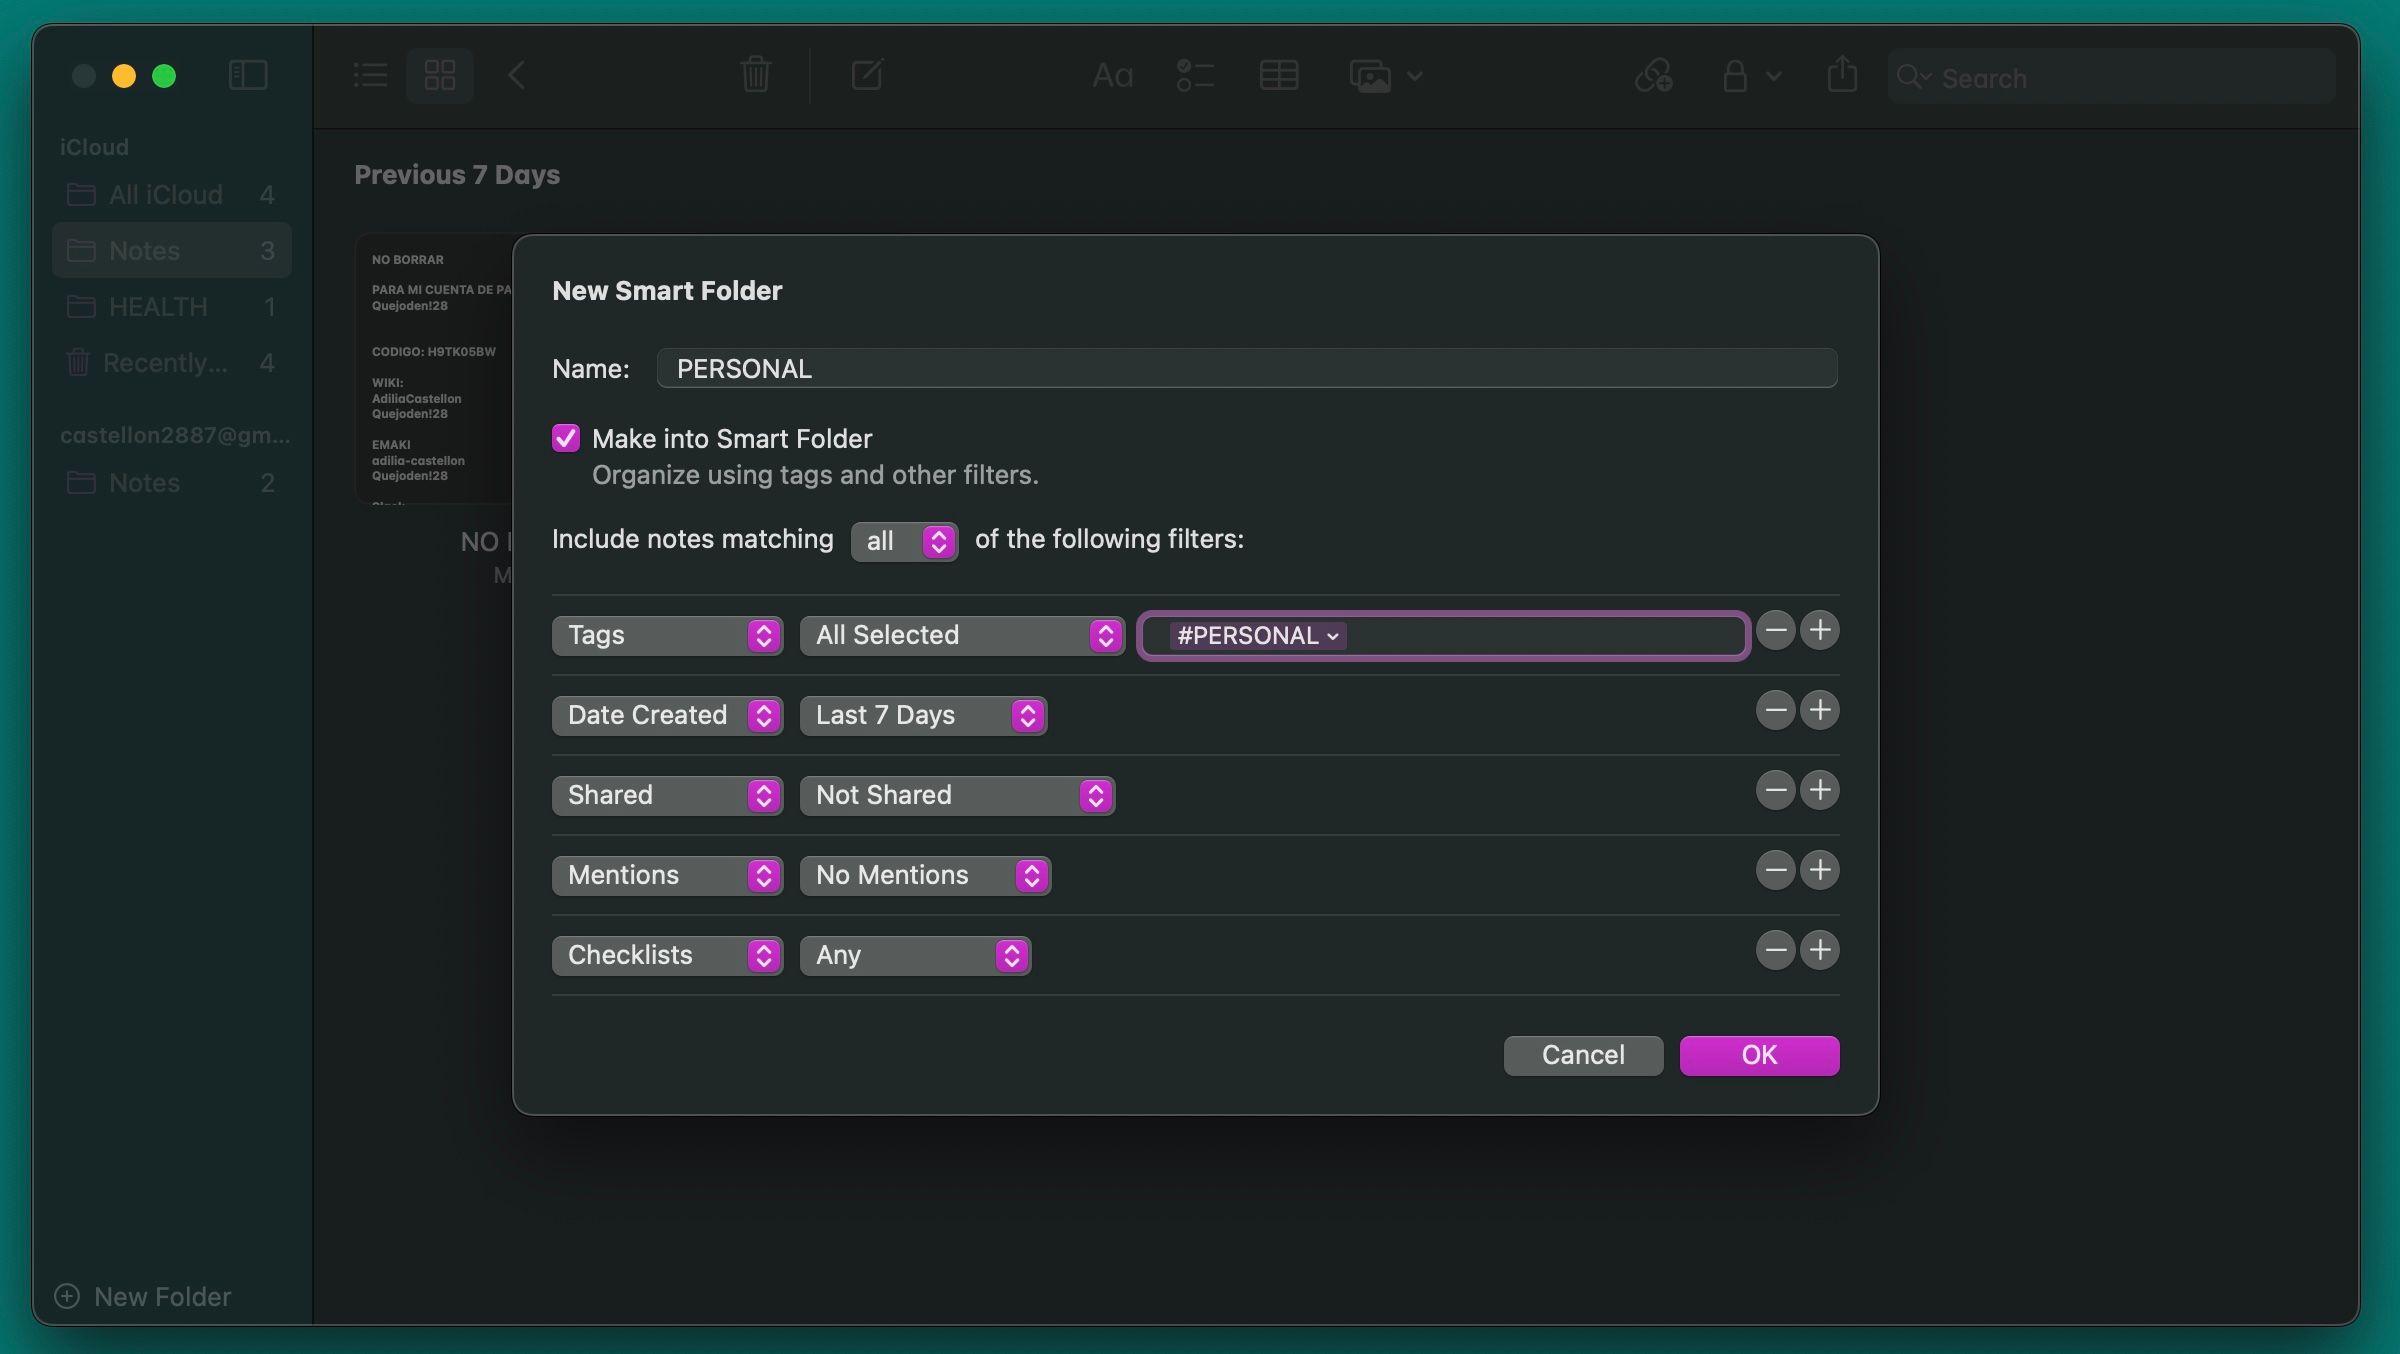
Luckily, you can create Smart Folders and let the app find all the notes you want. To create a new Smart Folder in the Notes app on your Mac, go to File > New Smart Folder, enter a name for your folder, and check the option Make into Smart Folder.
Next, add all the filters you want to use for your new smart folder. For instance, you can select tags, the date of a note, attachments, and so much more. Adjust the filters to whatever you want, and then click OK. Once Notes creates the new smart folder, it will automatically add all the notes that match the filters you used.
On your iPhone, you'll need to tap the New Folder button in the bottom-left of your screen. Enter the name of your folder and tap Make into Smart Folder. Choose all the filters you want to use and then tap Done. It's that easy.
3. Search for Specific Types of Notes
If you have a lot of notes, finding the one you're looking for can be tough. Sure, you can try searching for specific keywords that you used, but that might still take a lot of time. Instead, you can search for specific types of notes to find the ones you're looking for.
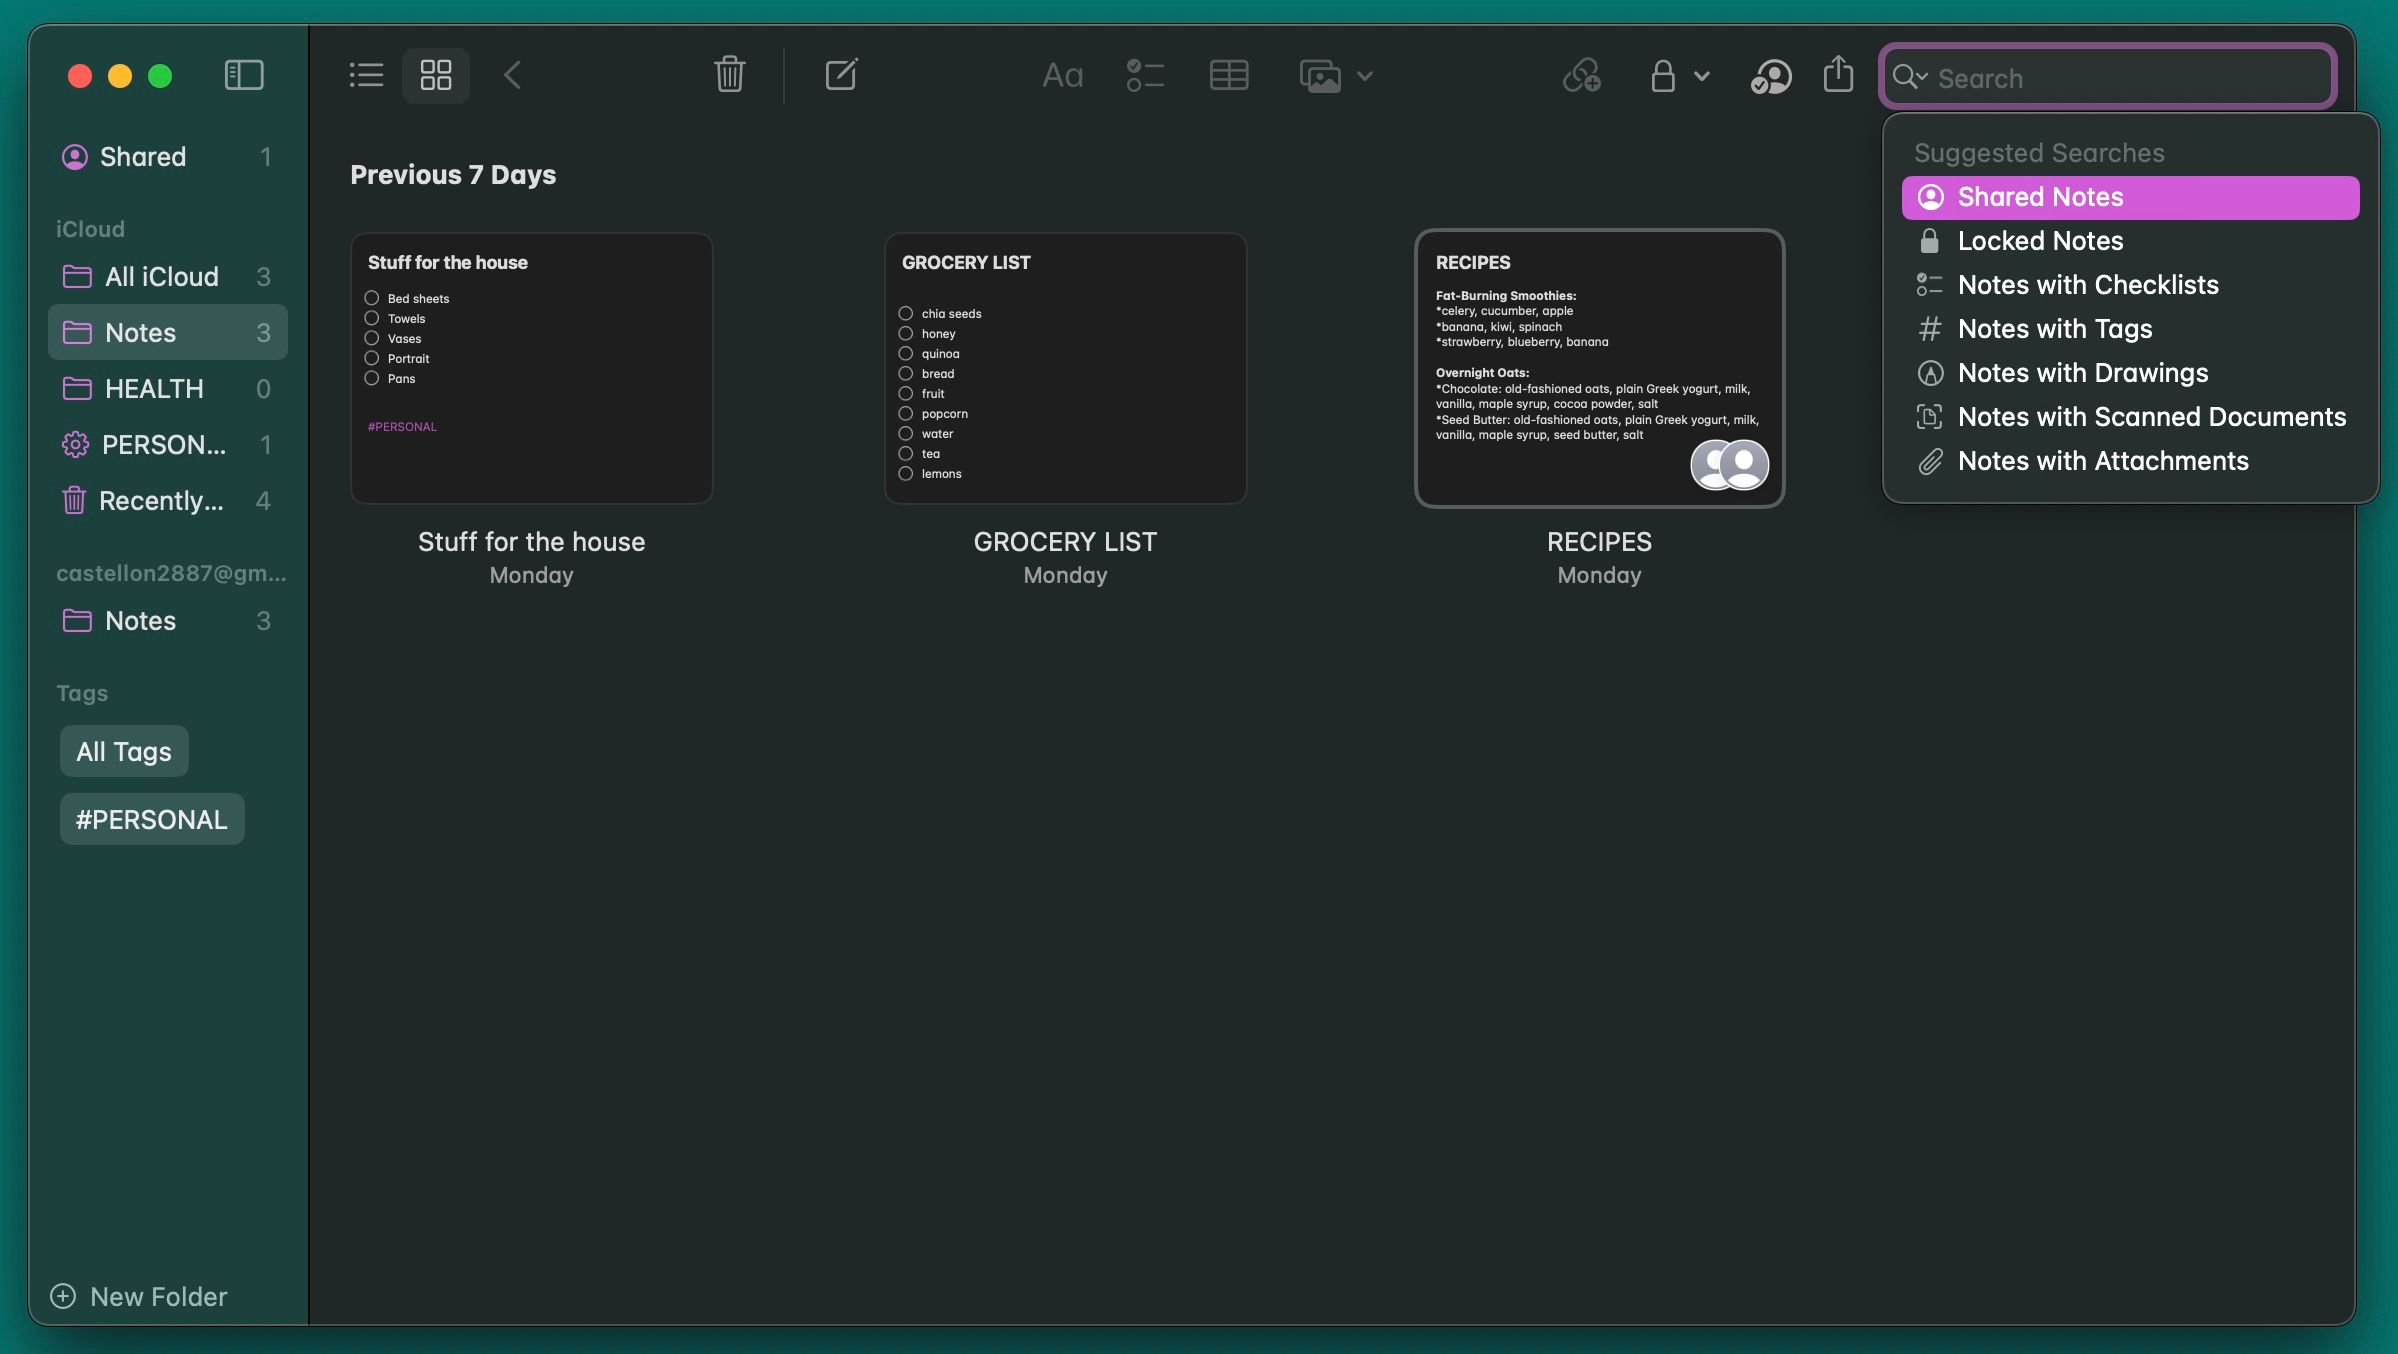
For instance, you can search for notes with attachments, notes with checklists, or notes you shared with someone. You can even search for locked notes on your Mac.
To search for specific notes on a Mac, click the Search field in the top-right corner of the Notes window and choose one of the suggestions in the dropdown.
On your iPhone, go to the Notes folder you want to browse and tap the Search bar near the top to view suggested searches similar to the macOS version of the app.
As you can see, you can still type anything you want in the search bar after you choose a suggestion. This means you can write specific words to make searching for notes easier.
4. Use Emojis in Folder Names
Having too many folders is problematic because Notes doesn't let you customize folders. You can't choose a background or assign colored labels, resulting in dull lists of folders with no visual differentiation, making them difficult to identify.
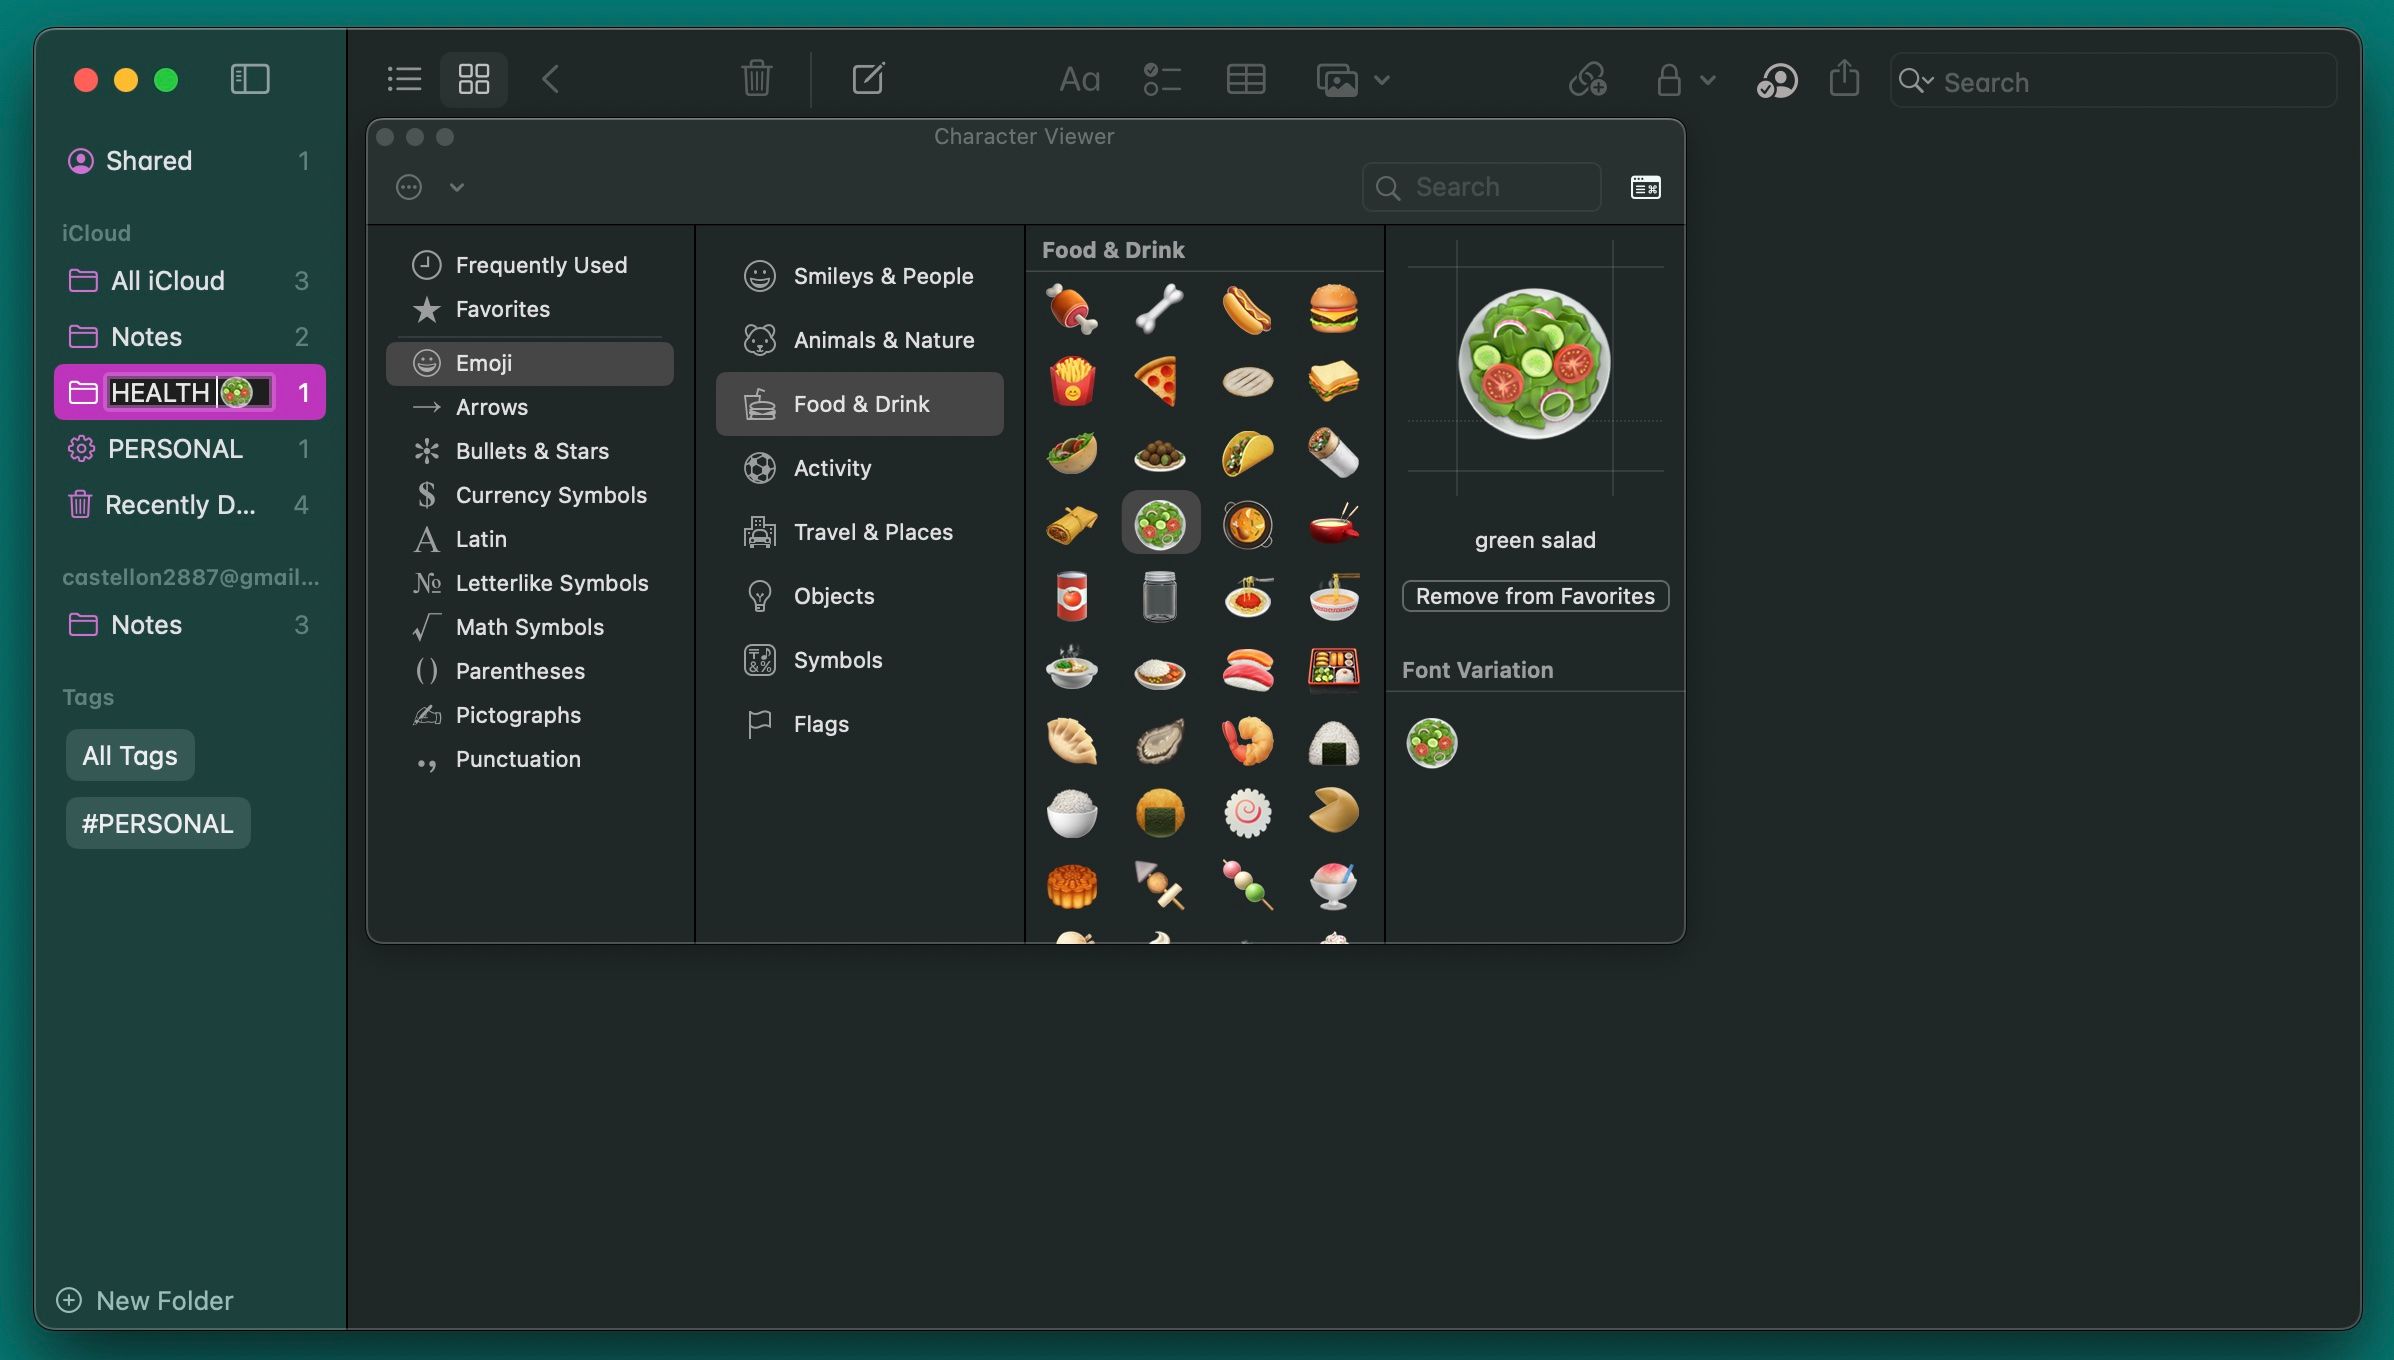
But you can put an emoji either before or after the folder name. You have multiple ways to type emojis on a Mac, but the fastest way to do it is by pressing Fn + E. You can also go to Edit > Emoji & Symbols from the menu bar, which will open a new keyboard where you can choose the emojis.
On your iPhone, you'll need to enable the emoji keyboard or use one of the best iPhone keyboard apps for emojis. To add an emoji to a folder's name, long-press the folder and select Rename. Once you enter your desired name, press the key with a smiley face on it; it's located below the 123 key on modern iPhones.
5. Use Custom Images to Differentiate Notes
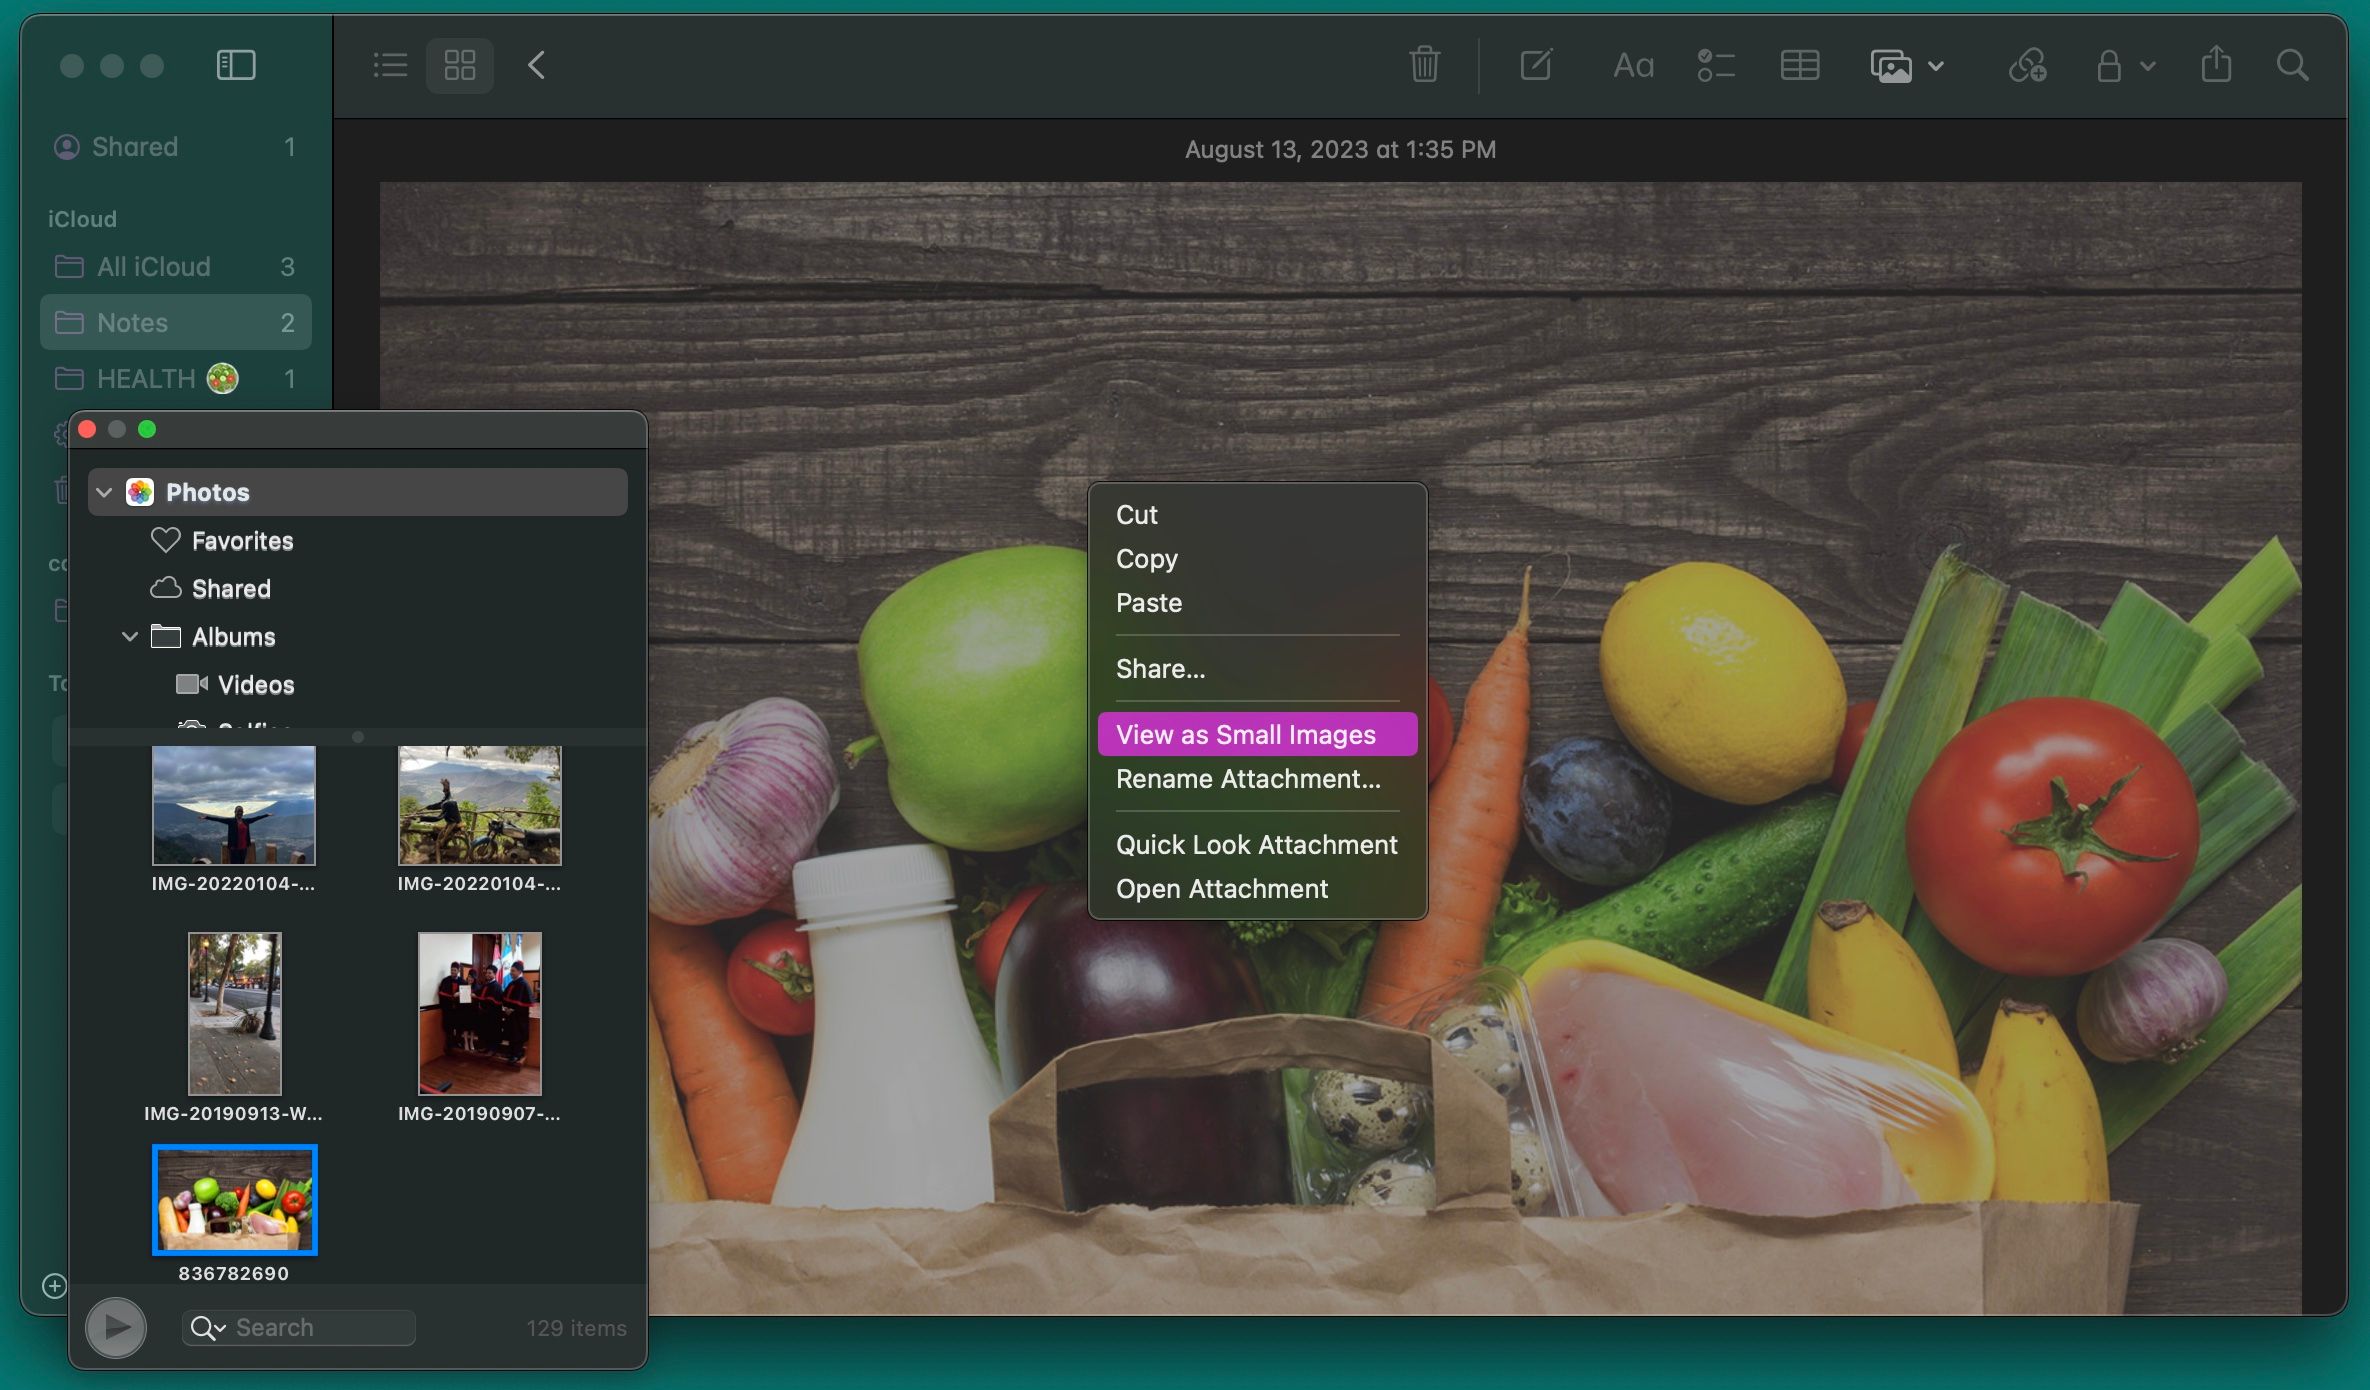
Images are powerful visual cues. You can add an image to every note or only the important ones. With this simple trick, you can find the right notes faster and organize your notes in different folders.
Open your desired note, click Window > Photo Browser, and drag the photo from the browser to the note. Control-click (right-click) the image and select View as Small Images from the context menu. Instead of a picture, you can also paste a logo or symbol if you prefer.
On an iPhone, you can tap anywhere in the note and tap the camera icon that appears above the keyboard to add images. And once you've inserted the image into the note, long-press on it and tap View As to set it to Small.
6. Use Hashtags to Quickly Search Notes
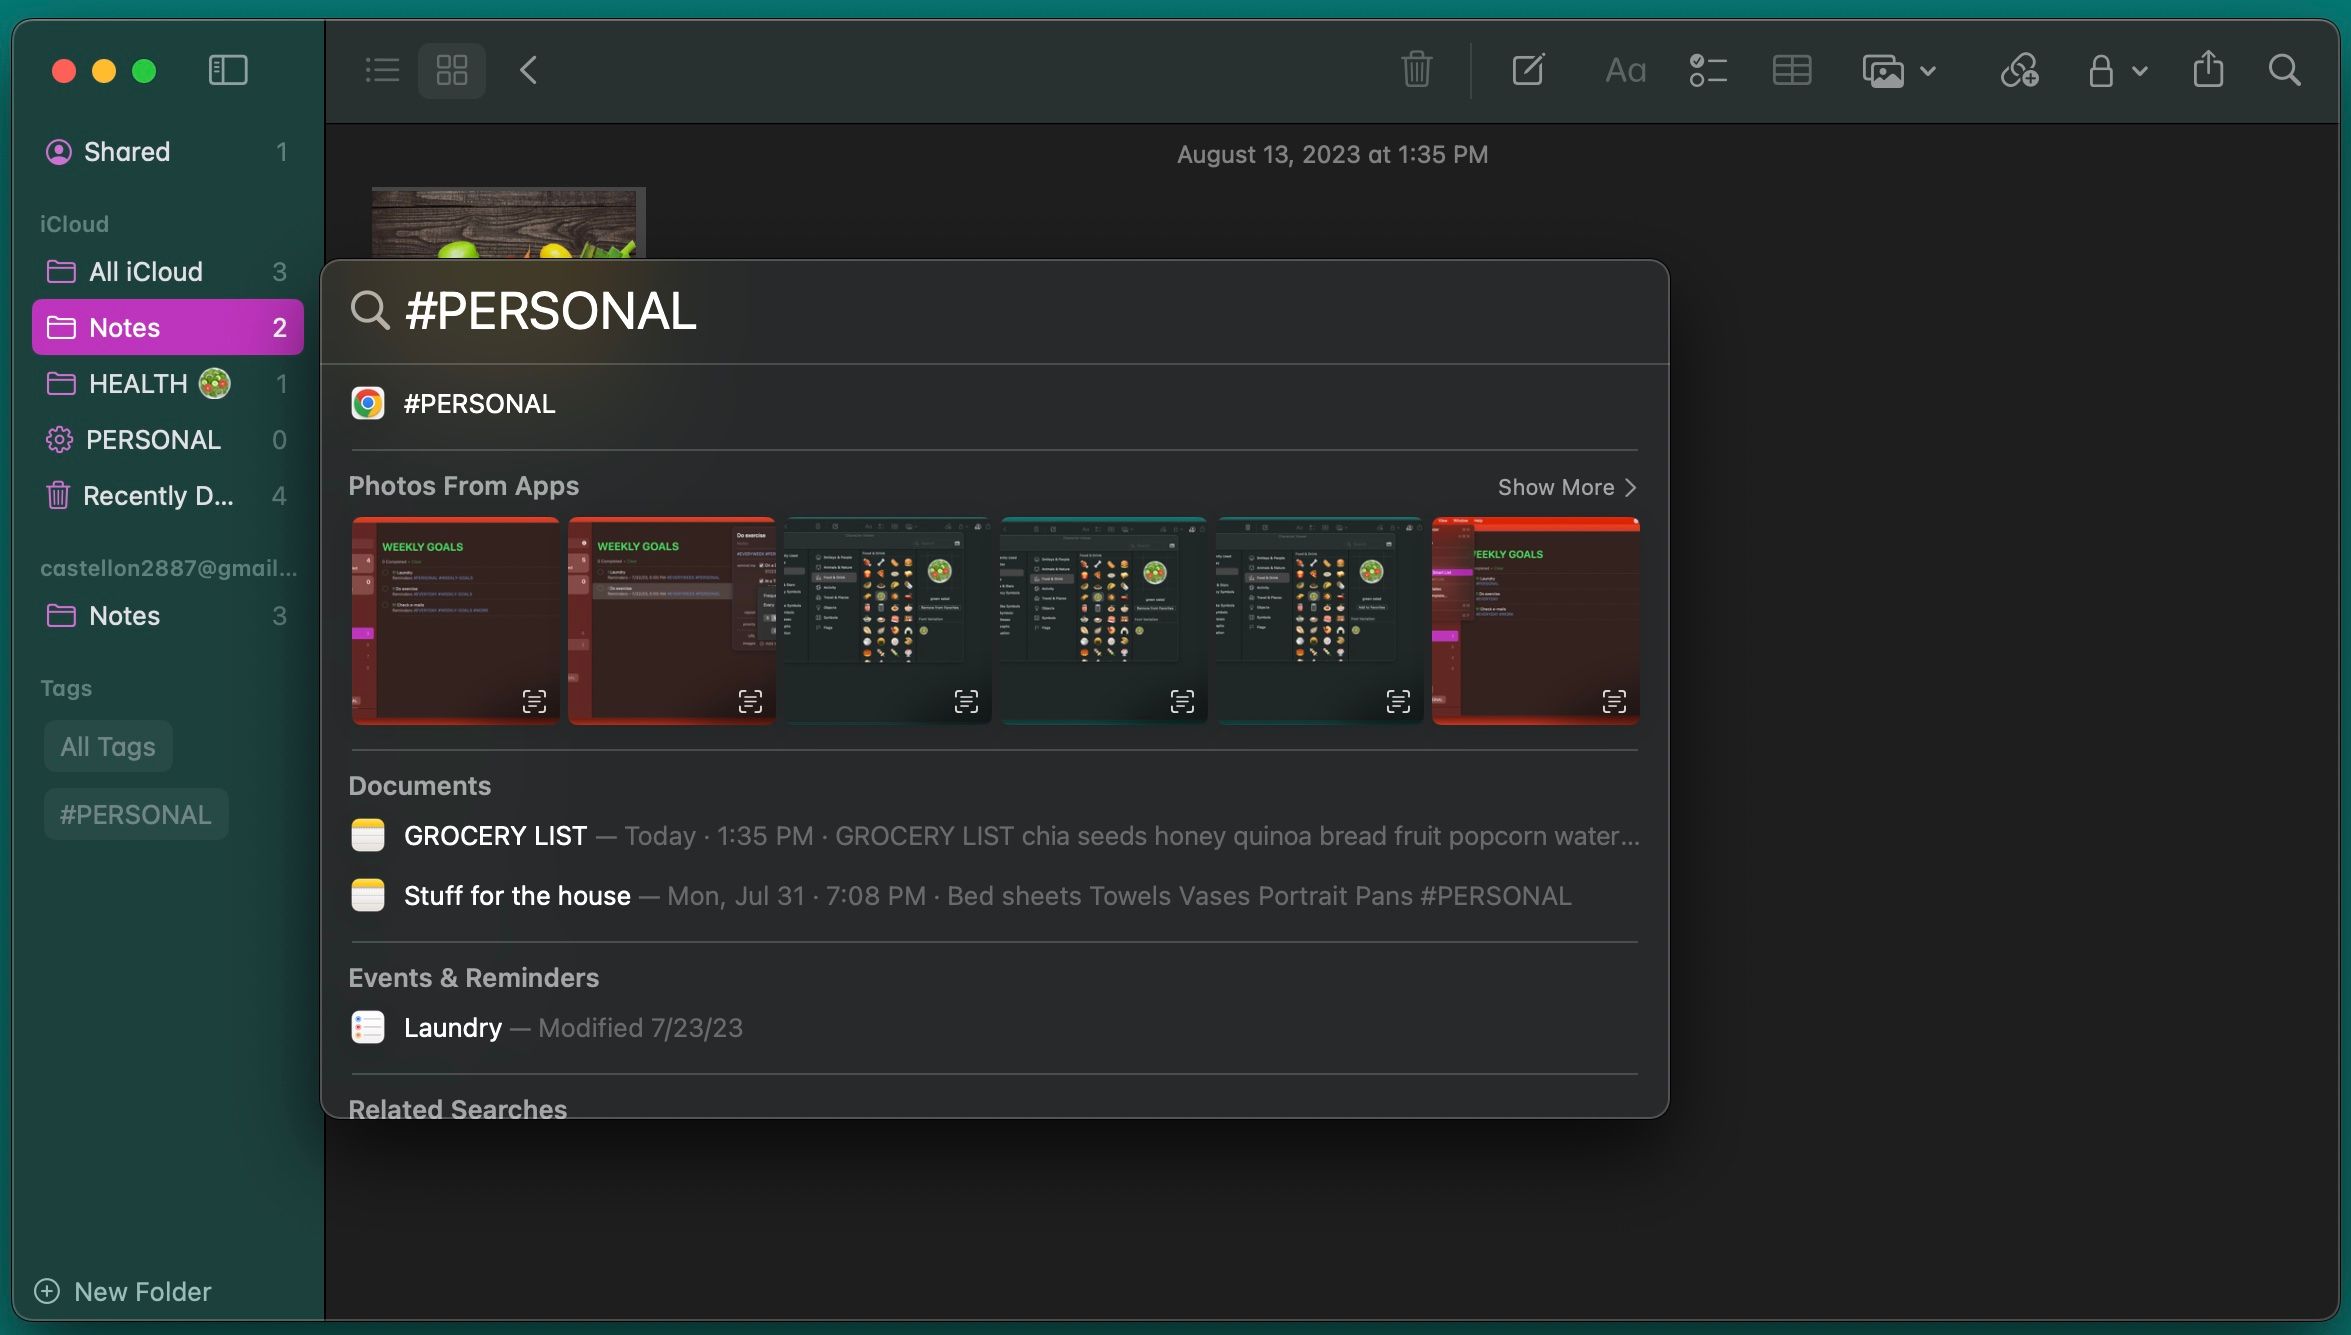
Adding a hashtag to your notes will automatically create a tag. These tags can be anything you want, and they make it extremely easy to search for your notes. So, the next time you you type a note, put a hashtag at the beginning or end of the note.
When you want to find it, press Command + Space to launch Spotlight search on your Mac and search for the hashtag you used. Spotlight will pick up the note with that hashtag.
On iPhone, the hashtag system works in a similar way. Swipe down from the middle of the Home screen to bring up Spotlight, where you can type your search term. Your iPhone's search feature will go over your notes and pinpoint the tags to their actual location in a note.
7. Integration With Calendar and Reminders
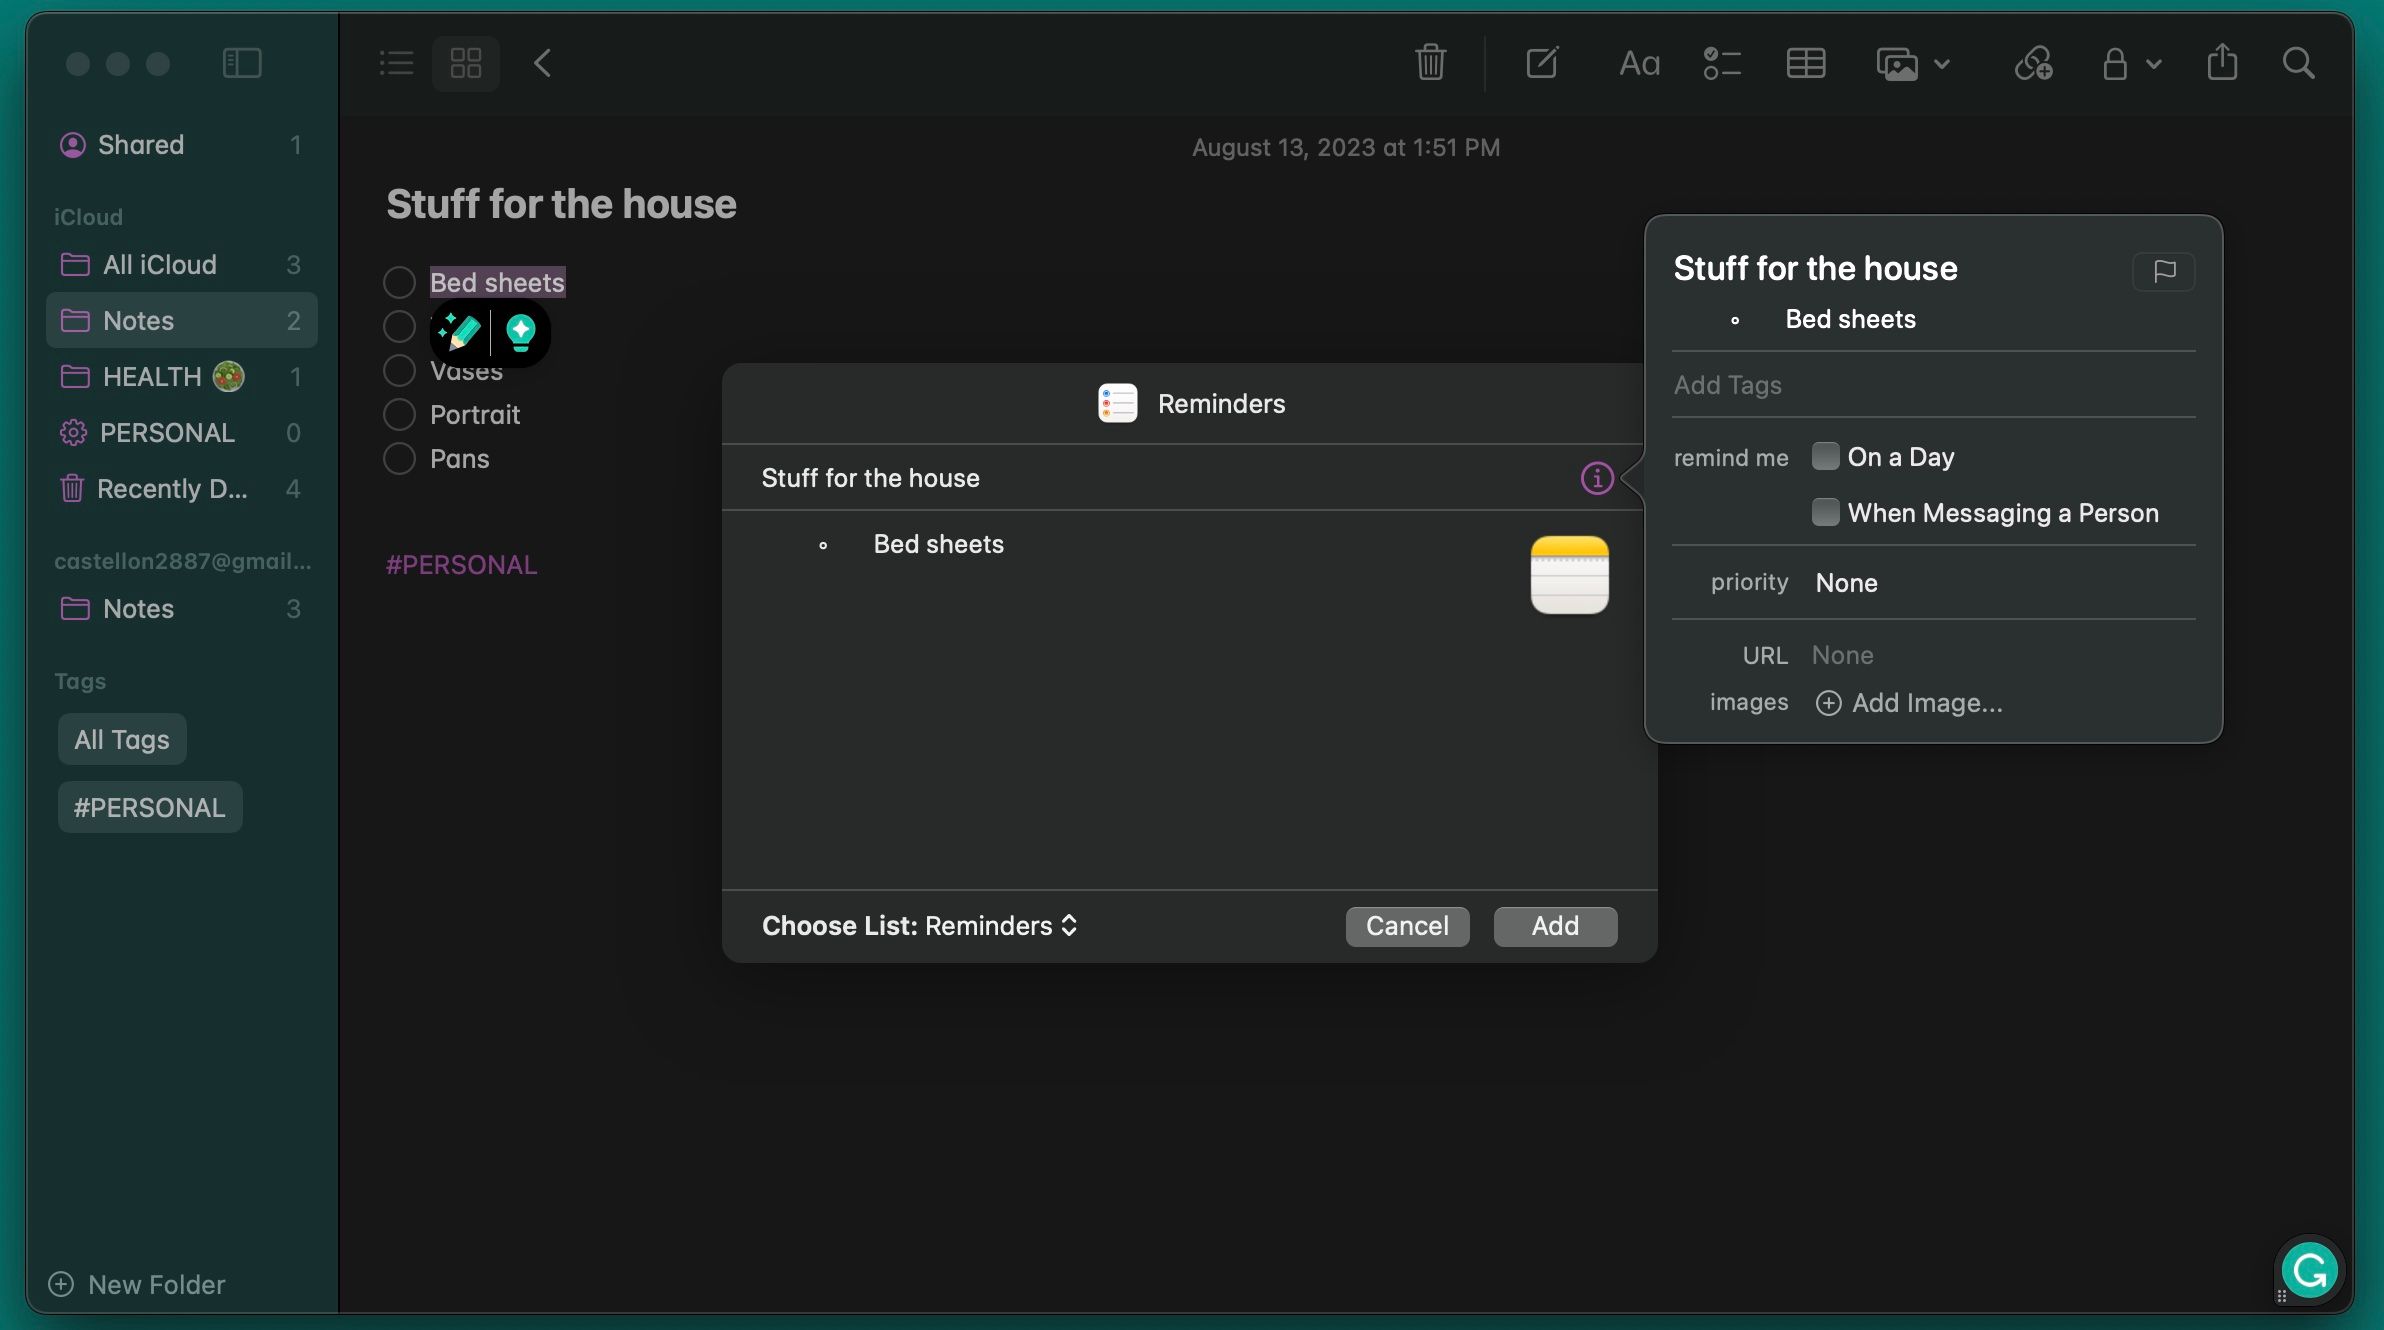
Apple's Calendar and Reminders apps work great with Notes, although this might not be obvious initially. To create a reminder from Notes, select a text snippet and Control-click (right-click) it. Then, select Share. In the dialog that appears, click the Info button to add a time-based alarm to a reminder.
On an iPhone, open the note you want a reminder about, then launch Siri and say Remind me about this. Siri will copy the content of the note to a reminder and link to it.
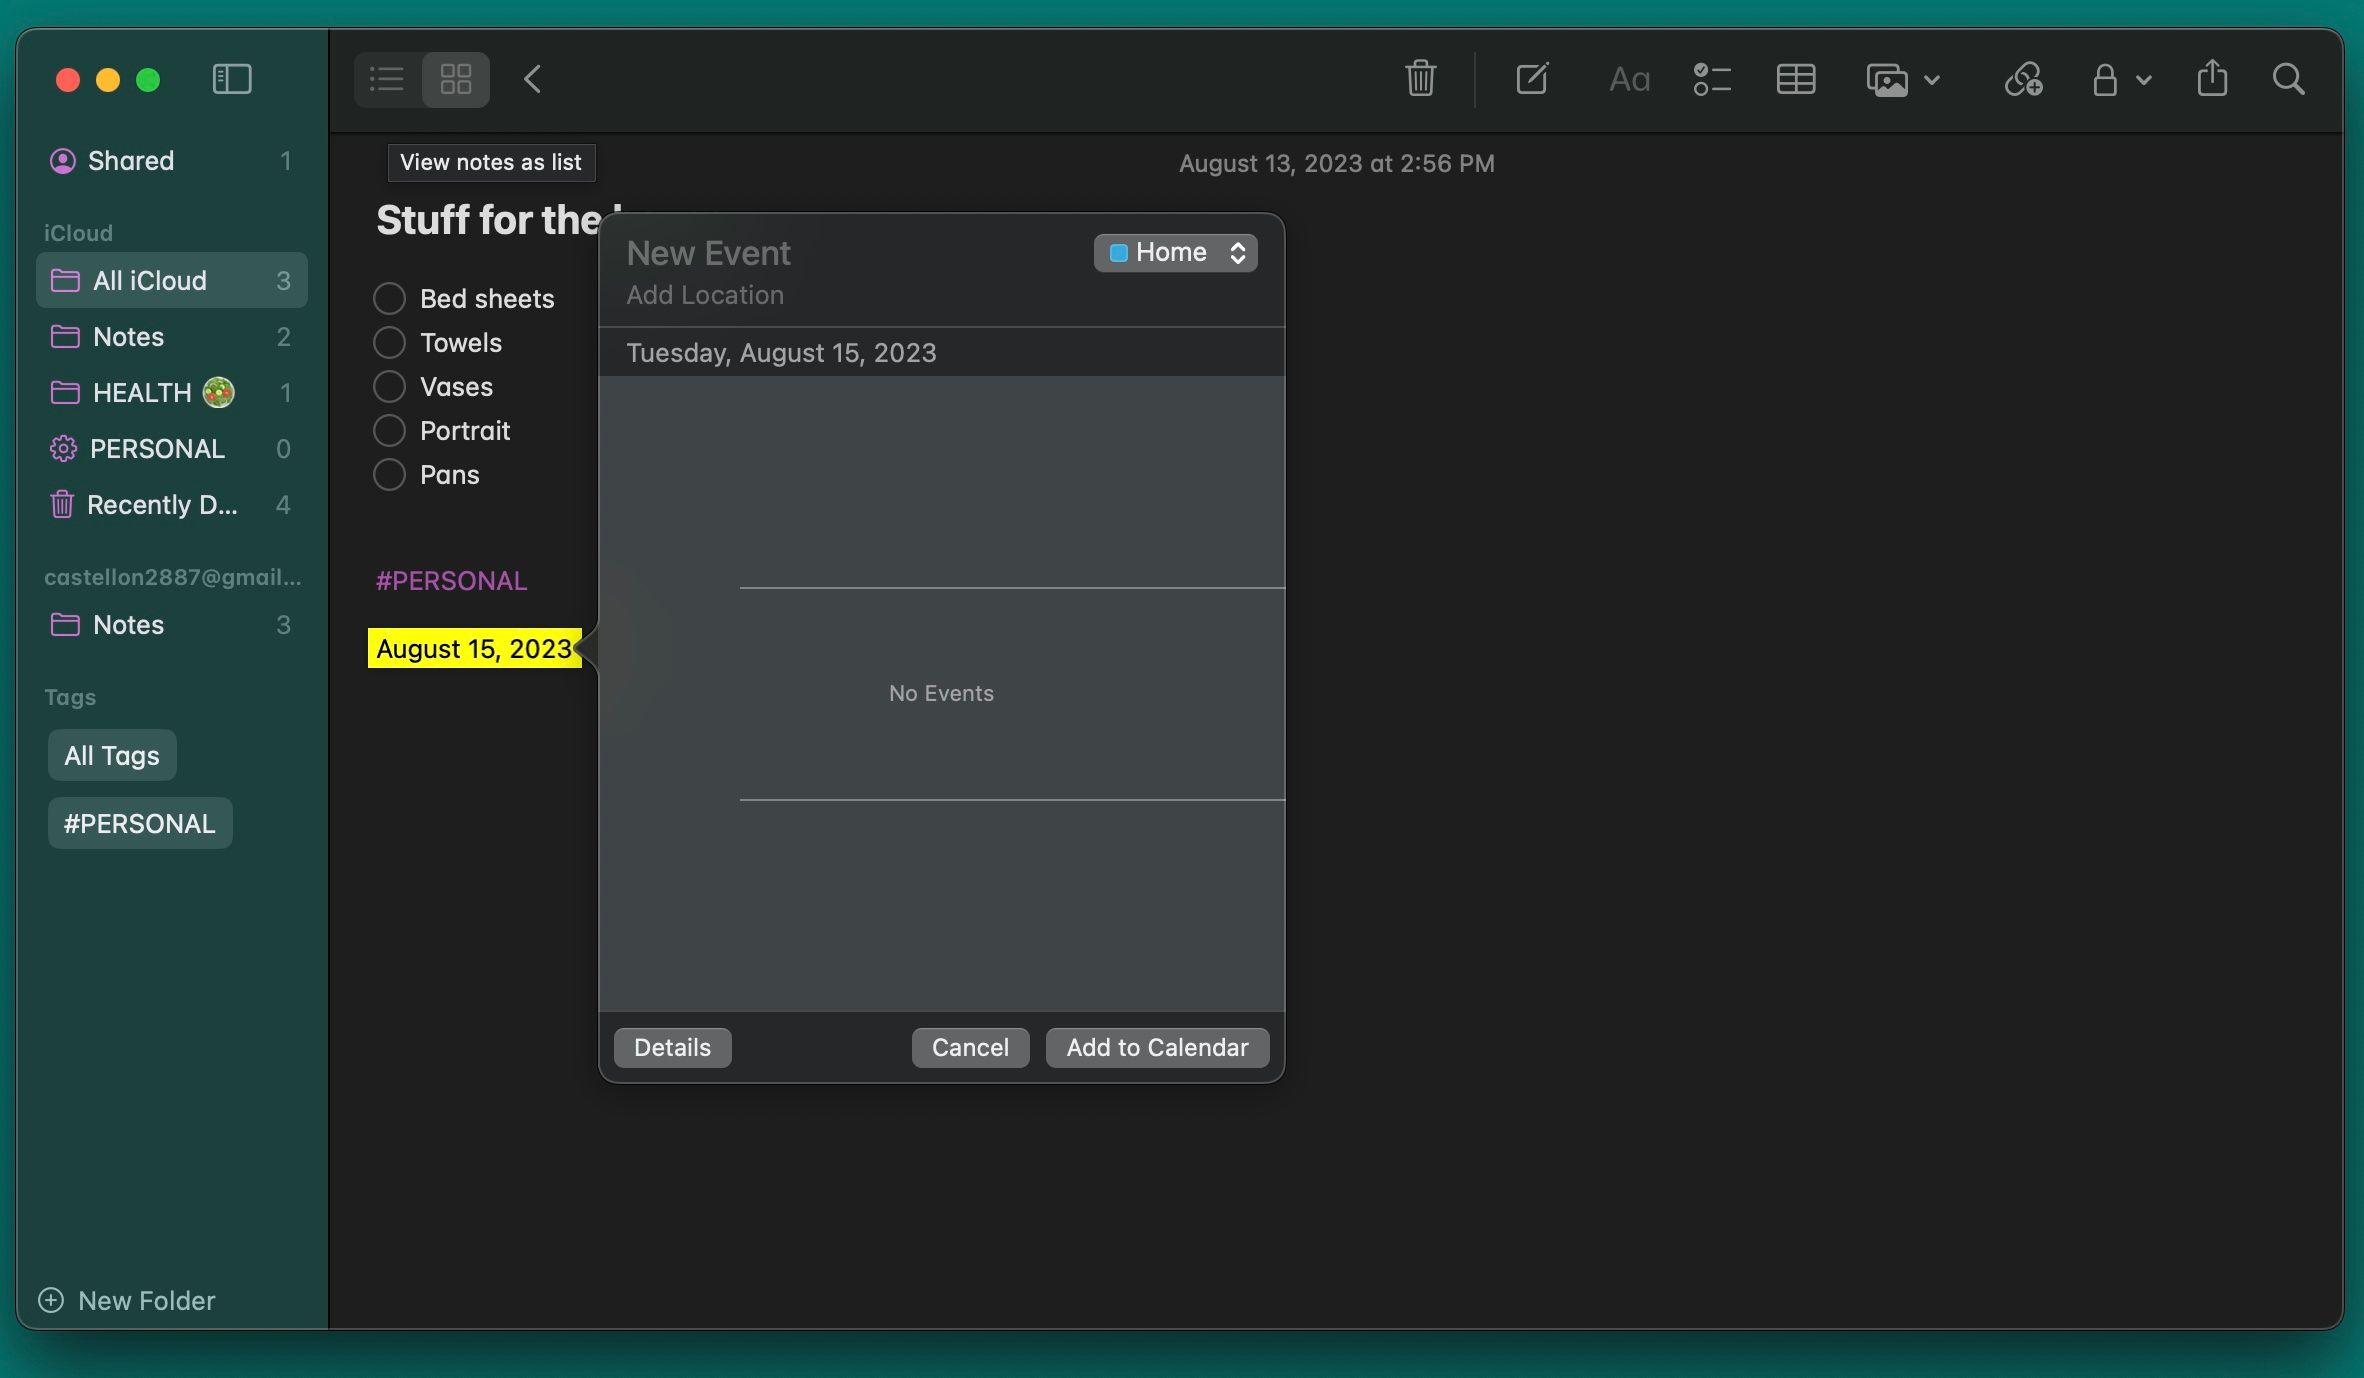
To create a calendar event from the Notes app, write a specific date in a note and Control-click it. Then, click Create Event. Now, enter the event's name and click Details to change the event however you want. Once you're done, click Add to Calendar in the bottom-right corner of the pop-up window.
On an iPhone, you can highlight the text with the date and tap the > button in the context menu to go through the options and choose Create Event. You'll also have the option to create a reminder from here.
Make the Most of Apple's Notes App
Apple's Notes app has many features that help you jot down notes quickly and efficiently. Besides writing notes, creating events, and adding pictures, you can keep all your notes neatly organized with folders, smart folders, or tags.
Of course, it takes time and practice to develop a systematic workflow, but with these tips, you should be able to get the hang of it in no time.

