System Restore tracks changes to critical system files on your computer and creates restore points before significant changes occur. System Restore will automatically backup important system files such as drivers and the registry so that it can roll back to a previous setting. Restore points are usually created by the system before new device drivers, automatic updates, unsigned drivers, and even when some applications are installed. You can also choose to manually create restore points.
Using System Restore assures you that you won't lose personal data such as documents, e-mail settings and messages. However, keep in mind that data you have stored in My Documents, My Pictures, or My Music folders are not affected by System Restore.
Today, I am going to introduce you one tool that can be used to create Windows System restore point with a single click of a button.
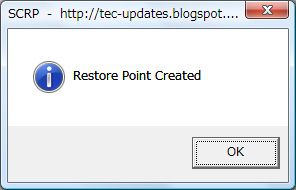
To simply and easily create System Restore points, you can use Single Click Restore Point. Just run SCRP with administrator privileges and it will automatically create a restore point for you - no need to dig through the menus. The only caveat is that you can't name the restore points yourself, they're all called "Created by SCRP Tool". In my experience, SCRP does the job and makes it more convenient for less tech-savvy users. All you need to do is double-click on the application and a resulting window pops up:
To restore your computer to an earlier time in Windows XP, log in as an administrator, and then follow these steps:
- Click Start>All Programs>Accessories>System Tools, and then click System Restore.
- On the Welcome screen, click Restore my computer to an earlier time, and then click Next. You can also click on Create Restore Point to manually create a backup of the system files. This backup will appear along with the other automatically generated backups.
- On the Select a Restore Point page, select the date from the calendar that shows the point you'd like to restore to.
- On the Confirm Restore Point Selection page, check to see if you selected the right restore point.
- Click Next if you are ready to continue or click Back to change the restore point.
- The computer will automatically shut down and reboot. On reboot, you'll see the Restoration Complete page.
If you're happy with how the system is behaving after the restore, you don't have to do anything else. If not, just open System Restore and select Undo my last restoration on the System Restore Welcome page. If your computer doesn't boot normally, you might have to use Safe Mode to access System Restore. To access Safe Mode, press F8 key during reboot and choose Safe Mode.
In Windows Vista and 7, all you have to do is type System Restore in the search bar within the Start Menu. You'll will be presented with the most recent restore point in the windows that appears. If you want to choose another restore point made earlier, click Choose Another Restore Point and Next. After you've selected the restore point you want, just click Finish. Your computer will automatically restore the required system files and restart.
To manually create a restore point, open Advanced System Settings (by typing this into the Start Menu) and select the System Protection tab. Once there, click on Create.
Did you find this tutorial handy? What other programs do you use to manage your restore points? Let me know in the comments.


