Laptops don't last forever, but the screens inside them usually do. Even if the main computer is broken, you can extract the display panel, and reuse it. In today's project, we'll be turning an old laptop and a Raspberry Pi into a magic mirror.
What You'll Need
- Broken laptop. Please don't tear apart a functional one, there are much better things to do with one that still works! (Free)
- Raspberry Pi 2 or 3 (preferably 3 since it has built-in Wi-Fi). ($30)
- Thick wood and a Kreg jig to make a frame. ($10 for the wood)
- 1-way mirrored acrylic sheet. ($20)
- Suitable power supply and display controller board (see below). ($30-$40)
Total cost: ~$100
Extract and Recover the Old Screen
Before you start, I should note that counterintuitively, it's not always cost-effective to try and rescue a panel from a laptop, since you need to find a suitable driver board and power supply. Unlike a ready-made monitor which just plugs into HDMI, the LCD or LED panel inside your laptop will have had a signal directly from the laptop's motherboard.
In order to use that panel, you need a controller board made by a third party, which converts a standard HDMI signal into one suitable for that display. Annoyingly, the controller board must also be precisely matched to your panel. Once you factor in the additional $30-$40 for extra parts, it may be cheaper just to buy a fully functional old monitor at auction. A cursory glance through the "ending soonest" listings of eBay shows some 17-inch ex-office monitors going for less than $15.
Of course, where's the fun in that? Part of my motivation in doing this is to make good use of something that would otherwise have ended up in the trash, regardless of whether it costs a little more or not. Adding to the mountain of e-waste is something you should aim to avoid.
Still want to go on? If you can't find an iFixit tear down guide for your laptop, just grab a flathead screwdriver or craft knife and begin ripping the screen bezel off. From there, you should able to find the screws that secure the display to the hinges. Take extra care around any existing ribbon cables, as you may need to re-use them later.

When you're done, turn the panel around and locate the model sticker. All panels will have one of these.
Here's the money shot. The sticker describes the panel and allows you to search for a suitable driver board. Type the model number into eBay (in this case B126XW02) plus "controller".

You can tell a little about the board just by glancing at the codes:
- B is the manufacturer -- AU Optronics -- though this is also explicitly written below the model number so nothing surprising here. You can find a reference list of manufacturers and their codes here.
- 156 = 15.6" screen size.
- XW = XWGA resolution (1366 x 768).
- 02 = Panel version 2.
Expect to pay around $20-$30 for a suitable driver board, the top end being boards with a HDMI connector, the cheaper end being just VGA. If in doubt, take a picture of the label and send it to the seller, most will be happy to advise if you're buying the right item, or point you in the direction of the correct board if not. You'll also need a power supply for the driver board: 12v 4a is recommended, which should set you back around $10.
When your board arrives, you won't find a single controller board: likely you'll have a separate inverter (for LCDs, which require a high voltage), a board with buttons on for input control, and possibly a remote control receiver board (optional). This is the main controller board:

Since this is an LED, there no need for a separate inverter board. The ports should be obvious, and there's only a few separate ribbon cable connectors. You'll find some pins labelled LVDS: this is where the delicate flat cable that connects to the LCD screen will go, but don't plug that in yet.

You may also find a connector for the controller buttons and IR receiver. On mine, this single white cable breaks out to both the IR and KEY boards. Plug those in now, and connect to the main controller board where indicated. Connect the LVDS ribbon and power supply when you're ready to confirm everything is working, but unplug it again until the very last step, since it's fairly delicate and easy to damage.
Build a New Frame
I used some 1.5-inch square planed timber to cut roughly the right size frame to fit around the screen, then used a router to cut out the frame inset. This was really a process of trial and error.

To join the edges of the frame, I used a single pocket hole created with a junior Kreg Jig. I use the Kreg jig on every woodworking project I've ever made, because it's simple and works. If you don't already have one, I strongly suggest buying one -- it's only $40 and has enabled me to do many fantastic DIY woodworking projects, like this rack case.

Finally, I used some polyurethane glossy wood stain that I had to finish off the wood.
Fit the Screen and Mirror Sheet
The last step was to fit the mirror sheet -- 3mm mirrored plexiglass -- with the screen behind it. It was a tight fit anyway, so no additional fixings were required. I used some double-sided sticky tape to secure the Raspberry Pi and other bits.

At this point, I booted up the Raspberry Pi to find that in the couple of months I'd left this project unfinished in the garage, the screen had been cracked on one side. Half the screen was still functional however, so I slid a piece of black card into the frame too, sandwiched between the display and the plexiglass. It hides the broken area perfectly!
Install MagicMirror2 Software
To make things simple, we're using a popular open-source magic mirror solution by MichMich with support for many plugins. We could code up our own unique web app, but there's really no point in reinventing the wheel.
Don't worry if you've never used a Raspberry Pi before -- our unofficial guide covers everything you need to know.
Installation is ludicrously simple. In the command line, enter:
bash -c "$(curl -sL https://raw.githubusercontent.com/MichMich/MagicMirror/master/installers/raspberry.sh)"
and let it work its magic. If this fails, you're likely not using a Raspberry Pi 2 or 3. While it's possible to use a Pi Zero or Zero W, it's considerably more work.
At some point it'll ask you if you want to auto-start the Magic Mirror, and you probably do. Once it is all done, it should launch directly into the default layout.
Once completed, log in from a remote machine using SSH and edit the config files:
        cd MagicMirror/config/
nano config.js
Don't be daunted by the code in this file -- it's mostly just blank space!
You start off with a smattering of default modules, and the syntax to adjust their position and settings should be obvious. Additional modules will provide their own documentation and example config blocks. Just remember that each module config is surround by curly braces {}, and requires a comma in between. If you have no comma or a mismatched brace, you'll get errors.
Your first step should be to configure the default weather module. To make use of the OpenWeatherMap data, you'll need to sign up for a (free) API key. For our simple needs, the free account is perfectly adequate.
To rotate the display 90 degrees, add the following to the end of /boot/config.txt:
display_rotate=1
To stop the screensaver kicking in after five minutes, I followed these instructions from the MagicMirror Wiki. Then, to enable MagicMirror to autostart on every restart, I used this guide. I won't copy the instructions here as they're simple to follow and require no additional explanation.
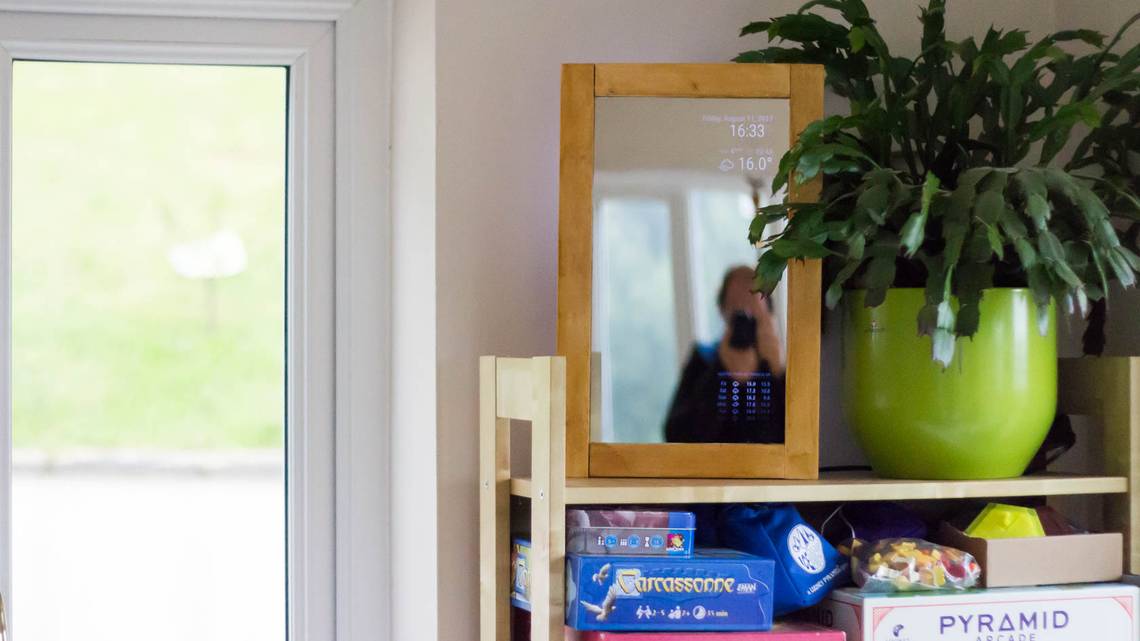
Since my monitor was only functional on the right-hand side, I've kept the modules quite understated, with just the default time and weather forecast, in the top and bottom of the right hand side respectively.

That Was Too Easy!
The hardest part of this project was probably building the frame, and I think I could have done better. If I were to repeat the project, I'd likely build a separate front panel with greater depth behind it, and allow space for a back panel to cover up the backlight, which currently bleeds out, as well as hide the cables away. It would also be a good idea to make room for a motion sensor that could turn the display on and off, though the panel itself doesn't draw that much power.
That said, I'm pleased with how it came out. It's a beautiful at-a-glance weather display, sitting right by the front door -- which is especially useful in my neck of the woods where the forecast can change at a moment's notice.
If this project is not what you're looking for, or you want something simpler, why not take a look at our guide to Raspberry Pi projects for beginners.
Have you built a magic mirror using MichMich's code? What are your favorite modules? Tell us about it in the comments below!