What happens if you get bored of playing Minecraft? Modding is the answer! From cookies to rockets, mods alter anything and everything in the Minecraft game, but wouldn't it be fun to create your own mod?
By following these simple steps, you can get started on your own path to creating custom Minecraft mods.
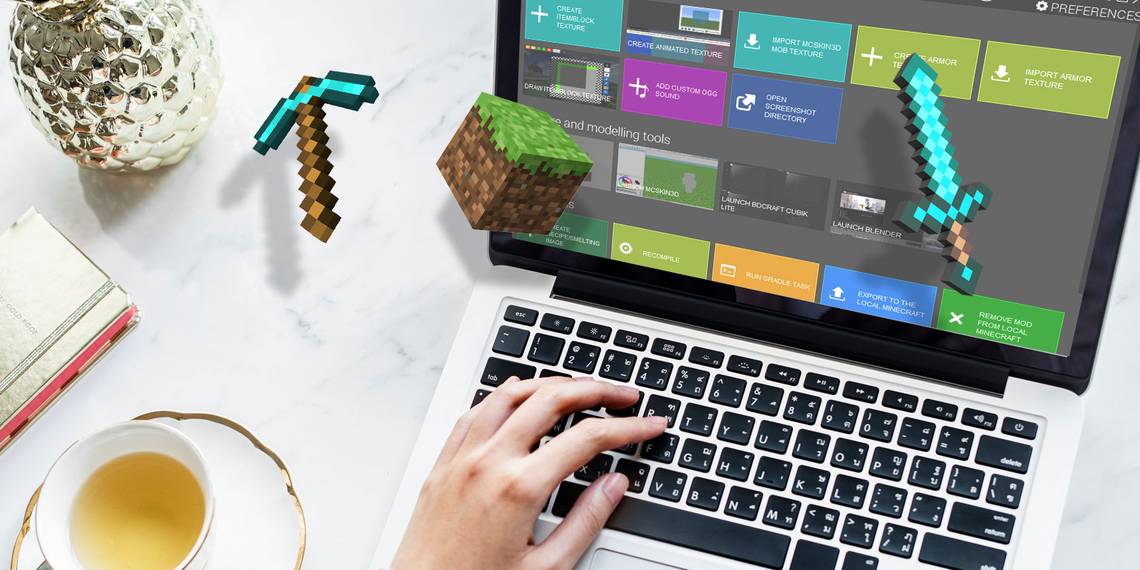
Getting Started With MCreator
Advertised as "The Best Minecraft Mod Maker Ever," MCreator is a free tool for making your own Minecraft mods. You don't have to write any code---although you can if you'd prefer to.
Get started by visiting the MCreator download page and downloading a version to match your current version of Minecraft.
The download page details which version of MCreator you need, but if you're running Minecraft version 1.12.2, then you'll need MCreator version 1.7.9.

Once you've chosen a version, go ahead and download MCreator for your operating system. The Windows, Mac, and Linux operating systems are all supported.
If you're running Windows, download and run the executable file (EXE). If you're using Mac or Linux, the installation is a bit tougher, but the MCreator installation guide contains detailed install steps.
Once up and running, MCreator will need a bit of time to get things in order. It needs to download the Minecraft Forge Development Kit, and download dependencies and compile. This may take some time depending on your computer and internet speed, but once it's completed for the first time, it won't need to do it again.

Once configured, MCreator will ask if you'd like to sign in with your Pylo account. Go ahead and press Skip if you don't have one.
Everything is now ready to go. The screen you see is the main menu for MCreator. You can import or export current settings, install mods developed by other people, or start writing your own mods.

Writing Your First Minecraft Mod
For this example mod, we're going to produce a super diamond ore, which will produce a vast quantity of diamonds when mined, instead of the usual one or two. You might also want to get inspired by some great existing Minecraft mods.
To get started, you need a texture for your new block. This is an image which defines what your block looks like. This could be stone, wood, or any custom artwork. This example will use the diamond ore, but you can use any art you want.

From the top of the main menu, select Tools. Choose Create item/block texture. This will open the Texture Maker, where you can create your own texture, based on existing Minecraft artwork.

The texture maker contains contains four layer controls. These allow you to choose artwork and a color, which all get combined into your final texture.

Except for Layer 1, the layer controls contain the same three settings. From left to right, these are:
- Artwork selector: Use the drop down menu or popout interface to select a piece of artwork.
- Color picker: Select the three dots to choose a color for this layer.
- Lock saturation and brightness: These limit the layer color brightness. Play around to see what you like.

Once you've designed your artwork, select Use at the bottom, and then Block for the texture type. Choose Exit to go back to the Workspace page. The workspace page will now list your texture.
From the left hand menu of the Workspace tab, select Mod Elements. This is where you will create your mod using your texture.

Select the New mod element button from the top left, which looks like a large plus.

This New mod element page may look overwhelming, but it's a simple tool to use.
For Name of the element, enter a unique name. This isn't seen in Minecraft, it's used as an identifier in MCreator and the Minecraft code.
For the element type, you can choose what type your new element is. For this super diamond, the default of Block will do. If you're working on a different mod, such as a mob, command, or tool, then select the appropriate type.
Select OK to go back to the Texture page. This is where you can assign your texture to the block, as well as configuring transparency, and the block dimensions.

On the left is the Block textures area. The six squares represent each side of your block. It's possible to use a different texture for each side, but for this example, they will all use the same texture.
Click each square, choose your texture, and then press Ok. Leave all the other options at their defaults, and then choose Next.

There are various settings on this screen but start with Name in GUI. This is the name of the block in your inventory. Any name will do, but make sure it's descriptive. For this block, "super diamond" is a suitable name.
If you're not sure what a parameter does, select the small question mark next to the name. This will load the MCreator documentation.
To make this block drop a different block when mined, tick the box next to Doesn't drop itself. Next to Block that drops, press the small rectangle. This will load the Block/item selector. Use this menu to search for and choose the block you want to be dropped.

Finally, change Drop amount to a suitable number. As we want the super diamond to yield a large number of diamonds, 10 is a good place to start.
Select Next to go to the Particle settings. This is where you can change the block animation. Feel free to experiment here, but this isn't required for this super diamond mod.
Leave the Block's inventory settings at their default, and choose Next. The Procedures page allows you to customize what happens when any event occurs involving this block. This isn't required for this mod, so press the Next button.

Finally, the Block spawning/generation properties page allows you to configure when, where, and how often your new block spawns. If you'd like your modded block to spawn in the game, then tick Generate in world.
The other settings can stay at their default values, or you can customize them to make your modded block more or less common.
Exporting Your Minecraft Mod
Once you have produced your mod, you need to export it ready for Minecraft to use.
From the bottom left of the Workspace toolbar, choose the Export workspace into mod file button. This will bundle your mod up into its own package, ready for Minecraft to import. If you modified more than one block, then all will show up in your mod.

Note: If you'd like to work on several mods at the same time, switch to a different workspace from the main menu.
The Mod details menu provides options for packaging your mod. You can enter a name, a version, description, and creator details. Upload an image if you want to. The most important of these options is the File extension. Leave this on the default option of .JAR.

When you're ready, press Recompile and export. This will package up your mod, but it may take some time depending on your computer, and the number of things you have changed.

You will need to agree to the terms of use, but once compiled, finish up by choosing a location on your file system to store your completed mod.
Importing Minecraft Mods With Minecraft Forge
Now that your mod is complete, all that's left to do is import it into Minecraft.
To install this mod, or any other mod, you need to install Minecraft Forge. Forge provides a simple and easy way to install custom mods into Minecraft itself.
From the Forge home page, download an installer suitable for your operating system and Minecraft version. Run the installer, and when prompted, choose Install client.

Once installed, launch or restart Minecraft. From the Minecraft Launcher, press the up arrow to the right of the play button at the bottom. Select Forge. This will load Minecraft with Forge, so you will need to do this everytime you want to use your mod.

When in Minecraft, things will look different with Forge running. There's some extra text at the bottom, along with a Mods button.
Choose the Mods button, and you'll see that your mod is not visible. You need to install your mod into Forge/Minecraft. Installation involves copying and pasting your mod into the mods folder of Minecraft.
- On Windows, this is in AppData/.minecraft/
- On Mac, this is in Library/Application Support/minecraft/
You may need to restart Minecraft if you've pasted your mod while it is running. Enter the mods menu, and your mod will show up, complete with description, title, picture, and creator information. Well done!

For this example, the "super_diamond" is now visible alongside all the other blocks.
Where Will Your Minecraft Mods Take You?
Modding Minecraft is an excellent way to add some variety to the game, but it's even better if you make the mod yourself. Once you have learned these basic building blocks, you can begin to make more complex mods.
If you'd like to keep customizing, take a look at how to use command blocks in Minecraft. And if you enjoy custom game content like this, you might have a laugh at some of the best video game glitches.