While Microsoft Word is an easy-to-use application, you may find certain Word features to be intimidating. For students, writers, and academics, the References tab is a must-have feature. But if you have never used it or do not use it often, it can be scary.
To help you use that tab's default features to their fullest, here are explanations and steps for using them.
Table of Contents
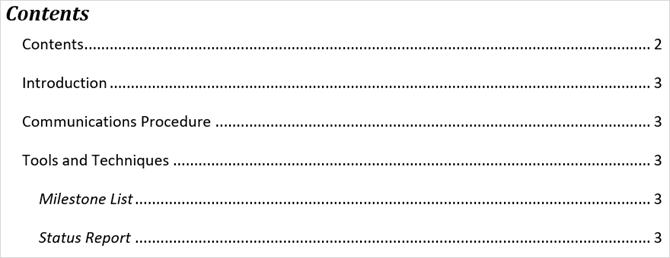
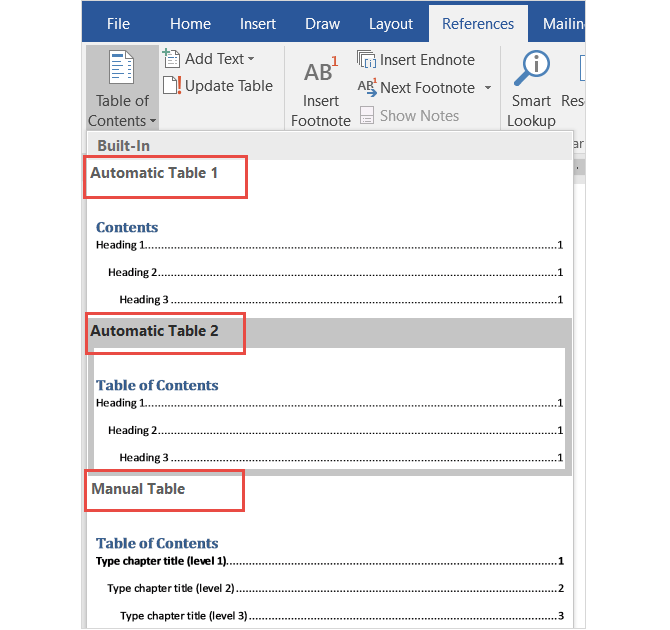
The table of contents feature is probably one of the more common tools. You should consider using these nifty tables in lengthy documents to provide a quick view of the sections contained. You have built-in options to add either an automatic or manual table of contents to your document.
The automatic option is a real time-saver, but it requires you to use headings for your sections so that they display correctly. Do apply this style, just select your text and choose your heading from the Styles section from the ribbon on the Home tab.
An advantage of using the automatic table of contents in Word is that readers can click within it to move directly to a specific section.
If you go with the convenient automatic table, keep in mind that you will need to update it as you create and edit your document. But don't worry because this is actually quite simple.
Just select Update Table from the ribbon under Table of Contents or right-click anywhere within the table and select Update Field from the context menu. In the pop-up window, choose between updating just the page numbers or the entire table.
If you prefer to go with the manual table option, it does take more time. However, it allows you to control your table completely. Just remember that you must manually type in the sections and page numbers.
Footnotes (and Endnotes)
Footnotes provide a convenient way to include a comment that pertains to certain text in your document at the bottom of the page. An endnote is like a footnote, however the comment displays at the end of the document instead of the bottom of the page.
Both tools allow your reader to continue and only stop to read the comment if they so choose. They are commonly used to display additional resources on the topic, explanatory notes, and citing sources, which makes them ideal for research papers. The use of footnotes and endnotes will likely depend on your style guidelines or publication requirements.
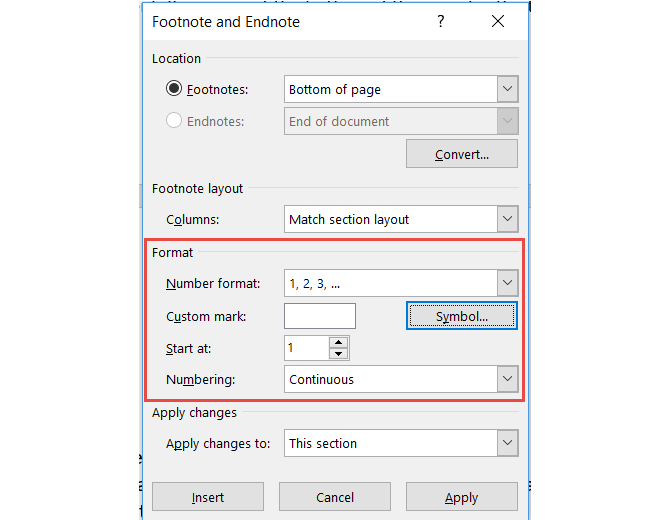
While you normally see footnotes and endnotes with number indicators, you can choose from different options in Word. Open the Footnotes formatting arrow from the ribbon. Under Format, you can choose from numbers, letters, or special characters.
With the formatting box open, you will also see options for adjusting the location of the footnote or endnote, the column layout for footnotes, and a choice for the document section to apply your changes.
For more information, here's our guide on how to add and format footnotes and endnotes.
Citations & Bibliography
The Citations & Bibliography tool in Word is extremely handy for creating essays and research papers. And if you are in school it is likely that you are required to include a bibliography for your term papers. While we are covering the basics of that section here, you can also check out Saikat's article on how to create an annotated bibliography for further details.
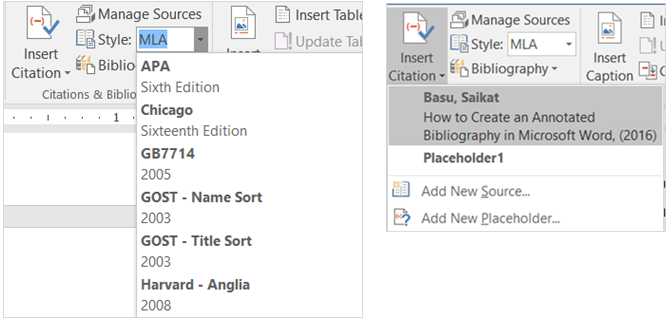
First, you must pick your style and insert your citations. You can choose from various style options such as APA, MLA, or Chicago. Then, select your text or document location and click the arrow next to Insert Citation from the Citations & Bibliography section of your ribbon.
You can then insert a placeholder if you plan to gather the details later or click to Add a New Source to complete the citation information.
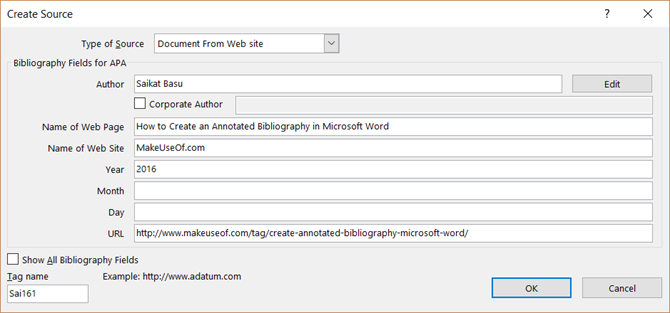
When you select Add a New Source, a pop-up window will display for you to enter all of the source's details. Be sure to choose the correct source type in the drop-down box at the top. Depending on the type you pick, the fields below it will automatically adjust for the details you need to provide.
Each source you add will be saved so that you can reuse, edit, or delete it. You can also add all of your sources up front if you prefer. These actions can be done by clicking Manage Sources from the Citations & Bibliography section of your ribbon.
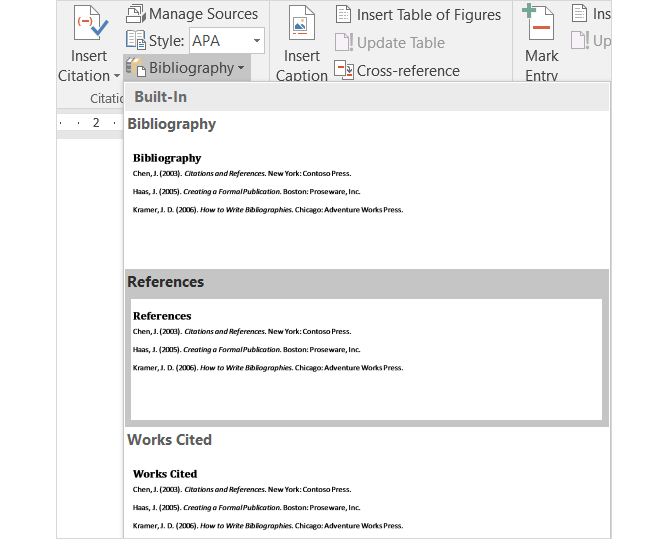
When you are finished inserting your citations, Word provides three options for an automatically-generated bibliography. You can select this table to be labeled Bibliography, References, or Work Cited. Just click the arrow next to Bibliography in this section of your ribbon to make your choice.
Captions
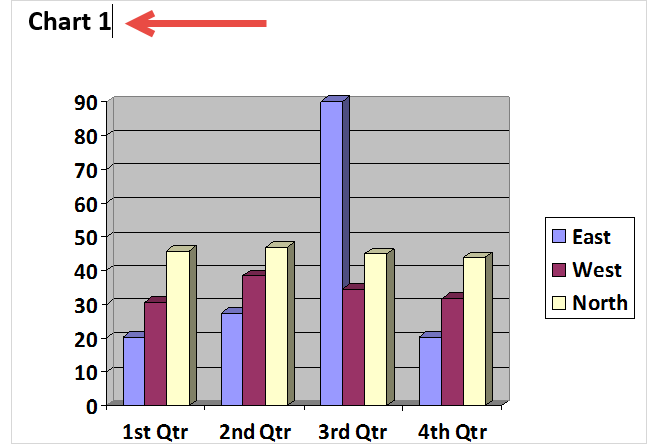
Captions is probably the easiest to understand within the References tab. This convenient tool adds labels to your tables, charts, images, figures, and similar document items. You can then insert a table of figures with page numbers. You can and should use captions for most any type of document where you will be referencing those items.
To insert a caption, select your item and click Insert Caption from the Captions section of your ribbon.
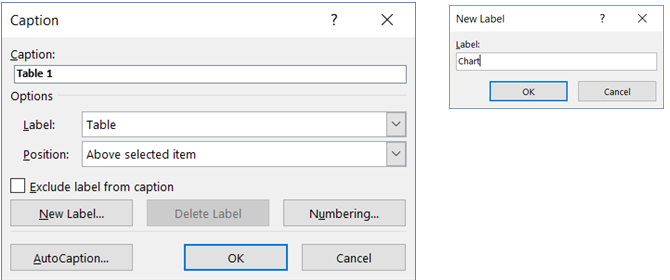
Then, choose a label and location for the caption, whether above or below the item. You cannot change the caption name, however you can mark the checkbox to remove the label from it if you like.
Word has a few built-in labels, but you can easily add your own by clicking the New Label button. Once you do this and apply the label, you will see the caption name change automatically.
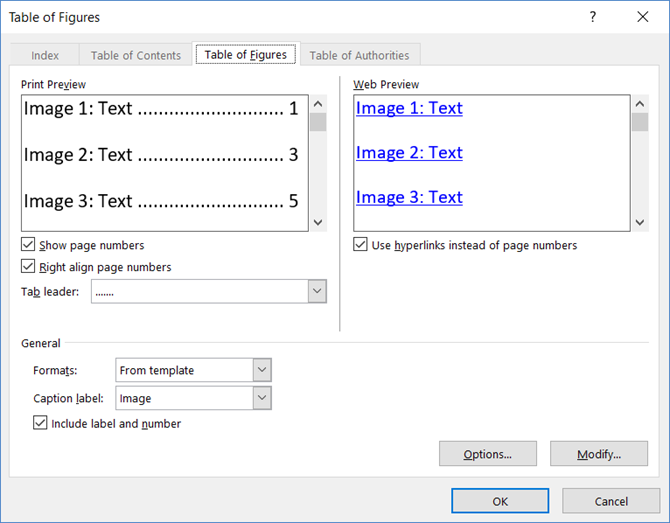
Next, if you would like to include a table for those captioned items click Insert Table of Figures from the Captions section of your ribbon. You have formatting options in the pop-up box for showing and aligning page numbers, using hyperlinks, and including both the label and the number.
Index
An index is like a table of contents but is located at the end of the document rather than the beginning. Additionally, an index is based on keyword or subject, can contain more detail, and displays the reference pages within the document.
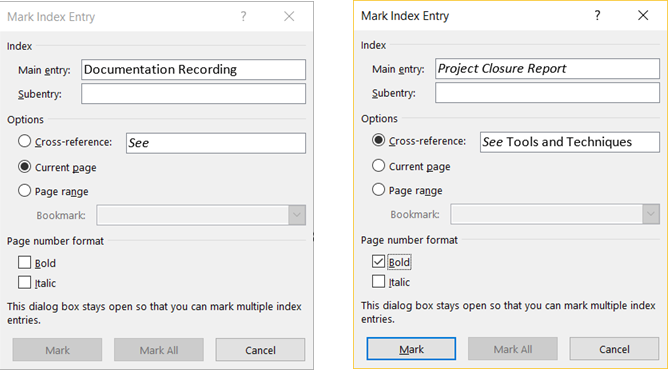
Creating an index in Word begins with marking your entries. First, select the text that you would like to reference in the index and click Mark Entry in the Index section of your ribbon. When the pop-up window appears, you will enter your options and formatting.
You can adjust the main entry, add a sub-entry, choose a cross-reference or page, and pick a page number format. When you are finished with that entry, click Mark and then Close.
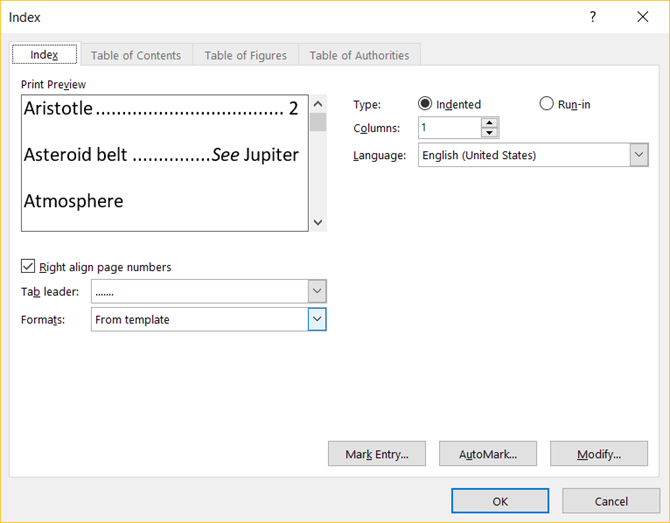
After marking your entries, navigate to the place in your document where you would like to place the index. Then, click Insert Index from the Index section of your ribbon.
You can now adjust the format of your index in the pop-up box including number of columns, page number alignment, and indented or run-in. When you are done, click OK.
Table of Authorities
The table of authorities is normally used in legal documents. It lists references in the document with the page numbers. The process for creating a table of authorities is similar to that of creating an index where you begin with marking your text.
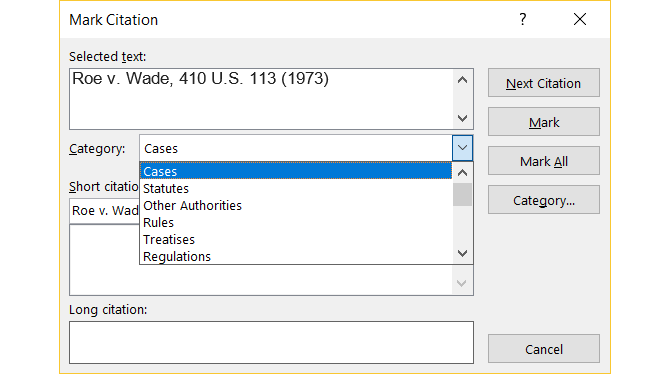
First, select the text that you would like to reference in the table and click Mark Citation in the Table of Authorities section of your ribbon. You can adjust the selected text, include a category, and view the short and long citation sections. When you are done, click Mark and then Close.
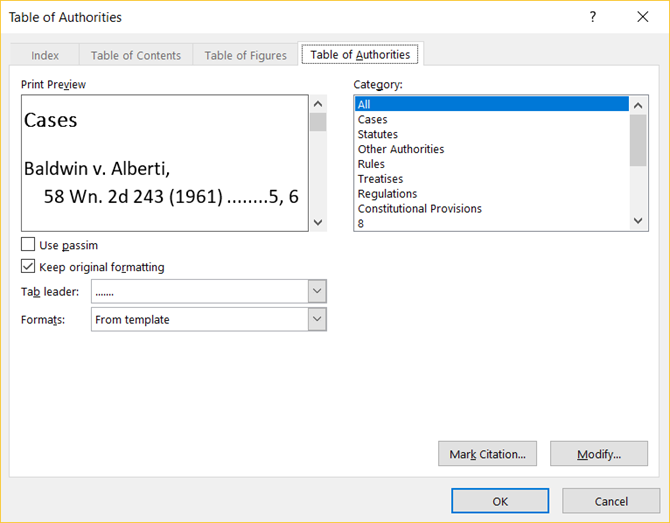
After all of your citations have been marked, navigate to the spot in the document where you want the table. Click Insert Table of Authorities from that section of the ribbon.
Here again, you will see formatting options for your table such as keeping the original formatting and selecting the categories to display. Click OK when you are finished.
One Tip to Note
If you use the Index or Table of Authorities feature, you may notice that your document suddenly contains markings. These items include paragraph and space indicators like in the image below. These can be very distracting, so to hide them, simply press Ctrl + Shift + 8.
How Do You Use the References Tab in Word?
Are you in school or a profession where the References tab in Word is one that you use often?
If so, do you find it to be easy to use or confusing? Hopefully these explanations and steps will assist you in taking full advantage of the References tab and its built-in features.
And if you have suggestions and tips for others, feel free to share them below!

