
Microsoft Word can do so much more than just type up papers and reports. From changing the orientation of individual pages, to adding diagonal lines in your tables, to embedding fonts, there's plenty you can do to tailor your documents to your exact needs.
Trick 1: Embed Fonts in Documents

If you want to share a Word document with a friend or colleague for editing, you want them to see the document exactly as you created it. One major element to that might be the font. But if your friend or colleague doesn't have that font installed on their computer, they won't see it.
And that's where embedding fonts comes in. To embed a font in a Word document, do the following:
- Click Office logo/File > Options.
- Go to the Save tab.
- Under Preserve fidelity when sharing this document you can check Embed fonts in this file.
You can choose not to embed common system files, which is definitely recommended. You can also choose to embed only the characters in the font used in the document. This is useful if you want to keep the file size small but is not recommended if your recipient is expected to edit the document.
How much the file size will increase depends entirely on your typeface, and may increase even more if you include its bold and italic fonts.
This feature will only work with TrueType Fonts (TTF) that allow embedding. Depending on the font's licensing, you may not be able to embed them.
Trick 2: Insert Diagonal Lines in Tables

Inserting diagonal lines in tables is a useful design element to break up your tables and demonstrate that some of your cells contain unique information.
- After you've created your table, place your cursor in the cell where you want to insert a diagonal line.
- In the Home tab find the Paragraph panel, click the Borders dropdown menu.
- You can choose between a diagonal line going down from left to right or a line going up from left to right.
While this creates a dividing line within the cell, it doesn't actually create two separate cells for you to type in.
Trick 3: Change Orientation of a Specific Page
If you have a long document filled with charts or tables, you may find that selecting a landscape orientation for a couple of your pages.
- Select the text on the page you want to change to landscape.
-
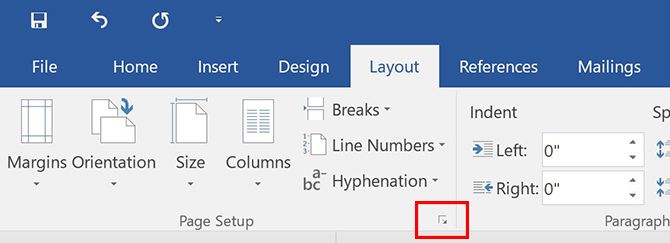
Go to the Layout tab and click the arrow in the corner of the Page Setup panel.
- In the Margins tab, under Orientation, click Landscape.
-
Under Preview for Apply to, select Selected Text from the dropdown menu.
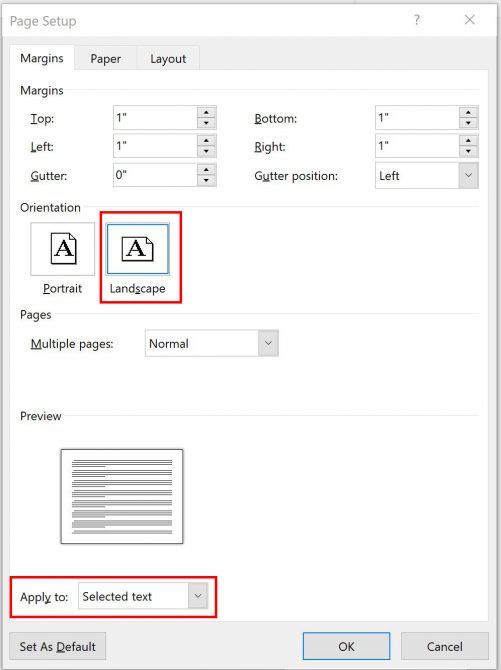


Image Credit: dennizn/Depositphotos