Ready to learn from the best? This year's Microsoft Office champions share their tips and tricks.
Today's students have been using computers as part of their learning since day one. As such, they've had ample time to learn all kinds of Office tips and tricks that help them get the most out of their PC.
Microsoft is well aware of this fact. That's why the company hosts the Microsoft Office Specialist U.S. National Championship, an opportunity for the most talented students to show off their expertise in Word, Excel, and PowerPoint.
LifeHacker asked this year's champions for their best techniques, and their answers are sure to come in handy. Here's how to use Microsoft Office like a student specialist.
Word
Just about everybody uses Word, but not every user can consider themselves an expert. However, these two tricks will help you get one step closer to mastering the program.
1. Selecting Separate Bodies of Text
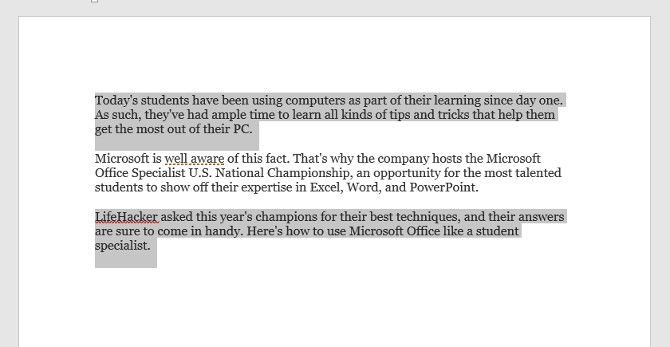
Forrest Liu, who was named champion of Word 2013, offered up this helpful tip about text selection. If you hold down Ctrl while highlighting text, you can select two completely separate sections at the same time.
On a similar note, if you hold down Ctrl and then click any part of the text, you'll select that sentence only.
2. Quick Access
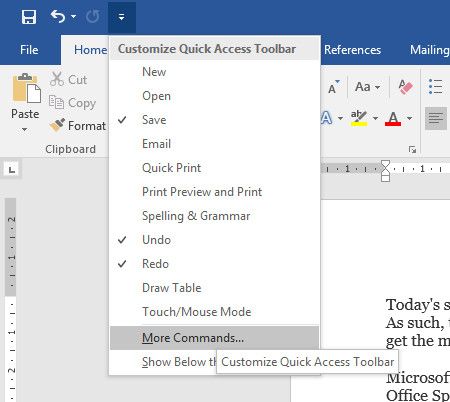
The Quick Access bar at the top left-hand corner of the Word user interface is outfitted with shortcuts to Save, Undo, and Redo by default -- but it gets really powerful when you customize it for yourself.
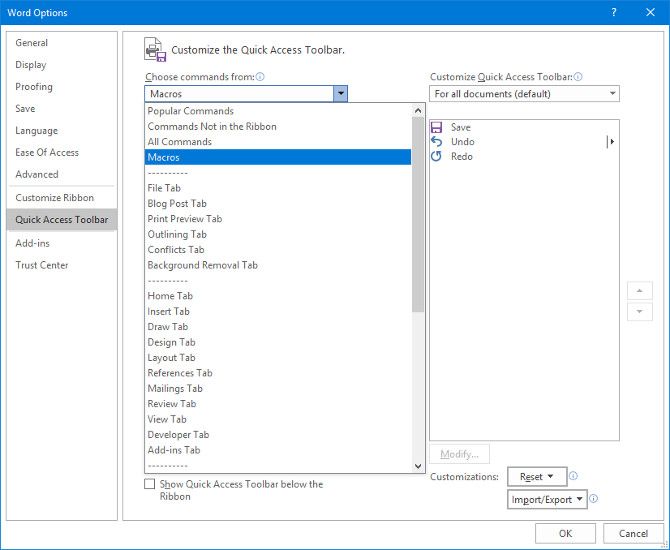
Use the drop-down menu and select More Commands to see a full list of the ways that you can customize the toolbar.
If you're really feeling adventurous, then you can even add your own macros to the toolbar.
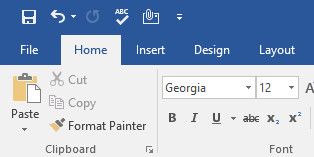
However, Word 2016 champion Joshua Garrelts -- who contributed this tip -- likes to opt for a couple of more traditional options. His Quick Access bar features a spell check shortcut and a button that shares the current document in an email.
Excel
Both the Excel 2013 champion Anirudh Narayanan and Excel 2016 champion John Dumoulin settled on the same tip for getting the most out of the program. Unsurprisingly, it's one of the most powerful pieces of functionality locked away in the software
3. Conditional Formatting
Conditional Formatting is a sure-fire way to make your Excel spreadsheets more visually interesting, and it's really quite easy to implement.
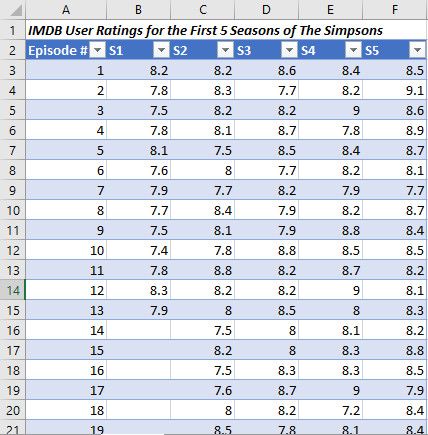
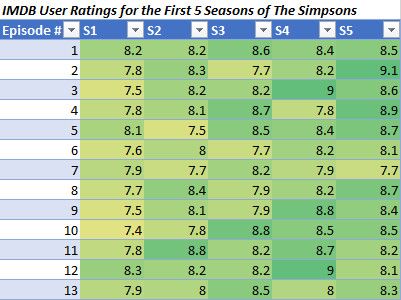
The first step is to make sure that you're working with data that's going to benefit from the technique. I've compiled a chart of IMDb user ratings for individual episodes of The Simpsons, as you can see below.
There's a lot of information crammed into a small amount of space, but it's not particularly easy to see which episodes are highly rated and which ones are not at a glance. Conditional Formatting can help remedy that.
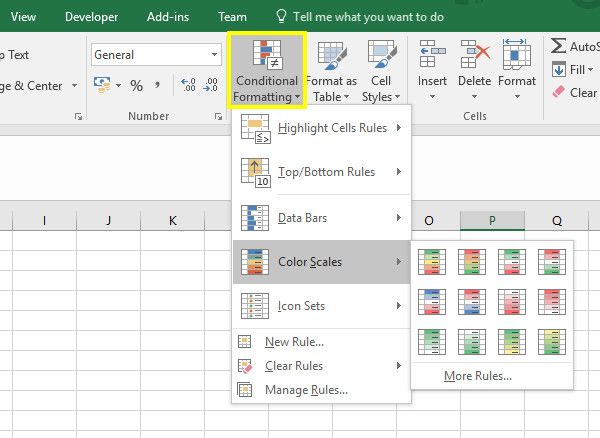
It would be easy enough just to highlight our data and use one of the pre-built options in the Conditional Formatting drop-down menu in the Styles section the Ribbon's Home tab.
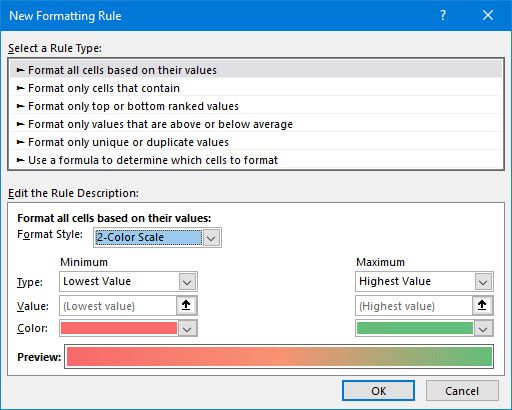
However, that's not the way of a Microsoft Office champion. Narayanan recommends tailoring your result using the New Rule option that you can see above.
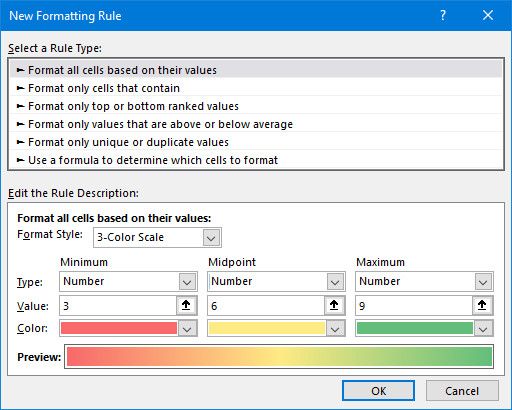
This screen allows us to fine-tune our formatting to meet our exact specifications. I'm going to switch to a three-color scale using the Format Style drop-down menu. I'm also going to change both Type fields to Number, and set the Value of each manually. This is because I don't want an episode that scores in the low 7s to turn red, as that's still a relatively high score.
Once you're happy with your adjustments, click OK.
You should end up with something like the image above. Now it's easy to get a general idea of what our data is conveying just by looking at the formatting.
PowerPoint
When it comes to the Microsoft Office suite, PowerPoint is often underestimated. A novice user might only be able to produce simple slide shows, but in the hands of an expert, it's really quite powerful. Here are some quick tips on how to make the most of the software.
4. Embedding Fonts
Using custom fonts in PowerPoint is one way to add visual interest, but if you transfer the document to another system before you present it, you might run into problems. Fortunately, PowerPoint 2016 champion Dheya Madhani has the solution.
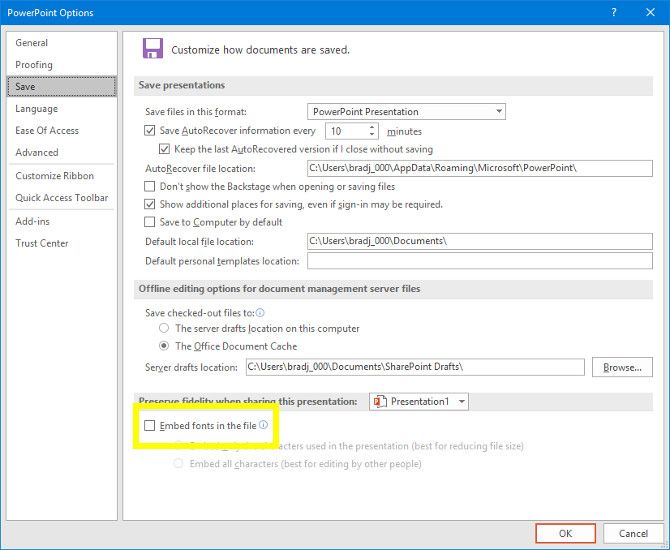
Head to File > Options, then head to the Save section of the menu.
Mark the checkbox labelled Embed fonts in the file. This will make sure that the fonts are saved as part of the document, making the presentation truly portable.
5. Use the Selection Pane
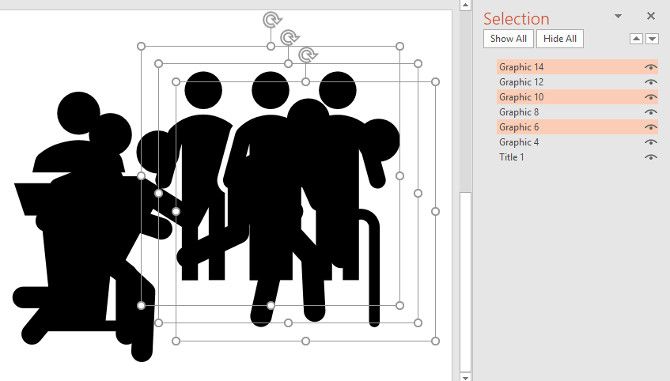
Madhani has another tip that simplifies the process of laying out content in your slides. I've added several images to my presentation by heading to Insert > Illustrations > Icons. Unfortunately, I added them all at once, so they've coagulated into a big mess.
I could click at random parts of the blob until I grab hold of the individual icon that I want. Alternatively, I can take advantage of the Selection Pane.
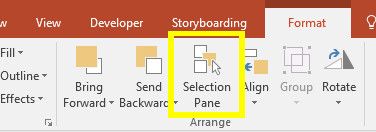
Double click any icon to open the Format tab.
Click Selection Pane and it'll open up on the right-hand side of the screen.
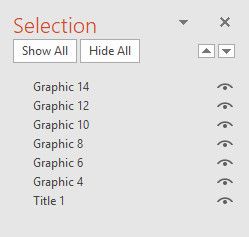
You can use this menu to select individual items, which you can then move around as normal. You can even use Shift or Ctrl to select multiple items at once.
I can use the Selection Pane to make my slide look exactly how I want it to be.
6. Slide From Outline
Madhani has one final tip, and it's sure to be particularly useful for students. Imagine you've just spent an hour typing up notes on a particular subject, then you find out that you're going to have to present your findings to the class. Wouldn't it be great to produce a PowerPoint presentation from the work you already have at hand?
It might sound too good to be true, but it's possible. To get started, first prepare your notes in Word.
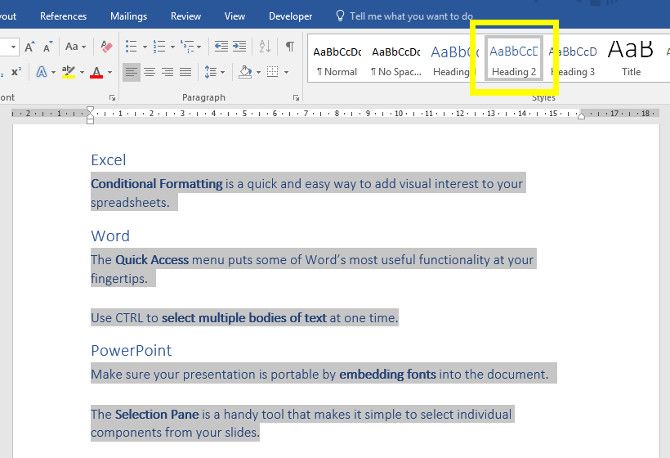
PowerPoint will do its best with whatever you give it, but generally, it's best to use heading styles to give the software a helping hand. As you can see, I used the method of selecting multiple sections of texts we went over earlier to speed up the process.
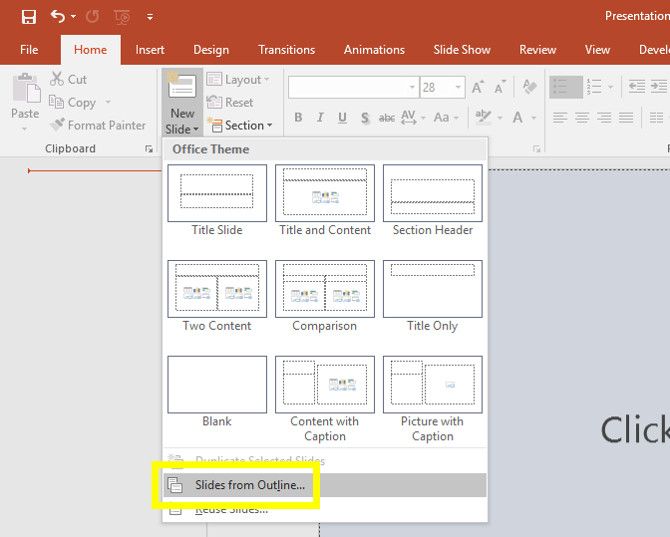
Next, head to PowerPoint. From the Home tab, click New Slide and then select Slides from Outline.
Navigate to the document containing your notes and click Insert.
You should get some pre-made slides based on your notes. Now you just need to make some visual tweaks and hey presto, your presentation is done!
7. Show, Don't Tell
PowerPoint 2013 champion Dominic Allain had a more theoretical tip for anyone embarking on a PowerPoint project. He advises users to try and illustrate their point to their audience using visuals, rather than just the written word.
This is an important aspect of PowerPoint that many people miss. PowerPoint's greatest strength is its ability to bring together all kinds of different visuals. Make a chart (how to create a pie chart). Add a diagram. Embed a YouTube video. You can pack your slides with text, but that doesn't mean anyone is going to read it. And if they do they won't listen to you. Instead, play to the strengths of the format.
Never Stop Learning
Most users would think of the Office suite as pretty basic software, but it's got a great deal of depth. There's always something new to learn, so always be on the lookout for ways to up your game.
The Office champions in this article didn't become experts by accident -- they learned each program inside out. Don't rest on your laurels! Whether you're creating a Word document, an Excel spreadsheet, or a PowerPoint presentation, ask yourself whether you could be getting more out of Office.
Do you have a championship-worthy tip you want to share with other readers? Or are you looking for assistance with one of the techniques listed in this article? Either way, why not join the conversation in the comments section below?
Image Credits: Mike Orlov/Shutterstock

