Getting the perfect exposure on a photo requires a lot of things to come together, including the correct aperture and shutter speed, the state of ambient light, and effective metering. Metering is one of the things that beginner photographers often don't understand very well, but it can make a huge difference to your photos, so it's worth taking some time to explore.
Here's everything you need to know about the metering modes on your camera, how they affect your photos, and how to make adjustments.
What Is Metering?
In short, metering helps your camera get the proper exposure on a photograph. Your camera analyzes the light and dark points of the scene, determines which part of the photo to prioritize, and then attempts to get the correct exposure for that part of the scene. It's one of the many things that your camera does automatically to help you take better pictures.

Because the metering modes make automatic adjustments, you might think that they're only important in automatic or semi-automatic modes on your camera, but they can also be useful in manual mode. Even in manual mode, your camera will give you information about the exposure you're getting in the photo, and the way it interprets the scene via the exposure meter is affected by the metering mode.
So no matter how you shoot, it's a good idea to have a good understanding of metering modes and make an intentional choice about which one to use.
How Does Metering Affect Photos?
In the rest of the article, you'll see exactly how different metering modes affect photos, but in general terms, different metering modes prioritize different parts of your photo for correct exposure.
Of course, "correct exposure" is a subjective term, but when I talk about it in this article, what I'm referring to is the capturing of the most possible detail in a particular part of a photo (in the photo below, for example, many cameras would have compensated for the bright sunset by making the man in the foreground very dark, eliminating important detail).

Because metering modes prioritize different parts of the scene for correct exposure, knowing the difference between them can mean the difference between getting a great shot of your subject or having that subject be too bright or dim.
Choosing the right metering mode is especially crucial when your scene isn't lit evenly, which is quite common in landscape photography, portraiture, and still life. You can always correct your exposure in Photoshop, but getting it right the first time makes for much higher quality photos.
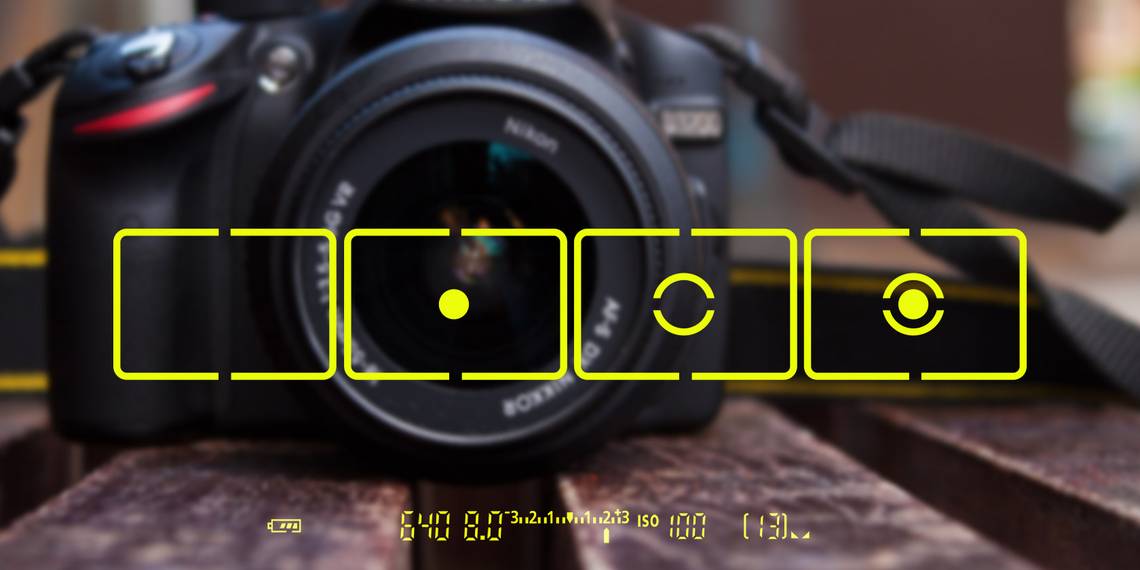
Reading an Exposure Meter
Before we get into the different metering modes, I'm going to take a moment to explain how to read an exposure meter. The exposure meter tells you if your photo is correctly, over-, or under- exposed. It's a line with a "0" in the middle, a "+" on one side, and a "-" on the other. If the meter is skewing toward the "+", it's overexposed. Toward the "-", it's underexposed. Near the "0", it's properly exposed. That's all there is to it.

Exactly when and where your camera displays an exposure meter can vary (mine, for example, only displays when the subject is greatly over- or underexposed), so you'll need to consult your camera's manual to find it.
You can see an example of an exposure meter in the image above, which is the view from my Nikon viewfinder (it also displays in the live view).
Also, remember that "correct exposure" is determined programmatically by your camera—if the meter is at 0, that means the light in the area of metering averages out to neutral gray. This is good to know, but it doesn't necessarily mean that it's the best exposure for your picture. You'll need a lot of practice to develop an eye for good exposure.
With all that out of the way, let's look at the different metering modes.
Evaluative Metering
Also called "matrix" metering on Nikon cameras, evaluative metering is usually the default setting on cameras, as it takes the most information into account when trying to optimize your exposure. It looks at the entire scene present in the viewfinder and, according to my own camera's user manual, "set[s] exposure according to tone distribution, color, [and] composition." With some lenses, it takes distance information into account, too. In short, it tries to do as much work for you as possible.

Because the brighter background of this test image takes up a large portion of the photo, the darker wood piece gets underexposed, making it hard to pick out details. For the most part, using evaluative metering will work well if you don't have big contrasts between the light and dark parts of the scene.
Center-Weighted Metering
If you want more control over how your camera exposes the shot, center-weighted metering is a good option. Instead of looking at the entire scene in your viewfinder, it places an emphasis on the center of the photo and its immediate surroundings. This is often a good metering option when your subject is in the middle of the frame and is significantly brighter or darker than the background.

As you can see, the test image is significantly brighter, as the darker colors of the wood piece are emphasized by the center-weighting. Center-weighted metering is a common choice for portraits and still life photography if the subject is in the middle of the frame. If it's elsewhere, or the surrounding light still isn't letting you get a good shot, you'll want to go to the next option.
Partial / Spot Metering
Nikon cameras have three metering modes: matrix, center-weighted, and spot. Canons, on the other hand, have four: evaluative, center-weighted, partial, and spot. The difference between partial and spot is minor. Canon's partial and spot metering modes take into account approximately 6.5% and 2.5% of the scene, and Nikon's spot metering looks at about 5% of the scene.

If you don't tell the camera to choose a different point for metering, it will focus on the center of the image, and you'll get a result that's similar to center-weighted, as you can see in the photo above. However, you can also tell your camera to expose for specific point away from the center of the photo, which is useful if your subject is toward one side of the frame.

In the photo above, the exposure meter was still looking at the center of the scene, and didn't take the darker wood into account. For the image below, I adjusted the focus point to be centered on the wood, resulting in a better exposure for that part of the picture.

Spot metering is often used when your subject is heavily backlit and the backlighting interferes with center-weighted metering. And, as shown above, it's good when your subject isn't in the middle of your photo (which is usually a good composition practice anyway).
Adjusting the Metering Mode on Your Camera
Now that you understand metering modes, you'll need to know how to use them on your camera. I'll be demonstrating on my own Nikon, and making some additional comments with pictures from my wife's Canon, but if anyone can provide guidance on how to do it in other cameras (or if I'm doing something wrong on the Canon), please share in the comments!
On a Nikon, there are two ways to adjust the metering mode. First, by accessing the menu and going to the Shooting Menu.

Once in the shooting menu, scroll down until you see Metering, then select it and choose your metering mode.

To change the mode on the fly, go into the information display view by hitting the information button (it has an "i" on it), and scroll to this field:

Click there, and select your metering mode.

To change the metering mode on a Canon, go into the menu and scroll to the second menu panel.

Select Metering mode, then choose which mode you'd like to use:

Practice Your Metering Skills
The best way to get to grips with how different metering modes affect your photos is to take a lot of pictures in the different modes to see what happens.
Eventually, you'll come to learn which metering mode is best for which situations, and which one you'll use most often. If you have any other questions about metering, or tips on how to get the best exposure with different modes, leave them in the comments below!
Image credits: ne3p via Shutterstock.com, izuboky via Shutterstock.com,