If you're learning how to use Excel, you probably already know you can adjust the row height and column width in Excel using your mouse, but it can be an imprecise method. If you know the exact measurements you want to use, you can enter it manually instead.
There are two ways you can access the setting to adjust your column width and row height.
Method 1
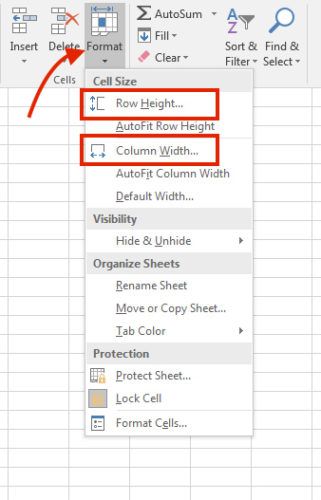
Make sure you are on the row or column that you want to format -- selecting just one cell will suffice. In the tabbed menu at the top of excel, go to Home > Cells > Format. Under cell size you can either select Row Height or Column Width. If you want to adjust the height or width of multiple rows or columns, make sure you have selected at least one cell in each row or column.
After you make a selection, a window will pop up where you can enter the figure manually. The default unit of measurement in Excel is points.
Click OK and the entire row or column will be adjusted.
Method 2
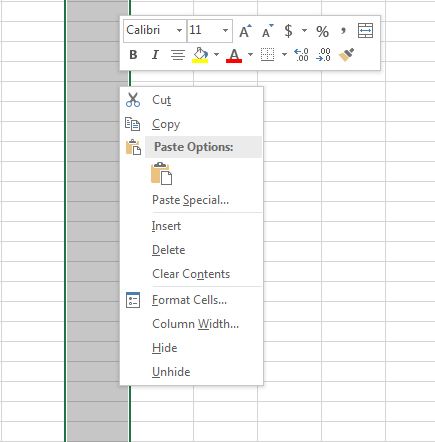
Select the entire row or column that you would like to edit and right click to bring up the menu. If you have selected an entire column, click on Column Width.
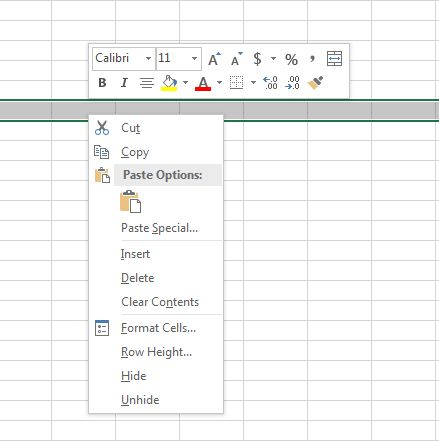
If you have selected an entire row, click on Row Height.
The same dialog box will appear where you can manually enter the figure. If you want to adjust the width of multiple columns or the height of multiple rows, just select them all and then right click to bring up the menu.
If you would prefer to use inches as your unit of measurement, go to View > Workbooks View > Page Layout. When in this view mode, you can also change the unit of measurement to centimeters by clicking the Microsoft Office Button image > Excel Options > Advanced > Display. Select the unit of your choice in the Ruler units list.
Do you have any tips or tricks that you use with Excel to streamline your workflow? Let us know in the comments.


