When using Linux, there are times when you may need to manage hard drives, removable media such as USB drives and SD cards, and more. This is especially true if you plan on dual-booting Ubuntu with Windows or a second Linux installation.
Therefore, it's important to know how you can manage your drives and the partitions that are on them. Resizing a partition, reformatting your hard drive, or checking its health are some of the things that you can do with Ubuntu's built-in disk management tool known as "Disks."
General Overview
To launch Disks, open up the Applications menu by clicking on the launcher in the bottom left corner. There you can either manually look for the app or start typing its name to search for it.
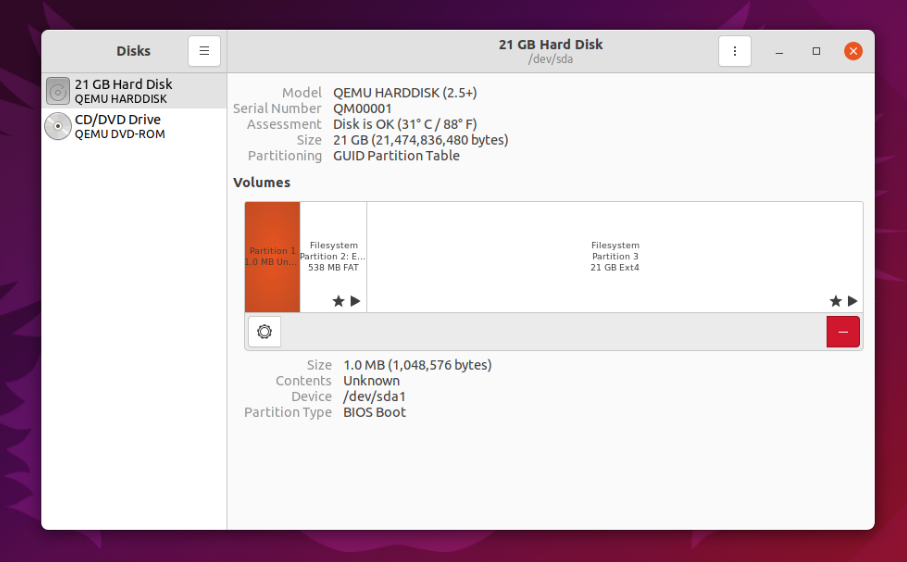
The layout of the utility is quite simple. You have a list of drives on the left side that you can manage. Everything else on display pertains to the drive that is currently selected.
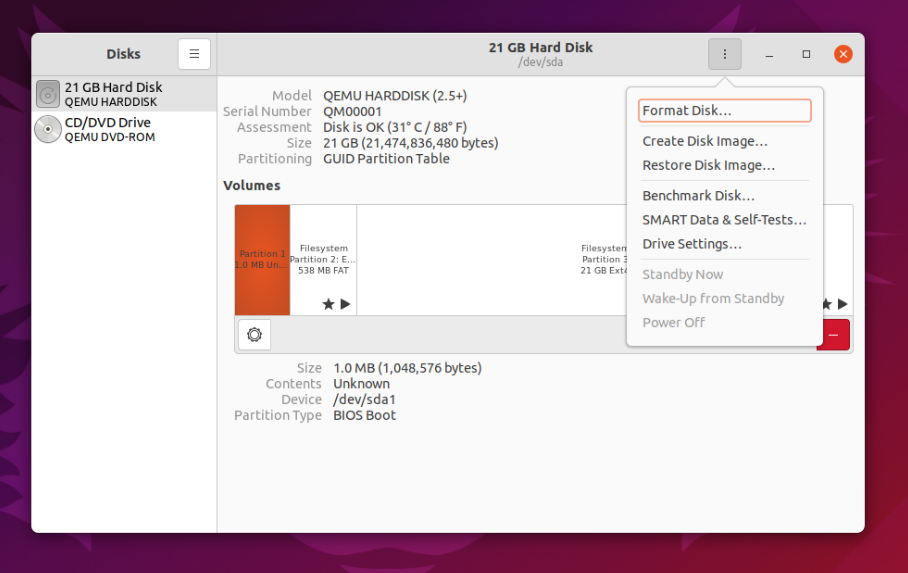
The top half has general information about the drive, such as its name, how much storage capacity it has, how it is partitioned, and the SMART status of the drive (more about that later). You can also perform actions to the entire drive via the menu in the top right corner of the utility.
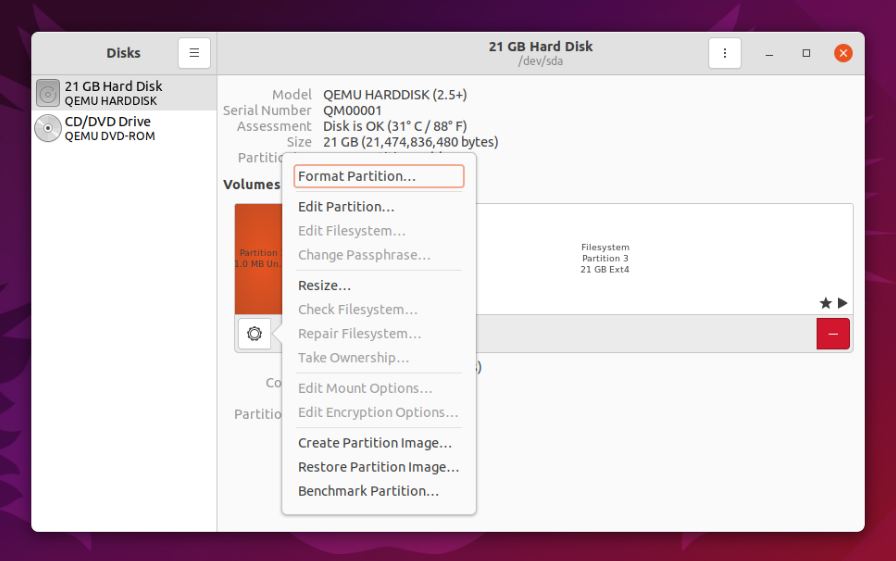
In the bottom half, you'll see the partition layout; this gives you information about the currently selected partition. Using the partition layout view, you can also add/remove partitions, unmount partitions, and perform other tasks hidden within the gears icon.
Let's go over the individual options in more detail. First, here are the actions you can apply to entire drives with Ubuntu Disks.
Disk Actions Within GNOME Disks
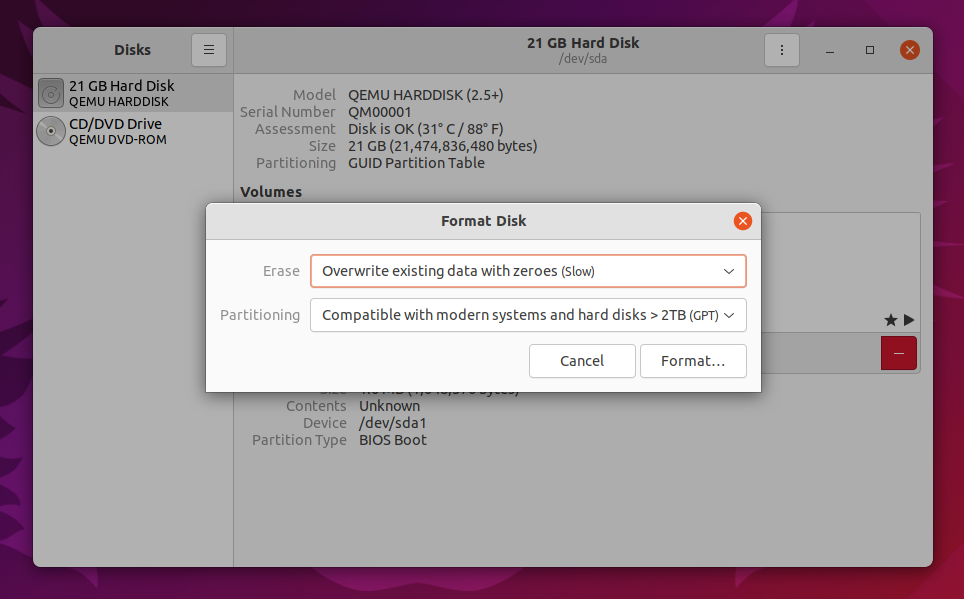
Format Disk lets you reformat your hard drive by creating a brand new partition table and overwriting the old one, causing your system to no longer recognize any partitions that may be on the drive.
You can choose between Quick and Slow options, which simply means that Disks will either just overwrite the partition table and leave the data technically still intact (although unusable without a recovery tool), or it overwrites all data on the drive with zeroes.
The choice between MBR and GPT is a bit more complicated. MBR stands for Master Boot Record and supports up to four partitions (but you can create a logical partition that contains multiple partitions within it, effectively eliminating the limit of four), and up to 2TB hard drives.
GPT stands for GUID Partition Table and essentially eliminates the four partitions and 2TB limitations. So choosing GPT is newer and "better," but there's no reason not to use MBR so long as its limitations do not affect you.
You can also create images of your drive, which make excellent backups. If you need to restore a drive using an image, you can use the utility to do that too. These options are Create/Restore Disk Image. Just be sure that when you create an image, you have another storage medium large enough to hold the image.
If you are curious about just how fast your drive really is, you can benchmark it with Benchmark Disk to see how fast your read and write speeds are, as well as your access time (the time it takes for the drive to locate a file).
If you think your drive has been behaving strangely, you can take a look at the SMART Data & Self-Tests to see if the system can detect any irregularities with the disk.
If it does find some problems, there's probably not much you can do to fix it, but at least you know it's a hardware issue. If the system can't find anything wrong, however, then something else might have caused whatever problem you're facing.
You can apply write cache settings under the Drive Settings option to speed up your drive. Enabling write cache can improve your drive's performance because it forces the drive to put data that should be written into its cache first, and once it fills up it gets permanently written onto the disk.
This is because one write event is quicker than many write events when the amount of data to be written is of the same size. Just be aware that enabling it can cause data loss in the event of loss of power—data that is in the cache but not yet permanently written to the disk will disappear when power gets cut.
Partition Actions in GNOME Disks
As previously mentioned, you can add, remove, and unmount partitions from the partition layout view. You can also click on a specific partition and then the gears icon, which will give you a list of similar actions that affect only the partition in question.
For example, you can format the partition (with both quick and slow methods) to a new filesystem type with Format Partition. You can create and restore images that contain just a partition rather than the whole drive with Create/Restore Partition Image.
Finally, you can also benchmark the partition to see if you can get any performance increases from different filesystem types (such as btrfs) or other factors with Benchmark Partition.
There are a few additional options available for partitions that aren't possible for drives. Under Edit Partition you can choose what type of partition it should be (this is different from actually formatting it with a certain filesystem type).
Use Edit Filesystem to change the partition's label/name. There's nothing else to it.
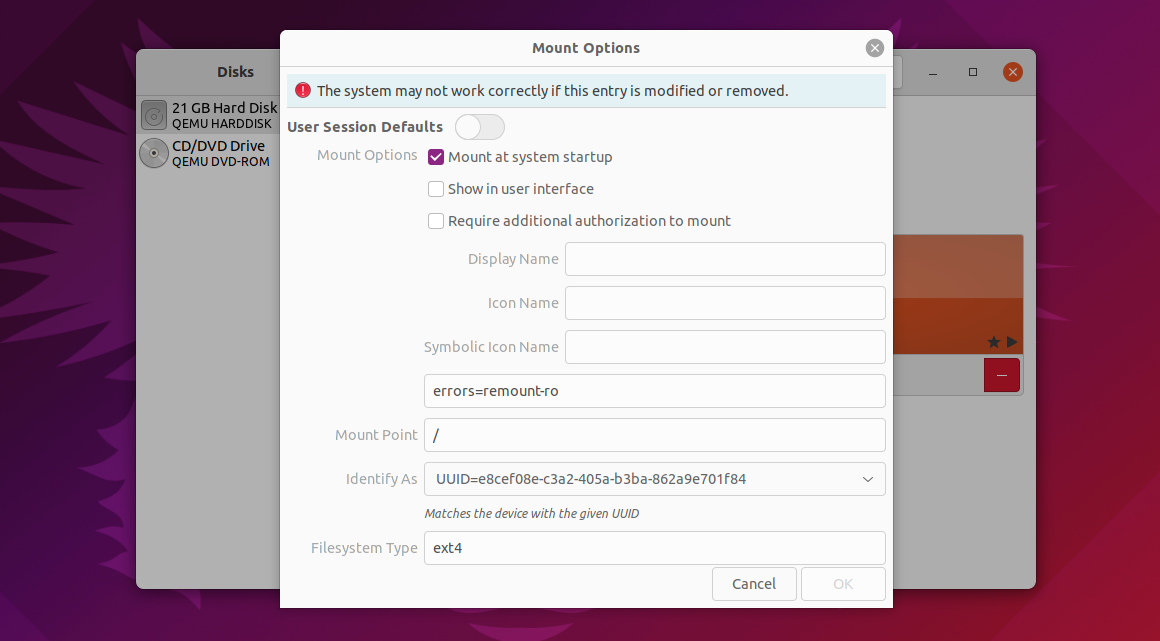
With Edit Mount Options, you can choose to mount the filesystem during bootup and make other changes if desired. You'll want to go here if you added a new hard drive and want the system to mount it automatically.
If you've set up a partition with encryption, you can also edit those settings under Edit Encryption Options.
Mounting ISOs
You can also use the Disks utility to mount ISO images as drives. Just click on the Disks menu that appears when you hover your mouse over the panel at the very top of your screen and then click on Attach Disk Image. Find the ISO image you'd like to mount, and you're done.
Easy Disk Management Comes Included
Disks is a great tool and capable enough to handle just about any disk management task on Ubuntu.
In case you're looking for any alternatives though, check out GParted, a well-established disk management tool. Or you can use one of the many drive management and partitioning tools available for the Linux command line.

