How many times have you installed copies of Windows on a computer following a major hardware change? A case in point is probably Windows XP – although flexible, popular and easy to use, the operating system wasn’t great at dealing with hardware changes, in particular new motherboards.
This shouldn’t come as any surprise, really. Anyone who has built a PC from scratch or had cause to reinstall their operating system should know that there are various drivers that need to be installed. Windows XP had a few problems with this, meaning that the end result of fitting a new motherboard was effectively the same as buying a new computer.
With Windows 7, however, this has all changed, and the operating system should allow you to upgrade your motherboard without reinstalling. Here’s how.
Preparing Your Computer
You will need to make sure that your computer is ready for what is going to be a motherboard transplant.
In order to get started with this, and to prepare for any failures, you should backup all data that you have on your system drive (such as that found in C:\Users\YOURUSERNAME).

After you have done this, audit the applications you are running and make sure you have access to their activation keys. The presence of a new piece of hardware like a motherboard may cause an application to be locked (an anti-piracy function) so you may need to re-enter the key after adding the new motherboard.
It’s also worth removing any premium Adobe software that you have installed, as these will probably fail to work on a new motherboard without reinstallation. The same goes for games.
Drivers & Storage Settings
Depending on the motherboard swap you’re carrying out, you may need to update your drivers. For instance, if you’re swapping an older motherboard with an Intel chipset for one with a more recent version of the same chipset, updating the drivers from the manufacturer’s website should result in the correct drivers being installed for your new motherboard. Manufacturers make drivers available in “supersets” – so although your older driver is present on your hard disk, so is the later one.
Before proceeding, you will also need to check and compare the disk interface settings between the two motherboards. If one is using an IDE driver from a different chipset, for instance, this is going to scupper the project.
Ultimately, this works best for motherboards that are either identical or extremely similar.
Prepping Windows 7 For a New Motherboard
The System Preparation Tool (sysprep) is a Windows 7 utility that can be launched from the command line and used to configure Windows, readying it for a change of host hardware. This can be used for running Windows on a new motherboard or even transferring the hard disk drive into a completely new environment.
Before you begin to install the new hardware, start Windows and then open the Command Prompt as Administrator (type cmd into the Search box, right-click the cmd.exe item and select Run as administrator). Make sure you are not running any other software at this point.

In the Command Prompt window, enter the following to launch the System Preparation Tool: %windir%\System32\Sysprep\Sysprep.exe

From here you will need to select Enter System Out-of-Box-Experience (OOBE) in the System Cleanup Action drop-down menu, checking the Generalize box, and selecting Shutdown below this.
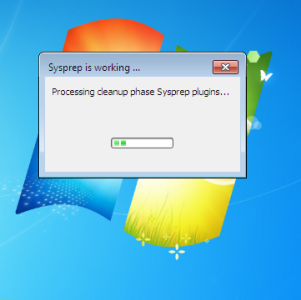
The System Preparation Tool will then set to work – while this is happening, ensure you don’t run any other applications or utilities. Eventually, System Preparation Tool will shutdown your PC.
You can then install your new motherboard, or if you're moving your HDD to a new computer, carry out that process.
Booting Your Windows Hard Disk Drive
With your hard disk drive connected to a new motherboard, and all installation checks made, you can power on your computer.
Don’t be alarmed when you see the Windows boot screen as it will be the "first run" image displaying information that "Setup is installing devices" and other first run processes.
Windows will then require information about your language and keyboard settings, location, etc., before proceeding to the account creation screen. You won’t be able to use your existing account just yet – create a temporary account for now until you reach the Windows login screen.

You can then use your old account, delete the new one in Control Panel > User Accounts and add any drivers that are required (such as GPU, motherboard, etc.)
Well done – you painlessly connected your hard disk drive to a new motherboard!
Conclusion
There are, of course, several requirements to successfully completing this process. You will need to have expertise with adding and removing hardware safely from a desktop computer – if you don’t, find someone who does.
Additionally, being prepared for any sort of data-related disaster is also important, hence the instruction to back-up your vital files earlier. You should also note that Windows may not activate with the new motherboard. In this situation you should contact Microsoft who will provide you with an activation code.
If you have any problems, let us know in the comments, or alternatively, describe your issue to our online tech community, MakeUseOf Answers.