You've got some great new gear that you want to tell the world about. YouTube is your preferred medium and you already have a few popular videos. But how do you get started with video reviews?
It's about more than just talking to the camera. You need a very particular set of skills, and plenty of imagination to make sure that your review leaps out of the browser and into the minds of the viewers.
Fortunately, these skills are straightforward to develop. Within a couple of days, you could go from recording flat, uninspiring face-to-camera reviews to fun, interesting films that show the product off and let viewers see just how good it is.
Capture the Unboxing
As long as you know what the item is you're about to unpack, it's worth setting up a camera and capturing the moment. But you don't want to make the moment so much about you. Rather, you should be filming the actual unboxing.
These days, unboxing videos are big on YouTube. We're not suggesting that your video review should be an unboxing video, but if you can record the footage, it can be used in two ways.
- Use it as a pure (but short) unboxing video, released as a teaser to your main review.
- Include the footage in the final edit of your video review.
Unboxing is too important an element to ignore, so take the time to make it a part of your review.
Use the Product
Realistically, you cannot hope to convince someone of a product's merits (or otherwise) if you haven't used it properly. As such, before you start even making an outline or script (see below), you need to spend a bit of time playing around with the item.
Is it makeup? Then try it on. Electronics and tech should be plugged in, booted up, and played around with for a few hours (preferably a few days to get a better idea of the device's merits). Video games should be played as much as possible (no one wants a review of the first level).

Play with toys, read books, cook with pans. Basically: USE THE PRODUCT.
Just don't be one of those YouTube videos where the reviewer did nothing. Using the product gives insight and opinion -- this is what your viewers are looking for.
Don't Forget Disclosure
Where did you get the product from?
If the item you're reviewing was something you bought, you should mention this in the video, if not in the intro than near the start. However, if it was sent to you from a supplier or manufacturer, things can start to get a little delicate.
You basically need to make it clear from the off that the item -- a full piece of hardware, or a small sample of something -- was sent to you with the express purpose of a review. Keeping this to yourself (not disclosing) will damage your reputation, and that of your YouTube channel, when it eventually comes to light (and it probably will).
In short, keep it real, keep it honest.
Use Good Hardware
You need to show the product in use, which means getting a decent DSLR camera (a top-end smartphone camera is good enough if you're just getting started), a tripod (smartphone tripods are a must-have accessory), and a microphone.
Built-in smartphone mics are not good enough. Neither are webcam mics or those built into your laptop, monitor, or tablet. Good quality mics can be bought without breaking the bank, but for the best results, you'll need to spend money.
While you're thinking about hardware, it's a good idea to have an additional battery for your camera, and/or a portable battery charger for your smartphone.
Before You Record, Make a Script
Actually, you need two scripts. The first should be your dialogue and the second should be a shooting script that outlines the different types of shots (and any images) you'll include in the edit.

If you don't want to write a full script, then you can save time by using a cue card approach, addressing various talking points in the video. To do this successfully, however, you should be familiar with the product, which takes us back to the point above -- make sure you've used it!
Templates for standard scripts and shooting scripts can be found online, or you can use a dedicated scriptwriting tool.
What sort of shots should you include?
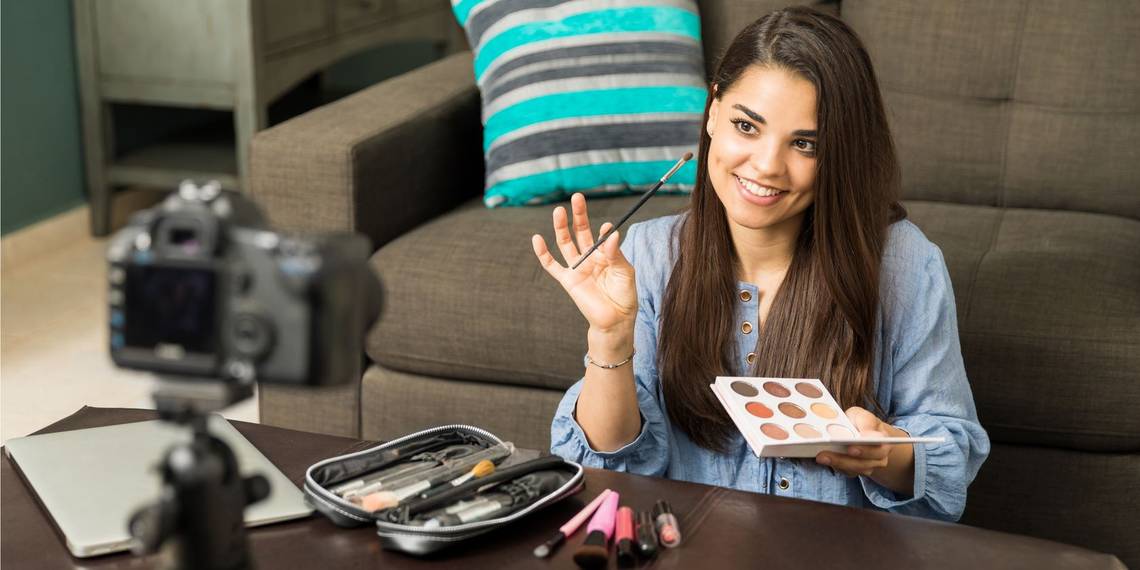
Show Yourself
The main shot you to include should be of you and the product. Make it clear that you have the product in your possession, that you've used it. Look at it, and hold it -- unless it's something you didn't like, this should look comfortable.
In the subject of looking, try and look at the camera as much as possible. There's a good chance you won't use most of this material (the other shots you use should be inserted throughout at the editing stage), but it's good to direct your gaze at the viewers, so they feel as though you're talking directly to them.
If your product requires some demonstration that you can be involved with (clothes, makeup, etc.), then this should also feature you. It's your review, make sure you're in it!
Get the Right Shots
Along with footage of you telling the audience about the product, you'll need to film the item in use. This might be makeup being applied, shoes being tried on, a game being played, phone display being thumbed… usual stuff. Indeed, it's possible to make it all look very dull. However, an original approach can make interesting
Be clever with your camera angles. Rather than take the obvious shot, drop to your knees with the camera, and capture video from low down. Or go high. Or ultra-close. Similarly, be inventive with backgrounds (these should typically be out of focus) and framing.
If the product you're reviewing is mobile in some way, get plenty of footage of it moving. If it doesn't move on its own, make it move in some way, either by moving it, or getting some motion in your shots. A selfie stick can work here for smartphone cameras, while handheld dollies and other useful gear can be bought for giving DSLR cameras a more mobile approach.
Getting this right can be tricky and will take practice. Check out Peter McKinnon on YouTube for some great photography tips.
Take Some Stills, Too
Don't forget to take photos to accompany your video footage. Again, these should be an inventive collection of stills, close-ups, the product in use, viewed from an unusual angle, etc. Use your imagination and take far more than you will need.

Your video software should enable you to import the images into the edit. There are various ways in which you might do this. For instance, you could simply drop a still into the timeline and specify a duration for it to appear. Alternatively (and this will depend on your editing software) you can include images in their own little slideshow within the video. Many video editing suites offer tools that replicate the "Ken Burns Effect", panning and zooming on still images on the timeline.
Encourage Your Audience With a Call to Action
Remember, you're talking to a bunch of strangers on the web. They're watching because they're interested, so give them the chance to get involved! Rather than leave them hanging, give the viewers something to do.
If the item will change their lives, tell them how. Is it something they can try out easily? Ask them what they thought. YouTube has ample space for comments for them to leave feedback.
And if there is anything else the viewer can do, such as check out the product website, give them the details they need. This information should not be limited to the video, either. Give the finished product a detailed description on YouTube.
You'll Need a Video Editing App
As mentioned previously, all the video, stills, and even audio will need to be edited together to produce a finished review. How to do this is beyond the scope of this guide, but you'll find some great tips by looking at some YouTube product reviews produced by the MakeUseOf team.

You should also take some time to gain familiarity with your video editing suite of choice. If a new application is beyond your budget, try one of the various free video editing tools that are available. Online video editing tools are also available.
When editing, you should also consider things like soundtracks, captions, and other graphics, and perhaps even an intro segment or splash if you're regularly producing videos.
For a less polished but more immediate review, you might prefer to leave everything to an app on your smartphone if you're using this as a camera. This will certainly enable you to instantly upload the finished product to YouTube from wherever you are (data plan limits notwithstanding).
You're Ready to Tell the World
By now, you should have an idea of what you need to bring your review to life. Good equipment is not completely necessary, but capable editing software is. You should know how to use the software, how to photograph and film the product, and be aware of how to display captions in the edit.
Finally, you should now be ready to tell the world just how great that toy/console/makeup/book is.
Have you made a review for YouTube? Could these tips and tricks have made the video better? Or have you already developed your own production standards for video reviews? Tell us below!
Image Credit: antoniodiaz via Shutterstock.com