I recently suggested that users looking to jump ship from Windows XP should consider a Mac instead. While I still think it's a good idea, plenty of readers called me crazy; not everyone wants to learn to fly by jumping off a cliff. Those who want something more familiar can always turn to Windows 7 instead, and you can make it look almost identical to Windows XP with a few quick modifications.
Step 1: Download The Luna Theme
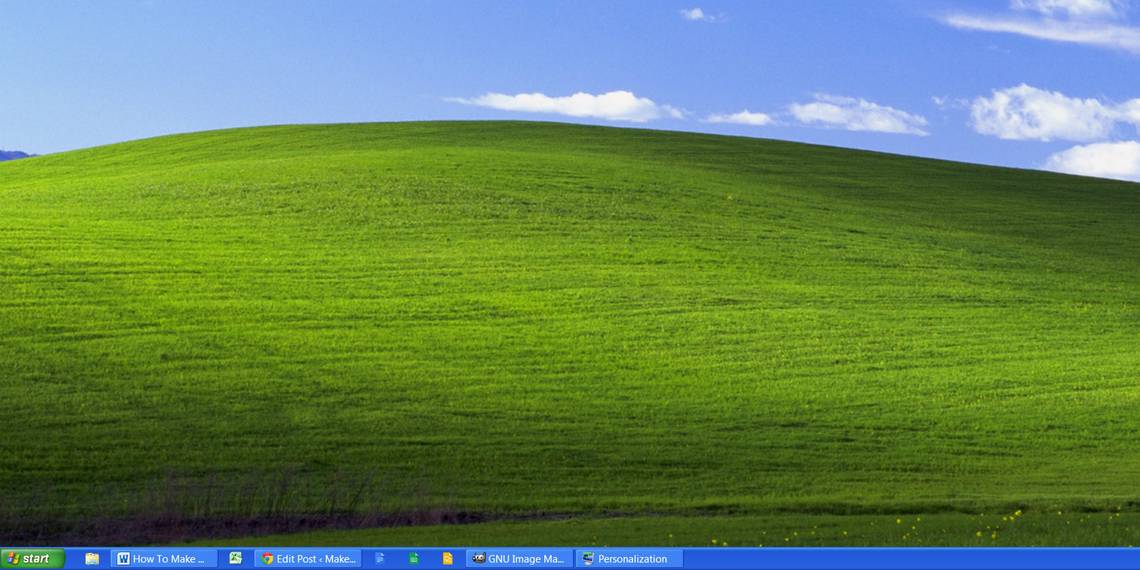
The default look that most Windows XP users are familiar with is the Luna theme. This includes the blue taskbar and the desktop background of grassy, rolling hills.

Windows 7 does not include this theme, but you can grab it from DeviantART, where a user named Satukoro has put together a popular re-creation. You can't use the .zip file yet, though, so set it aside for now.
Step 2: Download Universal Theme Patcher
Now you have the Luna theme, but Windows 7 does not fully support third-party themes by default. To use it you need another program called Universal Theme Patcher. You can grab this from Theme Bin, TCP-Z and a few other websites. Many other websites hosting this utility try to install adware alongside it, so be careful what you click.
Step 3: Install Universal Theme Patcher
Opening the UTP zip file will present you with two executables. One will have x86 in its file name, the other x64. Remember that x86 is for 32-bit Windows installations, while x64 is for 64-bit installations. Install whichever is appropriate for your PC.

The installer will present a window telling you what version of Windows you're using and how many files need to be patched. Click Yes to continue.
Now you'll see an interface with three sections. Each lists a file that must be patched. Click each patch button, and then restart your computer.
Step 4: Install The Theme Files
Now find the Luna theme .zip you downloaded and open it. Also open Windows Explorer and navigate to C:\Windows\Resources\Themes. Copy the files from the zip folder's themes folder into the \Themes directory.

Right-click any empty space on your desktop and open Personalize. In the window that opens you should see a new Installed Themes category, which includes Luna and Luna Aero. Pick Luna for that pure XP look.
Step 5: Adjust The Taskbar
That's more like XP! But wait - you're not done. There are some things that the theme won't change, and we need to fix them, beginning with the taskbar.
Right-click the taskbar, click Properties, then change the following options in the window that opens.
Use small icons: Turn on
Taskbar buttons: Set to Never combine.
Notification area: Customize so that most icons are turned off, or adjust to your preference.

Apply those changes and close the window. You'll now see a taskbar that's very similar to Windows XP. Some icons may linger because they're pinned, but you can remove them by right-clicking the icon and then hitting Unpin this program from taskbar.
Step 6: Download And Install Classic Shell
To finish up the changes, you'll once again have to move beyond the default options. Fortunately there's a program called Classic Shell that can change core interface features. Go to the Classic Shell website, download, and then install it. This should be simple; there's no x64 version or adware to worry about.
Step 7: Change Start Menu Style To Luna
Open the Classic Shell Menu Settings application. When you do so, you'll see the Start Menu Style tab selected. Begin by selecting the Classic with two columns option.

Now go to the Skin tab. Click the drop-down option and selection Windows XP Luna. The skin applies automatically when you select it. You can play with a few other options, like turning user name on or off. I'll leave those up to your preference.
Step 8: Change The Start Button
Now you're close. You may notice that the Windows 7 start button remains and Classic Shell doesn't provide an XP look-alike. Don't worry. Check out the Classic Shell Forums and download the XP-style start buttons provided by the community. Save the image to your download folder or some other familiar location.

Now open the Start Button tab in the Classic Shell Menu Settings application, click the Custom radio button option, and then click […] next to Button image. Navigate to where you saved the XP-style Start image and select it.
Step 9: Change The Look Of Windows Explorer
You're almost done. Open the Classic Explorer Settings utility (it's in the same folder as Classic Shell Menu Settings). In the resulting window you'll see the Windows XP Classic option at the top. Select that.

Personally, I find this setting's default buttons to be unrealistically large, so I suggest hitting the Show all settings checkbox. This will reveal a number of tabs, one of which is Toolbar Settings. Open that, then un-check the Big buttons box.
Now click OK to exit the utility. Close Windows Explorer (if it's already open) and then re-open it to see your changes.
Step 10: Enjoy Sweet Victory!
If you've followed these steps precisely, you'll end up with an incarnation of Windows 7 that's strikingly similar to Windows XP. You'll find there's surprisingly little compromise to this approach. The revised start menu, taskbar and Explorer should be smooth and stable.
You can further customize your experience by dinking around in Classic Shell. Your imagination is the limit, as the tool lets you change font sizes, spacing, button size, button type, and much more. These settings can be used to further emulate XP or to customize Windows to your liking.
Do you think Windows 7 looks good in XP's skin? Let us know in the comments!