
Microsoft PowerPoint has a little feature tucked away in the Ribbon called Set Transparent Color that can remove the background from an image and turn it transparent. This tip is handy when you want to make infographics with PowerPoint using inserted clipart images.
This tip works on inserted images only. It does not work for images inside shapes. If your image is inserted in a shape as a fill, the Set Transparent Color option won't be available. Here's how to work it. The screenshots are from Office for Mac, but it's all the same for Office on Windows.
How to Change Image Transparency in PowerPoint
- Select the picture or fill background for which you want to change the transparency.
- Select the picture with a double-click. The Picture Format toolbar is displayed on the Ribbon.
-
Go to Picture Format > Color. Click the little arrow next to it and select Set Transparent Color from the dropdown menu.
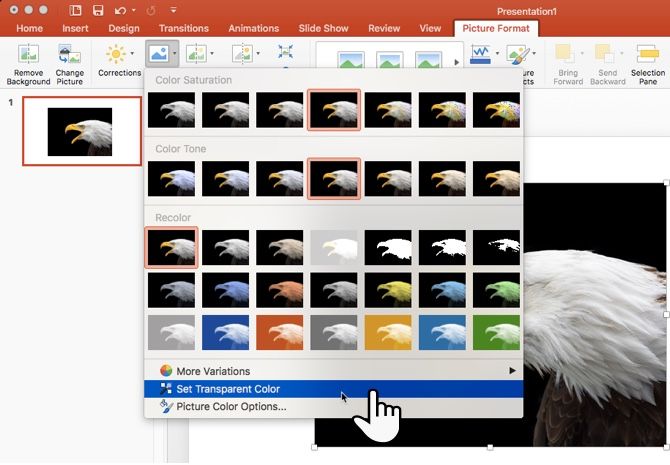
- When the pointer changes, select the color in the image that you want to be converted to transparent.
-
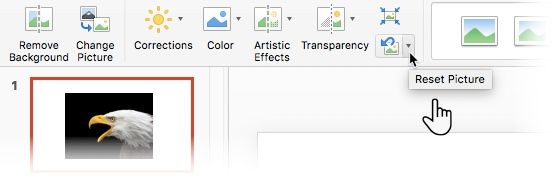
To revert the color changes, click Reset Picture icon in the same group.


The Set Transparent Color tool isn't perfect. It's not precise like the Eyedropper tool in Adobe Photoshop. It also gives you two more problems to tackle:
- When you repeat the process with a different color, it will remove the transparency from the first color.
- It also removes the color you choose for transparency if the same color is located within the main picture.
You can't do much about problem number one. But there's a workaround for the second handicap -- you can protect the same color within any area you don't want to turn transparent.
Protect Image Colors With Shapes
Draw a Freeform shape to cover the area of the picture you want to preserve that also contains the transparent color:

Fill this Freeform shape with the color that was made transparent (black here) and move it behind the front image but in front of the background. Right-click on the shape and select Send to Back > Send Backward.
Then set the transparent color.
In older versions of PowerPoint, this feature worked on PNG and GIF files only. Now you can turn to this even on PDF and JPEG images. Again, solid colors will give you the best results.
Do you wish Microsoft makes color selection slightly more powerful? How do you creatively set the transparent color in a PowerPoint image?