The work of perfecting the look and feel of your Windows desktop is never done. For some, changing the background wallpaper is enough to quench the itch of customization. For others (like me) looking for the next best way to customize your desktop experience is something of a passion.
One of the greatest exercises in customization is creating a live and interactive Windows background. Programs like highly popular Windows application Rainmeter are a godsend for the geek who enjoys spending hours customizing an immersive desktop.
But why spend hours fiddling with Photoshop, when with these simple tricks you can have an impressive live background in minutes?
Install Rainmeter
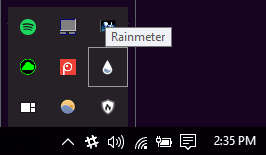
Once you installed and launched Rainmeter, it will work in the background and can be accessed in the system tray near the Taskbar clock.
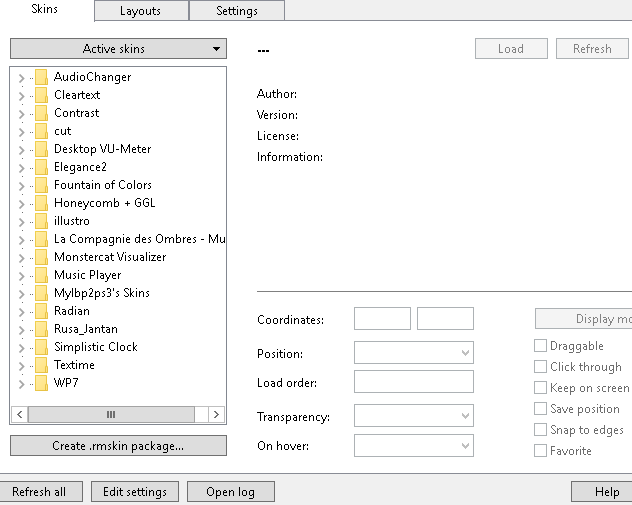
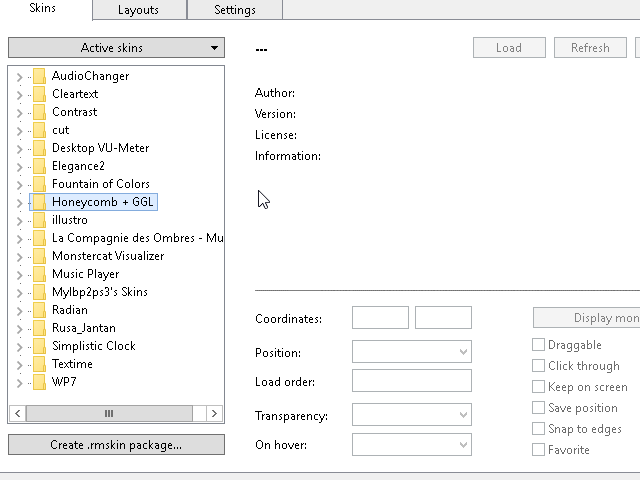
Before messing with Rainmeter, it's best to familiarize yourself with its features. The Rainmeter manager has three categories: Skins, Layouts, and Settings. The skins menu holds all of your icon packets and tools and will be used the most when customizing your desktop. You can add new skins and folders to this menu in This PC > Documents > Rainmeter > Skins.
Rainmeter uses INI files to create custom icons and skins. The best feature of INI files is their easy editing, as INI files open with any text editor and their parameters are easily changeable.
1. 3D Sound Visualizer Effect
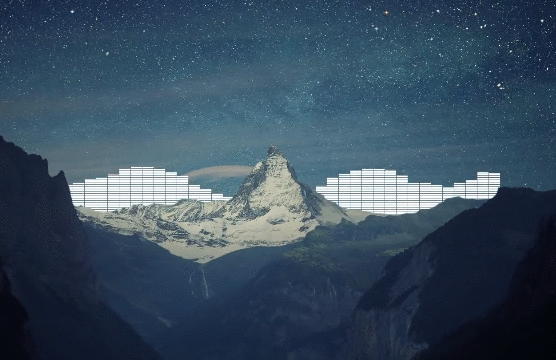
Our goal is to imitate the visualizer effect seen below:
The foreground of the wallpaper obscures the Rainmeter sound visualizer, which creates a cool 3D effect with the wallpaper. Although it may seem complicated, the process for this is both easy and lightweight on your computers processing power.
Step 1: Pick a Background
Pick a wallpaper that has both foreground and background elements from the get-go. The example above shows a white and blue mountain with a blue sky, which goes perfectly with the white sound bars. Color scheme is also important, but not necessary.
I've picked out a minimal wallpaper from Simple Desktops, which provide hundreds of free, minimal desktop wallpapers. In order to facilitate the process, create a folder named cut in the Rainmeter Skins location (This PC > Documents > Rainmeter > Skins) and save your wallpaper to this folder.
The simpler the background, the better; this particular desktop wallpaper is only composed of three colors and uses one color as the foreground. This will make it easier to edit, so we can create the proper 3D effect.
Double-click the wallpaper to open the Windows 10 gallery. Right-click Wallpaper > Set as > Set as background to set the first layer of your background.
Step 2: Cut Out the Foreground
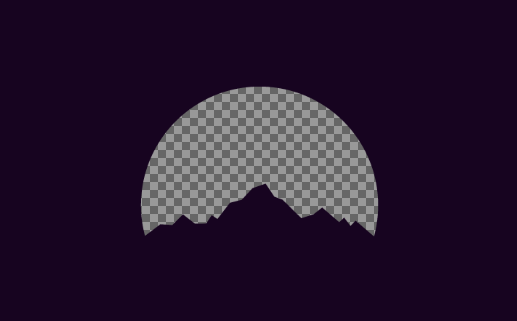
In order to block off the parts we want, create a copy of your wallpaper and edit it by erasing the background of the image. Using the image editor of your choice, erase the background from the wallpaper. I am using GIMP, a free and dynamics image editor. You can use a Wand or Color Select tool to select and cut the background from the image. (It's even easier if you use Photoshop.)
Once you've cut out the background, save or export the file as a PNG in order to preserve its transparency. If the part you cut out looks white or black in a thumbnail, don't fret; your image is still cut out. Name this edited file anything you'd like, but try to name it something you can remember.
You can view the file extension in the file name under Windows key + X > Control Panel > Appearance and Personalization > File Explorer Options > View > Uncheck Hide extensions for known file types.
Step 3: Create the INI File
Next step is to create the INI file, which will add our newly made background onto the background. In our cut folder, right-click in the window and select New > Text Document. Open the file and add the following:
 [Rainmeter]

            Update=-1

            [Background]

            Meter=Image

            ImageName=wallpaperfilename.png

            W=resolutionwidth

            H=resolutionheight
The Update=-1 parameter prevents the background from updating automatically, which decreases the processor use of the skin. The Background parameter lists the type of meter (ergo Rainmeter) and references your edited wallpaper. Change wallpaperfilename.png to your wallpaper's actual file name.
The W and H parameters stand in for your monitor resolution. Replace resolutionwidth and resolutionheight with the appropriate numbers.
When you're done, go to File > Save As and save the file under whatever name you prefer with the added extension .ini at the end.
If every parameter is correctly entered, Rainmeter will be able to read the INI file and show up in your Configuration panel. Click on the drop-down menu beside your cut folder and double-click the INI document to load the skin.
Next, adjust the Rainmeter settings for your cutout wallpaper.
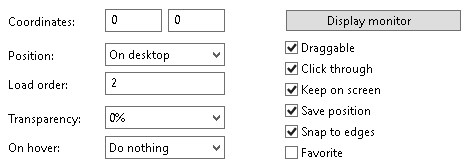
Set the Position to On desktop and the Load Order to 2. The position will set where the wallpaper should be placed, and the load order will layer your skins so they achieve the desired effect. Check the Click through option to dismiss right-click options.
Note: Opening the Rainmeter options will temporarily hide your task bar behind your edited wallpaper. Rainmeter assumes you are editing your skins content. Close your Rainmeter options to reveal the Taskbar properly.
Step 4: Download the Sound Visualizer Skin
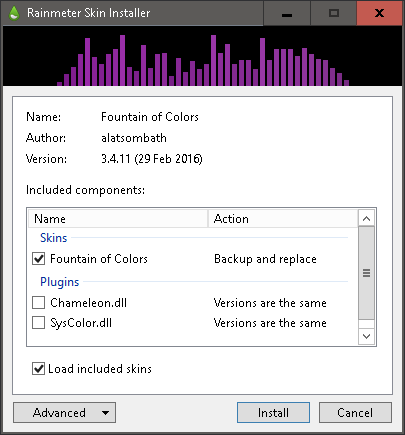
To finish the effect, download a Rainmeter sound visualizer skin. I prefer using Fountain of Colors for its extensive customization options and sleek design. Download and run the MRSKIN file to get started.
Load the Fountain of Color INI file in your Rainmeter settings. Place the skin on or near the cutout area of your wallpaper. Change the Load order to 1 so it's loaded before your cutout and change its Position to Bottom.
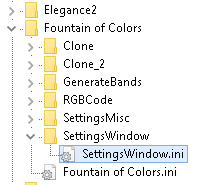
Optional: Fountain of Colors makes it very easy to change the color of the visualizer, creating dynamic color ranges for an enhanced look. In the Rainmeter program, open Fountain of Colors > SettingsWindows > SettingsWindow.ini to access the settings.
The easiest way to pick an aesthetically pleasing color for your sound visualizer, is to toggle the Wallpaper colors - Avg option, which gives your sound visualizer the average color of your wallpaper.
Step 5: The Finished Product
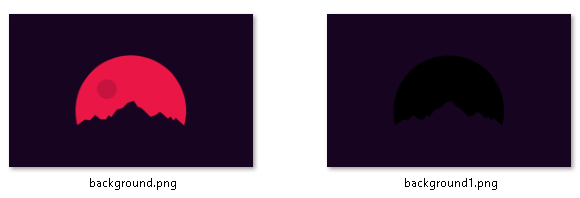
Here is the effect without the visualizer color change or layering.
Here is the effect after color change and layering.
You should have the desired effect with your own background and sound visualizer. If not, remember to check the layering settings in the Rainmeter window.
2. Mouseover Background Change Effect
This effect is great for adding a mouse over feature to your desktop.
Download the popular Honeycomb Rainmeter skin, which comes with preset icons and background. Simply install and load Honeycomb's INI files to create the mouseover effect.
A more difficult method is shown below, which allows for custom icons and backgrounds along with the addition of logo PNG files. Nevertheless, it is very similar to the 3D Rainmeter effect method.
It may take a little longer, but learning the ins and outs of Rainmeter is an invaluable skill, which opens up a world of customization opportunities.
3. Video Wallpaper
For those who would rather have continual movement in their background, you can play videos as your wallpaper using VLC. Usually treated as a top-notch video and music player, VLC also has the capability to set videos as wallpaper. It's as easy as opening up a simple video in VLC and going to Video > Set as Wallpaper. Here's an excellent example by reddit user /u/teebane:
While this is just one method of creating a live wallpaper, there are many others ways to create animated live wallpapers for Windows.
Breathe Life into Your Desktop Background
I'd like to thank the sub-reddit community of /r/rainmeter, which provides continually updated inspiration for new Rainmeter skins and techniques.
Why settle for a boring, static background when you can make your desktop experience that much more dynamic? All of these methods have been thoroughly tested for both performance and low processor usage, so you can enjoy your live wallpaper without much lag on your computer.
Note that if you don't want to use Rainmeter, you can still set an animated GIF as your wallpaper using other tools and methods. And if animated wallpaper isn't for you, check out these striking dark wallpaper sites for your desktop instead.

