Are you fed up with performing the same repetitive tasks in Premiere Pro? Do you often find yourself getting bored and wasting time with mundane and repetitive edits, instead of the fun and creative challenge of producing a video?
Premiere Pro presets are an excellent way to automate repetitive tasks and to free yourself to work on the creative side of editing. Here's everything you need to know...
Working with effects in Premiere Pro can be demanding on your computer, so if your computer is struggling to cope you should learn about offline video editing.
Why Use a Premiere Pro Effects Preset?
Effects presets can save you a large amount of time.
If you're a video editor or YouTube content creator, you may have dozens of effects or common editing tasks you perform on every video. With effects presets, you can speed up your workflow into a one-click process. Here are some common editing tasks I perform when editing some of our review videos here at MakeUseOf:
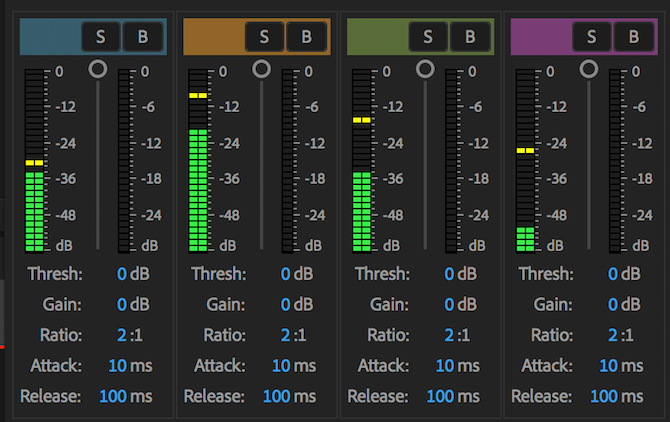
- Apply EQ, compression and adjust the gain on a voiceover
- Apply a narrow 300 HZ cut to background music
- Animate keyframes for rotation, scale, and position
These edits only take a few minutes each, but over the course of a whole video edit, they can add up to hours. It may sound clichéd, but time is money when it comes to video editing, and saving two to three hours on every video leads to a huge increase in time and productivity over the course of several weeks and months.
How to Make Your Own Presets
In order to save your own presets, you need to use the Effect Controls Panel and perform an initial edit. This could be a speed ramp, a creative transition, or even a simple volume boost.
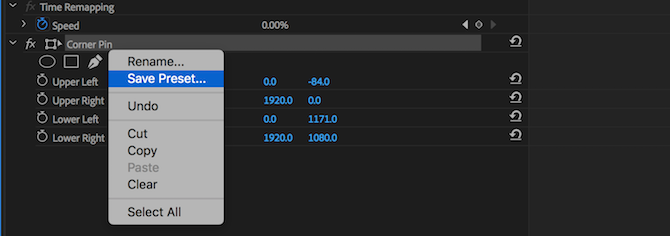
For this example. I've used the Corner Pin effect:
Creating a preset from a single effect is very simple. Right-click on your effect name inside the effect controls panel, and choose Save Preset:
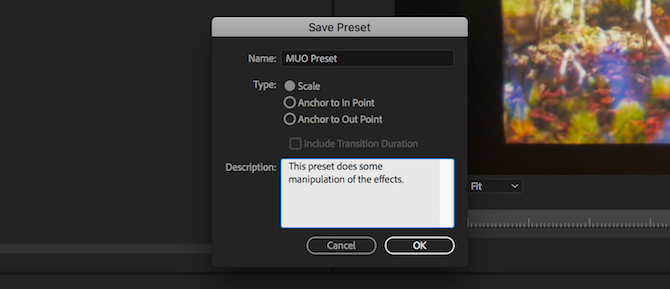
You'll be prompted to enter a name and description. Enter some suitable text, and leave the Type at the default of Scale. Press OK and you're done. Your very first preset is complete, in less than 30 seconds.
If you'd like to save multiple effects into one preset, hold the Command key on macOS, or the Control key on Windows, and click to select multiple effects. When an effect is selected, it will turn light gray.
When it's time to use your preset, you'll need to open the Effects panel, found in the Window > Effects menu. Expand the Presets folder, or use the search bar to find your preset.
Click and drag your preset onto your clip on the timeline, or select your clip, and then click and drag your preset onto the Video Effects section of the Effect Controls panel. The effects control panel will now show all of the effects, settings, and keyframes you created when you first saved your preset.
Advanced Presets: Setting Anchors to In or Out Points
When creating a preset for the first time, you're prompted to specify a Type, which defaults to Scale.
This type is only used when you have used keyframes in your preset. It defines the duration and handling of keyframes when the preset is applied.
When you use Scale, Premiere Pro will adjust the effect duration depending on the length of your clip. If you created your effect with a 24-frame duration, and you drag it on to a clip with a 48-frame duration, then Premiere Pro will extend the effect to cover the full 48-frame duration.
This is good most of the time, but it may not always be what you want. The types Achor To In Point, and Anchor to Out Point both anchor the effect to the In or Out point respectively. This will maintain the duration you defined at creation.
If you create a keyframe with a duration of 24 frames and anchor it to the In point when applied, your clip will start the preset at the beginning of the clip, and then continue for 24 frames.
If anchored to the Out point, the preset will begin 24 frames before the end of the clip.
These types are a very powerful way to configure your presets. If you're still unsure how they work, the best way to learn is to create presets with each of the types selected, and then drag them onto a clip and inspect the keyframes inside the Effect Controls panel.
How to Modify Your Own Presets
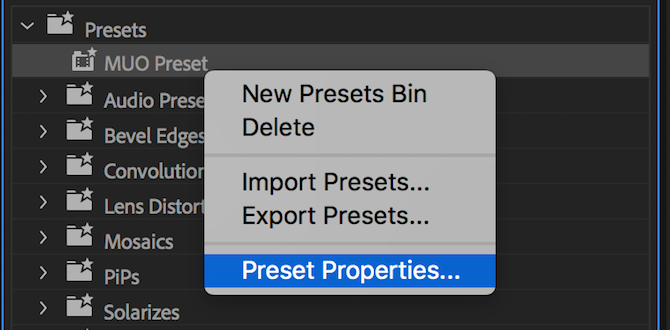
If you'd like to change a preset name, type, or description, all you have to do is Right Click on your preset inside the Effects panel, and choose Preset Properties. You'll be presented with the same menu you used when you originally created the preset.
If you'd like to change effects or effect properties within a preset, you have to create a new preset based on the old one. It's a straightforward process:
- Drag your preset onto a clip.
- Modify the effects properties.
- Create a new preset with your changed effects.
- Delete the old preset.
How to Import and Export Your Custom Presets
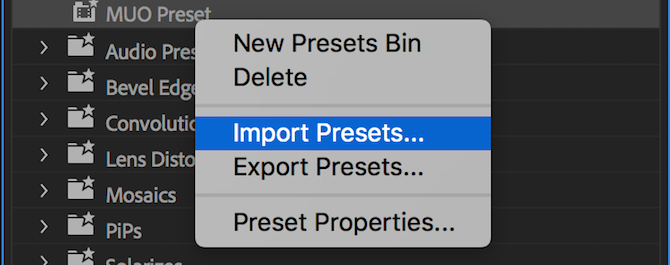
It's a very simple process to import or export your custom presets. Start by Right Clicking inside the presets folder in the Effects panel. Choose either Import Presets or Export Presets.
Adobe Premiere Pro will prompt you for a file location. Choose a folder to store your presets (if exporting), or a previously exported file (if importing). Press OK and Premiere Pro will populate your presets folder, or generate a file containing your presets.
How Much Time Will You Save?
Now that you know just how easy it is to use presets with Adobe Premiere Pro, there's no reason not to use them. From working with LUTs to cutting a video into clips, there are numerous tasks that can benefit from custom preset creation.
Once you've mastered presets, find out how to keep Adobe Premiere Pro projects organized.

