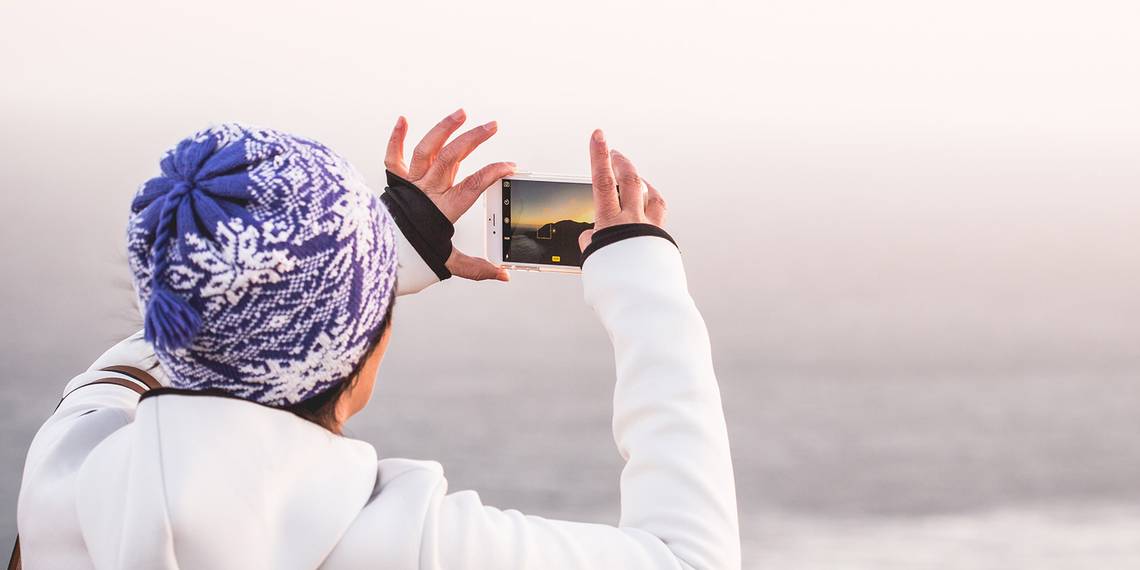
According to Flickr, the iPhone is the most popular camera in the world. Apple is so proud of their cameras that they proudly display "Shot on iPhone" images in their retail stores, and even formed an advertising campaign centered around that.
But there's more to taking great smartphone pictures than first meets the eye. First you've got to understand your equipment inside and out, then you need to be prepared to push it to the next level with the right techniques and apps.
With good photos, you might even be able to make some money out of your photography habit.
1. Launch Your Camera Quickly
It might sound cliché, but the best camera is the one you have on you. Being quick is often paramount of capturing a great shot, which is why you should launch your camera from the iOS 10 lockscreen with a simple swipe to the left.

If your phone is already unlocked, you can also swipe up to reveal Control Center and launch your camera from there too. This is a lot quicker than manually tapping an icon on your home screen (in fact, go ahead and bury that icon somewhere).
2. Zoom With Your Feet
Unless you have an iPhone 7 Plus, which features a dual camera with a 2x optical zoom, you shouldn't rely on digital zoom for composing your shots. Digital zoom stretches pixels and results in a gradually worse quality image the further you zoom in.

Many professional and enthusiast photographers prefer prime lenses when taking pictures. These use fixed focal lengths, and thus do not offer any zoom. Think of your iPhone in the same manner, as a prime lens that requires you to move around and get physically closer to your subject in order to have them occupy more of the frame.

The iPhone camera has a focal length equivalent to around 30mm on a full-frame SLR camera, which makes it a very versatile lens. It's great for landscapes and cityscapes, but also makes a solid portrait lens when used closer to your subject. Ultimately it's good all-around, but you'll need to get up and move to make the most of it.
3. Use Grid & Auto HDR
Head to Settings > Photos & Camera and you'll be able to turn on the Grid. This overlays a 3x3 grid of squares on your viewfinder that allows you to compose photos in accordance with the rule of thirds. Essentially you want to arrange your subject or other interesting parts of your image on the same axis as the lines you see on your screen.

The rule isn't golden, and you shouldn't aggressively stick to it at the cost of a good shot. I also find the grid is handy for centering images, getting a straight horizon, and generally composing interesting images. Another feature you'll want to enable from the Camera app is the Auto HDR function -- just tap HDR and choose Auto.

HDR stands for High Dynamic Range, and it's a feature that uses multiple exposures to increase the dynamic range of your image. This means that you'll get more information in the highlights and shadows within a single image. While many SLR users take the HDR thing a bit too far, the iPhone implementation is subtle and rarely looks overdone.
4. Use Burst Mode for Action
Often overlooked and forgotten, your iPhone has a pretty competent burst mode that you can take advantage of by pressing and holding the shutter button. Generally speaking, the newer the iPhone, the bigger the buffer, and the more shots you can take.

This is a really handy feature for capturing action, fast moving targets, or when you absolutely don't want to miss a moment and ruin a photo with a badly timed blink. Once you've taken your shot, head to the photo and tap Select... to choose your favorites. You can then discard the rest for best use of available space.
5. Avoid the Flash
Even with a TrueTone flash, which balances for skin tones, the iPhone LED often results in disappointing images. It can often fire when you least expect, it's weak, and as it faces the same direction as your lens, it often washes out detail with a harsh rear-facing beam of light.

For this reason, it's often better to just disable it: open the Camera app, tap the "lightning" flash icon and select Off. A better idea is to use an external or natural light source, like a window. Another tip is to use a friend's iPhone in "flashlight" mode (swipe up and select it from Control Center) which you can use to light your subject from a more forgiving angle.
6. Lock Focus, Adjust Exposure
Tap to focus is a great feature, but the iPhone often decides to refocus even when you've selected your subject. Conquer this by tapping and holding to lock both focus and exposure. From here you can slide your finger up and down the yellow box to adjust the exposure and get your shot just right.

This is great technique for use in challenging lighting conditions, like shooting sunsets or when your subject is dark and throwing the rest of the scene's exposure off. Practice really makes perfect, and it's often a good idea to take a few shots at different exposures to get a handle on what you can achieve (and have a good choice of images to use later).
7. Triggering the Shutter
Your iPhone can closely mimic the form of a traditional point and shoot camera when you hold it like one. You can use the volume buttons on the side of your device like a traditional shutter, but you'll still need to tap to focus first. This also works with burst mode, and it's arguably a much more comfortable position than using your thumb to hit the on-screen shutter.
Another trick is to use remote volume buttons on earphones (like the ones that came with your iPhone) as a shutter. This is great if you're shooting with a tripod or trying to get an interesting angle.

Apple Watch users should also remember that their wearable can launch and fire the iPhone camera, and it even includes a handy preview of what the camera sees. Pair it with the three second timer, else you'll look like you're always checking the time in every picture you shoot.
8. Don't Forget Third-Party Apps
If you want a little more control over your exposures, consider ditching Apple's stock app for something else. Camera+ ($2.99) probably offers the best bang for your buck, with fully manual controls, an intuitive editing suite, and accompanying Apple Watch app. If you need something a little more powerful, Obscura Camera ($4.99) [No longer available] focuses more on the ergonomics and interface side of things.

Apps like this provide a greater level of control over the scene than simply being able to lock focus and adjust exposure. Camera+ allows you to manually select a low ISO to reduce noise, or choose shutter speed to avoid (or force) blurring your shot when the scene contains movement. You can pick your own white balance and lock it, and adjust the exposure value for the whole scene to get a lighter or darker shot.
The only problem with third-party apps is that they're not as readily available as Apple's own app, which requires only a swipe on the lockscreen to access. To help combat this, some include dashboard widgets, which make launching the app a lot quicker (but you'll still need to unlock your device with a fingerprint or passcode first). If you're obsessed with selfies, there are apps for you too.
9. Some iPhones Shoot RAW
iOS 10 introduced what is possibly the biggest improvement to iPhoneography in years: the ability to capture RAW. When you shoot images in RAW, you don't necessarily capture an image file but a dump of data. This data is then rendered by your device, allowing you to make changes to your photo before creating lossy (JPEG) images for sharing online.
This gives you a lot more freedom in terms of post-processing your photography. You can make big changes to your image by adjusting parameters like exposure and white balance, and scrape a lot more detail out of the shadows and highlights to improve the dynamic range of your image.
Unfortunately, not all iPhones are capable of RAW capture. You'll need an iPhone 6s (or Plus), SE, or 7 (or Plus) in order to shoot RAW images. You'll also need an app like Obscura Camera ($4.99) or Adobe Photoshop Lightroom (Free) in order to capture images in this format, though the default iOS Photos app can be used to edit your shots if you like.
Note -- RAW images are much larger than JPEGs, so make sure you move your images elsewhere to regain space!
10. Consider Accessories Too
There are a lot of accessories out there for iPhone photographers, but none of them are necessary to take great photos. These won't make up for a lack of creativity or skill. You'll need to practice and try new things to take great shots. But if you can afford it, there are plenty of accessories to experiment with.
Depending on your style of shooting, you may benefit from a tripod. Depending on what you go for, you might need a tripod mount like the Joby GripTight ($20/£8), which comes with a tiny stand and even fits the Plus-sized iPhone. When paired with a compact yet sturdy Gorillapod SLR ($60/£55), you can mount your iPhone virtually anywhere -- great for stills and video.
Aftermarket lenses can also expand your photographic horizons, with macro, fisheye, wide, and even telephoto lenses available. Olloclip and Moment seem to make the best quality lenses, but prepare to lose some sharpness in your image if you're thinking of going this route.

Do You Love iPhoneography?
Are you addicted to snapping pictures on your smartphone? The barrier to entry for photography has never been lower -- we all have highly competent point and shoot cameras in our pockets these days. The best way to improve as a photographer is to keep shooting with whatever you have available. Hopefully the tips and advice above will help you do just that.
What are your top smartphone photography tips? Let us know in the comments!