Face ID and Touch ID on iPhone and iPad give you a great balance of security and convenience. They're less annoying than typing a password or PIN, yet still strong enough to protect your device from intrusion.
Beyond just protecting your screen, though, Face ID and Touch ID can lock all kinds of apps on your iPhone or iPad. Let's take a look at several such apps you can lock with your fingerprint or face.
Why Enable Face ID for Individual iPhone Apps?
You might wonder why you would protect apps with your face or fingerprint when you already lock your whole phone. As it turns out, doing so adds an extra layer of protection for your most sensitive information.
This is particularly important when you unlock your phone and hand it to someone else. While you might want to show them pictures or let them play a game, you'd probably rather they not read your WhatsApp chats or poke around in your password manager.
It also acts as a safety net if you leave your phone sitting around unlocked and someone grabs it with malicious intent. While they'll have access to your phone, the most important apps on it will remain safe.
As a final benefit, scanning your fingerprint or face is much more convenient than typing a password to log into apps like banks or password managers. Plus, when you add Face ID or Touch ID, some of them also require you to set up a separate passcode, adding yet more security.
If you haven't set up biometric authentication on your iPhone or iPad yet, or want to make sure you have it configured properly, head to Settings > Face ID & Passcode (or Touch ID & Passcode). There you can add additional fingerprints for Touch ID, set up an alternate appearance for Face ID, and change various options.
As you set more apps to use this feature for security, you can review them under the Other Apps menu. There, disable the slider if you don't want an app to use Face ID or Touch ID anymore.

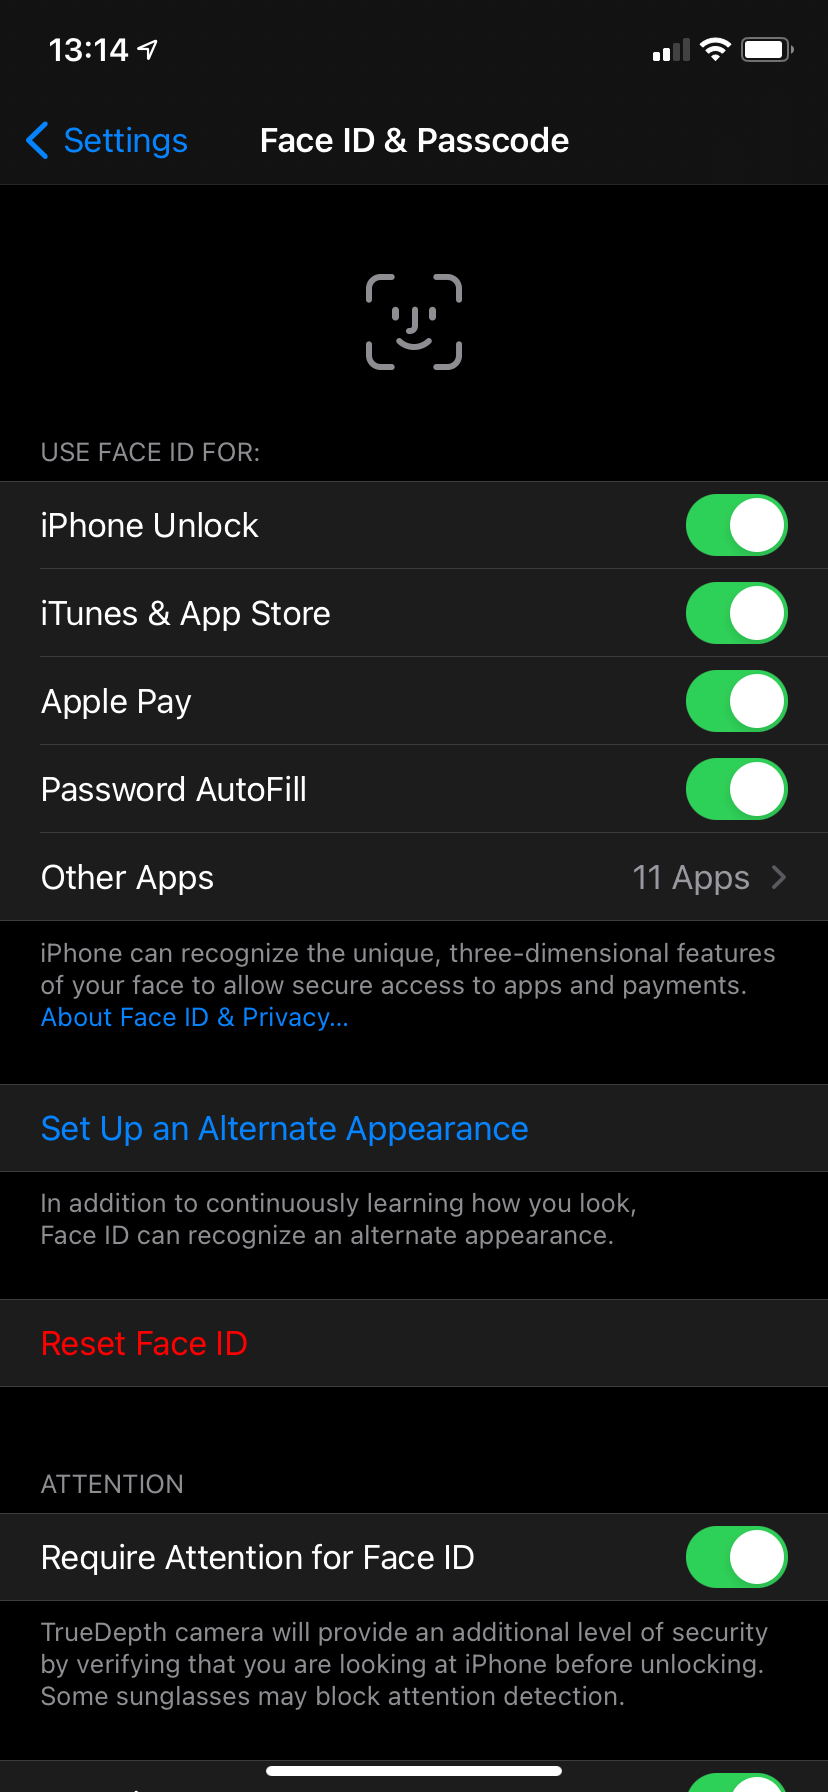
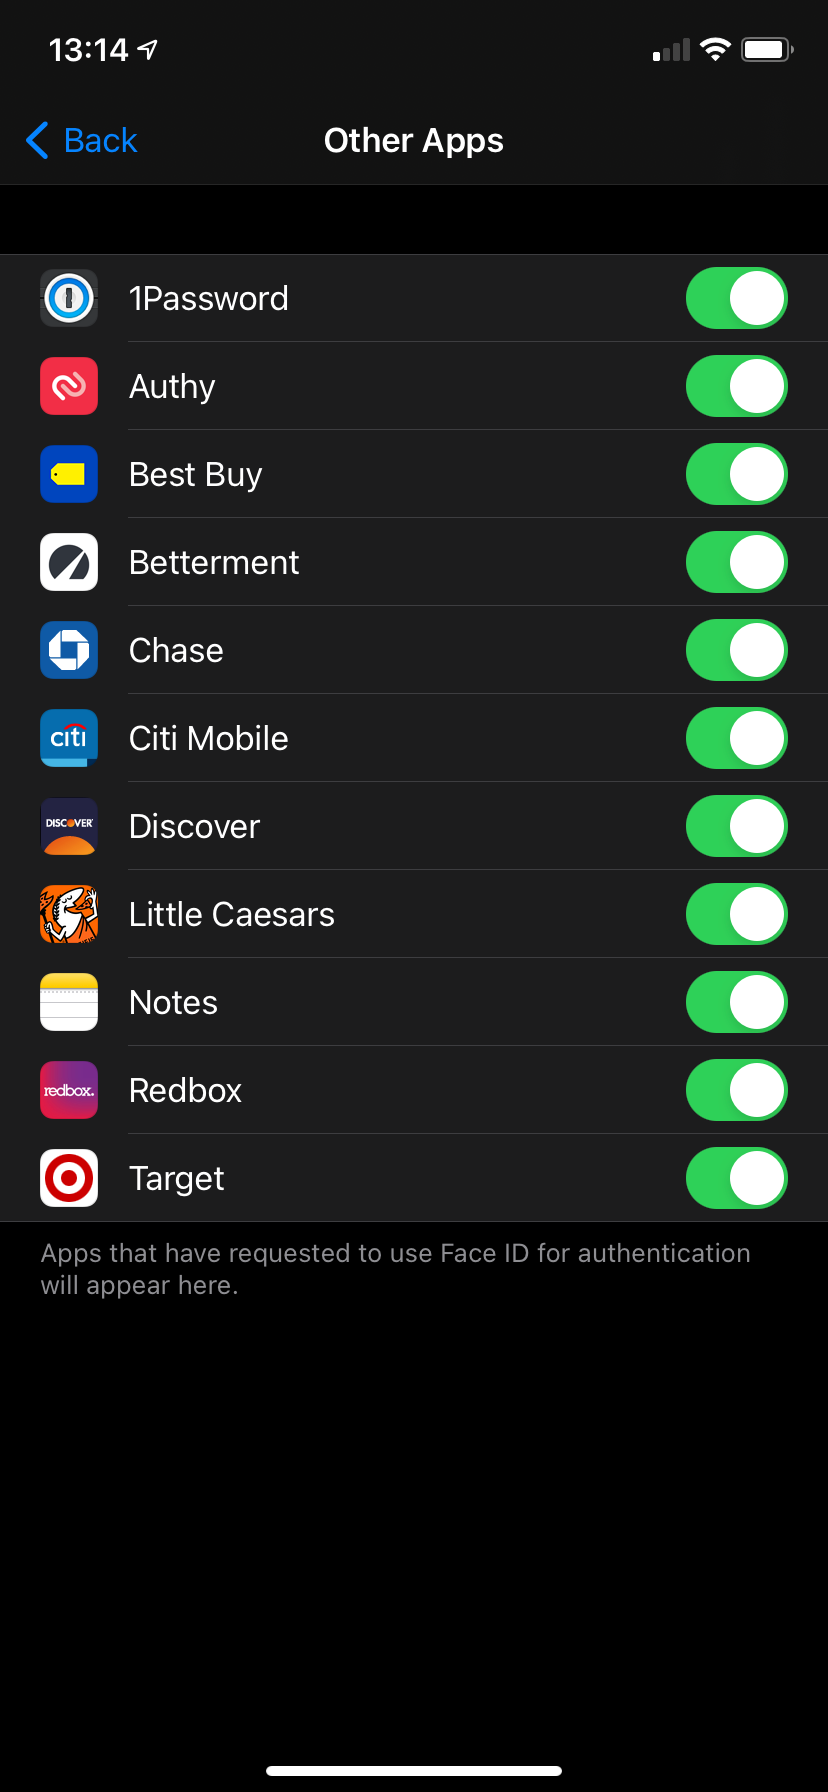
We used an iPhone 11 in the below screenshots. For simplicity, we'll thus primarily refer to Touch ID and scanning your face. But the steps are near-identical if your device has Touch ID instead.
1. WhatsApp
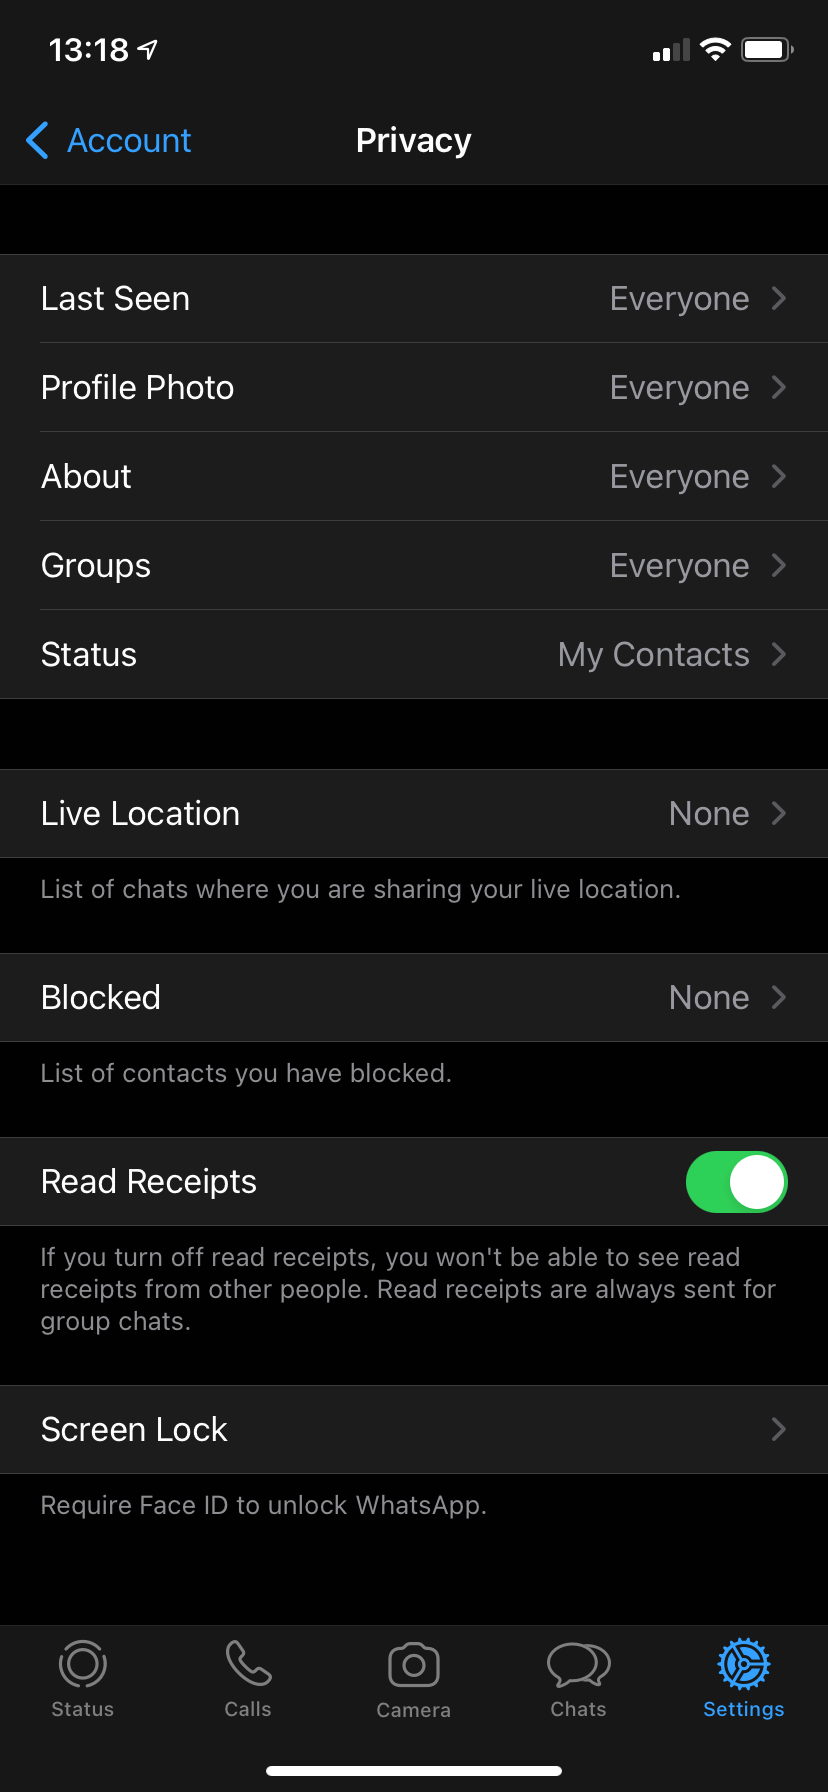
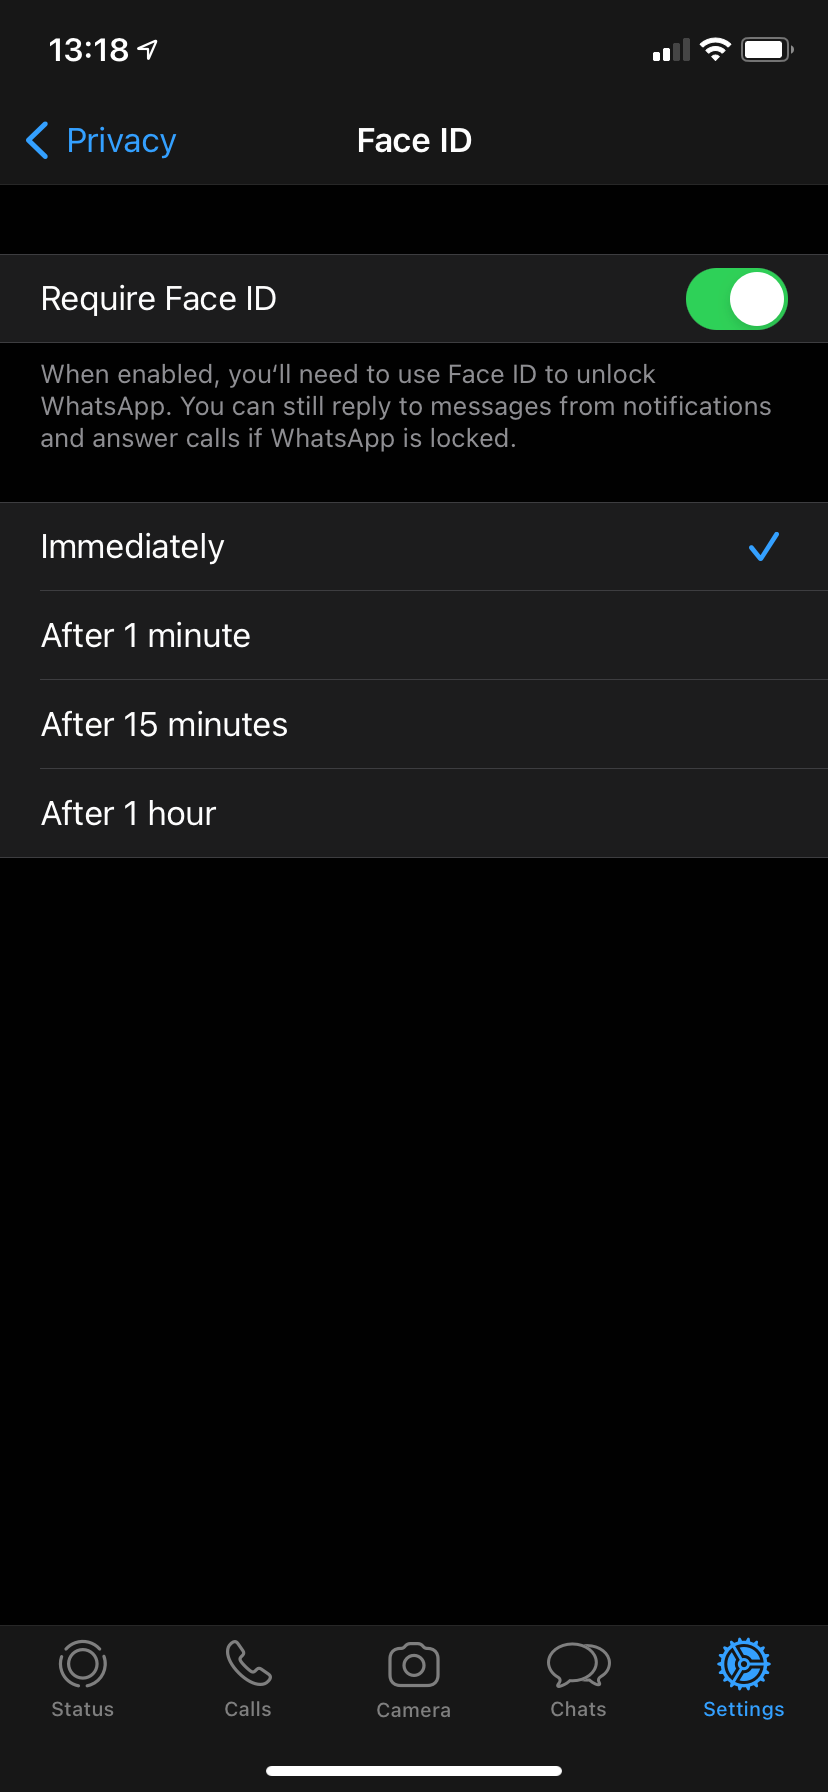
If you use WhatsApp for important chats, it's wise to keep it away from prying eyes. Thankfully, you can now do so with your fingerprint or face.
Open the app and tap the Settings tab at the bottom of the screen. Here, choose Account > Privacy and select Screen Lock at the bottom. On the next menu, enable Require Face ID. You can select how long the app should wait before locking, too.
WhatsApp isn't the only messenger to support this feature—Telegram has it as well.
Download: WhatsApp (Free)
2. 1Password (and Other Password Managers)
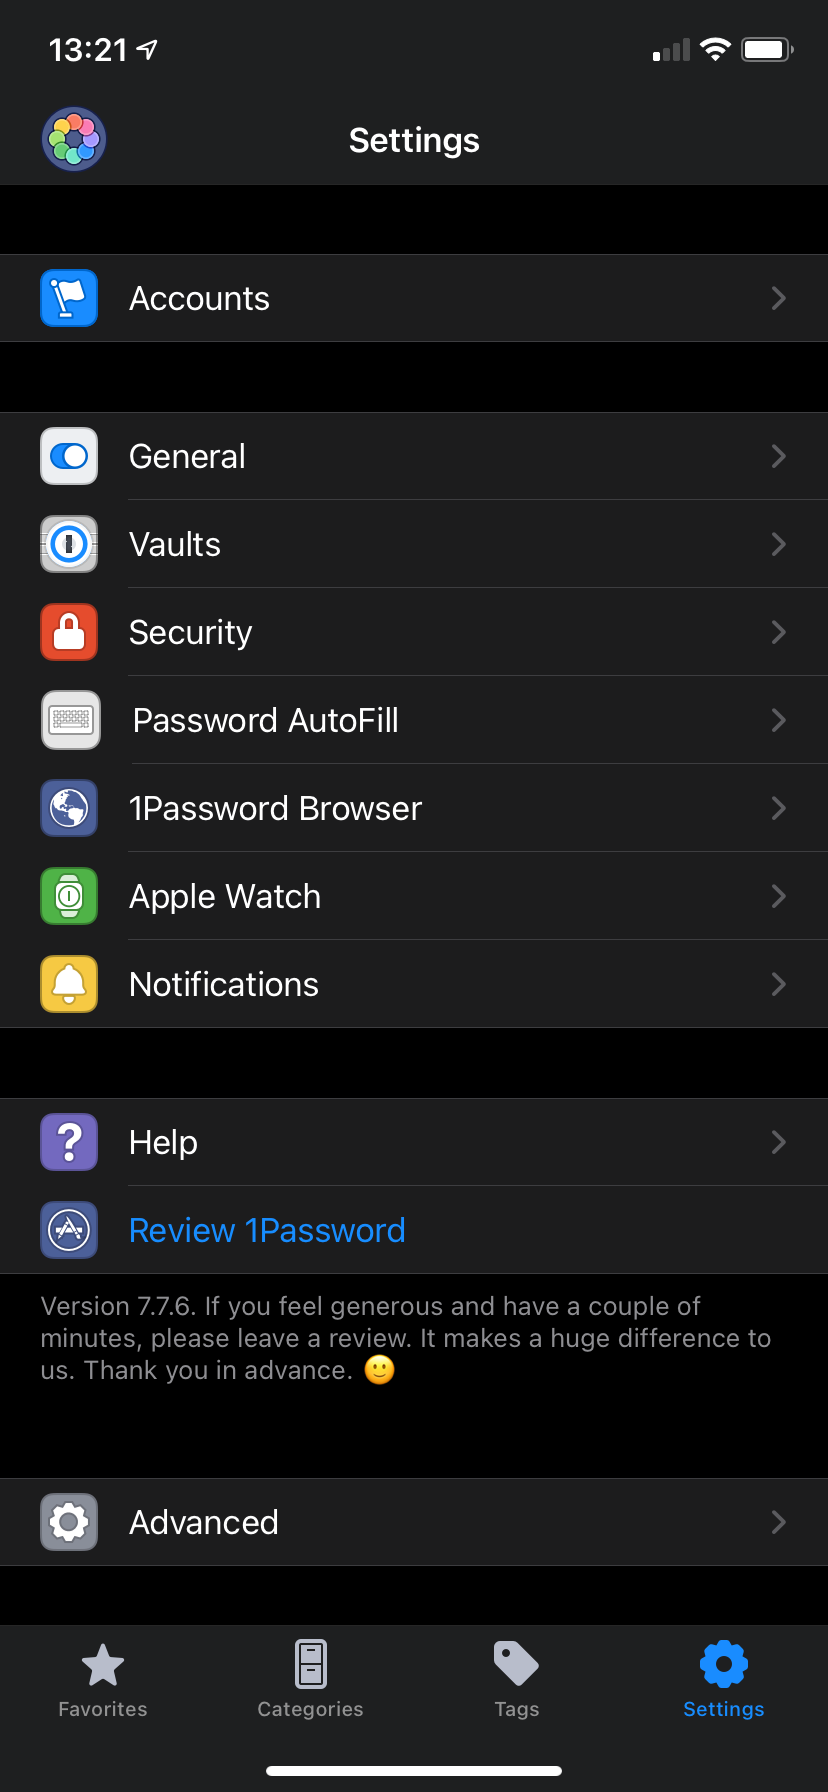
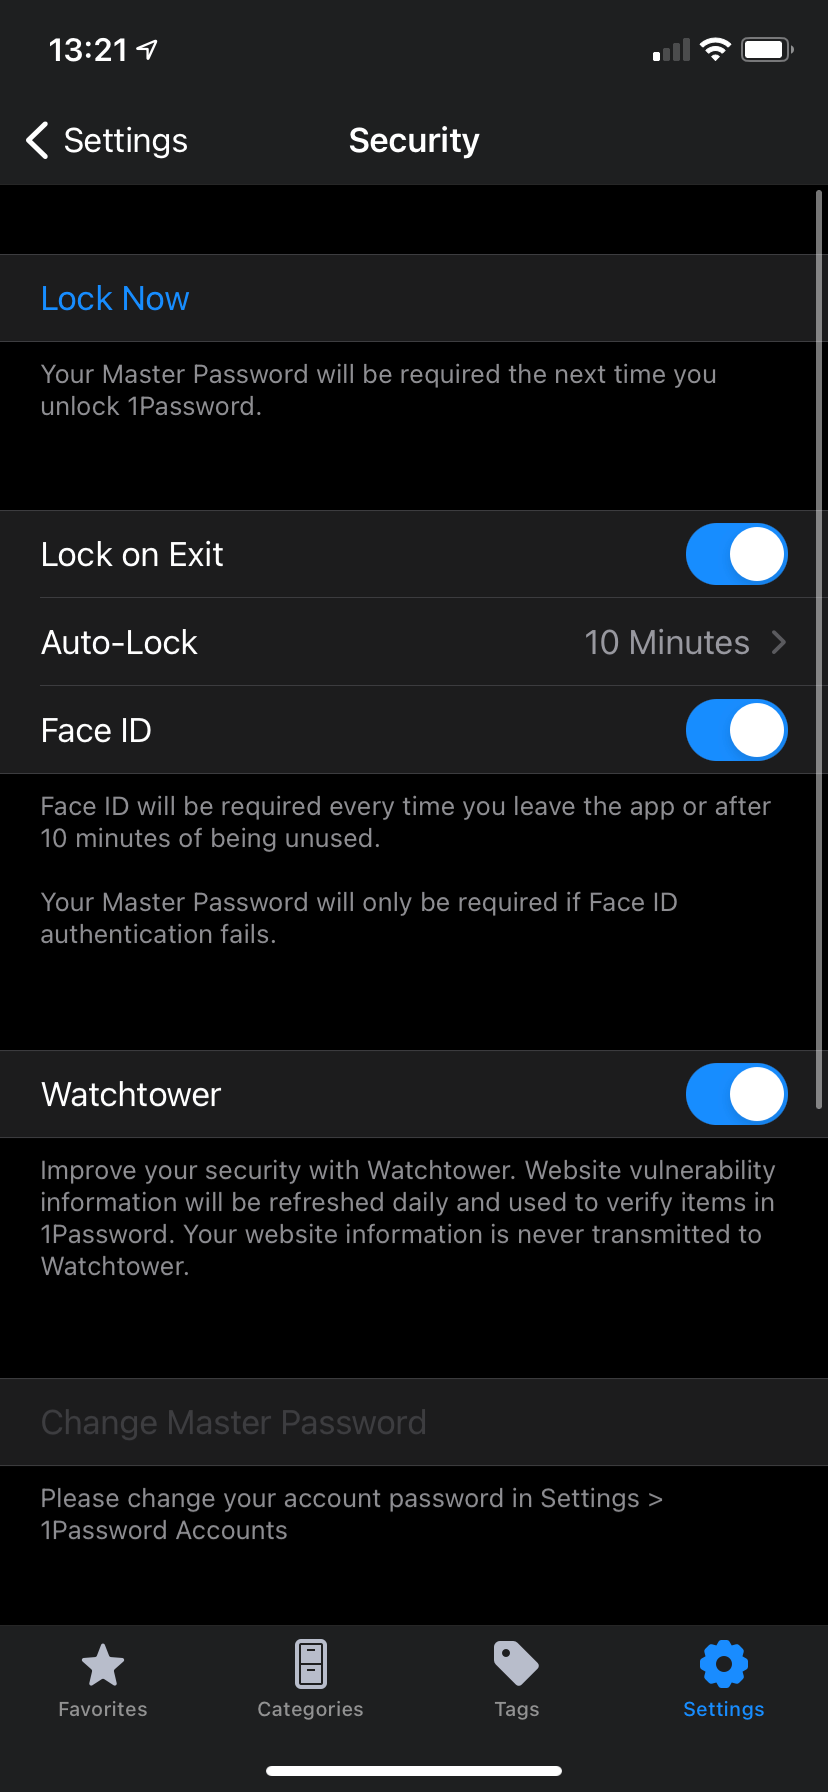
Since your password manager's master password keeps all your other credentials secure, you've hopefully made it something quite strong. Instead of typing out this long password every time you want to fill in a login elsewhere on your device, protecting it with Face ID is much more convenient.
We'll use 1Password as an illustration, but Face ID lock is available in most other password managers, too. Open the app and tap the Settings tab at the bottom-right of your screen. Select Security, and you'll see a slider for Face ID. Turn this on.
On this page, you'll find some other security options. Auto-Lock lets you choose how much time is required after leaving the app before it asks for authentication again.
Next time you open your password manager, you can simply scan your face or finger to log in. The app still lets you type your master password, if you'd prefer.
Download: 1Password (Free, subscription available)
3. Dropbox (and Other Cloud Storage)
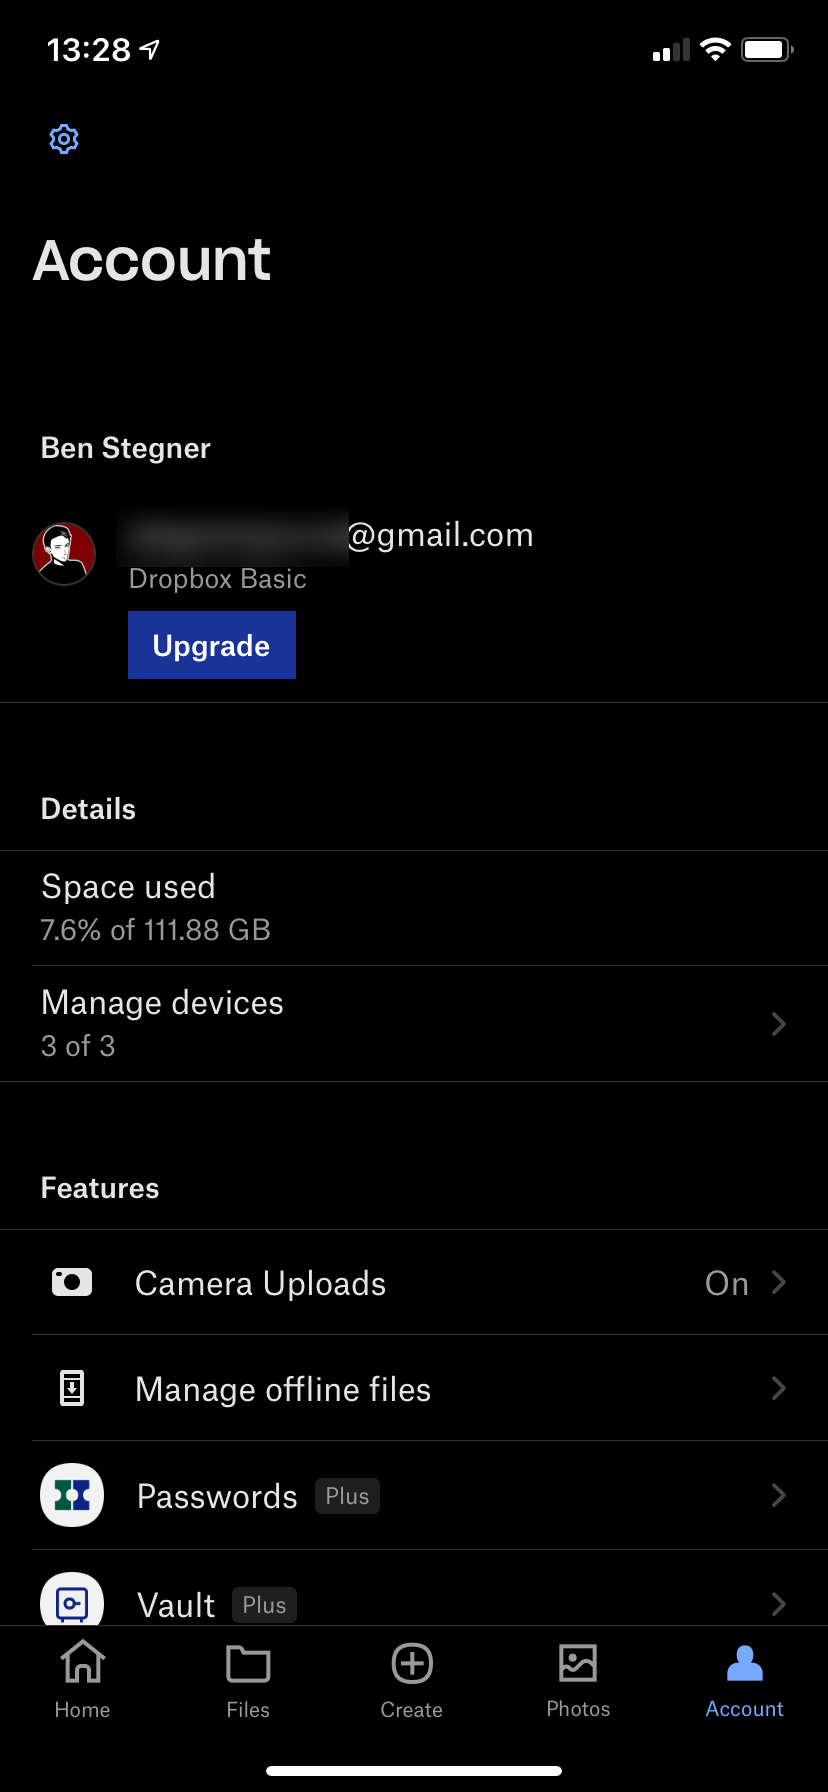
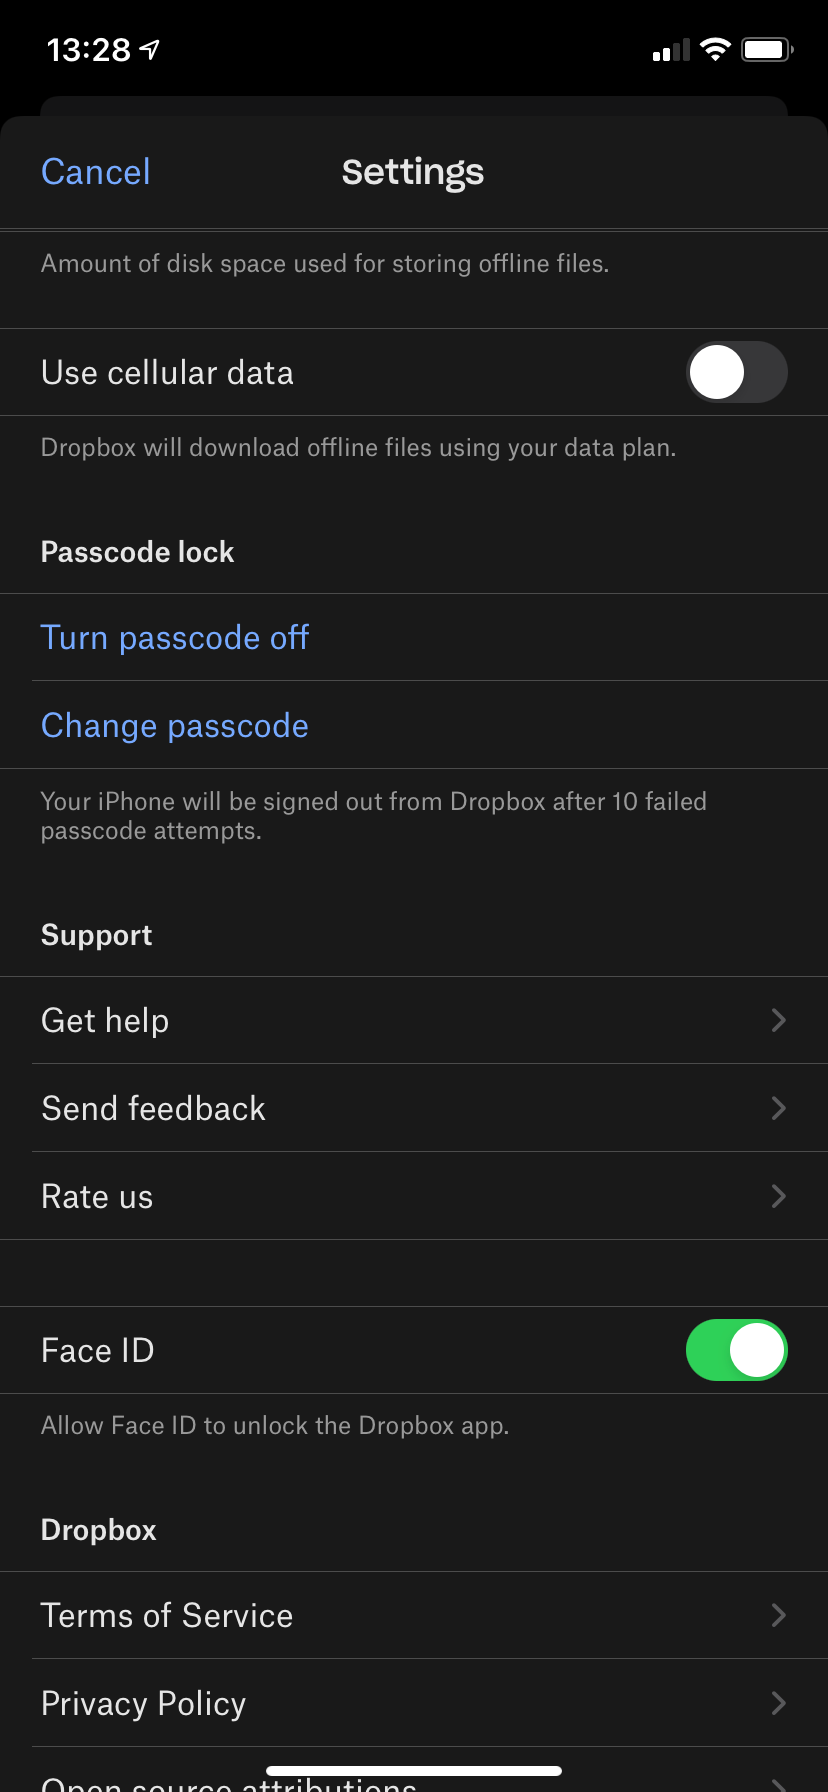
While Dropbox makes it easy to keep data in sync across your devices, you probably have files in your account you don't want others to see or access. Thankfully, it's easy to keep Dropbox protected.
Open the app and jump to the Account tab from the bottom bar. Here, tap the Settings icon in the upper-left corner. Choose to Turn Passcode On and create a new four-digit passcode for Dropbox. Once that's done, you'll see a new Face ID slider lower on the page.
Enable this, and you'll have to scan your face or enter your passcode to get into Dropbox. This setting is also available in Google Drive and OneDrive, if you prefer one of those.
Download: Dropbox (Free, subscription available)
4. Authy
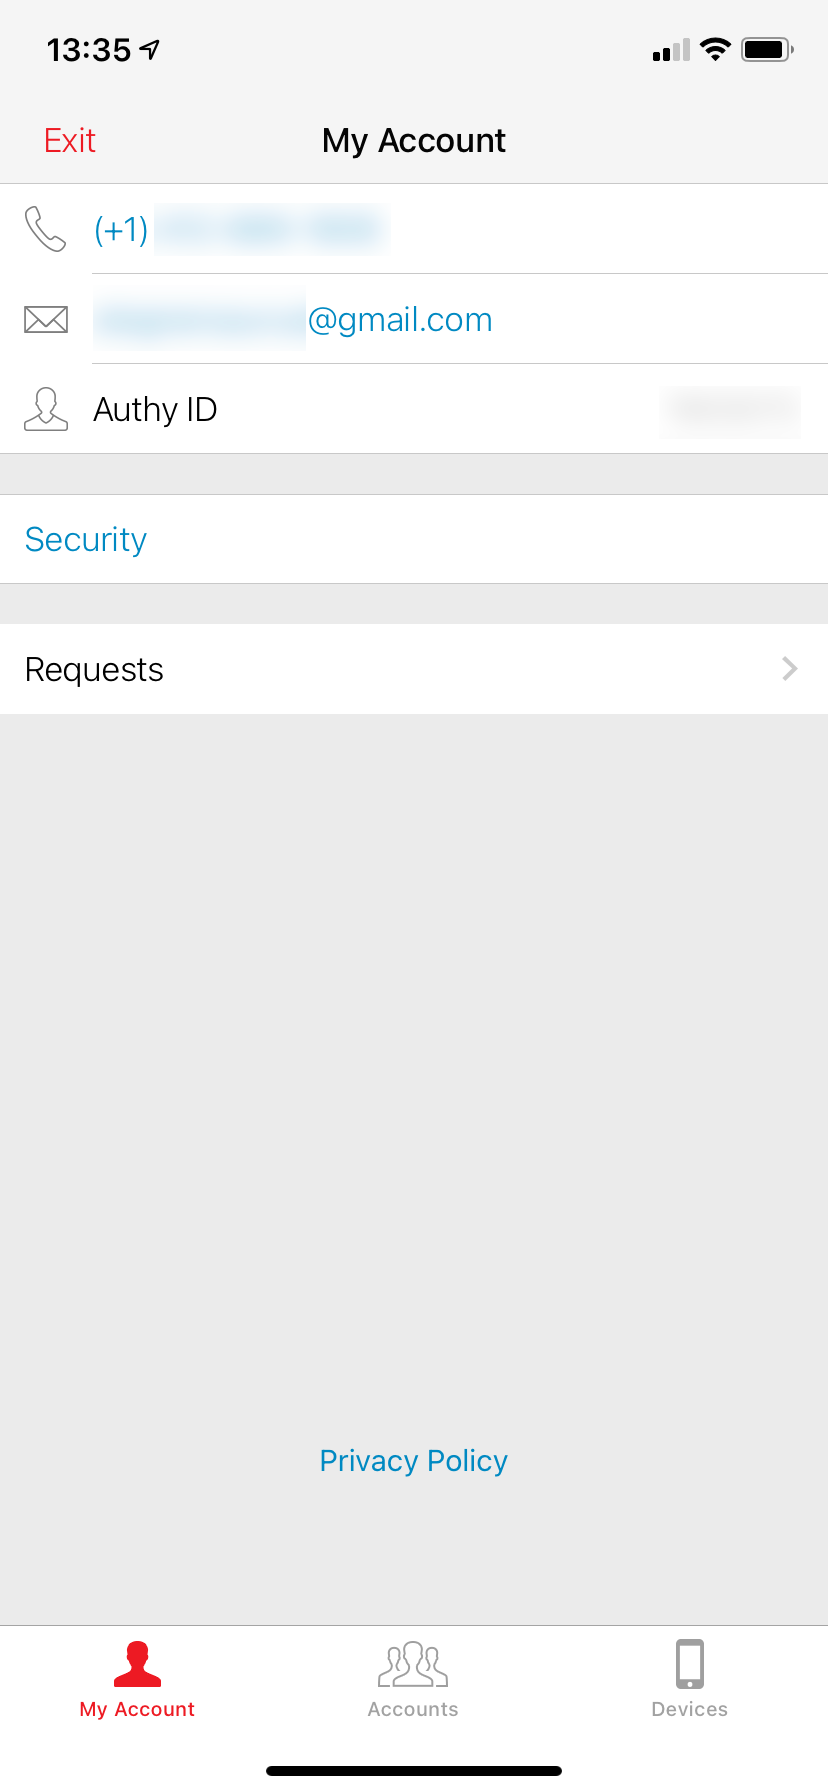
In addition to having a strong password, two-factor authentication is a vital way to protect your accounts. The 2FA app Authy is a great choice for this, since it lets you sync your account across multiple devices. It gets extra points for supporting Face ID, too.
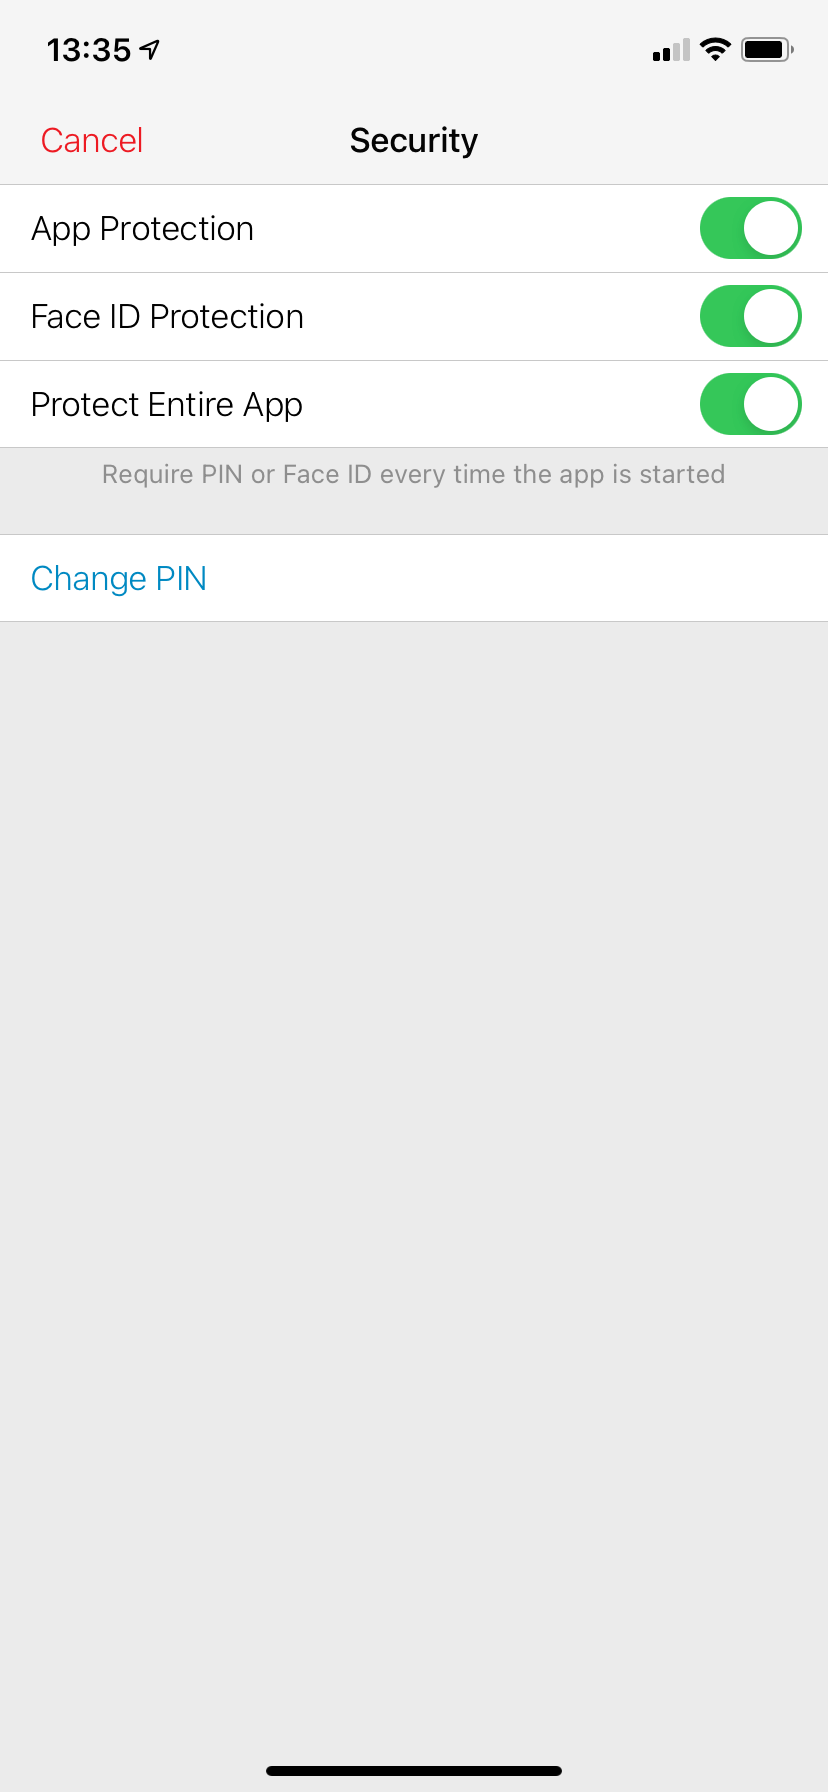
To enable it, open Authy and tap the Settings gear at the top-right of the main screen. Choose Security on the resulting menu. Here, you'll need to enable App Protection and choose a four-digit PIN to protect the app.
Once you've done that, simply enable the Face ID Protection slider to allow for login with your face. If you turn on Protect Entire App, you'll need to scan or enter your PIN every time you open the app. Otherwise, this only protects the Settings menu.
Download: Authy (Free)
5. Apple Notes

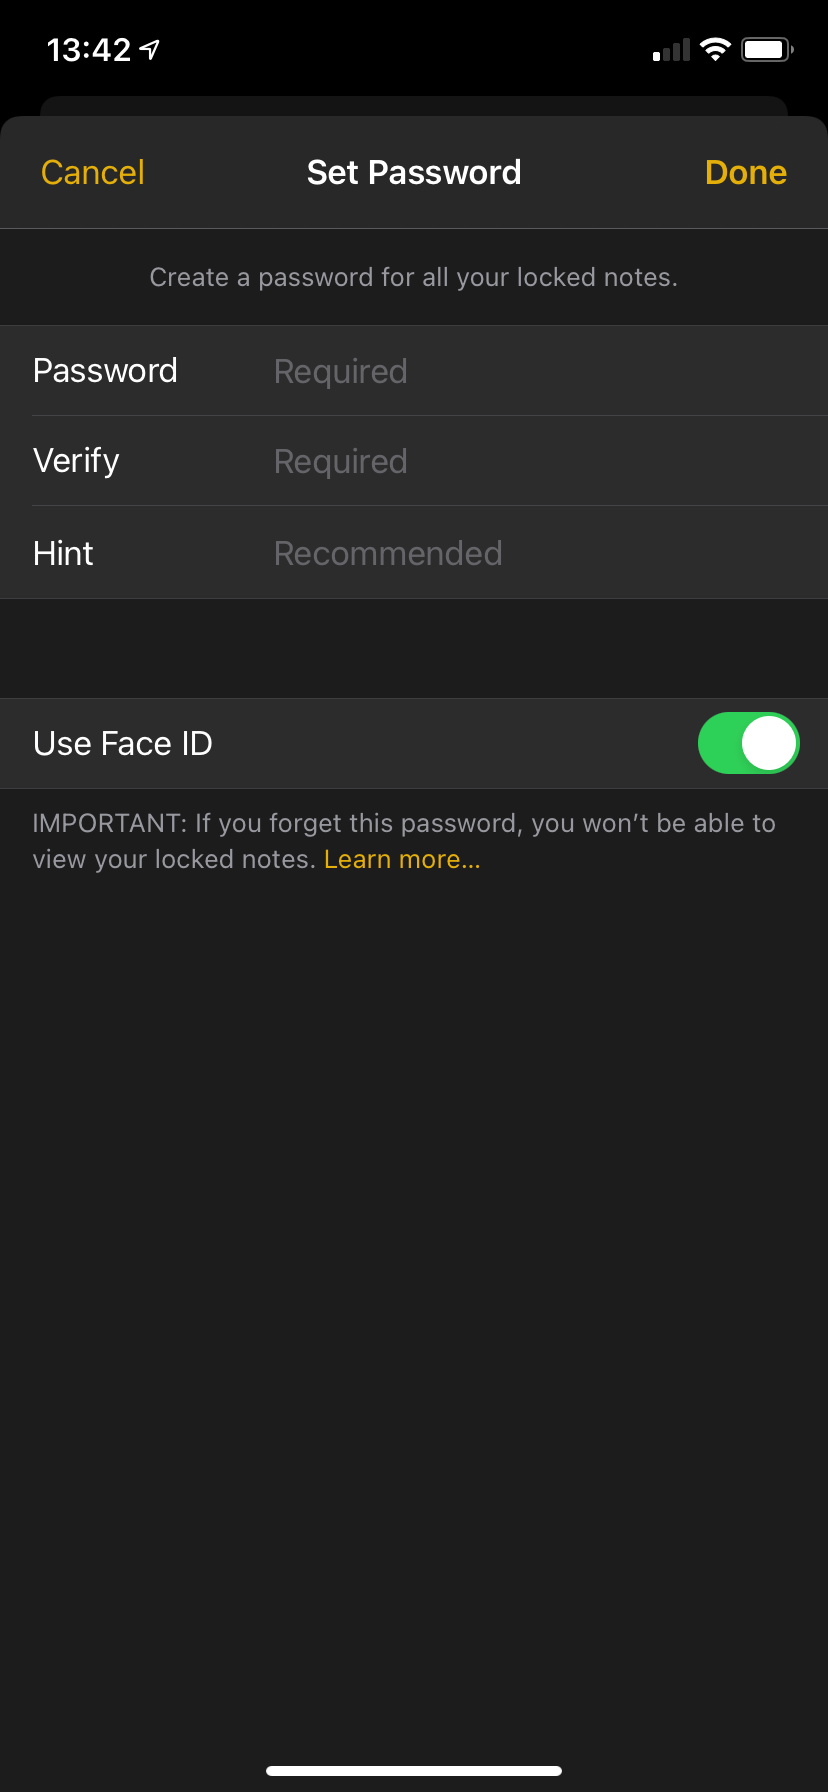
Most of Apple's built-in apps don't offer Face ID protection. Notes is an exception; it lets you lock individual notes for extra security.
To do this, create a new note or open an existing one. Then, to lock it, tap the three-dot menu button at the top-right corner of the page. On the sheet that appears, select Lock.
If you've never set a password to lock notes in Apple Notes before, you'll be prompted to add one. Type it twice and add a hint if you'd like. Make sure to enable the Use Face ID slider is enabled, so you can use that instead of the password for convenience.
To change this password later or reset it with your Apple ID, go to your iPhone's Settings app and visit Notes > Password.
Download: Notes (Free)
6. App Store


Tired of entering your Apple ID password every time you make a purchase on the App Store? You can protect your downloads with your face or fingerprint instead. You'll need to do this even when downloading free apps, but it only takes a moment to scan.
To make sure this is enabled, visit Settings > Face ID & Passcode. Confirm your passcode, then enable the iTunes & App Store slider on the following screen.
7. PayPal (and Other Financial Apps)
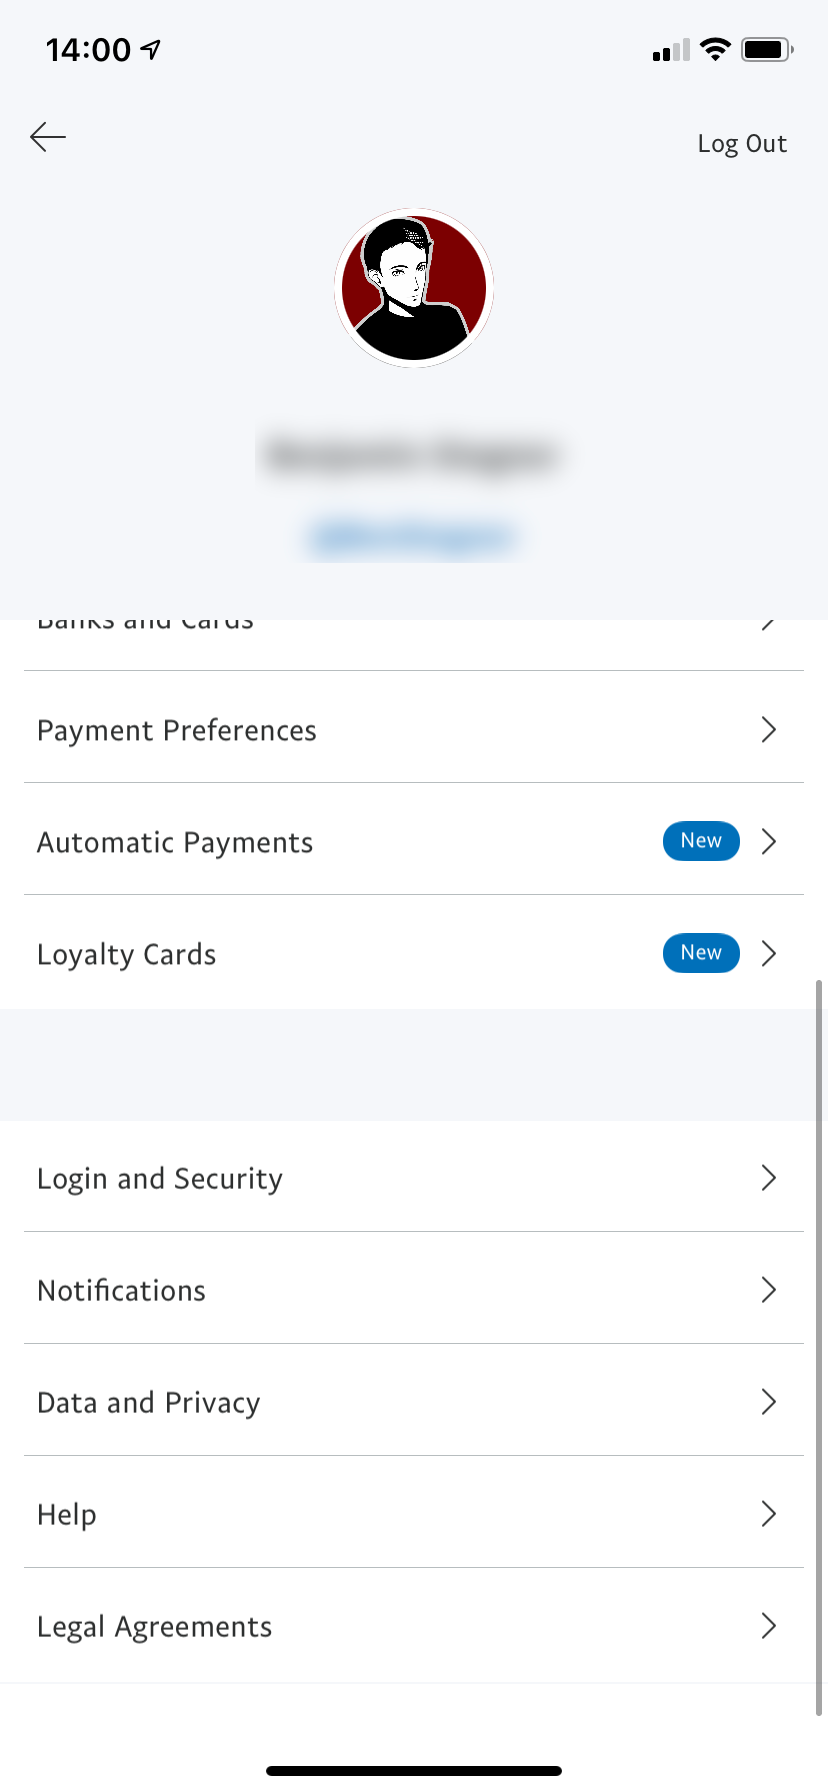
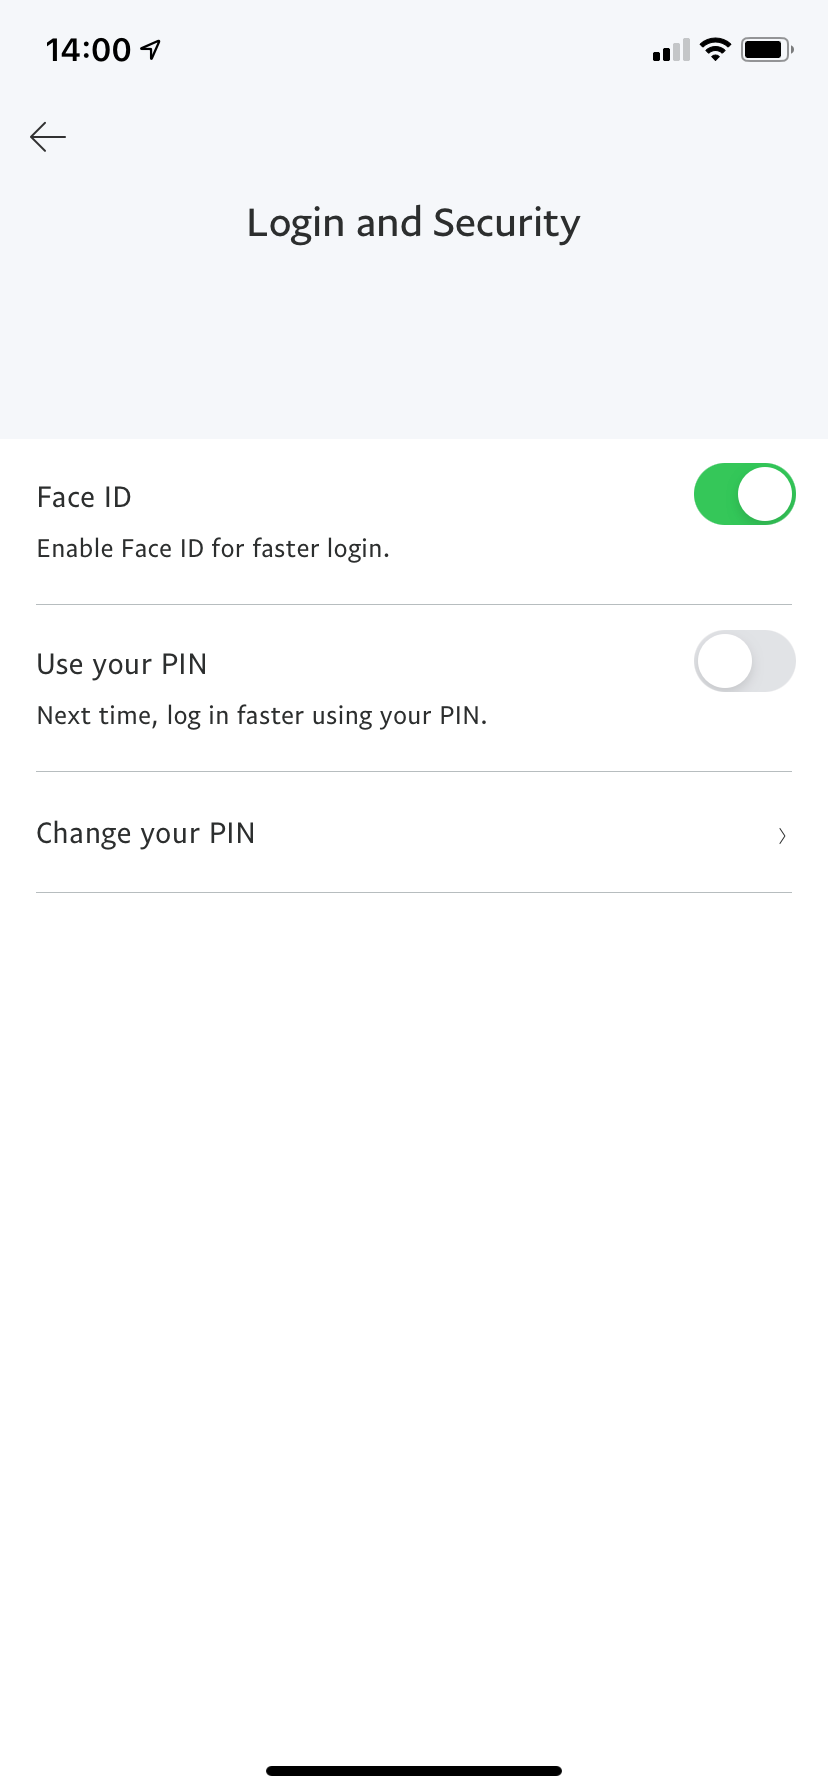
Since financial info is obviously sensitive, you'll want to add a layer of protection if you have the PayPal app on your phone.
When you set up the PayPal app for the first time, it will prompt you to enable Face ID. To add this later, sign in and tap the Settings gear at the top-right. Scroll down and open the Login and Security section, then enable Face ID. You can also set a PIN for the app here.
Many banking and other financial apps support Face ID, such as Chase Mobile and Discover Mobile. However, it's not feasible to cover them all here, as support varies greatly by bank. Take a look at your bank or credit card company's apps to see if they offer this feature.
Download: PayPal (Free)
8. Amazon
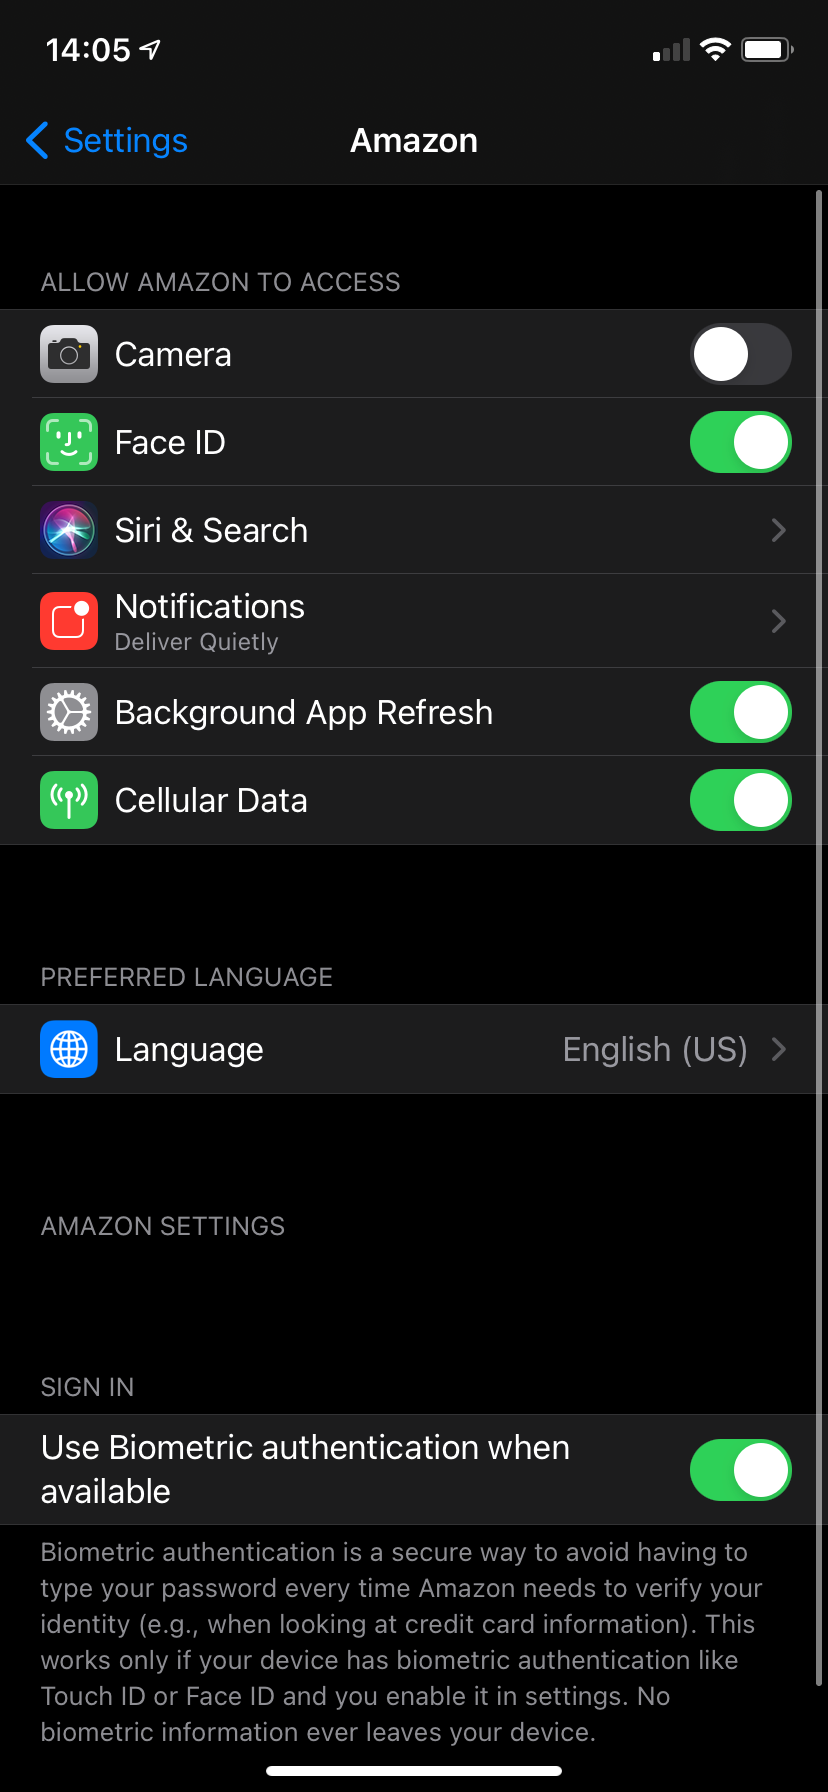
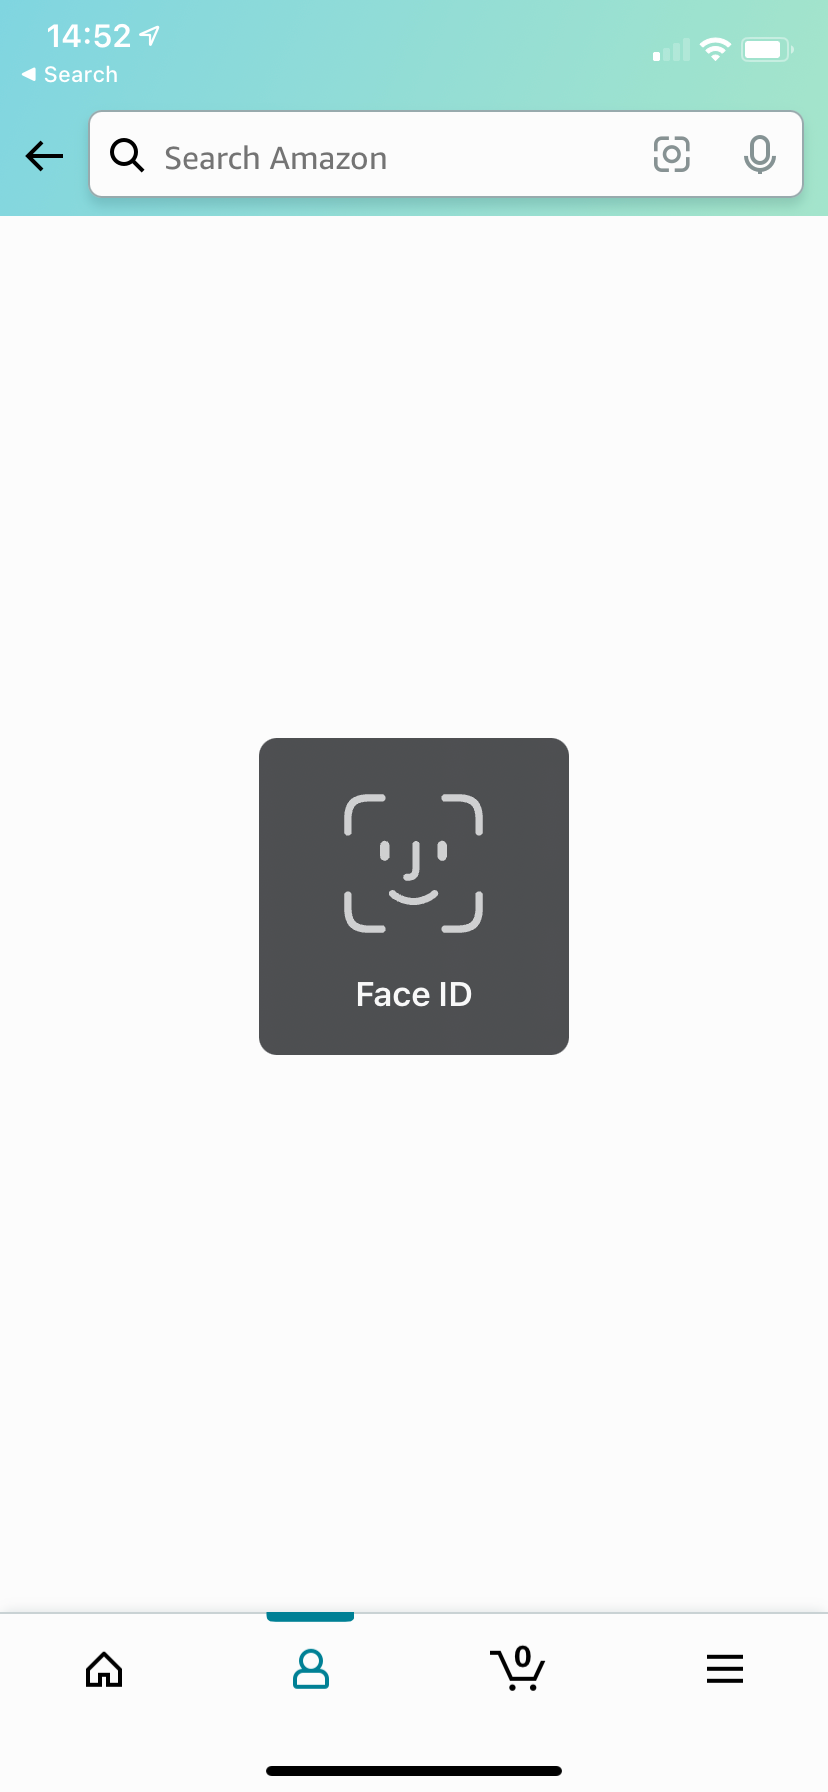
Amazon's app keeps you logged in once you've set it up, but will sometimes require you to confirm your account password when you try to access sensitive areas of your account. If you'd rather, you can use Face ID for this instead.
You'll find it in a different location than the above apps, however. Visit your iPhone's Settings and scroll down to Amazon in your list of apps. On its settings page, enable the Use biometric authentication when available slider. Also enable the Face ID slider in the top list.
Once you've done this, Amazon can use your face to verify your identity instead of requiring your full Amazon credentials.
Download: Amazon (Free)
9. Facebook Messenger
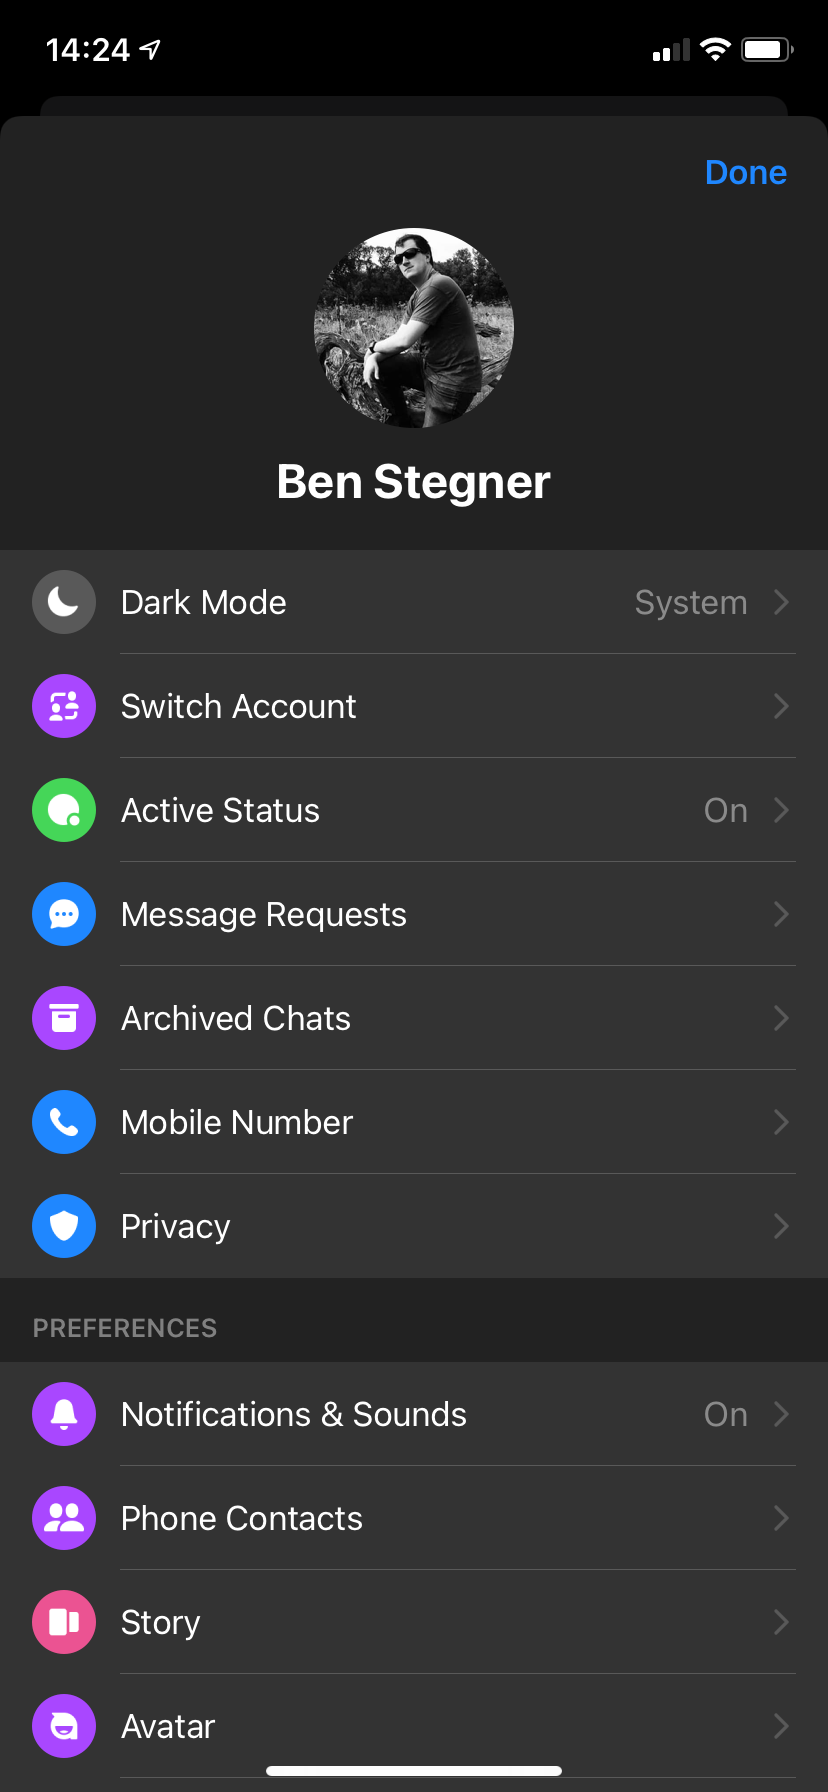
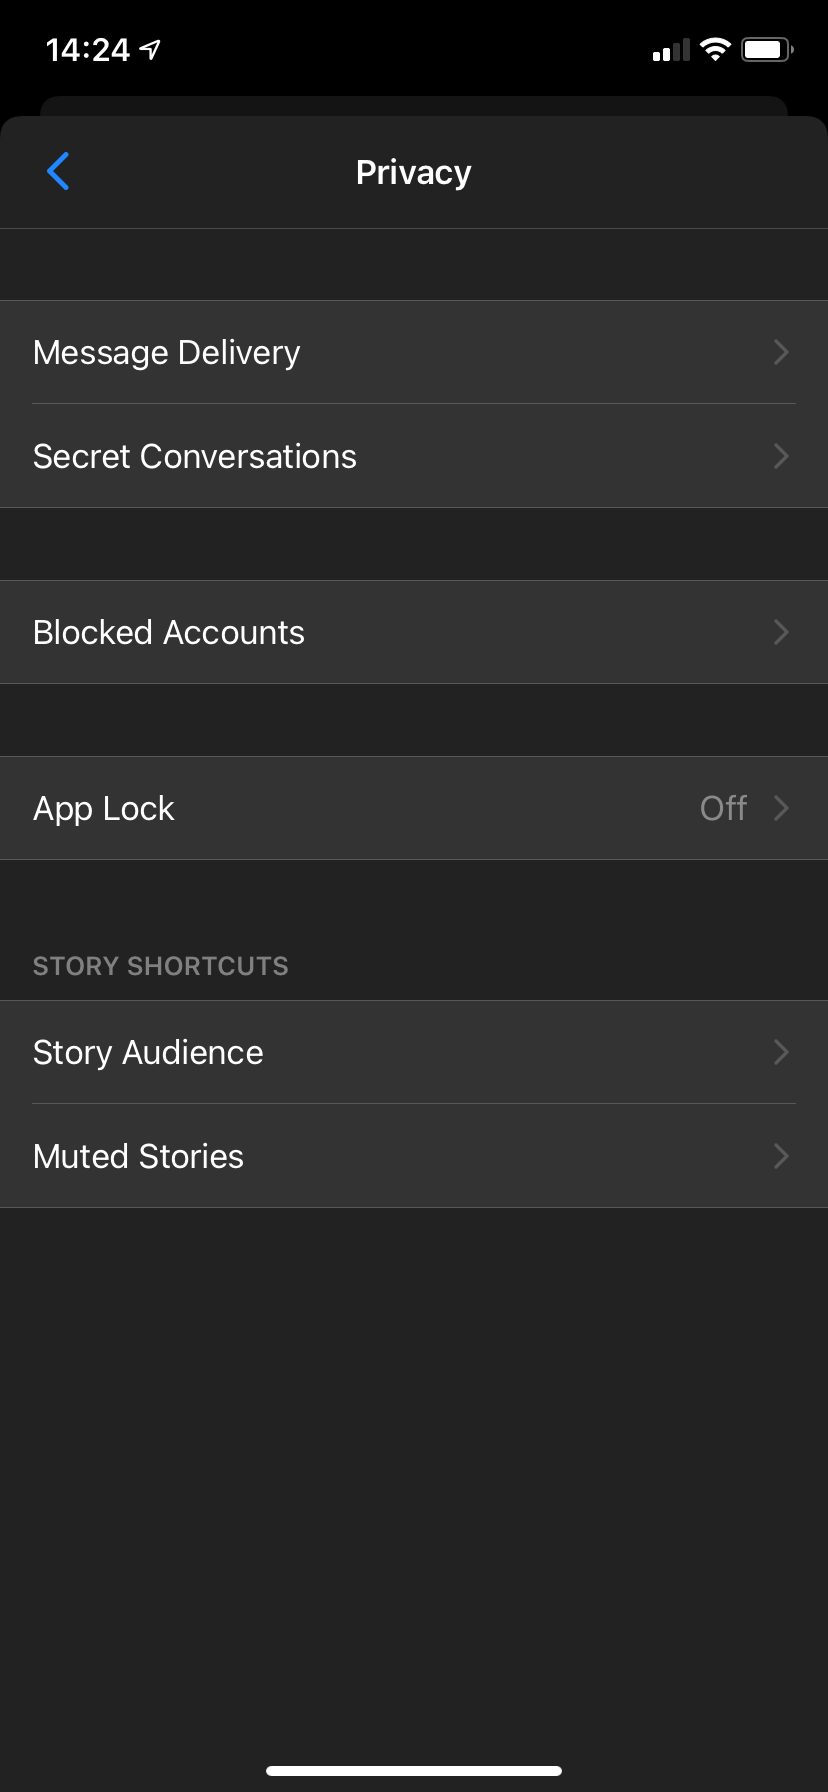
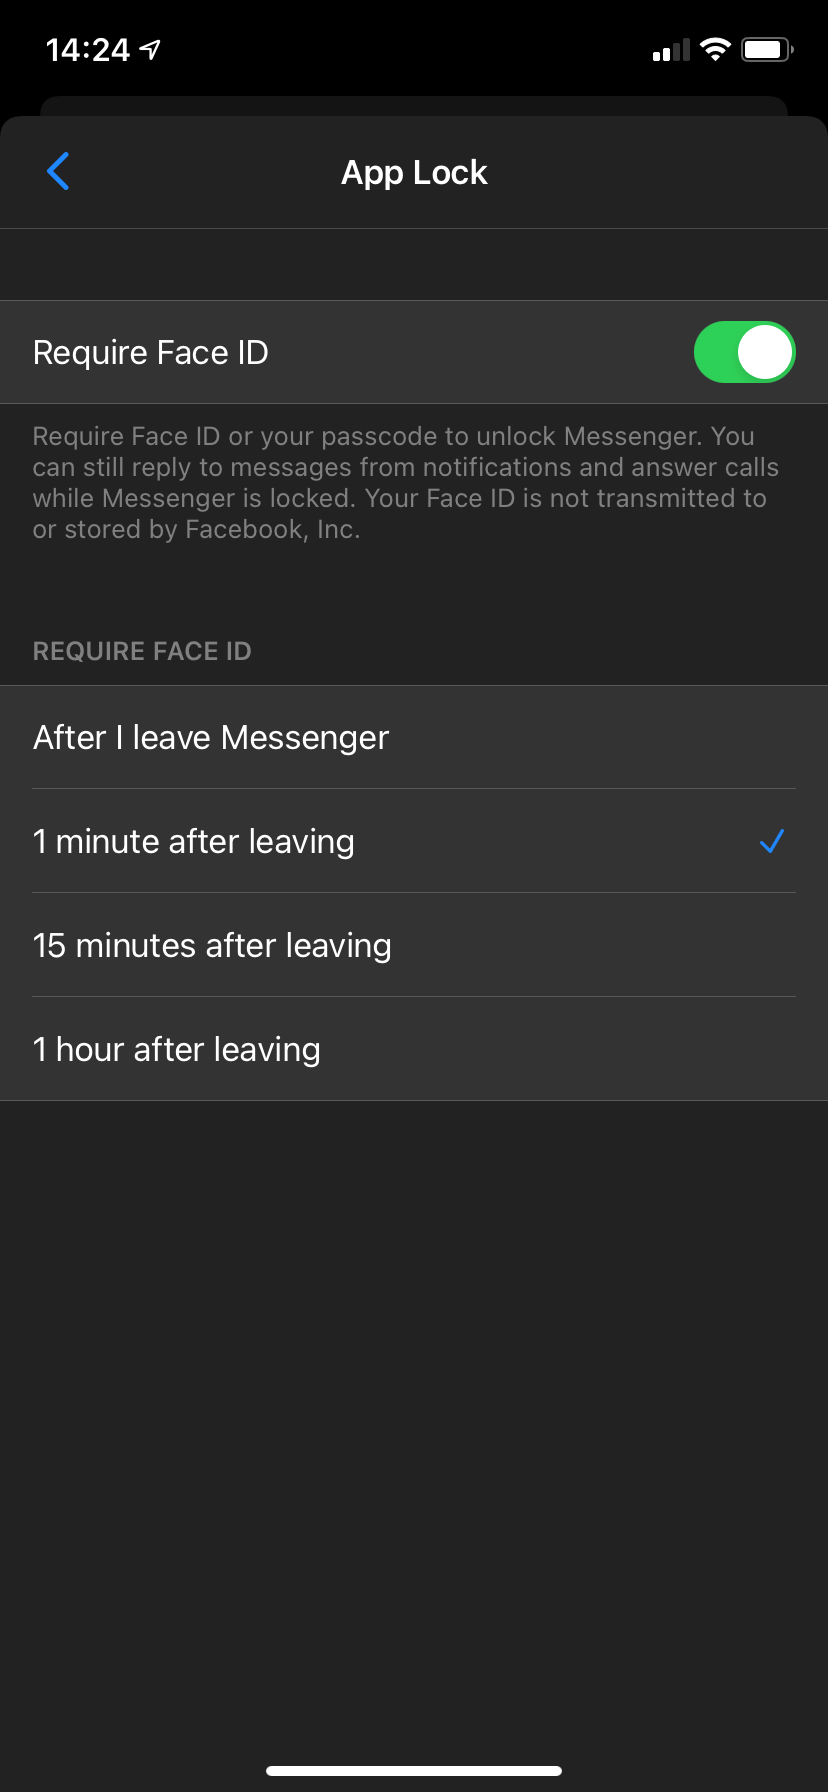
It's easy to prevent people from snooping on your Facebook Messenger conversations by adding Face ID protection. Open the app and tap your profile picture in the top-left, then choose Privacy. On the next screen, tap App Lock and enable Require Face ID.
This will require you to scan your face to open Messenger. Like WhatsApp, you can choose how long after leaving the app it waits before locking, too.
Download: Messenger (Free)
Don't Forget About iPhone Lock Screen Widgets
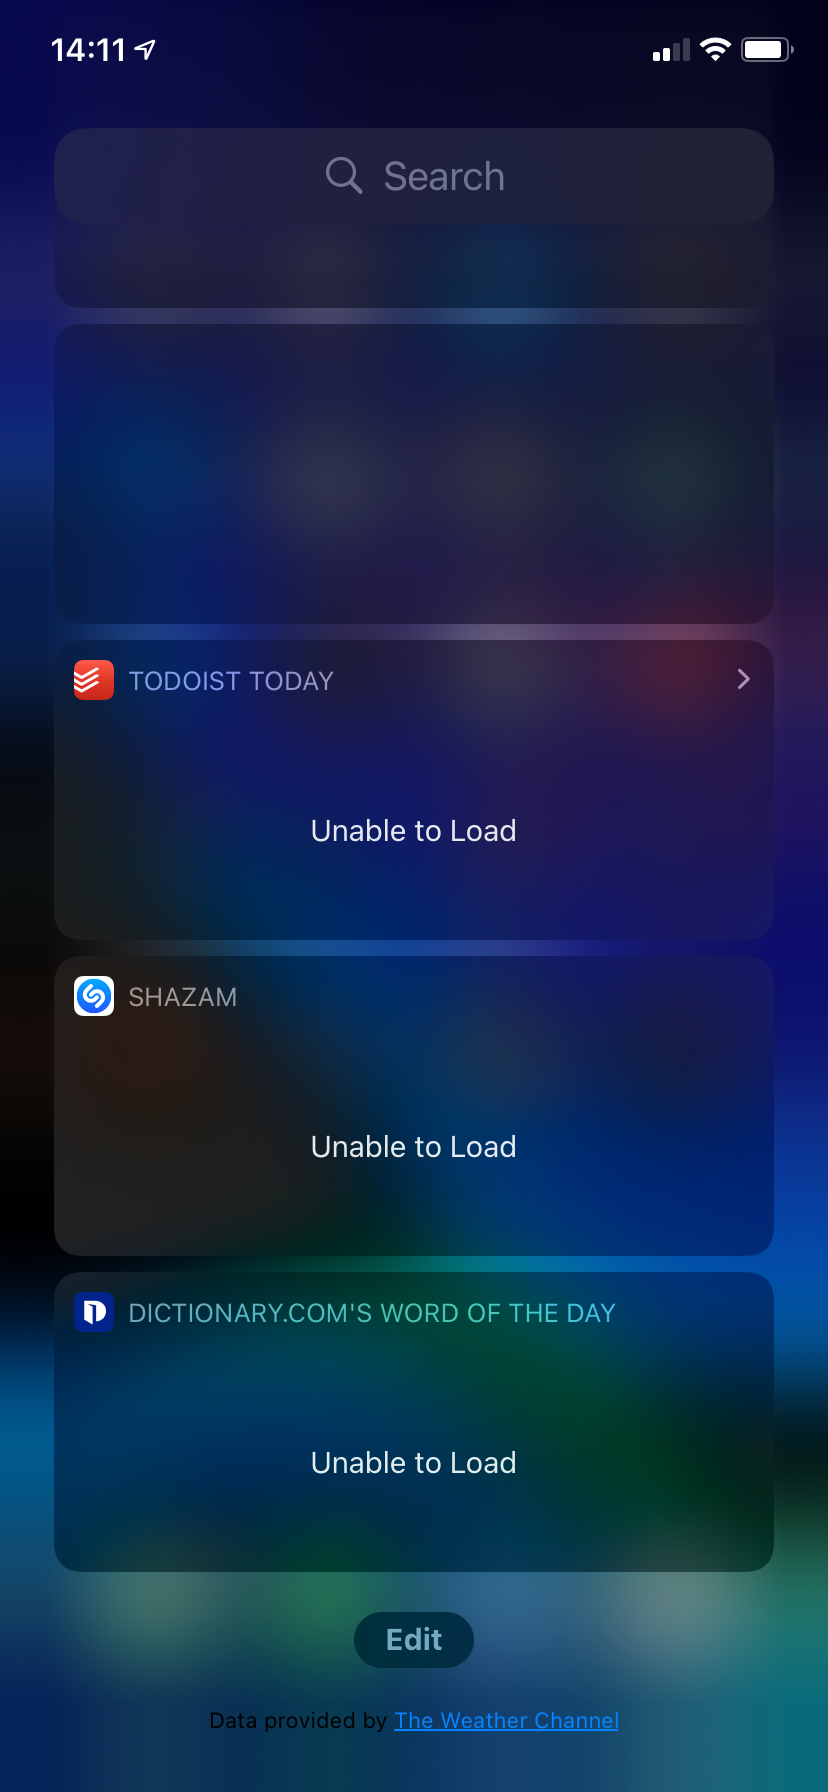
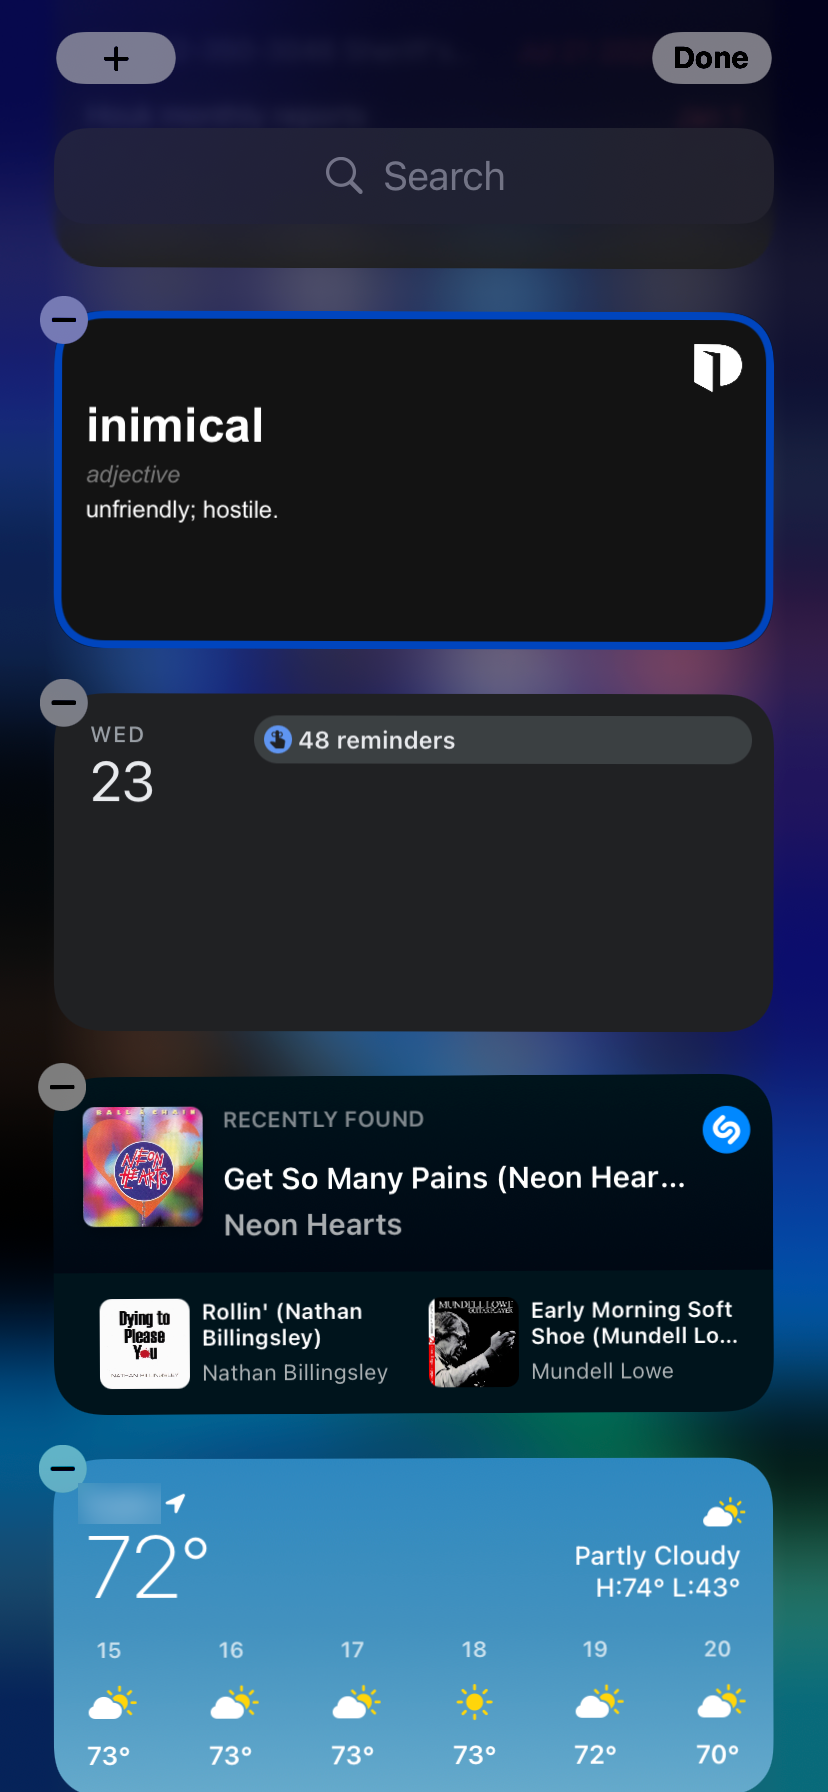
There's another easily overlooked aspect of improving your iPhone security. By default, your widgets in the Today View are accessible to anyone by swiping from left to right on the Lock screen. You probably don't want anyone with physical access to your phone to see them, so you can hide those widgets.
To delete a widget from Today and thus prevent it from showing on the Lock screen, unlock your iPhone. On the Home screen, swipe from left to right until you access Today. At the bottom of the list, tap Edit, then simply hit the Delete button next to any widgets you want to remove.
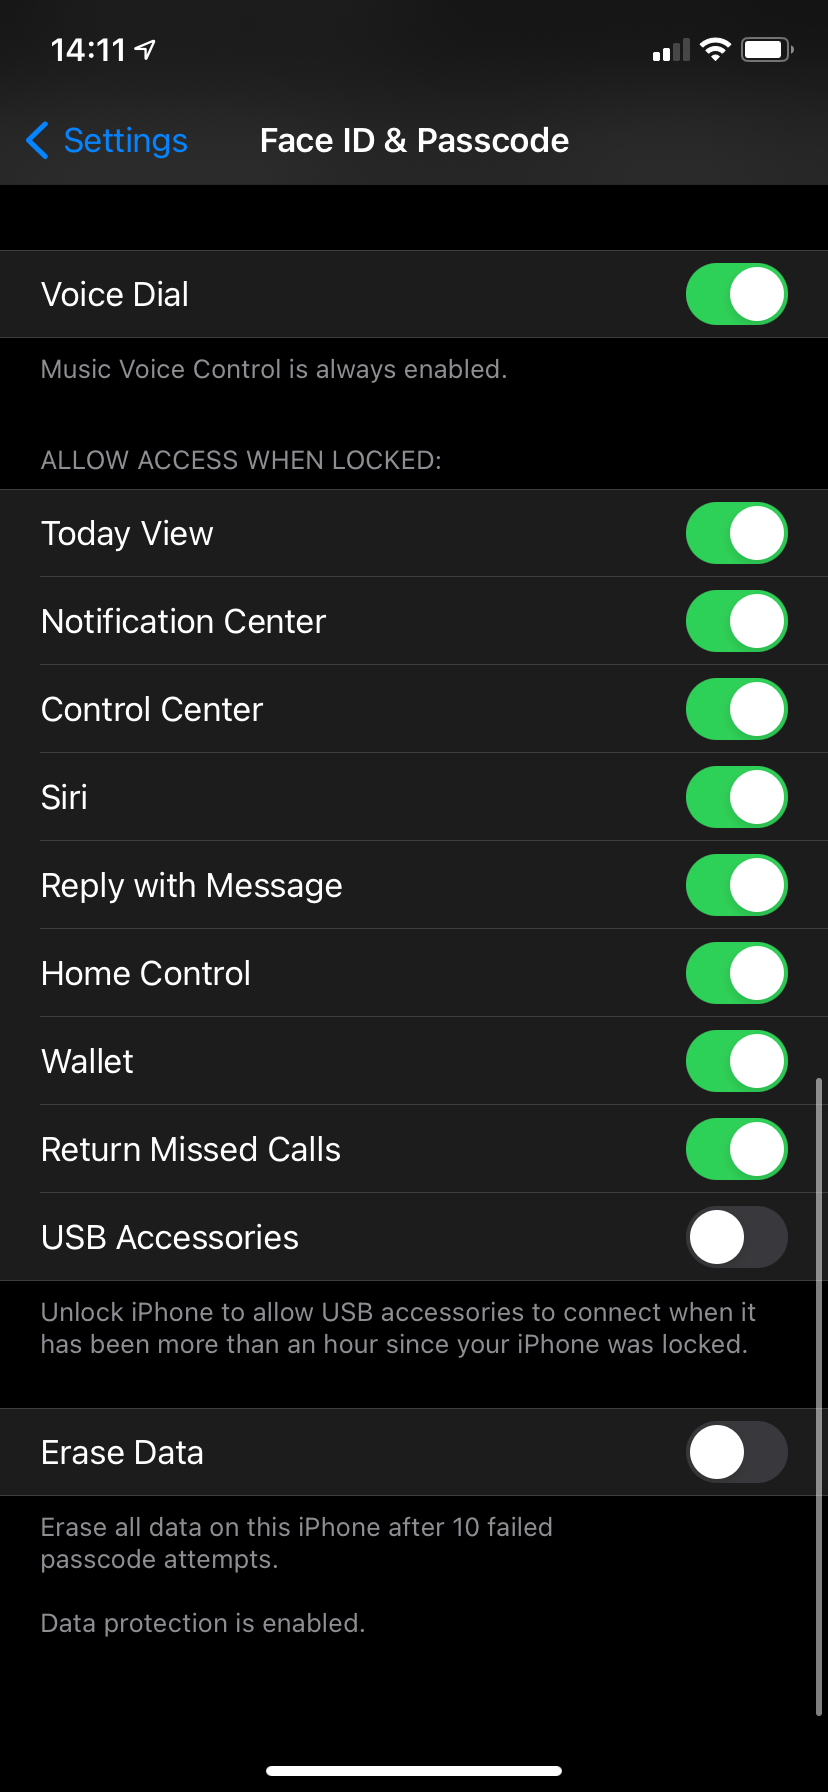
If you'd rather remove access to this feature on the Lock screen entirely, go to Settings > Face ID & Passcode. Confirm your passcode, then scroll down to the Allow Access When Locked section. Disable Today View, along with anything you don't want accessible from the Lock screen.
Protect Your iPhone's Apps With Face ID
We've taken a look at several apps you can lock with Face ID or Touch ID on your iPhone. Doing so lets you increase privacy for your most sensitive apps and even add some convenience for yourself in the process. If you were worried about using any of these apps on your phone, hopefully this feature helps alleviate your concern.
Unfortunately, this protection isn't available for every app. There's currently no easy way to lock Messages, Photos, or other stock iOS apps with Face ID. Hopefully, Apple will add this option in the future. For now, you should make sure you're taking advantage of other important iPhone security features.

