You caved in to peer pressure and finally bought a smart light switch so you too could become a member of the elite "smart home" crowd. Which switch? The simplest one to install and set up of course: the Belkin WeMo light switch (CA, UK).
A smart plug or a smart bulb are one thing -- you only need to plug those in and they work. But in the case of a smart light switch, you have to deal with actual in-wall electrical wiring. That's a horse of a different color!
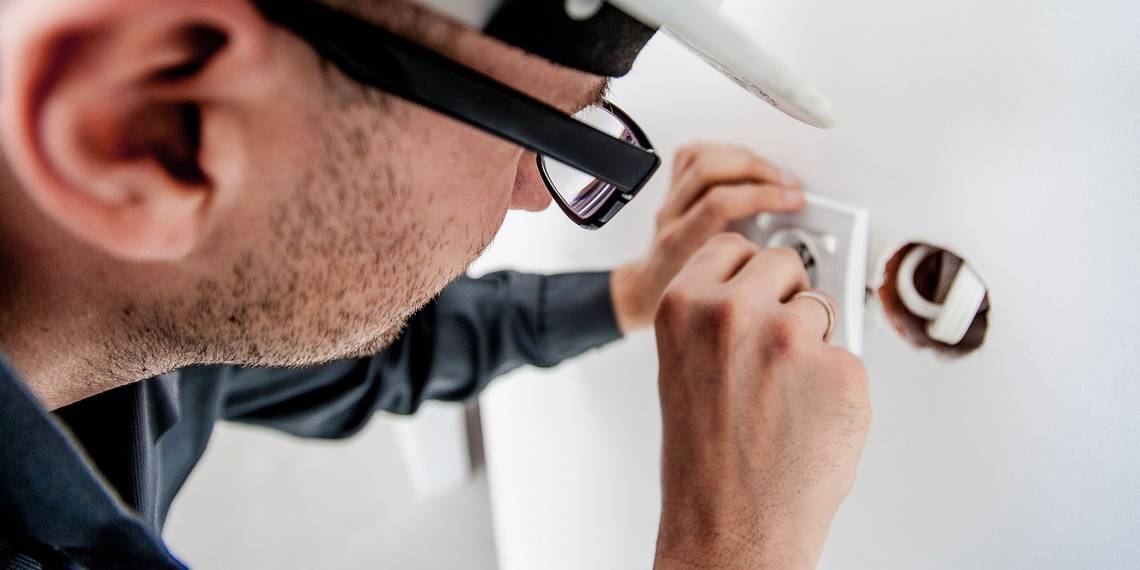
In this article, I'm going to take you from unboxing all the way through in-wall installation. Not only that, I'll also walk you through a couple of very useful automations you can do with the switch.
Unboxing the WeMo Light Switch
Belkin smart home products are fairly simple, most of the time. When you buy a smart outlet, you'll find the plug-in outlet, some documentation, and that's it. But it's a little different in the case of the WeMo light switch.

When you open this box, there are several pieces to the device. You'll find the main switch unit with all the "brains", and some colored wires sticking out the back. You'll also find a wall plate that just snaps right on to the switch itself. Finally, there are the orange wire nuts. You may or may not need to use all of them.

Now that you have your device nicely laid out, it's time to start the installation. First you need to disassemble your old, existing wall switch.
Removing Your Existing Switch
Before you begin with this project, it's very important to understand one critical concept about electricity.
Important Safety Note
Electricity kills. There's no sugar-coating it. The voltage behind the wall plate of your light switch is 120 volts alternating current in the US. It's 240 volts in the UK. Electricity has a very strong desire to travel from wherever it is, directly to the ground, taking the fastest route possible. If you touch a live wire with the wrong part of your body, and the electricity travels through the wrong organs on its frantic escape route to ground, you will likely die.
If this terrifies you and you feel like you have no business taking apart anything electrical, then do yourself a favor and hire an electrician. For those of you who are either trained in home electrical wiring, or you've got plenty of experience doing so safely: read on.
Removing Your Old Wall Switch
The first safety rule before working on any electrical wiring is to ensure that the power is off. Find the switch in your circuit box that identifies the room where your switch is located, and turn it off. Next, unscrew the screws that hold the switch faceplate in place, and remove the faceplate from the wall.

Once you've removed the faceplate, use a voltage tester to check that the screws where the electrical wires are connected on the side of the switch are completely without power. Once you've confirmed this, you're ready to remove the front screws that hold the actual switch itself in place.

A typical light switch is called a "single pole" light switch, and it will have two terminals -- usually black wires, though this will vary by country and when your lighting was first installed -- on the side of the switch. There's also a ground wire (usually uninsulated copper) at the top of the switch, ensuring that if a live wire touches the metal enclosure, it'll be safely grounded away.

If your switch has more than two terminals, then it's not a single-pole and the WeMo smart switch can not be installed here. The WeMo switch is a single-pole switch and can only replace the same kind of switch.
Once you've confirmed your switch is single-pole, go ahead and remove all of the wires from it by unscrewing all of the screws. With some switches you may also need to stick a small screwdriver in a hole in the back and twist slightly to release the wires.

Now that you've removed your old, outdated switch, it's time to install your brand new, state-of-the-art smart switch!
Installing the WeMo Light Switch
The wires coming out of your WeMo switch are as follows:
- One green: Ground.
- One white: Neutral.
- Two black: Hot.
The two black wires sticking out of your wall are one wire from your circuit box, and one wire going to your light. When your switch makes the connection, power runs through both of these black wires and turns on the light.
Using the orange wire nuts that came with your smart switch, connect one of the black wires from the back of your smart switch to one of the wires coming out of the wall. Next, connect the other black wire from the back of your switch to the other black wire coming out of the wall. It doesn't matter which black wires you choose to connect, so long as you've connected each one-to-one.

Finally, use another wire nut to connect the white wire coming out of your switch to the white wires sticking out of your wall box. If there are multiple white wires already connected via an existing wire nut, you'll just have to unscrew the wire nut, place your own switch's white wire with all of the other wires, and rescrew the wire nut over all of them.
Finally, use another wire nut to connect the green wire coming out of your switch to the copper ground wire coming out of the wall. That's it, you've just finished wiring your smart switch!
Now, carefully tuck all of the wires back into the box in the wall, and place your switch so that top and bottom screw holes align with the screw holes at the top and bottom of the wall switch box.

Using the two long screws that held the original switch in place, attach your new smart switch to the switch box.
Once it's securely in place, just take the faceplate that came with the WeMo smart switch, and snap it right into place. No screws required!

There you have it. Your new WeMo smart light switch is ready for use. Go back into the basement and flip the circuit to that room back on.
Setting Up Your WeMo Switch
All Belkin WeMo devices use the same approach to initial setup. First, you need to install the WeMo app (available via Google Play or the iTunes store).
Next, using your smartphone, connect to the wireless network that the WeMo device is transmitting. As your smartphone scans for new Wi-Fi networks, it should see the WeMo network.

Once you connect to the wireless network, open the WeMo app and follow the instructions to set up the device for the first time. This simply involves telling it what the name of your home's wireless network is, and the password to access it. After that, the app will reconnect your phone to your home's network and the WeMo light switch will show up in the list of devices in the WeMo app.
Configure a "Wake Up" Lighting Schedule
Once your new WeMo Smart Light shows up in your WeMo app, there are some really useful scheduling automations you can set up from right inside the app itself. In this example I'm going to show you how to set up a light alarm for your bedroom that turns on and off every minute, four or five times, to help you wake up more easily in the morning.

Down at the bottom of the main display, you'll see a "Rules" button. When you press it, you'll see a page where you can create new "rules". When you click the "+" button to add a new rule, you can choose between either creating a rule by time, or by using an "auto-off" timer.

For this example rule, you're going to select the "By time" rule type.
The rule is to turn the light on or off. For the first rule, set it up to turn the light on at 5:00 AM every day of the week, Monday through Friday.

Once you've created that rule, make another rule that turns the light off at 5:01 AM.

Repeat, creating rules that turn the light on at 5:02, off at 5:03, on at 5:04. Then you can leave the light on until maybe 5:30 AM with a new rule to turn it back off at that point.
If you haven't woken up after over 25 minutes of the bright overhead bedroom light being turned on, you're a lost cause.

As you can imagine, both the Time and Auto-off Timer rules inside the WeMo app offer plenty of opportunities to come up with some creative automations for your light.
Still, IFTTT offers many more, so I'd be remiss if I didn't share an example of how to create an interesting WeMo smart light automation using IFTTT.
Create "Panic Alarm" SMS With a WeMo Smart Light
Where there is plenty you can do with your WeMo switch through the WeMo app itself, the bulk of creative things you'll be able to do with this switch comes from the IFTTT service.
If you've never used IFTTT before, please be sure to check out our IFTTT guide to get your account set up.
The goal of this example will be to make it so pressing down the switch for more than two seconds (a long press) will trigger an SMS "panic" message. This way anyone in the house could send a panic message if something is going terribly wrong.
The first step is to make sure you've enabled IFTTT from inside your WeMo app. Once you've done this, you can select the WeMo switch as a trigger option from inside of IFTTT.

"Long Press" is one of the available trigger options for the WeMo smart light. When you move on to the next step, you can choose the Android "Send an SMS" action.

Next, fill out the phone number of the smartphone you want to send an SMS to in the case of a long press "panic" event.

You can also customize the code to include the name of the switch that was set off with a panic press (upstairs bedroom or downstairs kitchen), as well as the time that the button was pressed.
Now if anyone is having a medical or any other emergency and they can't get to their phone, they can simply press the light switch for two seconds and you will be alerted that something is wrong at home. If you're close enough, you can go home to help, or call 911 and get emergency services there right away. Just make sure your family knows how serious things have to be in order to do a long-press on the smart light switch!
Much More Than a Light Switch
As you can see, having a smart light switch is more than just turning your lights on and off. Once you've installed one in even one room, there are all sorts of cool things you can do with it to improve your life. Installing it is easy, and making use of it is even easier.
Have you ever installed a smart switch in your home? If you haven't, what's stopping you? Share your thoughts in the comments section below.