A solid state hard drive is one of the best upgrades available for a modern computer. It increases the load times of programs dramatically, which in turn makes a PC feel snappier. Results can be dramatic. Some games, for example, loaded several times more quickly from an SSD after I replaced my own mechanical drive.
The benefits of SSDs are not in question. But how do you install one? Actually, installing a hard drive is one of the easiest upgrades possible. Anyone with two hands and a screwdriver can do it. Here’s how.
Note: This guide assumes you have a SATA SSD. Not sure what you have? Check our guide on PCIe vs. SATA to find out.
Obligatory Back Up Notice & Disclaimer
Before we dive in, let me remind you that this is a guide about installing computer hardware. That means opening your PC, connecting new cords and potentially disconnecting others. Problems are rare, but there’s obviously more risk to your computer than there would be if you did nothing at all.
Also, back up your data. This is a guide about installing a solid state hard drive. Even if nothing goes wrong, that new drive will be blank, and you’ll have to install a fresh version of your operating system on it or clone an existing drive to it.
Getting Ready
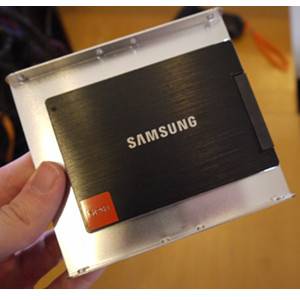
This guide is not a buying guide, so I assume that you have already purchased a solid state hard drive.
Before installing you’ll need to know if your desktop has 2.5” drive bay inside it. This can be hard to determine if no solid state drive is already installed. It will simple be a small, think bracket 2.5 inches in width. Don’t be surprised if there isn’t one. Even new desktops often lack this feature.
To install a solid state drive in a case without a 2.5” drive bay an adapter is required. This is a small metal tray similar in size to a 3.5” mechanical hard drive. It will have screw holes in its bottom that correspond to the screw holes on the bottom of the SSD. Just line them up and install like so.

When you have it assembled it should look something like this.

The only other hardware you must have is a SATA cable. Most SSDs will come with one bundled in the box. It should look something like this.

Once you have the SSD in the adapter (if necessary) and a SATA cable handy, you’re ready to go.
Installing the SSD
Disconnect your PC from all power and peripheral cords and move it to a flat, level surface with good lighting. Once settled, open it open. A standard tower PC will usually open on the left side (as viewed from the front). The panel will be secured by screws on the back. Not every case is like this, however. You may need to refer to your computer’s manual.
Once open, locate the drive bays. These are usually at the front of the case below the large optical drive bays. The bays themselves are usually just metal brackets with screw holes, though some more expensive cases will custom “tool-less” mounting system. If your case has such a system you may need to refer to it for mounting instructions.

Slide the SSD into its bracket, lining up the screw holes in the SSD or the 3.5” adapter with the holes in the drive bay. Make sure to install the drive so that its SATA power and data connectors are facing the motherboard.

Now secure the drive with screws. They should have been provided with solid state drive. If you for some reason are lacking screws, they can be purchased an enthusiast stores for very low prices.

With the drive secure it’s time to connect it to the motherboard. On the motherboard there will be a SATA port that looks like so.

Connect the SATA cable into one of these ports and connect the other end to the SSD. Note the L-shape design of the connection. This makes it impossible to install it in the wrong direction without a ridiculous amount of effort.
Next connect SATA power to the SSD. It is a long, thin, black connector with an L-shape design. It will be a part of your PC’s power supply.

A supply will often bundle three of these connectors together on length of cord, so where there’s one, there’s usually two more.
The drive, with data and power connections, should look like this.

You’re done! Now all you need to do is put the case back together and boot up your PC.
Installing An Operating System
Now the new SSD is installed. If you didn’t take out your existing hard drive, however, your computer will boot normally when you turn it on. The new drive will appear as a storage drive.
There are two ways to place an operating system on the new drive. One is to clone the data on your previous drive to the new one. The other is to start fresh and put a new installation of your operating system on the new drive.

Our own Justin has written a guide about how to clone your hard drive. Please see his article for information on that topic and come back here once you’ve finished. Otherwise, continue on.
Now that you’ve cloned data to the SSD, or decided to do a fresh install, you need to make the SSD your boot drive. This can be done only by entering your computer’s BIOS. Reboot the computer and then press the BIOS hotkey at the first boot screen (this is usually Delete or F12). Your operating system will not boot and BIOS will appear instead.
Windows 8 users might be able to access UFEI (the successor to BIOS on modern computers) through Windows itself. See our guide for more.
Once BIOS or UFEI is open look for a section labeled “Boot” or “Advanced Options.” Then look for the hard drive sub-category and open it. You will then see a list of currently connected hard drives. Your old hard drive will appear at the top, while your new hard drive will appear further down. Change the boot order so the SSD is at the top. Make sure to save the new settings when you exit BIOS/UFEI.

Now your computer will boot from the solid state hard drive. If you cloned data to that drive you are done. If not, you can now install the operating system of your choice as you would normally.
Driver Installation
Once you’ve boot into your operating system from the solid state drive it’s time to install drivers. Most SSDs will come with drivers, and I do recommend installing them. They usually include drive management utilities that maximize the performance and reliability of the drive.
There’s nothing else to note about installing drivers. They install like any other software. Just pop in the CD or run the executable and follow the installation wizard’s instructions. You may need to reboot after installation is complete.
Conclusion
I hope that you enjoy your new solid state drive. You’ll no doubt notice that programs load much more quickly than before. Boot times will also be quicker. Because SSDs tend to have small storage capacities it’s a good idea to manage data so that only important files and programs are on new drive. See our SSD management guide for more.
Image Credit: Legit Reviews