The latest version of Adobe Photoshop comes with a bunch of new brushes, but if you want to find and install your own brushes, it just takes four easy steps.
Installing Brushes in Adobe Photoshop
After you've downloaded the ABR brush file to your computer, do the following:
- In the menu, go to Windows > Brushes to open the Brushes panel.
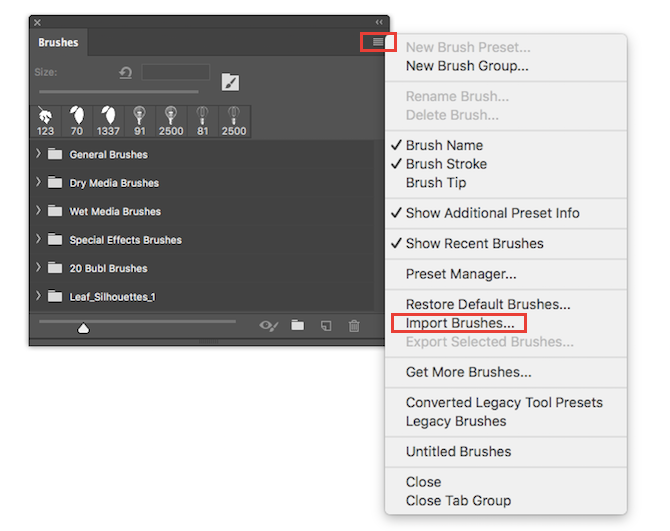
- Click the menu button in the top right corner of the panel and click Import Brushes...
- In the window, navigate to where the brushes are saved on your computer. Find the file with the .ABR extension and double-click it.
- The brush or group of brushes in a folder will now appear at the bottom of the list of Photoshop brushes.
Backing Up Your Photoshop Brushes
If you want back up your brushes and import them on another machine, open the Brushes panel and select all your brushes. Click the menu button and select Export Selected Brushes. Your brushes will be saved as one ABR file that you can then import on another computer.
Keeping Your Photoshop Brushes Organized
If you want to stay organized, you can copy and paste the ABR files to the Brushes folder in your system's Photoshop file. (This step is not necessary to install new brushes.)
Mac users can find this folder by following this path: Macintosh HD/ Applications/Adobe Photoshop CC 2018/Presets/Brushes. Windows users can follow this path: C:\Program Files\Adobe\Adobe Photoshop CC 2018\Presets\Brushes.
There are plenty of places you can find free Photoshop brushes, but don't forget, you can also create custom brushes yourself.
Where do you go to find Photoshop brushes? Let us know in the comments.


