<firstimage="https://www.makeuseof.com/wp-content/uploads/2011/06/arch_intro.jpg">
During my couple of months here at MakeUseOf, I've mentioned Arch Linux (hereafter simply called "Arch") a couple of times. However, Arch Linux has never really been covered here, so people may still be a little bit confused as to the purpose of Arch, and more importantly, how to get it installed and running on their computer. No need to worry folks, as I've got you covered with a clear path to getting an Arch system with GNOME running on your system.
About Arch
Arch is a distribution that concentrates on the KISS principle (Keep It Short and Simple). Therefore, the entire distribution is very minimalistic and values code correctness. Arch has no defaults. As a warning, Arch focuses a lot on the terminal. So go ahead and boot it up, log into it, and run the setup script, which will begin your journey.
Once you've successfully installed Arch's base onto your hard drive, you'll boot from that and start with the installation of the graphical server, sound server, and eventually work up to the desktop environment. In other words, you build up your own personalized system from almost (but not quite) scratch so there isn't any "fat". You could install any of the desktop environments that it has to offer, or you could skip all that and use your Arch box as a server. What you do with it is up to you.
Getting Started
So, as I said, you first have to download the base ISO from their website. For my test installation, I'll be using VirtualBox, and because the emulated hardware of VirtualBox will require a few different packages than raw hardware, a few parts of this series won't work word for word. Whenever such a moment arises, I'll let you know and try to give clear directions for what is possible for your raw hardware.
Once the download completes, you'll need to burn it onto a CD or USB stick. Once that completes, go ahead and boot your computer from that media and it'll load onto the login screen with instructions on what to do next. The screen will tell you what the root and user logins are, so go ahead and use the root login because you'll want as many permissions as possible to perform an installation.
Installation
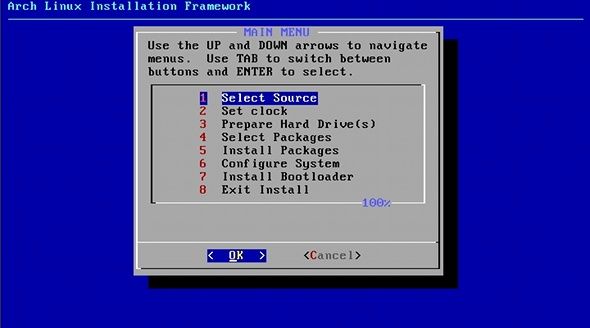
When you successfully log in, the next screen will tell you that you need to run /arch/setup to launch the setup script. It will then welcome you to the installation and continue.
You'll first have to select the source. Unless you downloaded the netinstall ISO, I'd recommend installing from the CD. Next you'll need to set the clock, which should be straightforward. You'll also need to choose whether it should set the BIOS time as UTC or localtime. Unless you have a Windows partition on your hard drive, I'd recommend using UTC.
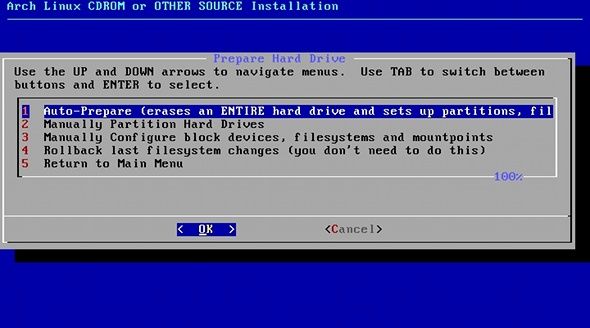
The next step is to partition your hard drive. You can do this automatically, where you can specify the sizes of the /boot, swap, and /, where /home will take up the rest of the hard drive. You'll also need to select the file system you wish to use, and accept one last confirmation before changes take place.
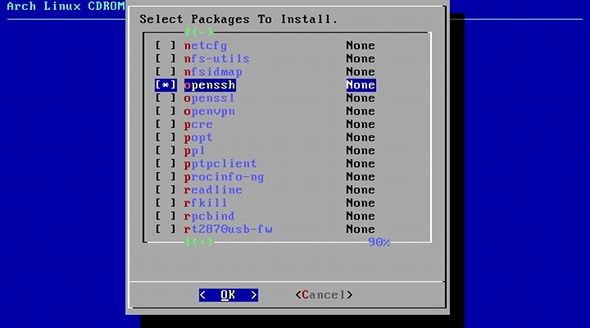
Going on, selecting packages is the next step. It'll first ask you if you wish to install the base and base-devel, but unless you specifically need base-devel, I'd just install base. Next you'll get a list of other possible packages to install. The first ones that are all marked belong to the base group, so you need to keep those. Below that are some other packages. You should look through this to see what you might need, such as sudo, tzdata, openssh, kernel headers, and possibly WiFi tools. You can select packages that you want with the spacebar, and hitting enter will continue to the next screen.
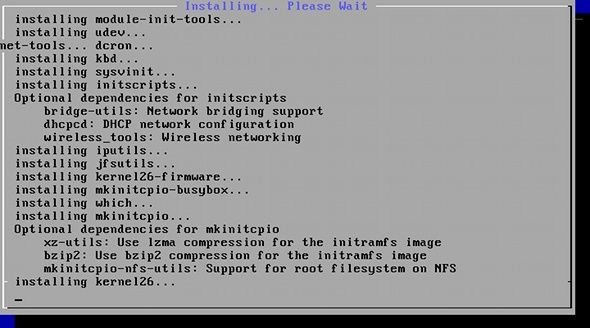
After selecting the packages to install, the next step is to actually install them.
In only a couple of minutes you'll get a screen that says that the installation has completed. Hit enter to leave that stage, and you'll again be greeted by the menu.
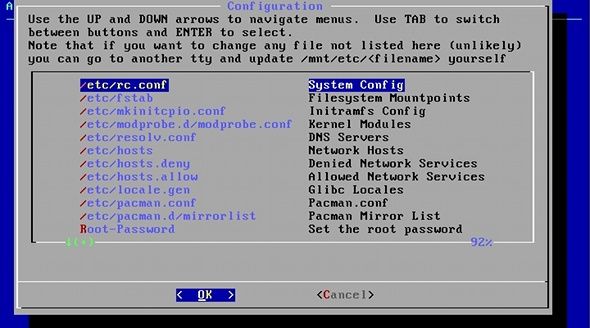
Next you have to configure your system for anything that is configurable at this time. First you need to edit /etc/rc.conf. Select that file, then scroll down until you find hostname. Between the quotation marks, change myhost to something else that will identify your computer. The rest of the defaults should be fine. Hit Ctrl + X and Y to save, then head over to /etc/pacman.d/mirrorlist. Here you'll need to go through the list and choose some servers you'd like to pull updates from.
Preferably you should enable servers that are geographically close to you. To enable a server, you need to delete the # in front of the line. Once you've done doing that to all servers you would like to check, save with Ctrl + X and Y. Finally, you need to set your root password, which is self explanatory. Now you can scroll to the bottom of the menu and hit Done.
Final Stretch
Finally, install GRUB. If you have other operating systems, you will need to add them into the configuration. It asks you to confirm. Choose where to install, let it install, hit OK, and type reboot to restart. You're finally done!
If you're following this article, how did your Arch Linux installation go? Anything that needs improvement? If you haven't tried yet, are you going to? Let us know in the comments!


