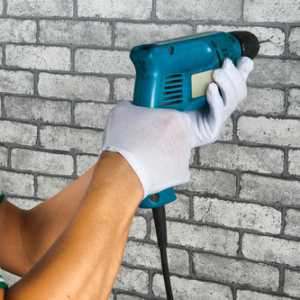
Mounting gadgets to the wall has some key benefits; you get them out of the , you free up space, and it looks better, too. There is an added benefit for wall mounting your wireless router; the right position, for example high up on your wall, can dramatically improve WiFi reception. Keep in mind that the average 1/2-wave dipole antenna radiates RF energy in a doughnut shape. So when you mount your wireless router, make sure it is positioned in a way that it provides optimal reception throughout your home.
Mounting sounds like a DIY job that requires handicraft skills and special tools. Well, there are proper ways and then there are clever workarounds. I'm here to show you both. Whether or not you have any tools or any skills, at least one of three approaches - screw it, hang it, or tape it - is going to work for you.
Screw It
This obviously is the proper technique to wall mount a router or any gadget.
Equipment:
- drill and/or screw driver.
- screws and anchors, depending on load and type of wall.
- handicraft skills.
Most WiFi routers and other devices meant to be wall-mounted come with holes or grooves that fit a screw.

My latest router even came with screws, wall plugs, and an adhesive paper template for drilling the holes.

This is smart and user-oriented design. Don't worry if your device wasn't designed that well. The wall plugs and screws depend on your type of wall anyway and marking the holes you need to drill is the easiest part.
First you need to find and avoid electrical wires in your wall.
In brick or concrete walls, wires typically run vertically or horizontally between switches, power outlets, and junctions. You will want to avoid those horizontal and vertical connections, as well as the immediate area around an outlet, switch, or junction. In older houses or self-built walls, the wiring could be erratic. To be on the safe side, use a wiring finder.
In drywalls, wires typically run horizontally through the wall at 6" to 12" above the receptacles. Also, the wiring runs around 1-3/4" deep in the studs that support the wall. So if you drill holes no deeper than that, you should be safe. Again, you can use a wiring finder to be 100% safe.

Second, pick the right type of screw, wall plug / anchor, and spot on the wall that will support your wall mount.
The advantage of brick or concrete walls is that you can basically drill anywhere, provided the area is free of electrical wires. Unless you use a special concrete screw, you do need a wall plug that matches the size of your screw, otherwise the screw will be loose. In solid materials, you can use plastic expansion anchors (shown below). In solid walls, you can use thicker and longer screws to support heavier loads. In drywalls, expansion anchors will support loads of up to 10 pounds.

If you have drywalls, find the wooden studs in your wall (see further down) and screw right in there. For light gadgets you don't need to drill a hole. Your hardware store has special drywall or wood screws for that purpose. Both types of screws have a pointy tip and are self-tapping.

If your indoors drywalls are supported by metal studs, avoid the studs and look into special drywall anchors instead. Like wood screws, EZ-Ancors are self-starting, but drilling a guide hole is recommended. The EZ-Ancors will support loads up to 20 pounds.

Moly Bolts or similar type anchors are ideal for hollow walls. They will split in the middle or at the end once the screw is inserted. This results in a firm clamp between the screw head and its split half behind the wall. Make sure you pick the right depth between screw head and splitting part.

Bolts provide solid support, whether the weight the screw is holding pulls downwards or outwards. For heavier loads of up to 50 pounds, use a toggle bolt.

For more information and visuals on how to install anchors, check out this video:
http://youtu.be/c3by-3a8RFc
At this point you probably wonder how to find the wall studs. There are stud finders that come paired with wiring finders. If you don't want to invest in such a device, you could just use a strong magnet. It will detect drywall screws or nails, which are used to attach the drywall to the studs. A magnet will not find aluminium studs, since Al is not a ferromagnetic metal. Steel studs on the other hand can be magnetic, depending on their exact structure.
Alternatively, you could drill a small hole into your drywall, which later can be sealed with spackling paste. Take a 20+" wire, bend it in the middle, insert it into the hole, and rotate it until you hit something solid on either side. The wire can help you find out exactly how far the stud is located from the hole you drilled. Given that suds are usually spaced on 16" or 24" centers, you now have a pretty good idea where the studs in your wall are.
Finally, you can use logic and a simple test, as explained in the video below:
If your device didn't come with screw holes, you need a workaround, such as fixing it between rubber bands that run between two screws, as this guy demonstrates:
Hang It
If the gadget you want to mount isn't heavy and if the result just needs to be practical and not pretty, you might be able to just hang it. The advantage is that you don't need any skills or tools and it will work on most types of walls.
Equipment:
- pin or small nail
- zip tie or any type of string
Your device needs to have something that you can wrap the zip tie or string around. Wireless routers usually have air vents and the bars between them are ideal for this amateurish type of wall mounting technique. The details are demonstrated in the video below:
Tape It
Depending on the structure of your wall, you might also consider taping the device to the wall. For example, to clean up the computer cable clutter under my desk, I have mounted my modem using Velcro.

Equipment:
- even surface
- industrial strenght velcro or doublesided tape
Alternatively, you could use something like Sugru, a self-setting rubber, to create a custom mount that sticks to many different types of surfaces when it's fresh, but at room temperature turns into non-adhesive rubber over night.
Conclusion
Wall mounting is a little science of its own. The good news is, it can be learned. And if you're still intimidated by drilling or similarly serious handicraft activity, there are many more alternatives than the ones I mentioned above. Do visit a hardware store and ask for advice; those guys usually have a great solution for any skill level.
What is your favorite wall mounting technique to wall mount a router or any other device? Have you ever had anything come down after mounting it? Please share your stories in the comments!
Image credits: Drilling Wall via Shutterstock, Drywall via Shuttestock, Dowels via Shutterstock, Wood Screws via Shutterstock, EZ-Ancor via Shutterstock, Moly Bolt via Shutterstock, Toggle Bolt via Shutterstock