You blog, I blog, everybody blogs and one of the names that stands out in the blog world is Wordpress. During the past several years, it has become the main choice for blogs all around the world - including the one that you are reading right now.
The main reasons: it's very good and very free - not to mention very expandable in functions and very flexible in looks if you use the self hosted Wordpress.
Given those facts, it surprises me that lots of people are still afraid of the (self hosted) Wordpress. "Wordpress is for geeks," they say, "It's too difficult for me."
Well, you can't love what you don't know. So, the first step is to get familiar with it and what better way to know more about Wordpress than to install Wordpress locally on your own computer? Be it a Windows, Mac or Linux PC. Plus, this is also the best way to check out plugins and themes before using them in the real live online blogging world (and start building your own Wordpress themes and plugins - should you choose to go that far).
Here's how you do it :
Step 1: Building The Local "Web Server"
In order to install Wordpress locally, you need to have a SQL database and a PHP environment in your computer. Before you ask with fear what creatures they are, let me clarify that these days you can easily summon them just by downloading and installing one of these:
- For Windows: XAMPP or WAMP (Read MakeUseOf review)
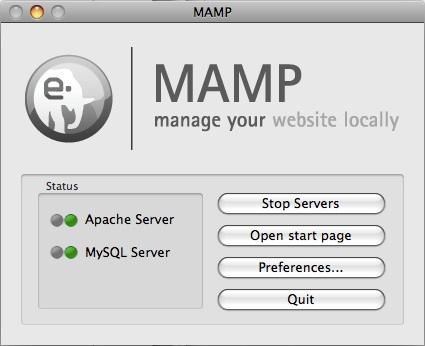
- For Mac: MAMP
- For Linux: LAMP
I use a Mac so the steps below are explained using MAMP. But the steps are valid under any OS and so slight differences are to be expected.
Step 2: Creating The Database
Open your AMP app and the server will automatically be on.
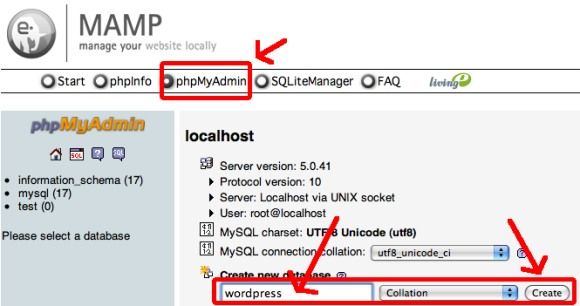
The web interface will show up in your browser. Choose "phpMyAdmin" tab.
Find "Create New Database" box, put a name there, then click "Create"
Step 3: Getting Wordpress
Download the latest build of Wordpress (at the time of writing is version 2.7)
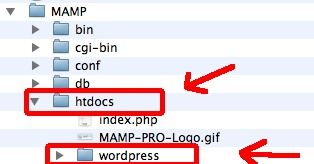
Extract the zip file into the htdocs folder inside the AMP folder. It will automatically create a "wordpress" folder there.
Step 4: Configuring The Wordpress Database
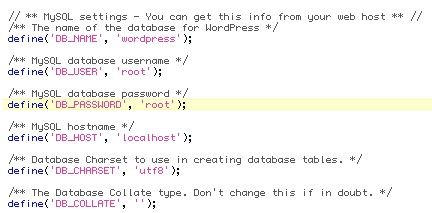
Go inside the Wordpress folder, then find and open file wp-config-sample.php using any text editor.
- Find these lines:
--> 'DB_NAME' and change "˜putyourdbnamehere' with "˜the database name from step 2'
--> 'DB_USER' and change 'usernamehere' with "˜root'
--> 'DB_PASSWORD' and change 'yourpasswordhere' with "˜root'
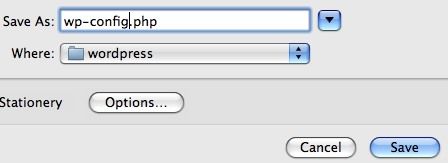
Save the file as wp-config.php
Step 5: Installing Wordpress
Open this address in your browser: http://localhost:8888/wordpress/wp-admin/install.php
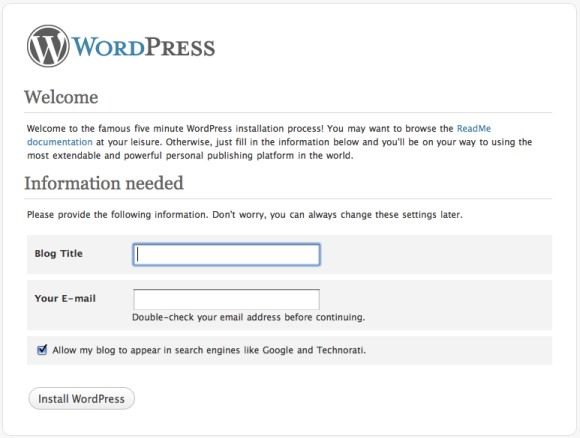
You'll be asked to put in a blog name and an email address. Click "˜Install Wordpress' after filling in those boxes.
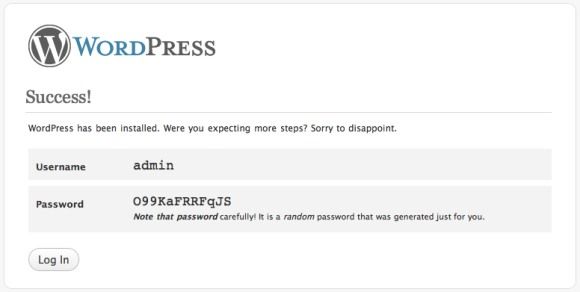
Wordpress will generate a username (admin) and a random password for you. Please keep the password safe until you have the chance to change it later. Click 'Log In' to continue.
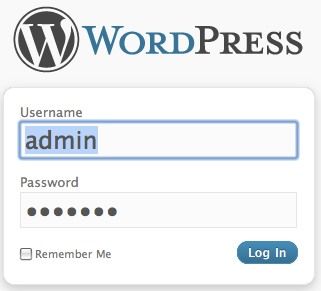
Fill in the username and password and click 'Log In' one more time.
Step 6: Changing The Password
Congratulations, you've just built your own local Wordpress blog to experiment with. But there's still one more crucial step to take: changing the randomly generated password to something you can remember easily.
Go to menu Users --> Authors & Users --> Admin --> Edit
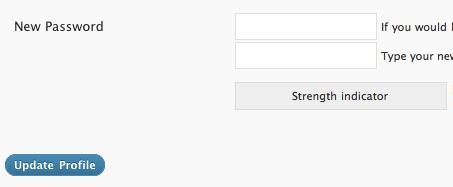
Find the two password fields down at the bottom of the page, fill in the empty boxes with your preferred password.
Click "˜Update Profile'.
That's it! Why not start experimenting with your Wordpress blog and see how you like it. If you have any problems, leave a comment and we'll see if we can help.


