
Can you move pages in Word? Depending on the type of document you're creating in Microsoft Word, you may find yourself in this situation.
It's especially likely for lengthy documents—moving a page on Word can "make or break" the document in the right circumstances. Here, we'll take a look at some ways to move, reorder, and rearrange pages in Microsoft Word pages.
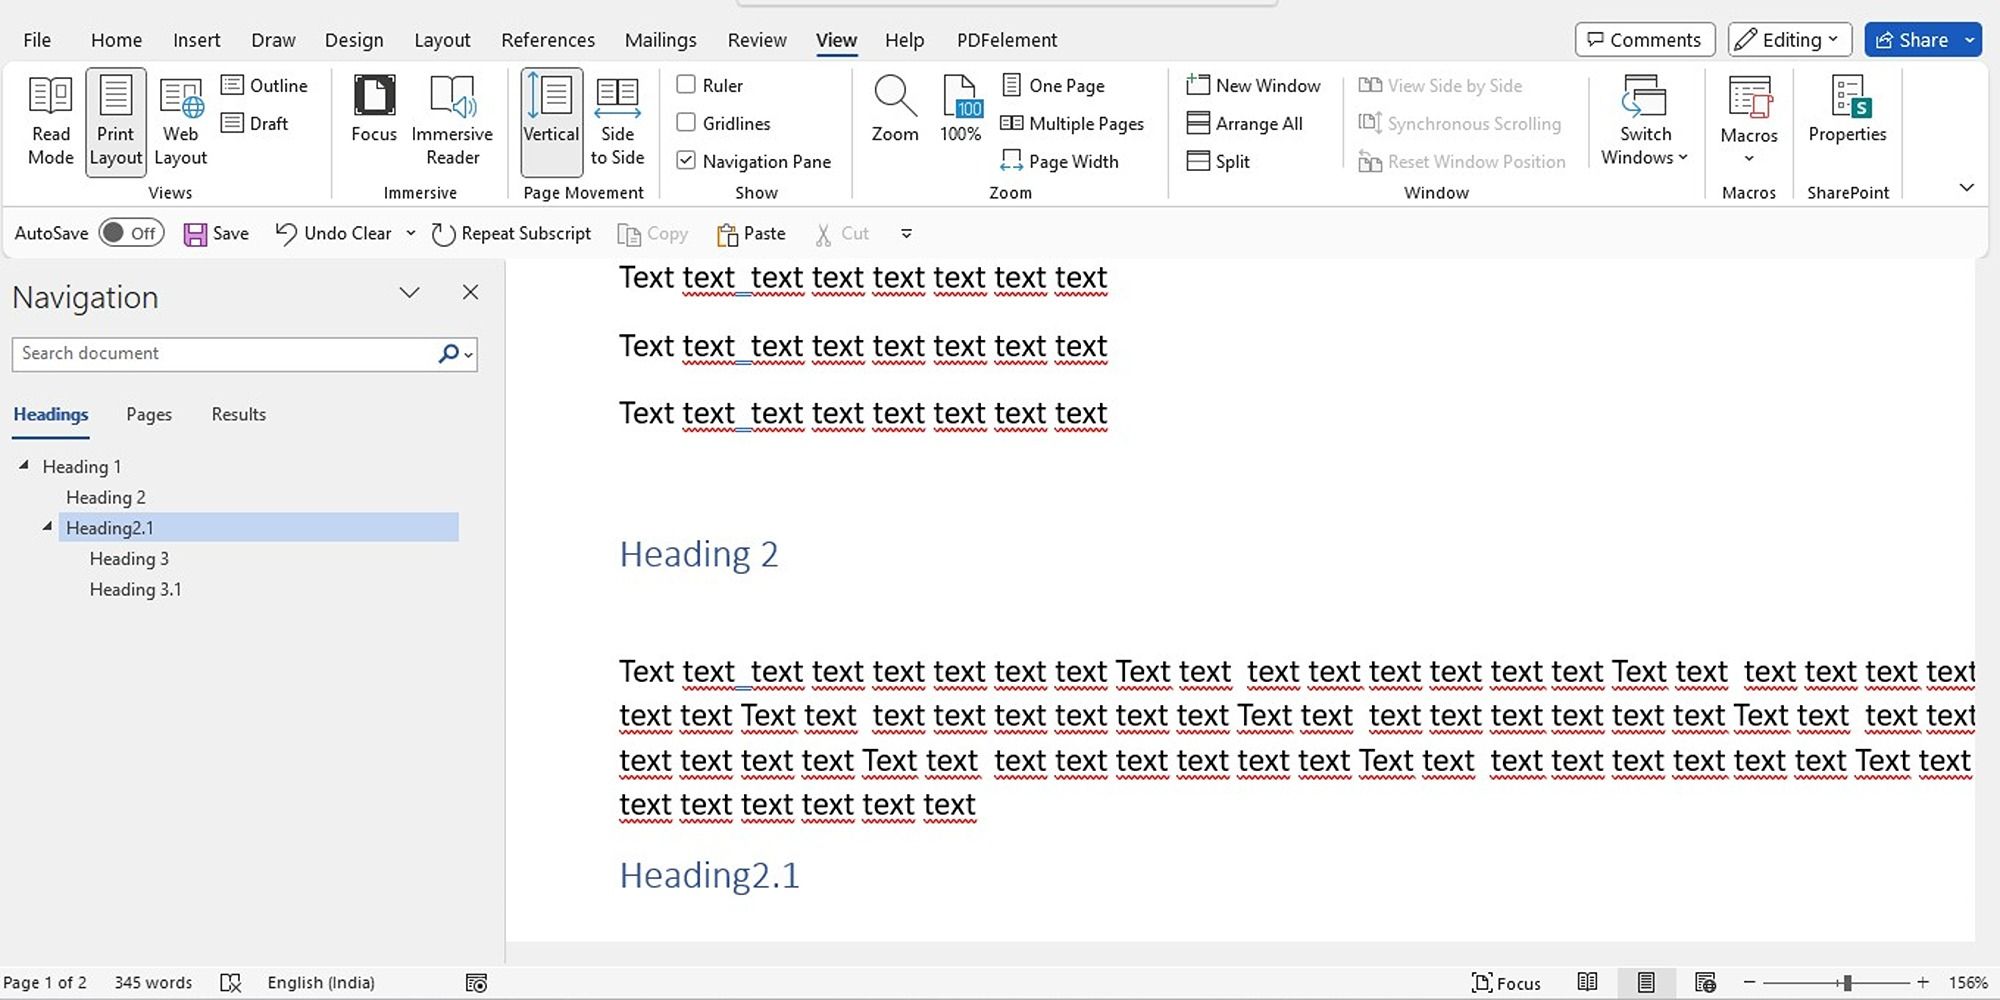
How to Interchange Pages in Word With the Navigation Pane
The Navigation Pane in Word is a handy tool for jumping to specific spots in your document without having to scroll or search. For this reason, the Navigation Pane method is the way to go if you use headings in your document. And it's most helpful if you have a heading at the top of each page.
- Click the View tab and check the box for Navigation Pane.
- When the tool opens on the left side of your document, click Headings in the pane.
-
To move part of the document, click the heading in the Navigation Pane and drag it to a new location in the Headings list.
- As you drag the heading, you'll see a dark line appear.
- When the line is in a spot where you want to move the heading (page), release it.
- You'll then see the heading and its contents in the new position; your document will reflect this change as well.

You can always format your text with headings. If you currently don't have your text formatted with headings, make sure to format your text by heading over to the Home tab. Select your text, and choose a heading in the Styles section of the ribbon in Microsoft Word.
Remember that all headings in the Navigation Pane are listed in descending order. So the order will be Heading 1 at the top, then Heading 2, Heading 3, and so on. To move an entire page, or section, use the highest-level heading for that section.
Ever end up with weird formatting when you paste something from the web into your Word document? We recommend some helpful ways to strip formatting while using copy-and-paste functions, for both Windows and Mac users.
How to Move Pages in a Word Document With Keyboard Cut-and-Paste
Apart from the Navigation Pane, you can rearrange pages by cutting and pasting, if you have to. If you prefer to maneuver this way with your keyboard, here's how to arrange pages in Microsoft Word in that style.
- Place your cursor at the very beginning of the text on the page you want to move to.
- Hold your Shift key and press the Page Down (Pg Dn) key. This will grab a screen's worth of text.
- If you need to select more, continue holding Shift and press Page Down again. You can do this until you have them all.
-
Press Control (Ctrl) + X to cut the text you selected.
- Move your cursor to the spot where you want the page moved to and press Control (Ctrl) + V to move the page. Word does all the rest.

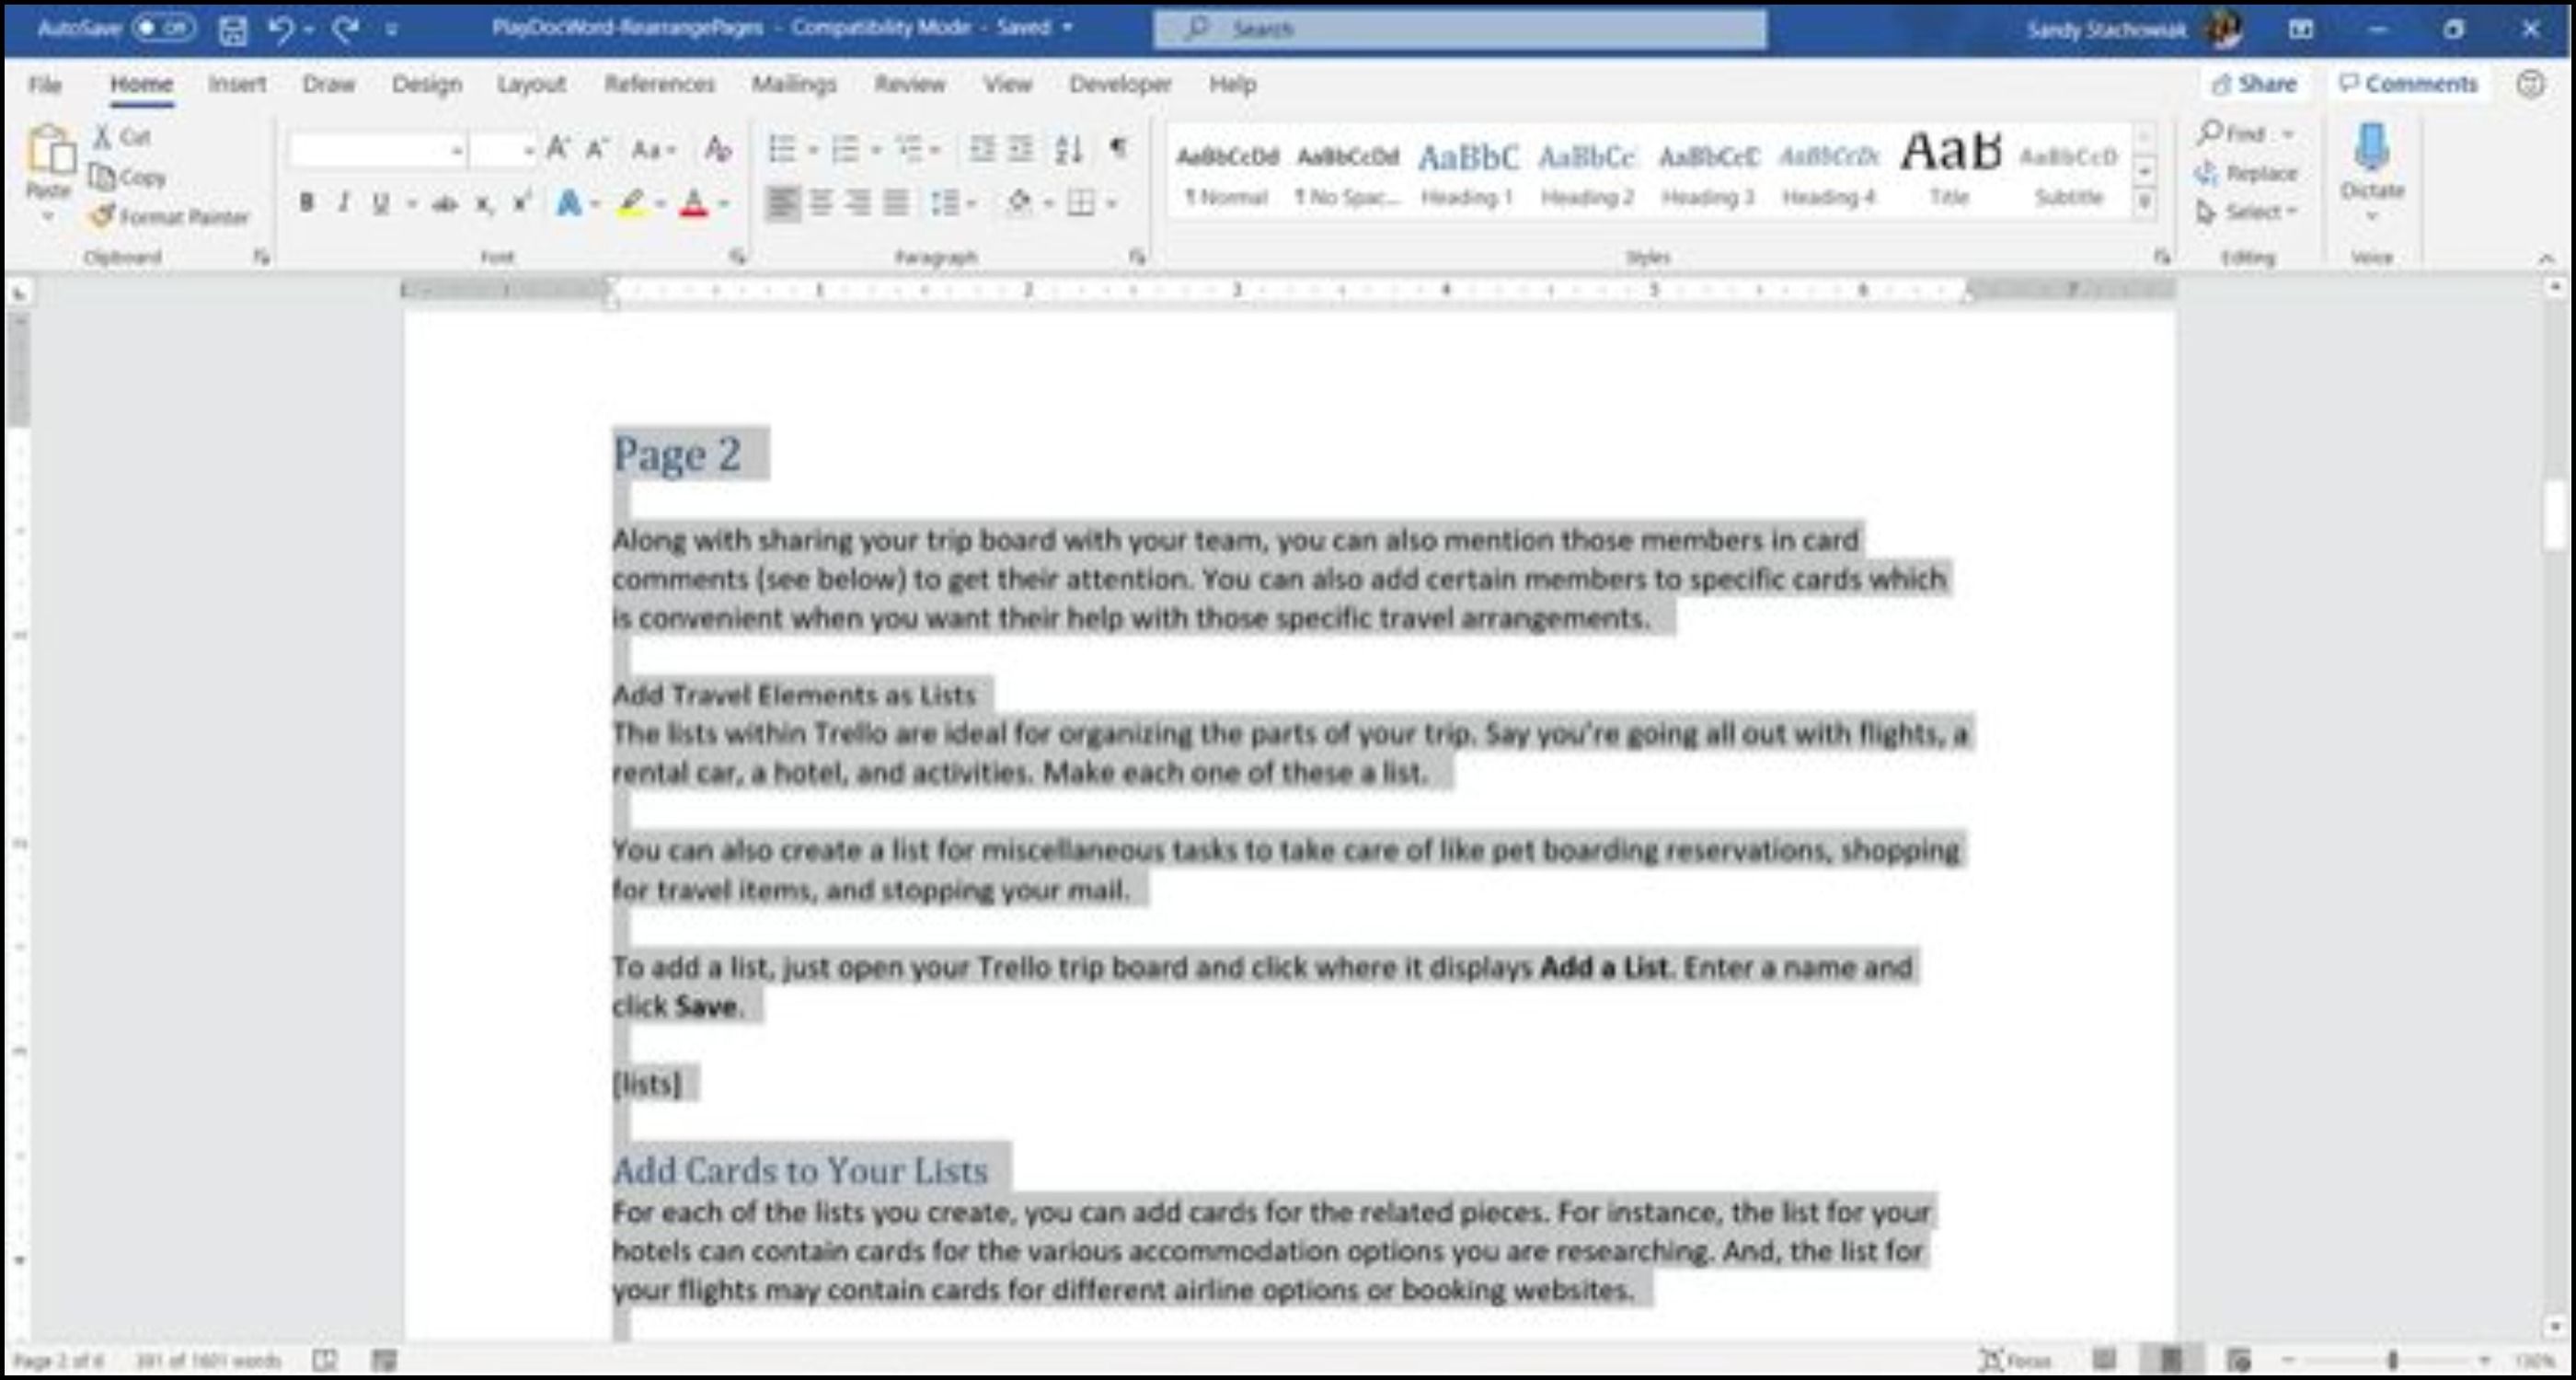
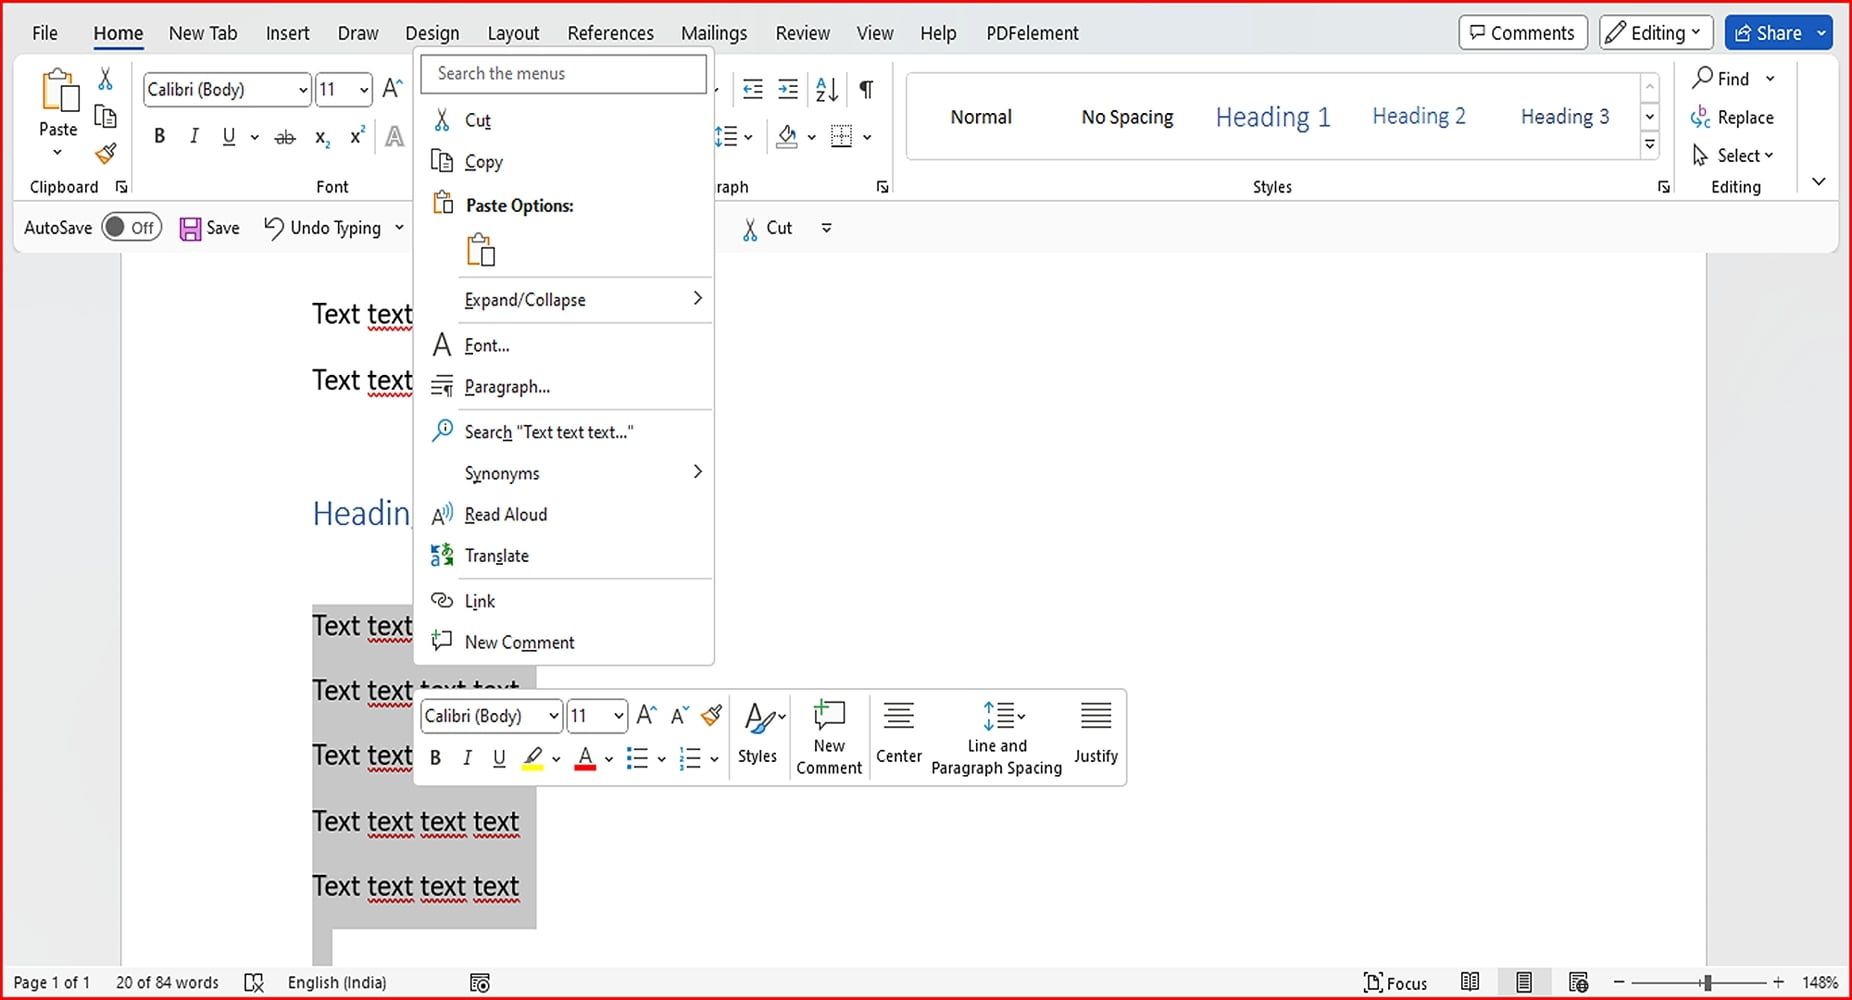
How to Change Order of Pages in Word With Mouse Cut-and-Paste
Maybe you're a pro with your mouse and would rather use it than the keyboard while moving pages in Word. You'll do the same thing to cut and paste the text, but a little differently. Here's how to do it:
- Place your cursor at the beginning of the text on the page you want to move.
- Hold the left mouse button while you drag through all the text on the page, then release.
- Right-click and choose Cut. Move your cursor to the spot where you want the page moved to.
-
Right-click, and pick Paste from the shortcut menu.

We also recommend taking a look at these handy tips to keep in mind while working in Word.
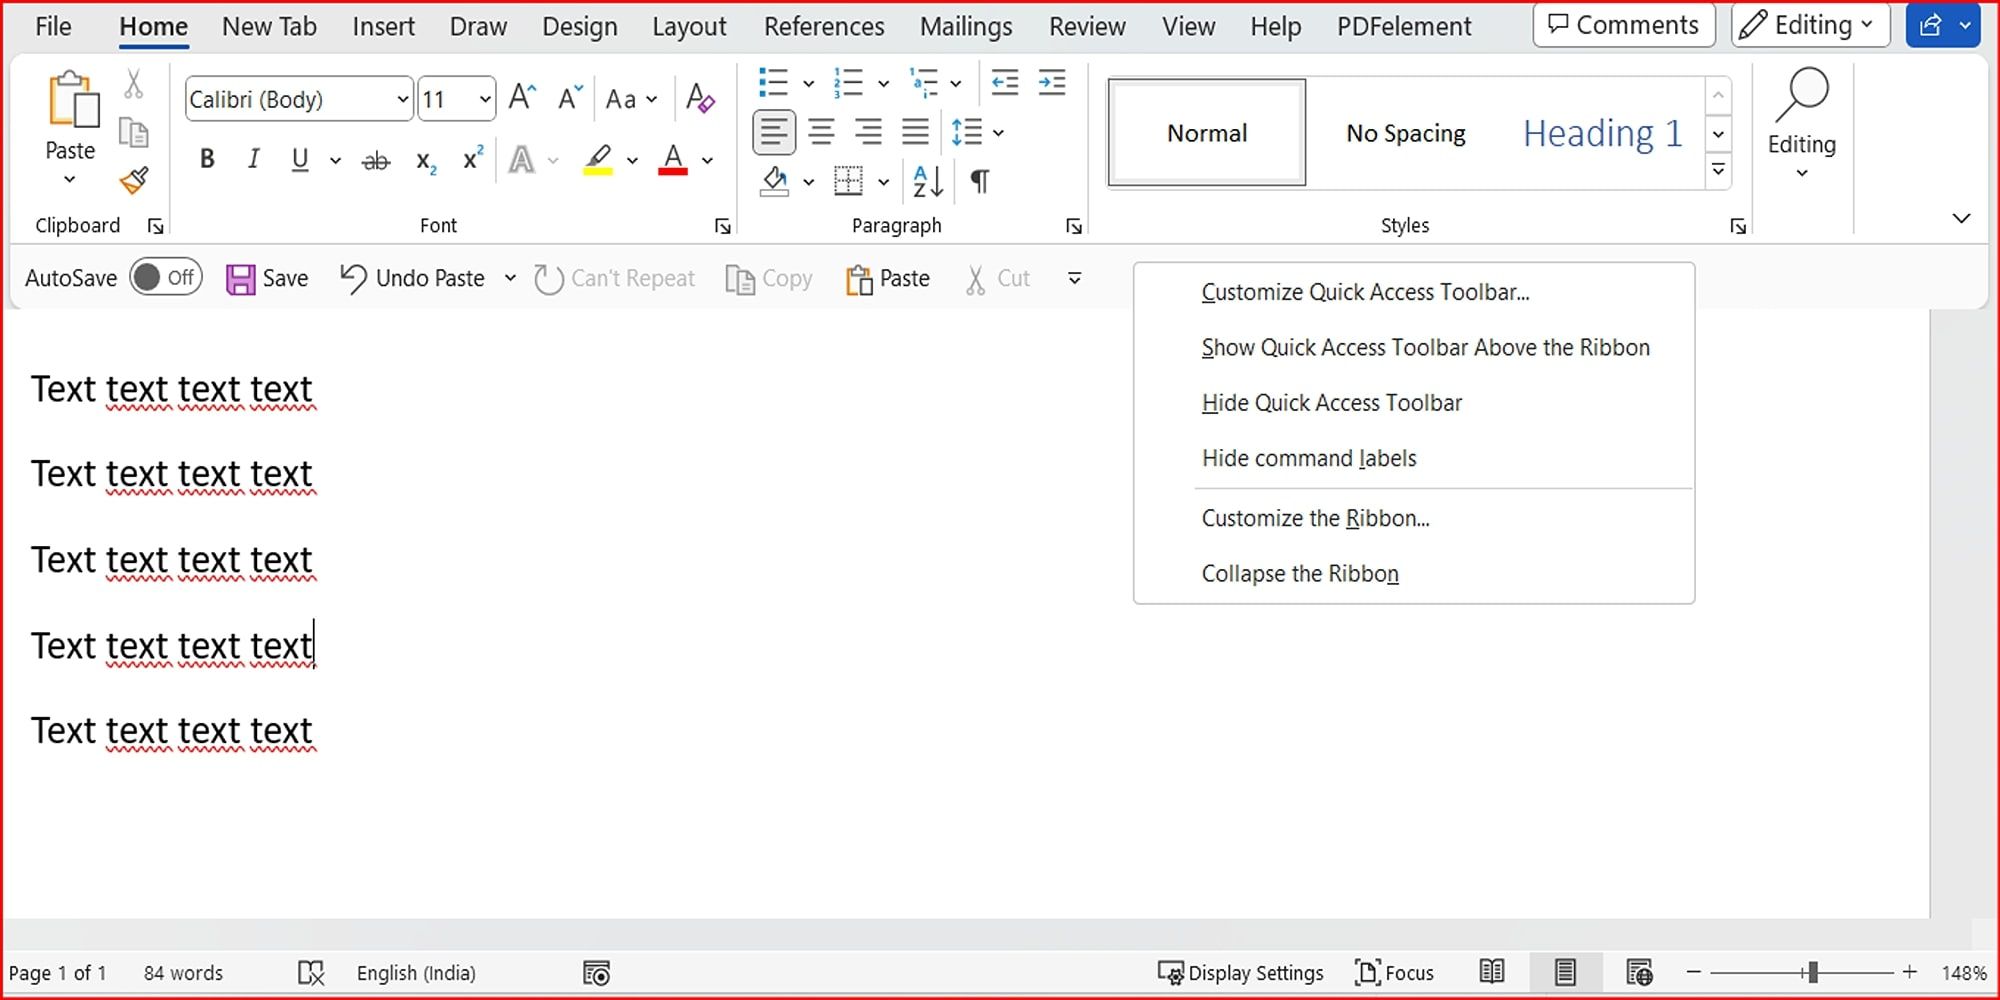
How to Reorder Pages in Word With the Quick Access Toolbar
If you would like to swap pages in Word with custom settings like the cut-and-paste commands in the Quick Access Toolbar, here's what you need to do:
- To get started, open up the Quick Access Toolbar by right-clicking anywhere on the ribbon at the top of the document.
-
Click on Customise the Ribbon > Quick Access Toolbar.
- Click on the dropdown Menu, scroll down, and select All Commands.
- A new window will pop up where you can select specific commands that you wish to add to the Quick Access Toolbar.
- You'll sometimes need to group commands as directed. Follow the on-screen instructions for the same.
-
Find Cut and Paste (individually) in the list of options and tap the Add button to include them in the toolbar.
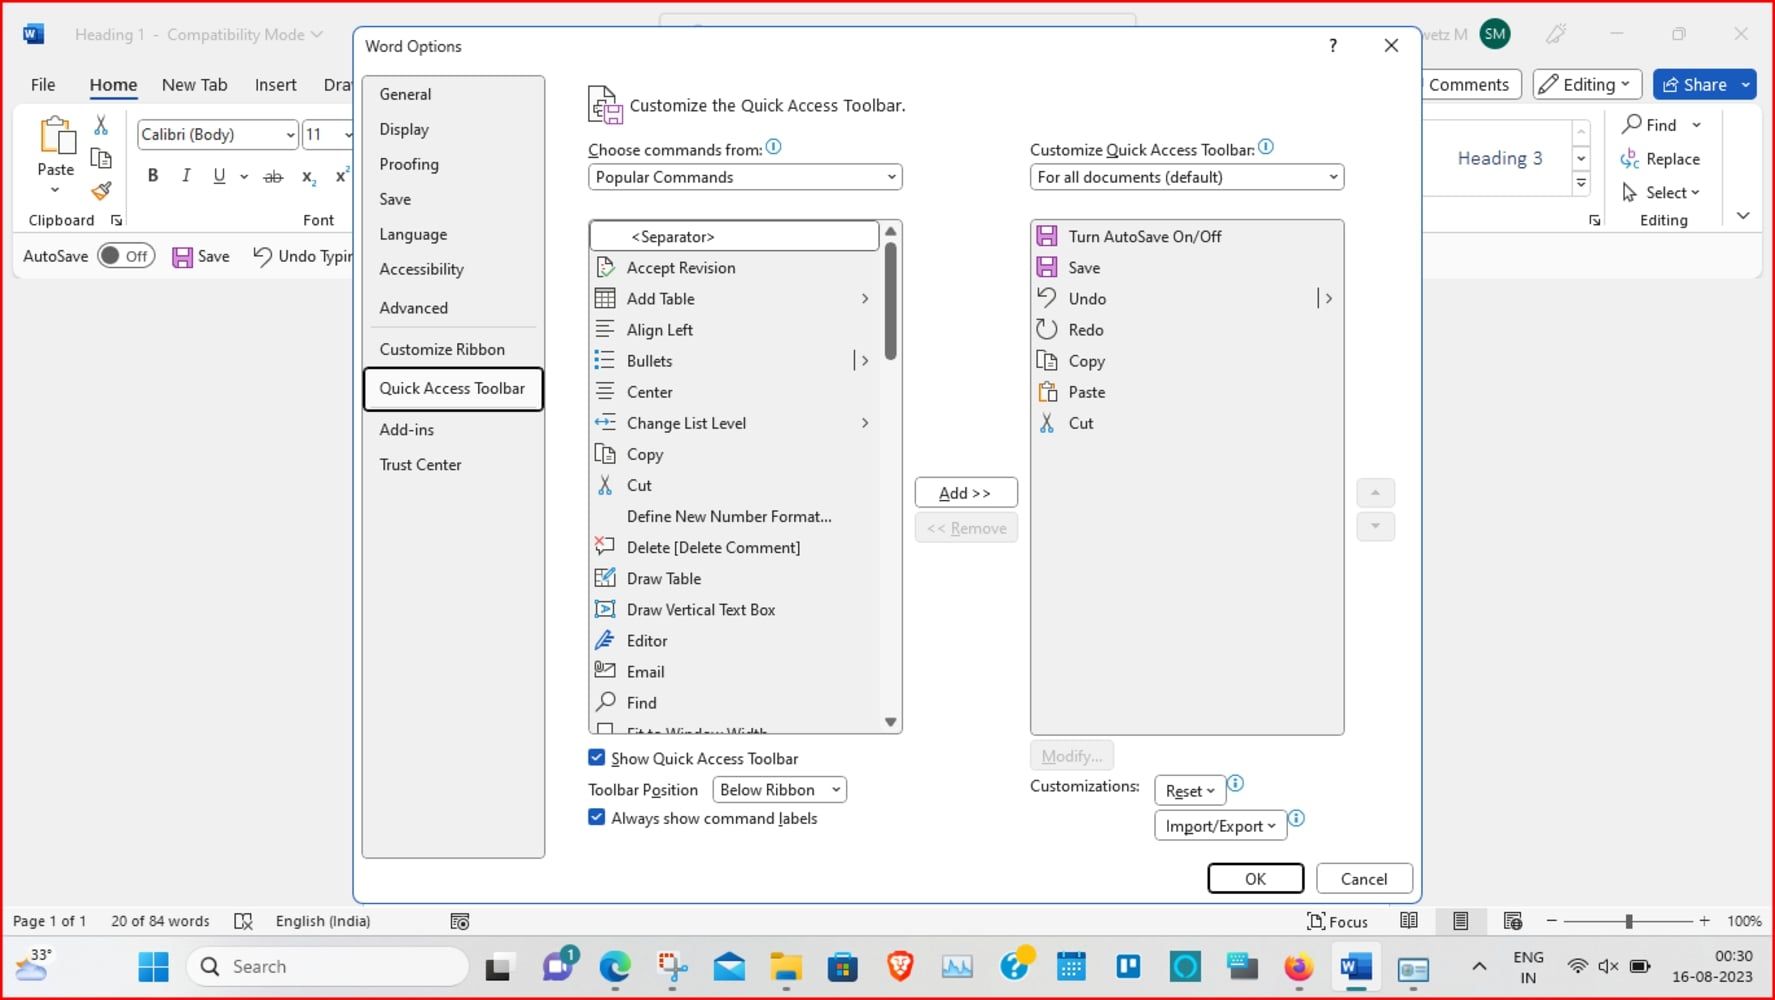
- Check Always show command labels at the bottom of the list.
- Hit OK to save your changes and close out the window. The icons will now appear in the toolbar.


Here's how to cut-and-paste text using the Quick Access Toolbar Ribbon in Word:
- Select the text you want to remove.
- Click the Cut icon in the Quick Access Toolbar (ribbon).
- Move your cursor to the desired area in the document and click Paste.
If you make a mistake during the cut-and-paste process, remember that you can undo what you just did. Click the Undo Move button in your Quick Access Toolbar. This will undo your last change, but you can click the arrow next to the button to go back through your history of changes.
How to Move and Reorder Pages in Word Using Your Clipboard History
Another cool way to arrange pages in Word is via the Clipboard History tool on Windows. The Clipboard is a feature that allows you to copy and paste information from one place to another.
- Move your cursor to the spot in your Word document where you want the page you just cut (or copied) in Word.
- Tap Windows key + V to open your clipboard history and select the text you want to be copied.
- Alternatively, on the Home tab, you can click the Clipboard section to open up the pop-up window on the left.
- Then, click an item in the history window to paste it and move pages around in Word.

With the release of Windows 11, there are many new features to explore! You can use the improved Clipboard Manager in Windows 11 to copy and paste symbols, GIFs, and emoji for a truly personalized experience.
You can arrange or separate pages in Microsoft Word by inserting page breaks. To do this, head over to the page you wish to move and position your cursor at the beginning of that page. Go to the Insert tab and navigate to the Pages section. Click on Page Break. This will insert a page break at the current cursor position and separate the pages. The pages will now be reordered automatically.
How to Move, Reorder, and Rearrange Pages in Microsoft 365
If you're using the web version of Microsoft Word, you can simply use the cut-and-paste method to move pages around. Here's how you can do this:
-
Open your Word document, and select the desired portion of the text by tapping and dragging the cursor over it. Right-click, and tap Cut.

- Move the cursor to the area where you'd like the text to be placed.
- Right-click and select Paste to move the text to its new location.

Further, keep a note of the fact that you cannot move or reorder pages in a protected document.
Carefully Handle Your Word Pages
You should be able to arrange Word pages using one of these methods. These tips can help you reorganize the pages of your brochure, your manuscript, or even just your homework.
We've only discussed a few approaches to rearranging Word pages; each one has its advantages. Thankfully, there's a way to change the page order in Word, no matter what type of project you're working on.