If you've got a video you think the whole world needs to see, most people instinctively reach for the upload button on a service like YouTube or Facebook.
However, sometimes it's impractical. High-quality videos can take an eternity to upload, especially if they are long. Nobody has time to sit around watching a progress bar slowly crawl towards 100 percent – there are far better things you can do with your time.
So, what's the solution? How can you quickly compress a video file so you can upload it to the web more quickly? Sure, professional movie studios offer the feature, but you don't need to spend hundreds of dollars on fancy software – Windows Movie Maker works perfectly well!
Here's how to use Microsoft's ubiquitous video app to compress video files for the web.
Installing Windows Movie Maker
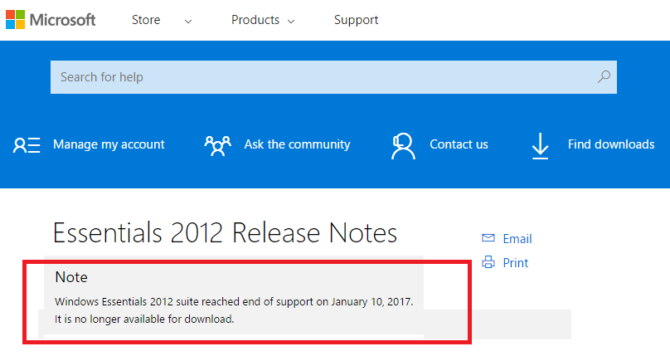
Sadly, at the time of writing, Windows Movie Maker is not an official part Windows. It used to be part of Microsoft Essentials – but the company shuttered the widely-used suite of productivity apps in January 2017.
At the time of the announcement, Microsoft suggested a new version of Movie Maker would eventually find its way onto the latest release of the operating system, but the quote has now disappeared from its website. Furthermore, Essentials is no longer available for download from the Microsoft website.
The upshot is you'll need to find a copy of Windows Movie Maker 2.6. It was the last version of the software that wasn't bundled into the Essentials suite. As such, you can install it as a standalone app. I found my copy on FileHippo, just make sure you scan anything you download for malware before you click install.
If you find a copy of Windows Movie Maker 2012 and try to install it, the process will fail. It's because the installation program is trying to pull data from nonexistent Microsoft servers.
Aside from an updated user interface, the two versions are virtually identical. Regarding this tutorial, either version will suffice.
Choose Your Video
For this demonstration, I'm going to compress a video of a Mexican soccer match I attended back in 2014.
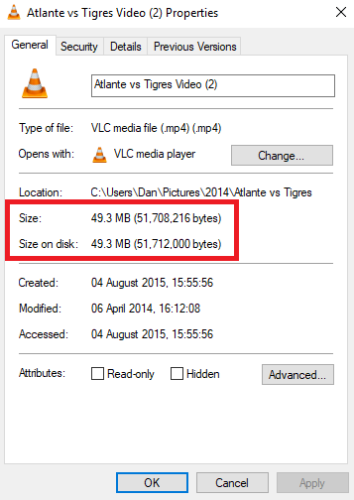
As you can see from the screenshot above, the current size of the file is 49.3 MB. It's not too large, but big enough to be annoying if I'm waiting for it to upload. If the file you want to compress is larger, don't worry. The steps I'm going to outline work with videos of any size.
Restrictions
Windows Movie Maker doesn't work with all file types. You need to have the video you're planning to compress saved in either the AVI, MPG, M1V, MP2V, MPEG, MPE, MPV2, WM, WMV, or ASF format.
If your file is in a different format, you can use a free desktop tool or an online converter to turn it into a supported file type.
How to Compress Your Video
Once you've found the video you want to compress, the steps are straightforward.
Import the Video
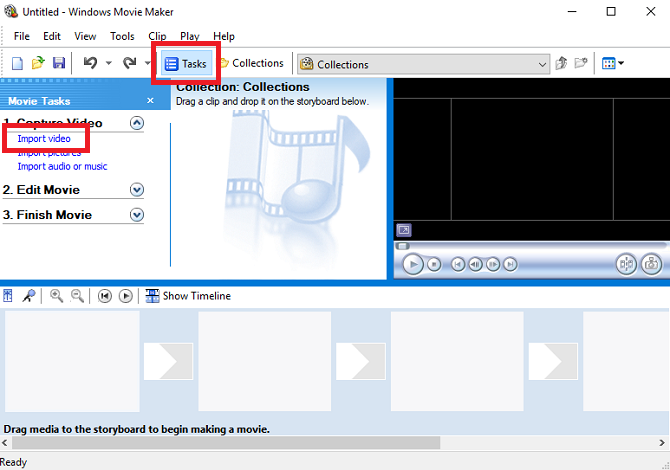
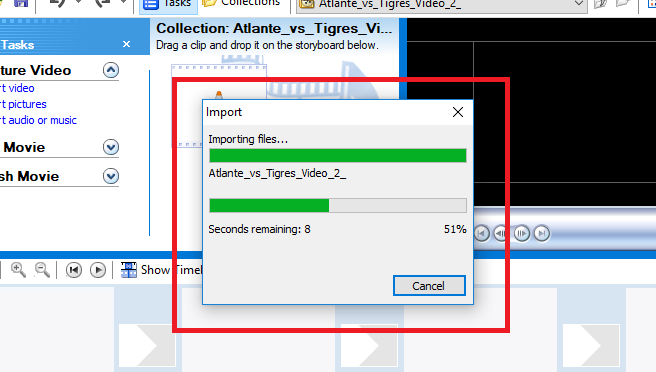
When you first open Windows Movie Maker 2.6, you should see an option called Import Video beneath Capture Video in the top right-hand corner of the window. If it's not there for any reason, click the Tasks tab in the header to activate the menu.
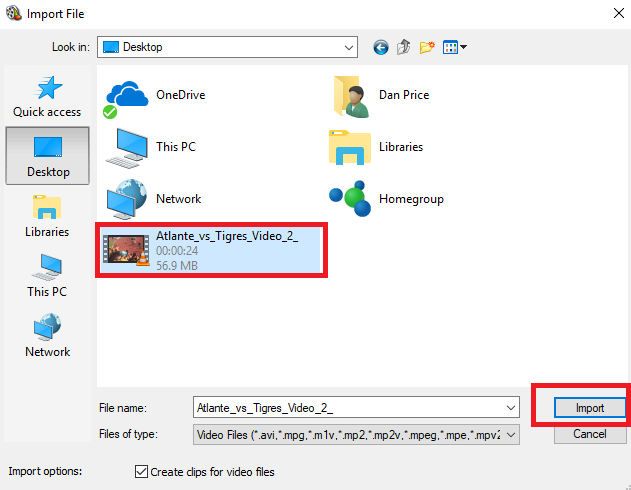
Find the video you want to convert and click Import to load it into the app.
The process could take some time to complete, depending how large the file is.
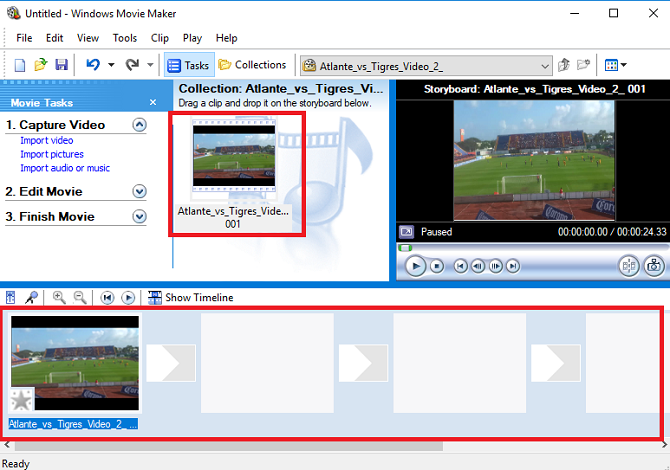
When the importing is finished, you'll see your file in the Collection panel in the center of the app. Left-click it, and drag it into the Timeline panel which runs along the bottom of the window.
Compress the Video
That's phase one finished. Next, you need to save the file in the newly compressed format.
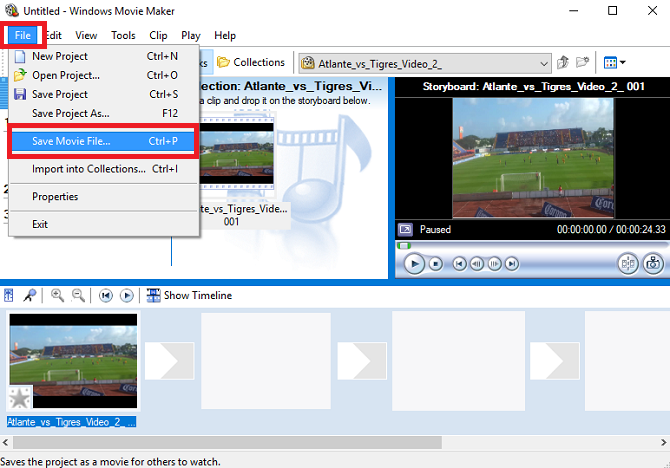
Firstly, head to File > Save Movie File.
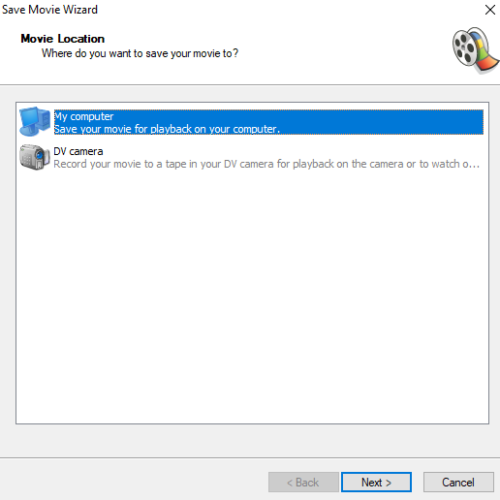
The app will prompt you to select the destination file. What you see on your own screen may differ slightly from the image below, depending what locations you have available to you. For most situations, you should select My Computer and click Next.
You'll be asked to give your new file a name. Enter something appropriate and once again click Next.
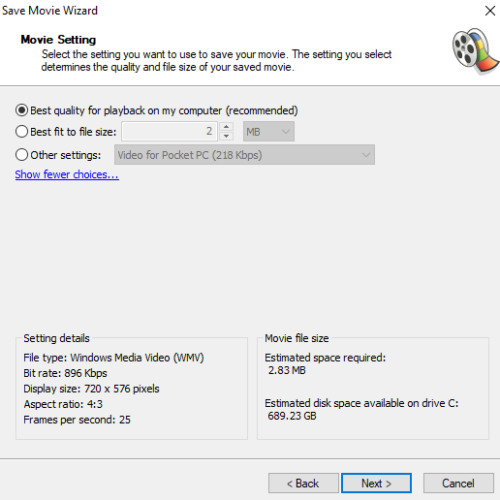
Now it gets interesting. On the next screen, you will need to select your Movie Settings. By default, the app recommends you save your file in the best quality for playback on your computer. Ignore the prompt, and click Show More Choices.
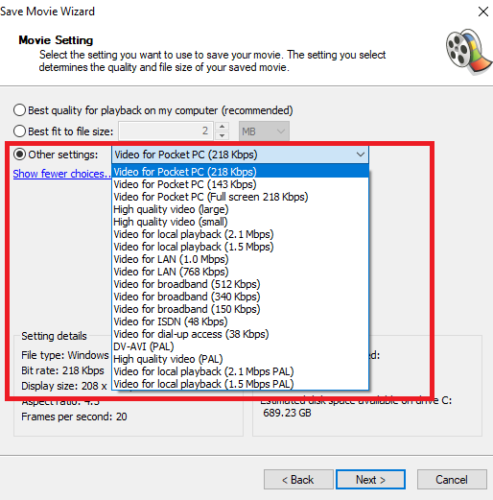
You have two options. You can either enter a desired file size or choose a setting for a particular internet speed. Some of the internet speeds look quite dated given the age of the program, but the slower the internet speed you choose, the smaller your file will be.
My recommendation is not to go below Video for broadband (512 Kbps). Your video will become too pixelated and lose quality. You can see the predicted new file size in the bottom right-hand corner of the window.
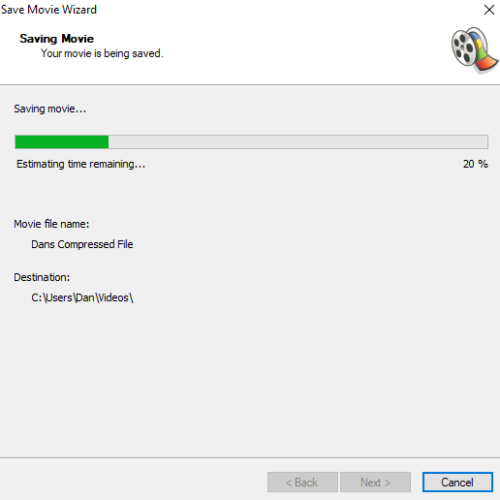
Once you're happy with your selection, tap Next. The app will start compressing the file. Again, depending on the size, it might take a while.
The Finished Product
So, how much of a difference did the compression make? If you recall, my original file was 49.3 MB.
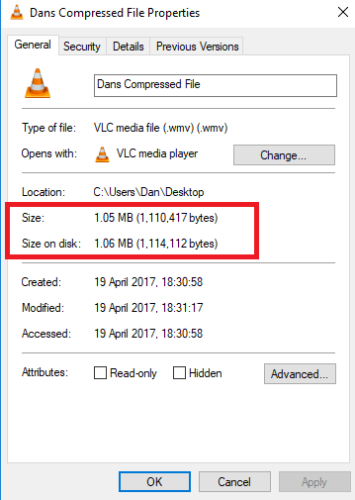
Here's a screenshot of the new file:
I've slashed it to a mere 1.05 MB. You'll be able to upload it to the web in a blink of an eye.
And here's a comparison of the two video files side by side:
Original
New
Sure, it's more pixelated, but as a video for Twitter is more than adequate. If it's too pixelated for you, you can choose a faster internet speed in the Movie Settings screen. Keep testing until you find a level you're happy with.
How Do You Compress Video Files?
In this article, I've shown you how to easily use Windows Movie Maker to compress video files so they are small enough to quickly upload to the web.
If you're already familiar with Windows Movie Maker, I firmly believe this is the most painless process available to you.
However, I'm sure some readers will disagree with me. I'd love to know which tools you use when you want to compress a video file. How easy are they to use? Do they have the same range of options as Windows Movie Maker?
As always, you can let me know all your suggestions, recommendations, and opinions in the comments below.


