On Sunday, we posted the first part of this guide, about how to downgrade your PSP and then upgrade to a custom firmware.
For those of you who've just tuned in; a custom firmware is one that is written by hackers (or crackers, depending on your point of view), which gives you all the possibilities of the official firmware, but also enables the use of homebrew.
Update: MakeUseOf released a Free PSP Downgrading/Upgrading Guide in PDF. Download here.
Homebrew are applications developed not by Sony, but by the community. The different types of homebrew applications range from text editors to ISO loaders. Due to the latter one, which enables piracy, Sony is strongly against homebrew and does its very best to contain it.
There's a constant battle between the homebrew community and Sony. Each fix is quickly followed by another exploit.
Last week we posted about various ways to downgrade your firmware. Today we'll guide you through a method that works for nearly all PSP's, disregarding the current firmware. It even allows you to unbrick PSP's (people call a PSP bricked when it stops working due to software abnormalities).
So why didn't we skip the previous part? Simple, the Pandora Battery method requires either the use of a PSP with custom firmware, or a spare battery pack. So if you haven't got one of those, but you've got firmware 3.50 or below, use part one.
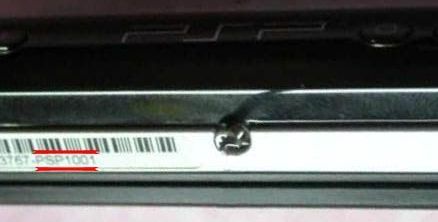
All PSPs can be cracked, disregarding current firmware. You'll need to use a Pandora battery for all models except those with a TA-88v3 motherboard (some versions of the PSP-2004, the PSP 3000 and up). Here you'll need to use a temporary crack. You can view your PSP model at the bottom of the device.
To check if you've got a TA-88v3 motherboard, look for a white sticker on your box and look at the printed letter. This will indicate your firmware, as well as your production line and thus your motherboard.
-
- (No Letter) = 3.60
-
- A = 3.71
-
- B = UNKNOWN
-
- C = 3.72
-
- D = UNKNOWN
-
- E = 3.80
-
- F = 3.90
- G = 3.95 / 4.01 (TA-88v2 / TA-88v3)
A PSP with 4.01 firmware (and up) installed most certainly has a TA-88v3 motherboard as well.
- non-TA-88v3 : Follow this article, or Download the Updated PDF Guide.
- TA-88v3 and >PSP3000 : follow this tutorial
LEGAL DISCLAIMER
Using these methods is 100% legal (although Sony obviously doesn't like it), but it CAN brick your PSP (every model except the PSP-3000 can be unbricked using a working Pandora Battery, though). It may also void the warranty of your PSP system as you would be working with delicate parts like the PSP's flash memory. So if you screw up, Make Use Of won't be held legally liable. If this sounds like too much risk to you, please don't go any further.
The Pandora Battery
The homebrew community was always looking for different ways to get in. Sadly, Sony kept closing these entrances one by one, and there are only so many doors in a house.
At a certain moment, there was an unexpected turn - a new way in that worked for all available PSP's (at that moment). They had ran out of doors, but they had found a sledgehammer! They reprogrammed the PSP battery (naming it Pandora Battery), which enabled them to overwrite the PSP's flash memory.
So what is it?
This method uses a hacked battery (Pandora Battery), which then runs specific software to hack your PSP from the 'Magic Memory Stick'.
Batteries that are compatible:
- Sony "standard" Li-ion 1800 mAh
- Sony PSP-280 2200mAh
- Atomic Battery Pack 3.6V 1800mAh
- Datel, PSP Battery 3600 mAh (X2)
- Datel, PSP Battery 1800 Max Power
Batteries that are not compatible:
- 2600 mAh Mega Battery Pack
- Sony PSP-280 2200mAh (Fake)
- Sony PSP Bloc-Battery pack 3.6v 1800 mAh
- Battery 3600mAh, unknown brand, (China made model NK-RH008) (Fake)
- Battery Pack, unknown brand, (lithium) 3.6v 3600 mAH (Fake)
- Intec 2200 mAh
Memory sticks that are compatible:
All memory sticks with the "Pro Duo" tag should work. Official ones will work better though.
There are a number of different ways to apprehend the Pandora Battery set, we'll be discussing them below.
Option 1: I have another custom firmware PSP
This is the best (and cheapest) way of doing so. If you don't happen to have two PSP's lying around, try to borrow a friend's.
What you need:
- Pandora Installer for 3.xx Revision 4b
- Version 1.50 eboot
- Version 3.40 eboot
- Version 3.80 eboot
- A Fat PSP with custom firmware
- A Pro Duo memory stick (at least 256MB, but under 8GB)
Making your Magic Memory Stick
Start out by putting the Pandora Installer on your CFW PSP. Do so by moving the pan3xx folder from the downloaded archive to E:PSPGAME (where E: is your PSP).
Go out of USB mode, navigate to Game -> Memory Stickâ„¢ and click on the Pandora Installer to start the application.
In the application, go to 'MemStick and MS-IPL options' and select 'Repartition'.
When your PSP has restarted, connect through USB and recreate the E:PSPGAME hierarchy. Again, drop the pan3xx folder in here.
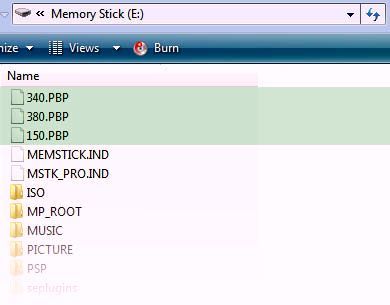
This time you must also put the versions 1.50, 3.40 and 3.80 eboot files in the PSPs root (main folder) and name them respectively 150.PBP, 340.PBP and 380.PBP
Go out of USB mode again, navigate to Game -> Memory Stickâ„¢ and click on the Pandora Installer to restart the application.
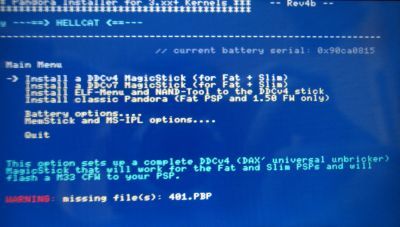
This time, select Install a DDCv4 MagicStick (for Fat + Slim), this is the version that works best with both Fat and Slim PSPs, and wait for it to finish.
Finally, choose to install the ELF-Menu and NAND-Tool. Some of you might not find this necessary, but some slim PSP's give trouble without it.
Next, press battery options to produce your Pandora Battery. You can also make a back-up of your battery's serial number here. This can be used while restoring your battery later on. As an alternative, you can also use an automatically generated serial number. This should work fine, but make a dump if you want to play safe.
Congratulations! You are now the proud owner of a Pandora Battery and a Magic Memory Stick. Read this part if you don't know how to use it.
Option 2: I have a spare battery
There is another way though, if you can't get your hands on a CFW PSP. You can still hardmod your battery, but this involves cutting it open and quite more risk than the above method, so proceed with caution and completely at your own risk. Also, don't go buying an extra battery for this method, the option below is cheaper and guaranteed to work.
As I have not tried this myself, I will send you to someone who has. Follow this picture-guided tutorial step by step, and you should be fine, but don't come crying to us if you mess up.
Once you are done, you can follow these steps to make a Magic Memory Stick without the use of a CFW PSP.
Option 3: I have none of the above
Of course it could also happen that you don't have any friends with a (custom firmware) PSP, nor a spare battery. Instead of buying a brand new battery to cut open, you can always spend less money for more certainty.
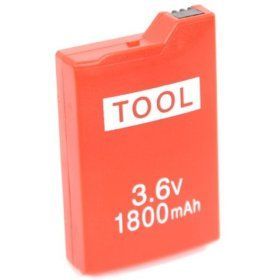
Available on eBay and Amazon are 'Tool' batteries, from Datel. These are batteries that are already modified! (i.e. you'll only need a Magic Memory Stick).
If you have one in your possession, use the below steps to make yourself a Magic Memory Stick
Making a MMS without a CFW PSP
If you don't have a CFW PSP you can use to mod your batteries, you probably won't have a PSP to make you a Magic Memory Stick either.
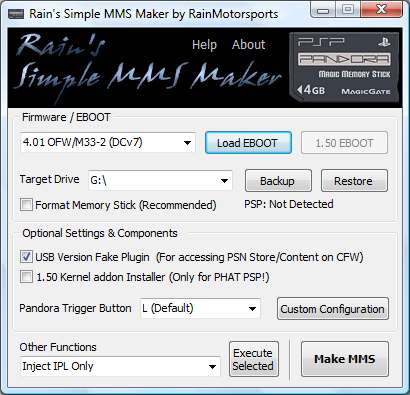
Luckily, it's also possible to do this directly through your PC, using Rain's Simple MMS Maker (available for Windows Xp & Vista). Download it here.
You're also going to need a 1.50 and 3.80 eboot file, which can be downloaded respectively here and here.
To use the program, just select DCv4 from the dropdown list and locate the 3.80 eboot file. Also check the Formatting checkbox and choose to add the 1.50 Kernel addon if you have a fat PSP.
Now, to make your MMS, just press the big button at the lower right.
Find out how to use your Pandora Battery Below.
Using your Pandora Battery
Make sure you have your Magic Memory Stick inserted and put in your battery, a black and white menu should pop-up. Then, go to recover and choose to install the 3.80 Custom Firmware (M33).
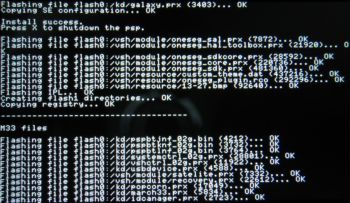
Just wait for it to finish (grab some coffee, this can take a while), and you're done. You are now running a 3.80 M33 Custom Firmware!
Upgrade to the latest Custom Firmware
As you might have noticed, you're on CFW 3.80 M33 now; that isn't very high up the ladder, considering CFW 5.00 M33-3 is already available (or even higher, by the time you read this). Follow the steps below to upgrade to the latest custom firmware.
Files you need:
- The latest M33 Firmware version (5.00-3 at the time of writing) [No Longer Available]
- The parallel official fimware (5.00 in this case) [No Longer Available]
a) File placement
Extract the downloaded archives.
Move the unRARred UPDATE folder to X:PSPGAMEUPDATE (with X: being your PSP). Also add the parallel official firmware to that folder, renamed in the same manner as in 2.a
b) Updating
Go to Game -> Memory Stickâ„¢ and open the installation file. After verifying the eboot, it'll ask you for confirmation. Press X to continue.
Follow the on-screen instructions to update. The update will take five minutes or less.
Congratulations, you are now on the latest M33 custom firmware!
For now this is the end of this guide. However, as soon as a working exploit appears for the PSP-3000, you can expect us to cover it!
Have you got yourself a CFW PSP yet? Which method did you use? Feel free to drop a comment below.
Update: MakeUseOf has released a complete step-by-step PSP Downgrading/Upgrading Guide now in PDF. It's free, no strings attached. Download here.


