If you've read our guide on how to make a website, you may be wondering what to do next to improve your skills. Making a photo slideshow is a surprisingly easy task, and one that can teach you valuable skills needed to get a programming job.
Today I'll be showing you how to build a JavaScript slideshow from scratch. Let's jump right in!
Prerequisites
You'll need to know a few things before you can get started coding. Alongside an appropriate web browser and text editor of your choice (I recommend Sublime Text), you'll need some experience with HTML, CSS, JavaScript, and jQuery.
If you're not so confident in your skills, make sure you read our guide to using the Document Object Model and these tips to learn CSS. If you're confident with JavaScript but have never used jQuery before, then check out our basic guide to jQuery.
1. Getting Started
This slideshow requires several features:
- Support for images
- Controls for changing images
- A text caption
- Automatic mode
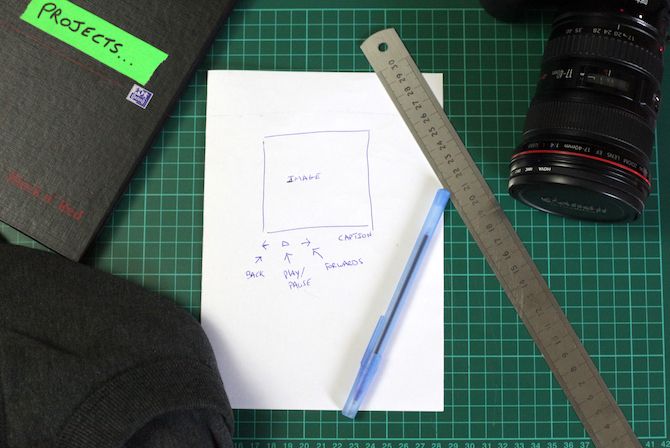
It seems a simple list of features. Automatic mode will automatically advance images to the next one in the sequence. Here's the rough sketch I did before writing any code:
If you're wondering why bother planning, then take a look at these worst programming mistakes in history. This project won't get anybody killed, but it's crucial to have a solid understanding of code and planning procedures before working on bigger code -- even if it's only a rough sketch.
Here's the initial HTML you need to get started. Save this in a file with an appropriate name, such as index.html:
<!DOCTYPE html>
<html>
<head>
<style>
</style>
<title>MUO Slideshow</title>
<script src="https://ajax.googleapis.com/ajax/libs/jquery/3.1.1/jquery.min.js" type="text/javascript"></script>
<script type="text/javascript">
</script>
</head>
<body>
<div id="showContainer">
<div class="imageContainer" id="im_1">
<img src="Images/1.jpg" />
<div class="caption">
Windmill
</div>
</div>
<div class="imageContainer" id="im_2">
<img src="Images/2.jpg" />
<div class="caption">
Plant
</div>
</div>
<div class="imageContainer" id="im_3">
<img src="Images/3.jpg" />
<div class="caption">
Dog
</div>
</div>
<div class="navButton" id="previous">❮</div>
<div class="navButton" id="next">❯</div>
</div>
</body>
</html>
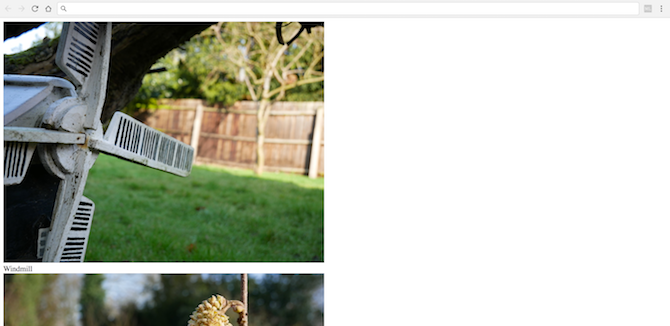
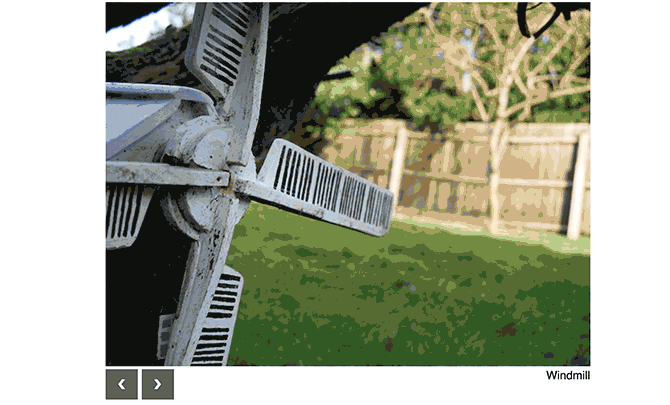
Here's what the code looks like:
It's a bit rubbish isn't it? Let's break it down before we improve it.
This code contains "standard" HTML, head, style, script, and body tags. These parts are essential components of any website. JQuery is included via the Google CDN -- nothing unique or special so far.
Inside the body is a div with an id of showContainer. This is a wrapper or outer container to store the slideshow. You'll improve this later on with CSS. Inside this container, there are three blocks of code, each with a similar purpose.
A parent class is defined with a class name of imageContainer:
<div class="imageContainer" id="im_1">
This is used to store a single slide -- an image and caption is stored inside this container. Each container has a unique id, consisting of the characters im_ and a number. Each container has a different number, from one to three.
As a final step, an image is referenced, and the caption is stored inside a div with the caption class:
        <img src="Images/1.jpg" />
<div class="caption">
  Dog
</div>
I've created my images with numeric file names, and stored them inside a folder called Images. You can call yours anything you like, provided you update the HTML to match.
If you'd like to have more or less images in your slideshow, simply copy and paste or delete the blocks of code with the imageContainer class, remembering to update the file names and ids as required.
Finally, the navigation buttons are created. These allow the user to navigate through the images:
<div class="navButton" id="previous">❮</div>
<div class="navButton" id="next">❯</div>
These HTML entity codes are used to display the forwards and backwards arrows, in a similar way to how icon fonts work.
2. The CSS
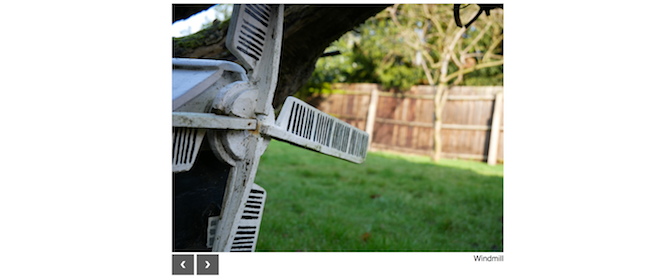
Now that the core structure is in place, it's time to make it look pretty. Here's what it will look like after this new code:
Add this CSS between your style tags:
        html {
  font-family: helvetica, arial;
}
#showContainer {
  /* Main wrapper for all images */
  width: 670px;
  padding: 0;
  margin: 0 auto;
  overflow: hidden;
  position: relative;
}
.navButton {
  /* Make buttons look nice */
  cursor: pointer;
  float: left;
  width: 25px;
  height: 22px;
  padding: 10px;
  margin-right: 5px;
  overflow: hidden;
  text-align: center;
  color: white;
  font-weight: bold;
  font-size: 18px;
  background: #000000;
  opacity: 0.65;
  user-select: none;
}
.navButton:hover {
  opacity: 1;
}
.caption {
  float: right;
}
.imageContainer:not(:first-child) {
  /* Hide all images except the first */
  display: none;
}
That looks much better now right? Let's take a look at the code.
I'm using sample images that are all 670 x 503 pixels, so this slideshow has mostly been designed around images of that size. You'll need to adjust the CSS appropriately if you'd like to use images of a different size. I recommend you resize your images to matching sizes -- different images of different dimensions will cause styling problems.
Most of this CSS is self explanatory. There's code to define the size of the container to store the images, center align everything, specify the font, along with button and text color. There's a few styles you may not have come across before:
- cursor: pointer -- This changes the cursor from an arrow to a pointing finger when you move your cursor over the buttons.
- opacity: 0.65 -- This increases the transparency of the buttons.
- user-select: none -- This ensures you cannot accidentally highlight the text on the buttons.
You can see the result of most of this code in the buttons:
The most complex part here is this strange looking line:
.imageContainer:not(:first-child) {
It may look quite unusual, however it is fairly self explanatory.
First, it targets any elements with the imageContainer class. The :not() syntax states that any elements inside the brackets should be excluded from this style. Finally, the :first-child syntax states that this CSS should target any element matching the name but ignore the first element. The reason for this is simple. As this is a slideshow, only one image at a time is required. This CSS hides all of the images apart from the first one.
3. The JavaScript
The final piece of the puzzle is the JavaScript. This is the logic to actually make the slideshow function correctly.
Add this code to your script tag:
        $(document).ready(function() {
  $('#previous').on('click', function(){
    // Change to the previous image
    $('#im_' + currentImage).stop().fadeOut(1);
    decreaseImage();
    $('#im_' + currentImage).stop().fadeIn(1);
  });
  $('#next').on('click', function(){
    // Change to the next image
    $('#im_' + currentImage).stop().fadeOut(1);
    increaseImage();
    $('#im_' + currentImage).stop().fadeIn(1);
  });

  var currentImage = 1;
  var totalImages = 3;

  function increaseImage() {
    /* Increase currentImage by 1.
    * Resets to 1 if larger than totalImages
    */
    ++currentImage;
    if(currentImage > totalImages) {
      currentImage = 1;
    }
  }
  function decreaseImage() {
    /* Decrease currentImage by 1.
    * Resets to totalImages if smaller than 1
    */
    --currentImage;
    if(currentImage < 1) {
      currentImage = totalImages;
    }
  }
});
It may seem counter-intuitive, but I'm going to skip over the initial blocks of code, and jump straight to explaining the code from half way through -- don't worry, I explain all of the code!
You need to define two variables. (Here's how to define variables in JavaScript.) These variables can be thought of as the main configuration variables for the slideshow:
        var currentImage = 1;
var totalImages = 3;
These store the total number of images in the slideshow, and the number of the image to start on. If you have more images, simply change the totalImages variable to the total number of images you have.
The two functions increaseImage and decreaseImage advance or retreat the currentImage variable. Should this variable go lower than one, or higher than totalImages, it gets reset to one or totalImages. This ensures the slideshow will loop once it reaches the end.
Back to the code at the beginning. This code "targets" the next and previous buttons. When you click on each button, it calls the appropriate increase or decrease methods. Once complete, it simply fades out the image on the screen, and fades in the new image (as defined by the currentImage variable).
The stop() method is built into jQuery. This cancels any pending events. This ensures each button press is smooth, and means you don't have 100 buttons presses all waiting to execute if you go a bit crazy on the mouse. The fadeIn(1) and fadeOut(1) methods fade in or out the images as required. The number specifies the duration of the fade in milliseconds. Try changing this to a larger number such as 500. A larger number results in a longer transition time. Go too far, however, and you may start to see strange events or "flickers" between the image changes. Here's the slideshow in action:
Automatic Advancement
This slideshow looks pretty good now, but there's one last finishing touch needed. Automatic advancement is a feature that will really make this slideshow shine. After a set period of time, each image will automatically advance on to the next one. The user can still navigate forwards or backwards, however.
This is an easy job with jQuery. A timer needs to be created to execute your code every X seconds. Rather than writing new code, however, the easiest thing to do is to emulate a "click" on the next image button, and let the existing code do all the work.
Here's the new JavaScript you need -- add this after the decreaseImage function:
        window.setInterval(function() {
  $('#previous').click();
}, 2500);
There's not a lot going on here. The window.setInterval method will run a piece of code regularly, as defined by the time specified at the end. The time 2500 (in milliseconds) means this slideshow will advance every 2.5 seconds. A smaller number means each image will advance at a quicker pace. The click method triggers the buttons to run the code as if a user had clicked the button with their mouse.
If you're ready for your next JavaScript challenge, try building a website with a static website builder like GatsbyJS, or a front-end framework like Vue. If you're a Ruby learner, Jekyll is also an option. Here's how Jekyll and GatsbyJS fare against each other.
Image Credit: Tharanat Sardsri via Shutterstock.com

