Modifying the Nook Simple Touch allows it to play games, browse, read RSS and more. However, even rooted, E Ink technology causes jarring page turns and pretty awful performance. Fortunately, a hack can turn a rooted Nook into a full-fledged, game-playing tablet. The modification enables multi-touch, full-motion display, Android 2.1 Éclair and more.
You may have read about other methods for modifying the Nook. Unfortunately, most of the articles available don't cover the latest methods developed at XDA, which includes better pinch-to-zoom, improved faster refresh (known as FastMode2), overclocking the Nook, on-the-go functionality and more. But enough lecture, here's video of the Nook playing Wipeout:
It's amazing! For more tips on the best emulator around, check out Retroarch (which isn't compatible with the Nook).
Requirements for Rooting
Many have seen Alan Henry's excellent article on rooting the Nook Simple Touch. The method outlined in his article, unfortunately, fast fell behind the times. In particular, his method fails on the latest firmware version of the Nook (1.2.1). Fortunately the mad geniuses at XDA developed workarounds, in addition to developing new ways of bumping up the Nook's potency as an e-reader.
This modification requires the following:
- Guevor's modified kernel (do NOT unzip), you may download either the 174 or 176 kernels;
- Imaging software (WinDiskImager32 is the best);
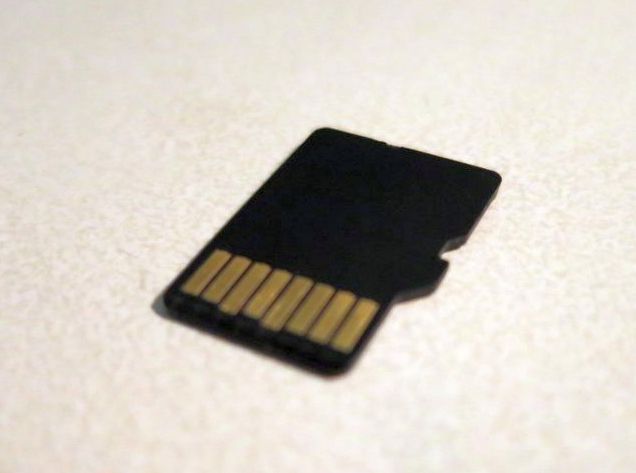
- 128MB (or larger) microSD card, preferably a class 10;
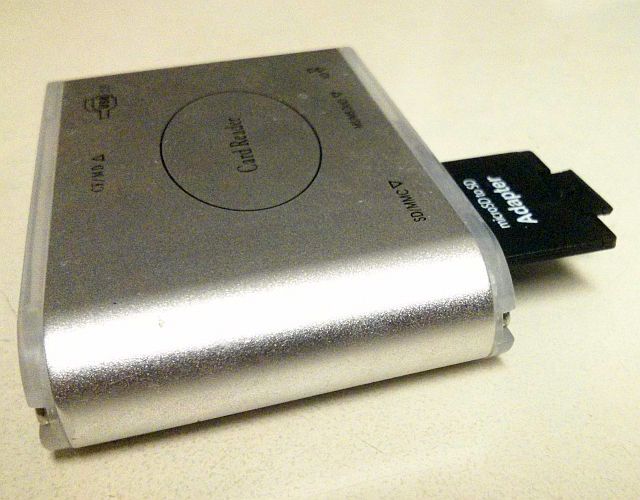
- microSD card reader;
- NookManager bootable image — download;
- ClockWorkMod bootable image, available as either a 128MB or 2GB+ sized file, once imaged onto your microSD card;
- FastMode2 APK via XDA user osowiecki – this version of the NoRefresh/FastMode app works on firmware version 1.2 and above. Just install after you've finished modding the Nook;
In a nutshell, you will use microSD cards in a similar way as you would an installation disk on a PC. This necessitates installing a bootable image on each microSD card and inserting this into the Nook. Fortunately, because these cards can be rewritten, you only need one microSD card to perform the modification. When you've finished one step, you can reformat the card with next bootable image.
Getting Started
Step One: Burn ClockWorkMod Image File Onto microSD Card
Attach your microSD card to your computer and start up WinDiskImage32. Locate the "2gb_clockwork-rc2.img" file, which is located inside of the same-named, zipped archive that you downloaded. Extract this file if you have not already done so. Next, use WinDiskImage32 to burn the extracted image to your microSD card.
Then find the "install-kernel-usbhost-176.zip" file (or whichever kernel file you downloaded) and copy this onto the root directory of the microSD card. After this finishes, eject the microSD card.
Step Two: Install Kernel on Your Nook
Turn off your Nook and insert the microSD card that you burned an image to, in Step One. Once the card is inserted, boot the Nook up.
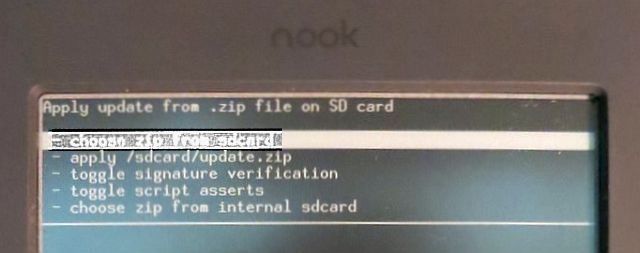
This particular software is known as ClockWorkMod Recovery, which allows you to install kernels and other software requiring root access. While in the recovery, use the right-side buttons to navigate up or down and the left-buttons to move backward. The Home button selects whatever option you're on.
Optionally, you can choose to make a backup of your system at this point, although you won't be doing anything that will irreversibly change your device.
From within ClockWorkMod Recovery, enter "Apply update from .zip file" and then select the "choose zip from sdcard" option. From there, select "install-kernel-usbhost-176.zip" and install it. Then select "Reboot" and remove the microSD card. Turn the Nook off at this point.
Step Three: NookManager
NookManager is another bootable image that will automatically root and install special software on your device. Just like in Step One, you will use WinDiskImage32 on the PC to burn an image of NookManager to microSD card. Then you will insert this into the powered-off Nook and then turn it on.
This will boot you into NookManager, which installs the essential software.
You will then choose "Root My Nook" from the options and NookManager will install the requisite files. This includes a custom launcher known as ReLaunch, as well as Amazon Market and more. After installing, eject the SD card.
Step Four: Start the Nook Up
Finally, start the Nook up and continue with Barnes and Noble's registration process. After completing this process, you should then be able to use the tablet as if it were an Android device. At this point, you may want to install the FastMode2.apk file.
If you already performed the registration process before installing the mod, this method should still work. Although, it's important to note that I haven't tested this.
Other Installation Options
There's a huge number of software packages available for a rooted Nook Simple Touch:
- Gapps: It's possible to install the entire Google Apps software package, including the Play Store, Calendar, Gmail, YouTube and more. Unfortunately, the process requires a great deal of time and effort. While, the payoff is worth it, I prefer installing alternatives to Google Software, such as the Amazon Market (which comes preinstalled).
- USB-host mode: If you install the 176 numbered version of Guevor's kernel, the Nook can also attach a USB flash drive, keyboard and other peripheral devices. While using a keyboard was quite handy, the interface isn't particularly easy to setup and in general causes more problems than it's worth.
My Favorite Nook Apps
There's a lot of great apps out there that work with the Nook. Unfortunately, you may end up needing to sideload them, if you choose to not install Google's Gapps software suite.
- EZPDF Reader: The current version of EZPDF works, although its setting menu doesn't work properly. Otherwise it's the best general-purpose reader for PDFs (and it reads ePUB as well).
- Dropbox: This is the single best app for sideloading, or transferring applications onto your device, without using an app store or market.
- FeedMe: FeedMe remains the best, most functional RSS reader available to the Nook. It also syncs with Feedly.
- CPU Master [No Longer Available]: Really any CPU management app will do, but you will need an application to control your now overclocked CPU. Just change the governor to "ondemand" and apply the change.
- Naked Browser [Broken URL Removed]: I dramatically prefer using Naked Browser over any other, for its extremely slim installed profile and wide array of customizable options. It's also quite fast.
- Wikitravel Mobile: Wikitravel allows for full offline installation, so you can turn your Nook into an extraordinary, offline navigating, digital-travel guide. It's perfect for this purpose, as the Nook is semi-ruggedized and includes a month of battery life.
- Wiki Encyclopedia Offline [No Longer Available]: The Nook makes for a fantastic offline Wikipedia reference.
If Something Goes Wrong
If anything goes wrong, you can factory reset the device by powering on the device and then immediately holding left page-down + right page-down until the factory reset screen comes up. Nothing in this guide should cause any irreparable harm to your device.
However, everyone with a Nook should have made a backup. Even though the method outlined in this article doesn't interfere with the restore feature, you should be prepared for any possible misstep. Making a backup doesn't take much effort, either. The NookManager bootable image has a simple, one-touch method of generating a backup of your Nook's operating system. If something unanticipated occurs, you'll be prepared.
If you get stuck along the way, here's a YouTube video covering factory resetting the Nook:
Conclusion
The rooted Nook absolutely kills its competition as a PDF reader. It remains the best E Ink device on markets, more than a year after it released, by a wide margin. Considering its month of battery life, rugged design and daylight readability, it's insane that no other manufacturer allows the rooting of their E Ink devices for use as a travel guide or offline Wikipedia device.
Anyone else love their Nook Simple Touch? Let us know in the comments.


