Digital has almost completely taken over the photography world. There are some diehards who still love the look of film (even though you can get it with Photoshop), but if you buy a camera today, there's a good chance it's going to be digital.
Despite the simplicity of the digital photography process (point, shoot, repeat), some beginners might find the world of digital photography to be intimidating. Should you buy a DSLR or mirrorless camera? What do the different settings do? What accessories do you need? How can you improve your skills?
These are all valid questions. And we're here to give you the answers you need. We'll start with the basics and go from there. Let's dive into digital photography!
Navigation:
- Why Digital?
- Which Digital Camera Should You Buy?
- Understanding Digital Camera Features
- Digital Camera Modes to Know
- ISO and White Balance
- Basic Photography Principles
- Exercises for Beginning Photographers
- Accessories to Consider
- Digital Photography Software
- Start Snapping
Why Digital?
If you've done any camera shopping, you'll have noticed that film cameras are all but extinct. Digital cameras have become the de-facto standard for everyone from the least experienced amateur to the highest-level professional.
And the reasons are simple. Digital cameras give you control over your photos. You can review them immediately to see how different settings take effect. The photos are easy to edit with post-production software. Many digital cameras are pocket-sized. Hobbyists save money on printing, because they only print the photos they want.

The power hidden in every digital camera is astounding, and that opens up many avenues for photographers. You can take extremely high-quality video. Add effects to your photos instantly. Take alarmingly crystal-clear photos. Even share your images directly from your camera.
Digital photography is better than film photography in almost every way. While film will always have a distinct feel, and there will always be fans of film, digital is absolutely the way to go for new photographers.
If you're considering photography as a hobby, a digital camera will help you experience the best parts of it. You get immediate feedback on your technique. You can share your photography instantly. In short, it makes the feedback loop a lot shorter, and that lets you enjoy and improve your photography more quickly.
It's a win all around.
Which Digital Camera Should You Buy?
To get into digital photography, you're going to need a camera. If you don't have one already, that means buying one. And with seemingly endless options, that's not an easy task.
There are three main types of digital cameras, and we'll go over the advantages and disadvantages of each type here. That should give you a good idea of what you need.
Point-and-Shoots

If you've owned a digital camera before, it's a good chance it was one of these. They're very compact, don't have interchangeable lenses, and usually have very little optical zoom.
The biggest advantage of point-and-shoot cameras is their portability. You can easily stick one in your backpack, purse, or even your pocket. You can get it out at a moment's notice and snap a photo. There's no need to choose the right lens, set up a tripod, worry about shutter speeds, or anything like that. Just grab it and snap.
Price is also an advantage here: you can get a point-and-shoot camera for a couple hundred bucks, and very nice ones still clock in at less than $500.
The small size comes with some drawbacks, though. You can't change lenses. The sensors are very small, and limit photo clarity. And they tend to be quite slow to take pictures.
Buy a point-and-shoot if you want to start taking pictures with minimal investment, or if you want convenient portability.
DSLRs

These larger cameras are the industry standard for high-quality photography. They have large sensors, support many lenses, come with a huge number of features, and are packed with technology that helps you take great pictures.
Of course, it takes a lot of room to get all that technology into one device. DSLRs are big and unwieldy (though they're getting more compact). They're also very expensive, with introductory models starting in the $350 range.
But if you want the best photos, there's no other choice. Professionals use these for a reason.
Buy a DSLR if you want the best pictures you can get, and if you're willing to put in some work to learn the camera.
Mirrorless

If you want something between a point-and-shoot and a DSLR, both in complexity and price, a mirrorless (or "bridge") camera is perfect. These cameras pack many of the features of larger DSLRs, but have a shorter learning curve and more portability.
The smaller bodies mean that they're more easily stashed in a purse or backpack, too. There are some compromises with mirrorless cameras, though. Many don't have optical viewfinders, and they usually don't have as many features as DSLRs.
They can be expensive, too (though there are more affordable entry-level and mid-range models).
Buy a mirrorless camera if you want the best of both worlds, but are willing to accept some compromises.
Smartphone

Recent advances in smartphone technology mean that many phone cameras now have dedicated cameras. And while many photography enthusiasts might not consider them "digital cameras," there's a saying in photography that "the best camera is the one you have with you."
And that's the biggest advantage of using your phone as your camera. You always have it with you. There are a lot of great camera apps out there that let you tweak settings and apply cool effects, too.
Of course, you won't be getting very many features. The settings are minimal. And the camera sensor on your phone is very small. But you also already have it, which means your initial investment will be $0.
Use your smartphone camera to try out digital photography with no investment. And when you need the maximum in portability.
Also, take a look at VSCO for capturing, editing, and displaying your smartphone photos.
Understanding Digital Camera Features
There are a lot of different features listed on different cameras. Manufacturers have proprietary ways of talking about the same thing, too. We'll just be covering the basics here. If you have questions about a specific model or brand of camera, it's best to head to the manufacturer's website.
Megapixels vs. Sensor Size
There's some confusion about exactly what it means to have more megapixels listed on your camera. The number of megapixels (usually written like "16MP") does relate to the amount of information that your camera can capture. And, in most cases, more is better.
But what really matters is the size of your camera's sensor. The larger the sensor, the clearer the resulting image. There are many different sensor sizes. Here's a breakdown of a few common sizes:

Most entry-level DSLRs have APS-C or Micro Four Thirds (MFT) sensors. Point-and-shoot cameras are likely to have 1" or smaller. When it comes down to it, larger sensors produce better images, even if they have fewer megapixels. And nearly every camera today comes with a lot of megapixels. So focus on sensor size.
Image Stabilization
It's rather difficult to hold a camera still -- which is why tripods are so helpful. But you aren't always going to have time to set up a tripod. In these cases, image stabilization can help.
There are different methods of stabilization and a huge number of acronyms across companies that describe it. It all boils down to your camera making an adjustment to minimize image degradation when you move the camera while taking a photo. Even a small shake in your hands can have an effect.
You won't want to have image stabilization on all the time, but it can be very helpful when you're not using a tripod.
Optical vs. Digital Zoom
When you're looking at lenses or cameras, you'll see two different kinds of zoom listed: optical and digital. Optical zoom is created by lenses, and it gives you the clearest pictures when you're zoomed in.
Digital zoom is applied by the camera, and it's just like scaling an image on your computer. It will necessarily reduce the quality of the photo. If the photo is really clear, you'll be able to digitally zoom a bit without creating noticeable degradation. But not much.
Optical zoom is always better. It's also more expensive.
RAW Capability
When your camera takes a photo, it can store the image in RAW format or a processed format like JPEG. In RAW, all of the information captured by the camera is saved to your memory card.
This takes up a lot of space, but also gives you the most options when you're editing later. Professionals shoot in RAW, and it's a good idea to start doing it yourself when you get into photo editing.
Take note of whether your camera is able to shoot in RAW format. If it is, consider trying it out!
Menus and Shooting Modes
When you're getting started, you probably won't worry too much about the features you can access from the menus or the different shooting modes. But as you become more experienced, these things will become much more valuable.

For example, the ability to use a fully manual mode gives you the ultimate control over your photos. Modes like Av, Tv, and P, which we'll discuss below, give you more control than Auto, but don't require extensive knowledge to use. And the ability to adjust ISO, shutter speed, aperture, and other shooting variables is key for progressing your photography.
Menu features might let you edit and organize your photos, adjust the screen on the back of your camera, and change shooting options (though it's best when these are on the body of the camera itself). The more options you have, the more control you'll have over your photography.
Don't worry about all of these options at the beginning. But know that you'll appreciate having more of them later.
Dozens More...
We could write about camera features all day. You can compare the number of points used in autofocus. ISO ranges. Battery sizes. Types of image stabilization. It's easy to fall down the rabbit hole of camera features.
But don't get too caught up in this. Having more and better features is nice. But you are the ultimate creative force in your photography. If you practice and develop your skills, you'll get better photos with a point-and-shoot than an unskilled photographer with the highest-end DSLR.
Digital Camera Modes to Know
As you'll see when you look at any digital camera, there are numerous different modes you can use. Different cameras might have slightly different modes, and some will have more than others, but there are a few basic ones you should know.
Auto

The Auto mode is extremely simple to use. Just point and shoot. Even on a DSLR, the Auto mode takes care of all the settings. It's great when you want to snap a photo really quickly or you're not in the mood to tweak lots of settings.
Giving creative control to the camera, of course, takes it away from you. Which is why many people recommend not using it. And they have a point -- getting to understand specific settings gives you a lot of control and lets you decide what your photo will look like.
That being said, sometimes you just need a photo, and fast. That's what Auto is good for.
Macro, Portrait, Landscape, Sports, and Night modes are all types of automatic mode. They'll tweak the settings so they're optimal for the specific type of photography you're doing. Again, you lose control here, but if you need a quick photo, they'll do the job.
Aperture Priority

This mode, usually denoted by "A" or "Av", lets you change the aperture, and your camera will handle the rest. In general, this is used for controlling the depth of field in your photo.
If you want a shallow depth of field (a blurry background), using a larger aperture will get it for you. If you want everything in your image to be in focus, a smaller aperture is the way to go.
Shutter Priority

The "S" or "Tv" mode lets you change the shutter speed, and lets your camera deal with aperture, ISO, and other settings. Usually, you'll adjust the shutter speed when you're photographing something in motion.
A faster shutter speed (denoted by a smaller number, like 1/650) will let you capture subjects moving very quickly. A slower speed gets you more light and detail for stationary objects.
Program

Some cameras have a program mode, denoted by the letter P. This is usually very similar to the auto mode, but it gives you a bit more control over things like ISO and flash.
Not all cameras have this, though, and the exact specs of this mode differ between manufacturers. Check your owner's manual to find out exactly what this mode does.
Manual

The full manual mode, "M," gives you control over everything. Aperture, shutter speed, ISO, flash, autofocus, and everything else. Using this requires some skill and a lot of patience, but it can be very rewarding.
In the beginning, don't worry about this mode. Stick with aperture and shutter priorities to learn the basics.
ISO and White Balance
In addition to shooting modes, your camera may have a wide range of other settings. Not all cameras are going to have the same settings, but some of them are consistent across models.
Understanding ISO and white balance is the first step to really taking control of your photography. Not all cameras will give you the ability to change these settings, but it's important to understand them either way.
ISO
This is best thought of as the camera's sensitivity to light. The higher the ISO, the more sensitive.
Why would you want to adjust this? In very bright settings, you might get images that are blown out if the ISO is too high:

Conversely, an ISO that's too low for dim settings won't register enough light and will give you a very dim image:

Finding the right ISO is often a matter of trial and error.

(All three images above were taken with the same aperture and shutter speed settings. The only difference was the ISO: 400, 6400, and 1600).
If the whites in your photo are too bright, lower the ISO. If there's a lot of noise in a dark image, lower the ISO. If you can't see as many things as you'd like, raise it. It's a bit more complicated than that, but keeping those ideas in mind will give you a head start.
And for more tips, take a look at our guide on taking the perfect, noise-free photograph.
White Balance
Different types of light have different shades of color. Incandescent light, for example, has a warmer hue than daylight fluorescent. Your camera can take the type of light into account when taking your photo, giving you the truest colors possible.
Most cameras automatically adjust the white balance in automatic and semi-automatic modes. But if it's not working well, or you're shooting in manual, you can make adjustments yourself.
In addition to these settings, check your owner's manual for how to change the self-timer, exposure compensation, and burst mode. Play around with them to see what happens!
Basic Photography Principles
Entire books have been written about the principles of photography, so this will necessarily be a very short overview. But understanding these ideas from the outset will help you get the best pictures possible.
It's All About Light: The Artistic Eye
Photography is all about light. Getting the right lighting on your subject. Capturing the right amount with aperture and shutter speed. Using shadows intentionally. Emphasizing the most interesting interplays of light in a scene.

Keeping this in mind is a great first step to developing the kind of artistic eye that will help you improve your photography. If you're not sure where to start, take a look at some professional photos or photo groups on Flickr to see how very talented photographers use and think about light.
Much of photography comes down to taking it slow. Don't rush through every day -- take a deep breath and become more aware of the things around you. Practice mindfulness. You'll be amazed at what you start seeing.
Exposure
Exposure is a technical extension of light. Too much light hitting your camera's sensor results in over-exposed photographs, like this one:

Not enough light results in under-exposed images:

You can, of course, use both of these effects for artistic purposes.
The interaction of aperture (how much light is coming into your camera), shutter speed (how long the light is coming into your camera), and ISO (how sensitive your camera is to light) results in exposure. The best tool for understanding exposure is your camera's histogram.
Get in the habit of checking the histogram after every shot, and look for balanced lighting. Try to minimize the amount of light at the very top and bottom of the histogram.
Composition
Another topic that's received book-length treatment: composition is simply the art of putting the right things in the right places in your photo. This is an important part of getting the right "feel" in your image.

There are many composition practices: foreground and background, the rule of thirds, the golden ratio, leading lines, and a whole lot more. Your best bet is to familiarize yourself with some of the basics and practice them intentionally.
Try taking photos with the rule of thirds for a couple days. Next week, focus on leading lines, and so on. Once you've gotten a good idea of how these methods work, you'll start to combine and alter them to fit your personal style.
And that's when the real fun starts.
There are plenty of other things that photographers think about when they're taking pictures. But if you start with these three, you'll be well on your way to improving your photography.
Exercises for Beginning Photographers
You don't absolutely need to engage in exercises to improve your photography. Just snapping photos when you see something worth recording will help. But intentional practice goes a long way toward developing your skills.
These five exercises are just suggestions; there are lots of other beginning photography exercises out there. There are cool photography projects you can embark upon. And there are groups on social media that will help, too.
But when you want to focus on becoming a better photographer, exercises like these are tough to beat.
Shoot in Black and White
Photographing in black and white is a great way to develop your eye for light. When color doesn't come into the equation, you need to focus on light and shadow to create an interesting effect.

Try taking only black-and-white photos for a week. Or even just a day. If you're really committed, try a month! You'll be amazed at how differently you start looking at light and shadow.
And for an extra challenge, vary your settings. Photographing black-and-white landscapes is very different from architecture or portraits.
Shoot a Single Color
For a week, take pictures only of blue things. Or red things. Or black, or white. The specific color doesn't matter. But this exercise will help train your eye to find interesting objects to photograph.
Once you start looking for specific things to take pictures of, you'll be amazed at how many interesting shots you find. Natural things, man-made things, clothing, people, animals . . . the possibilities are endless.
Take 10 Photos of a Single Object
When we photograph things, we very often stick to one angle. Taking multiple photos of the same object makes you think creatively about how to approach it.
There are lots of things you can focus on in this exercise. Of course, you can change the angle and direction of your photo. But you can also introduce new objects into the photo, emphasize a different part of the object, even use it for an abstract photo.
To even further develop your artistic eye, go for 15 or 20 photos.
Shoot Abstract Photos
Abstract photography might not be your thing, but this is another exercise that will help you see things in a new way. You'll need to look at textures, patterns, colors, and interactions apart from the object itself.

And that, of course, will help you see things in a new way. Which is what will lead to better photography.
Photograph Strangers
I'll be honest: this is a scary one. But there's a reason that so many pros recommend it. Ask ten strangers on the street to take their portrait.
This exercise is great for practicing your portrait photography, which is a really fun skill that most people don't get to use. But it also helps you realize just how many opportunities you have to get great photos. You might expect most people to say no . . . but you'll be surprised at how many people really want their picture taken!
It's intimidating, but trust me: this is one of the most important exercises of your budding photographic hobby.
Accessories to Consider
Photography isn't about gear -- it's about art. And developing your skills will take you much farther than buying accessories.
That being said, there are some things that it's really nice to have when you're getting started.
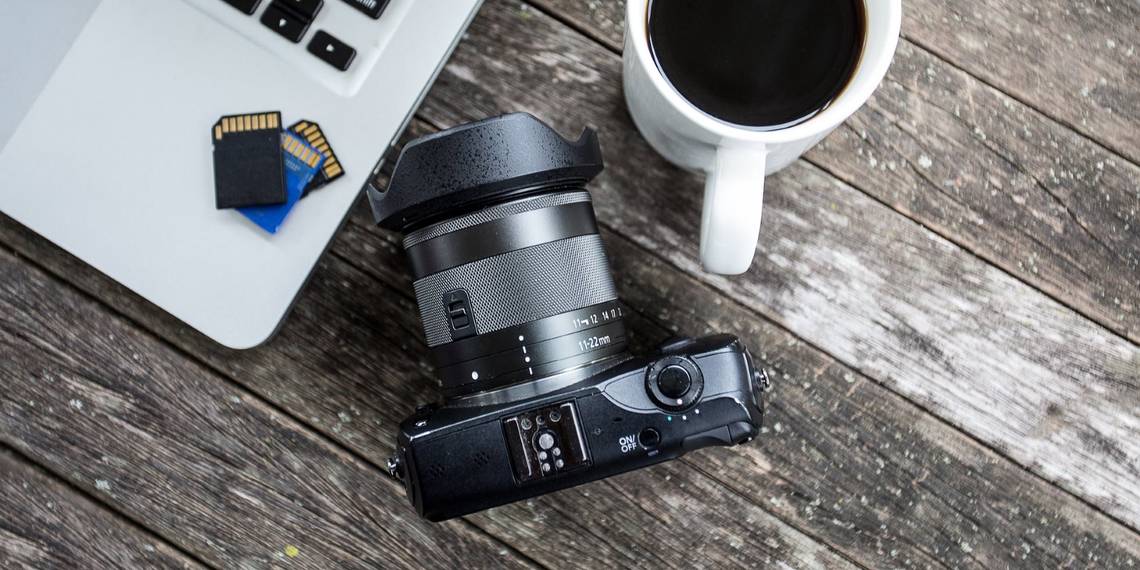
For example, an extra memory card or two is almost essential. When you get in the groove, you might take hundreds of pictures, and that can fill up your card quickly. Especially if you have a DSLR. Fortunately, SD cards are cheap and available pretty much everywhere. Grab a couple extras.
Extra batteries are great for the same reason. Every photographer has experienced the frustration of seeing a great shot only to find out that their battery is dead. It's infuriating. But if you have a spare battery, you can ensure that you always have a fully charged one ready to go.
How are you going to carry those cards and batteries? In a camera bag! This might not be necessary with a point-and-shoot camera, but DSLRs and mirrorless cameras are easiest to carry in a dedicated bag. They'll keep your gear safe and make it easy to carry more stuff.
If you're going to do any low-light photography, a tripod is essential. Your shutter speed will be so slow that even a tiny shake from your hands will show up in the photo. If you're not taking night photos, a tripod is still extremely useful. The ability to use slower shutter speeds can let you create some really cool effects, and holding your camera by hand for those shots is nearly impossible.
Once you start to get more into photography, you'll probably want to consider getting extra lenses and an external flash for your DSLR or mirrorless camera, too. Don't worry about these in the beginning. If you're curious about lenses, check out our guide to 5 lenses and when to use them.
Digital Photography Software
One of the biggest advantages of digital over film photography is how easily you can edit your photos after you take them. Digital photo editing is a huge topic, so we'll stick to a basic introduction here.
Your camera likely comes with some software from the manufacturer of your camera. And while this software can be decently good at organizing and editing your photos, there are better options out there. The first thing you'll want to do is organize your photos.
The go-to program for this was Picasa -- but that's no longer being distributed. There are lots of great alternatives, including both downloadable and cloud-based options. The best options are probably Photoshop Elements and Lightroom, but both of these are expensive for beginners. There are plenty of free alternatives to Adobe software that you can use, though.
Whatever you decide, it's a good idea to get in the habit of downloading and organizing your photos as soon as you shoot them. Your photo collection will be much easier to manage that way.
In addition to organizing, you'll want to edit your photos. Photoshop Elements and Lightroom are good for this as well, but again, there are lots of free (and more affordable) options. Many of them are beginner-friendly, too, which is a big help when you're getting started.
(I personally prefer Pixelmator, pictured above.)
In the beginning, don't worry too much about software. The better the pictures you take, the less you'll need to edit them later. So focus on that. That being said, if you're really excited about the possibilities of photo editing, go for it! GIMP is a powerful and free program for photo editing -- just be aware that it has a pretty nasty learning curve.
And remember that you can use built-in apps to great effect. Both Windows 10's Photos app and Apple's Photos app are great places to start.
On a related note, make sure that your photos are backed up. Using an automated, cloud-based backup system will make sure you don't lose all your hard work in the case of a drive failure.
Start Snapping
This is a lot of information. But what it all comes down to is this: digital photography is a great hobby, and the best way to experience it is to jump right in. Be intentional about getting better, and you'll continually improve.
There are lots of accessories and pieces of software you can invest in, but in the end, it comes down to practice. Take a lot of pictures, look back on them and critique them, and learn lessons from what you discover. And have patience; like any other skill, it takes a long time to develop your photographic eye. Enjoy the process!
When you're ready to start showing off your photos, consider these super simple websites to host your portfolio. You can also create your own website to put up your work. WordPress has terrific themes perfect for a photography portfolio!