When it is time to plan an online meeting, whether with a team spread across the country or just around the corner, GoToMeeting is a robust tool with great features. Accessible via the web and on mobile devices, the application is perfect for busy professionals on-the-go.
If you are new to GoToMeeting, here are details to make your online meeting a success.
Signing Up
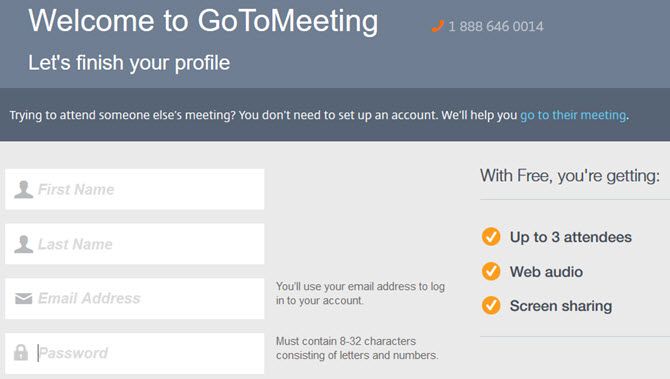
The first step in using GoToMeeting is to sign up for an account. You can start with a free account with limited features to test out the service. If you like it, GoToMeeting offers three paid plans, currently starting at $19 monthly, with useful features for more meeting participants.
The signup process is easy and only requires your name, email address, and password for a free account. You can then get started with web audio and screen sharing for up to three meeting attendees.
Setting Up
After you create your account with GoToMeeting, the setup process is just as simple as the sign up process. You will receive a confirmation email with a link to sign in. Then you will set up your personal meeting room, which is basically an editable link that you will be able to provide your participants.
You may want to save this link to your notes for future reference -- however, with GoToMeeting it is always close at hand.
Then you can jump right in by starting or scheduling a meeting. If you are starting a meeting, you can click the Share button and receive the details needed to invite your attendees. However, it is a smart idea to conduct a test meeting on your own just to get used to the features of the application before inviting others.
Installing the Application
If you are initiating a meeting for the first time, you will need to download and install the Citrix Online Launcher.
The process is the same whether you are using a Windows or Mac computer. Just follow the screen prompts for your platform.
Starting a Meeting
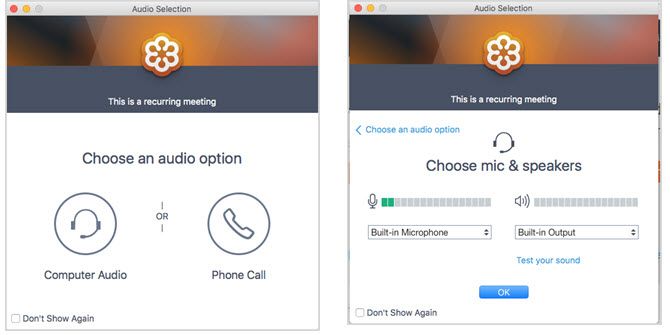
After the installation, you can start a meeting from the website or desktop application immediately if needed. To use the website, just click the Start Your Meeting button. You must then select your audio option from computer or phone call.
If you choose computer audio, you will be prompted to test your microphone and speakers which is a good idea to avoid potential issues before your meeting begins. Then, you are on your way to your first online meeting.
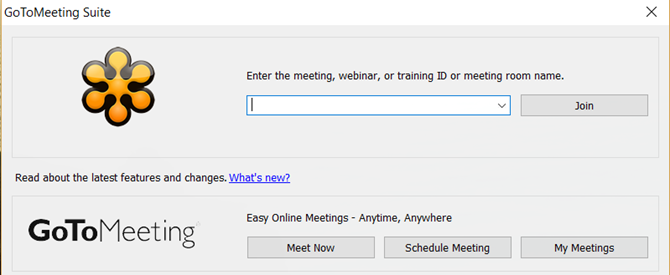
To start a meeting from the desktop application, simply open it and click the Meet Now button. GoToMeeting will then automatically open with the same audio options as the website. Make your choice from computer or phone call and then begin your meeting.
Scheduling a Meeting
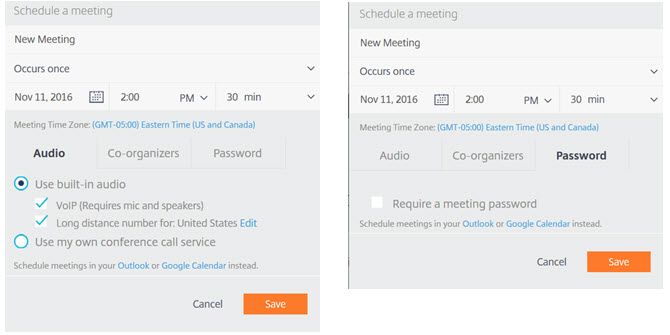
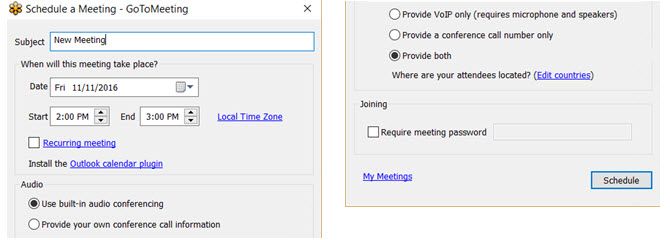
You will likely plan your meetings ahead of time and you can access scheduling sessions in two different ways. First, you can visit GoToMeeting on the Web, sign in, and then select Schedule.
You have a variety of options for a recurring meeting, audio selection, co-organizers, and setting up a password for the meeting.
Alternatively, you can open the application on your desktop and click the Schedule Meeting button. A pop-up window will give you the various scheduling options. This is a convenient method because it does not require you to open your browser or visit the website to schedule your meeting.
Scheduling your meeting from the desktop application provides the same options as doing it online, with slight variations depending on your platform.
Meeting Features
GoToMeeting offers a nice variety of features to organize your sessions and give you everything you need for a successful online meeting.
Here are just some of those features:
- Web audio (free).
- Screen sharing (free).
- 1-Click meetings (free).
- Drawing tools.
- Session recording.
- Keyboard and mouse sharing.
- Video conferencing.
- Conference line.
During Your Meeting
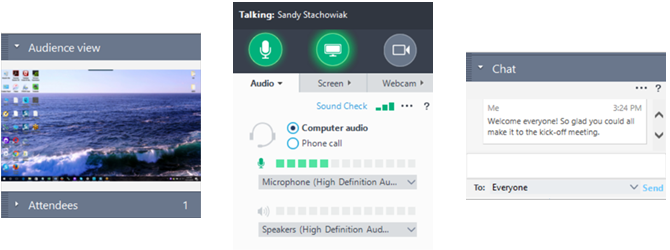
GoToMeeting offers an easy navigation from the sidebar during your meeting. You can share and adjust the audio, screen, or webcam using the icons or tabs at the top. The sections below those are expandable and include Audience View, Attendees, and Chat.
The Audience View sections shows you exactly what your attendees can see if you are sharing your screen. This is very helpful so that you do not have to continually ask participants if they are seeing what you intend.
Attendees shows you everyone participating and indicates next to their name whether their audio is on or muted, or if they are sharing their webcam.
The Chat area is handy for including a welcome message, sending text privately to one participant, or communicating with your team if an audio issue arises.
Each of these sections has a useful purpose. So, take advantage of these features and try to familiarize yourself with them before conducting your first official meeting.
Ending Your Meeting
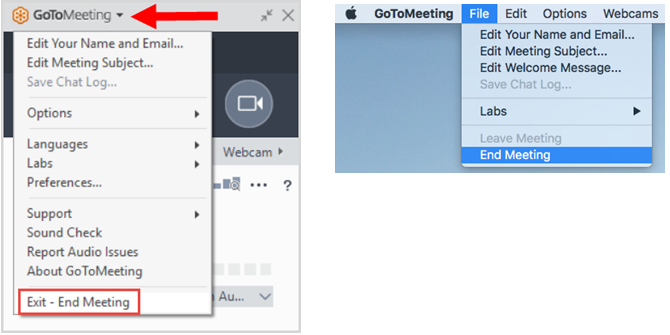
To end your meeting and close the application on a Windows computer, just select the arrow next to GoToMeeting in the top navigation and select Exit -- End Meeting.
On a Mac, navigate to File on your computer's GoToMeeting menu and choose End Meeting from the options. You will then be asked to confirm the end of the meeting.
Joining a Meeting
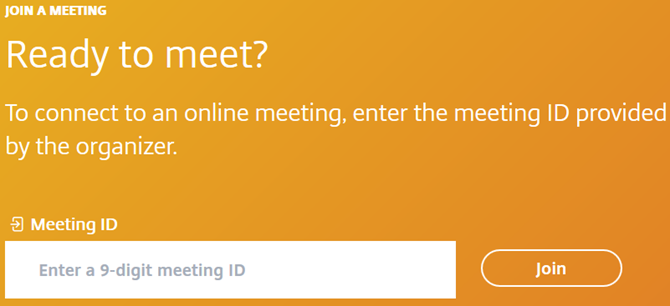
If you happen to be a meeting participant and not the presenter, you do not have to set up an account with GoToMeeting to join a session. You can either visit the website and click Join a Meeting or use the link provided by the meeting initiator and enter their meeting ID if prompted.
Notes on Recordings
If you have a paid plan and use the recording option, there are a few key items to keep in mind:
- You can choose to record only the presenter's screen or include the audio from all participants who speak during the session.
- If you stop the recording during a meeting you can easily begin it again by clicking the Restart button.
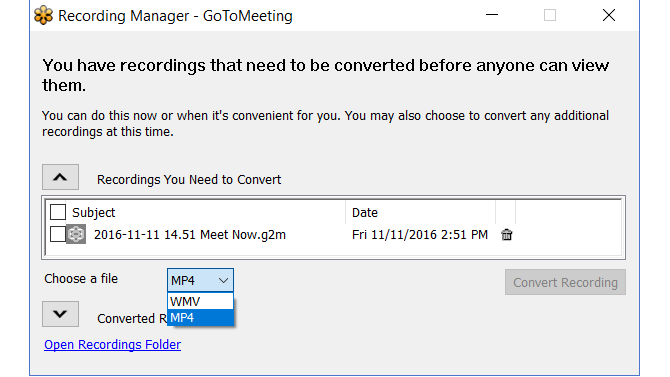
- When you end the meeting, a pop-up box will automatically display regarding your recording. You then have options to convert the recording immediately or open the recordings folder. Note that recordings must be converted to be viewed later with WMV, MOV, or MP4 file formats, depending on your platform.
- Your recordings will be saved locally to your computer by default and you can edit the file location if necessary. To edit this on a Windows computer, just select the arrow next to GoToMeeting in the top navigation and select Preferences > Recording. On a Mac, navigate to GoToMeeting on your computer's menu and choose Preferences > Recordings.
- Sharing or sending a recording is not currently an option from the GoToMeeting application.
Have You Conducted a GoToMeeting Session?
If you have set up an online meeting using GoToMeeting and have some helpful tips of your own, feel free to share them in the comments below.


