When you look at a photo taken with a smartphone, one thing makes it easy to tell apart from a photo taken with a serious camera - depth of field. Photos taken with a dSLR often have somewhat blurry backgrounds, and the object of the photo is sharply focused, popping into view. AfterFocus is an app for Android and iPhone that promises to deliver the same look to your smartphone photos.
We’ve briefly mentioned it in the MakeUseOf Directory, but today I am going to put it to the test, and run through the app with a real photo of your truly, taken in my kitchen this morning. Excited yet? I should hope so.
The Original Photo
First of all, here’s what we have to work with:

Yup, that’s me, wearing my Cookie Monster shirt. Not a great pic, but it’s typical smartphone quality: Everything is in pretty uniform focus, and nothing is too shaky or blurry to begin with. Now let’s see what we can do with it.
The AfterFocus Interface
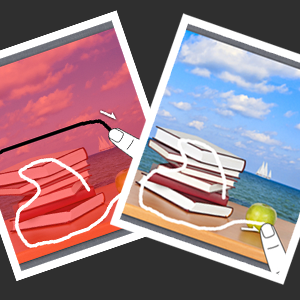
The first thing you should know about working with AfterFocus is that it is not fully automatic. You need to tell it what you want blurred and what should be kept in focus.

As you launch AfterFocus, the app lets you take a photo using your built-in camera app, or pick an existing photo from an album to work with. The “Take Two Photos” option is not active on Android yet. It’s reserved for the Pro version of the app, due on Google Play sometime in May. It’s a feature which is supposed to make it easier for After Focus to detect the foreground from the background by taking a photo, moving the camera slightly, and taking another photo.
We already have a photo we want to work with, so I just picked it off the gallery. Next, AfterFocus asked me how I want to select the focus area:

Manual Focus Selection
I will be showing both methods in this post, but I decided to go with Manual first. After picking that method, AfterFocus shows a quick two-stage tutorial:

It’s pretty simple, really. You basically paint over the photo to indicate what areas you want to keep in focus, and what areas you want to blur:

A quick look at my handwork (or rather, “finger work”) shows the problem with this method: It’s very easy to draw thick lines and mess things up. You can try fixing the damage by undoing, or by zooming in and drawing with the BG (background) brush:

Still, a very manual process that is prone to errors. I spent a quick moment zooming and panning around, fixing the outline until I ended up with this:

Better, but still messy. Realistically speaking, this is about as long as anyone would spend tweaking the outline. Time to move on to the next step, by hitting the “Next” triangle on the top-right corner.
![afterfocus[22]](https://static1.makeuseofimages.com/wordpress/wp-content/uploads/2012/04/afterfocus22.png?q=50&fit=crop&w=750&dpr=1.5)
AfterFocus instantly applies the background blur effect, and even on my smartphone screen I can see it leaves a lot to be desired. Still, let’s forge on, apply some effects, and see what we get. The bottom toolbar lets you control the amount of blur applied to the background:
![afterfocus[24]](https://static1.makeuseofimages.com/wordpress/wp-content/uploads/2012/04/afterfocus24.png?q=50&fit=crop&w=750&dpr=1.5)
You can also pick the aperture shape:
![afterfocus[28]](https://static1.makeuseofimages.com/wordpress/wp-content/uploads/2012/04/afterfocus28.png?q=50&fit=crop&w=750&dpr=1.5)
And, of course, apply a bunch of filters:
![afterfocus[30]](https://static1.makeuseofimages.com/wordpress/wp-content/uploads/2012/04/afterfocus30.png?q=50&fit=crop&w=750&dpr=1.5)
I am really not sure about vintage filters myself: I think in 15 years, I won’t be happy to find out all of my photos from this era are filled with retro-looking effects that degrade the image. Regardless, if vintage filters are your thing, AfterFocus has them.
Okay, we’re done. Here’s what we got:
![afterfocus[32]](https://static1.makeuseofimages.com/wordpress/wp-content/uploads/2012/04/afterfocus32.png?q=50&fit=crop&w=1500&dpr=1.5)
The background is definitely blurrier, and AfterFocus did not go overboard with the cross-processing effect I picked, which is nice. Still, you can definitely see weird fuzzing around my right shoulder (left, in the image) where I messed up the manual selection, not to mention the front of the photo is out of focus, which is plain weird (but it's my fault, because I did not highlight it initially).
Smart Focus
I went back to the beginning of the process with the same photo, to see how Smart Focus works. Here you get a six-step tutorial, along with a nice video (formatted for portrait mode, which is great):
![afterfocus[34]](https://static1.makeuseofimages.com/wordpress/wp-content/uploads/2012/04/afterfocus34.png?q=50&fit=crop&w=750&dpr=1.5)
The gist of it is that you don’t paint over the objects, but just “hint”: White lines mean foreground, black lines mean background. AfterFocus tries to figure out object boundaries on its own.
So, time to draw some white lines on myself:
![afterfocus[36]](https://static1.makeuseofimages.com/wordpress/wp-content/uploads/2012/04/afterfocus36.png?q=50&fit=crop&w=750&dpr=1.5)
The result wasn’t very good, initially:
![afterfocus[38]](https://static1.makeuseofimages.com/wordpress/wp-content/uploads/2012/04/afterfocus38.png?q=50&fit=crop&w=750&dpr=1.5)
AfterFocus decided the whole photo is “foreground.” Okay, let’s add some black lines:
![afterfocus[40]](https://static1.makeuseofimages.com/wordpress/wp-content/uploads/2012/04/afterfocus40.png?q=50&fit=crop&w=750&dpr=1.5)
Much, much better, only AfterFocus thinks my big white head is a part of the wall. Not great. A quick fix later, it looks like this:
![afterfocus[42]](https://static1.makeuseofimages.com/wordpress/wp-content/uploads/2012/04/afterfocus42.png?q=50&fit=crop&w=750&dpr=1.5)
Overall, selection is pretty smooth, and object boundary detection works well. This method took much less time than the manual one, and produced better results. Next, I will apply the same exact effect to the image as before, and let’s look at the result:
![afterfocus[44]](https://static1.makeuseofimages.com/wordpress/wp-content/uploads/2012/04/afterfocus44.png?q=50&fit=crop&w=1500&dpr=1.5)
Better, but still, definitely not perfect. This method got my shoulders right, but totally messed up the left side of my head (my ear looks weirder than ever), as well as the part of my shirt on the bottom-left of the photo. Some more work in the hinting stage might have fixed that, but again, I intentionally did not spend a lot of time on that stage, because I don’t think most users would. This isn’t Photoshop, after all.
Also, the foreground looks very artificial and totally messes up the effect: On an SLR, focus won’t drop so abruptly.
Image Comparison
Original:
![afterfocus[46]](https://static1.makeuseofimages.com/wordpress/wp-content/uploads/2012/04/afterfocus46.png?q=50&fit=crop&w=1500&dpr=1.5)
Manual foreground selection:
![afterfocus[48]](https://static1.makeuseofimages.com/wordpress/wp-content/uploads/2012/04/afterfocus48.png?q=50&fit=crop&w=1500&dpr=1.5)
Smart foreground selection:
![afterfocus[50]](https://static1.makeuseofimages.com/wordpress/wp-content/uploads/2012/04/afterfocus50.png?q=50&fit=crop&w=1500&dpr=1.5)
After the disappointing results from my initial spin with the smart foreground selection, I went back and edited more carefully, ending up with a more acceptable result:

The focus around my ear still looks really weird, but the foreground around my mocha pot is a bit more believable now – the photo isn’t instantly distracting in a “hey, this isn’t real” way.
Final Thoughts
AfterFocus is a nice gimmick, but my photos still look like they came from a smartphone. Dedicated users with time to spare will probably get better results than I got, even though I think that last attempt with the smart selection did improve the photo somewhat. It’s nice that the vintage filters are not so over the top and don’t completely destroy the photo.
Let us know what you think of the app and what results you managed to get with your pictures.