Blynk [Broken URL Removed] is an Internet of Things (IoT) service designed to make remote control and reading sensor data from your devices as quick and easy as possible. In this article we will cover exactly what Blynk is, how it works, and provide two short example projects on different uses of the service with NodeMCU and Raspberry Pi development boards.
It has never been easier to start developing smart objects using microcontrollers, and IoT devices have quickly grown in popularity over recent years. Development boards like Arduino or Raspberry Pi can be used to control everything from the power sockets in your home to motion-activated Christmas decorations.
One area which can pose a problem for the uninitiated is coding and networking. Blynk aims to remove the need for extensive coding, and make it easy to access your devices from anywhere on your smartphone. It's free to use for hobbyists and developers, though it's also available to use commercially for a fee -- companies can use Blynk to create their own apps and systems then sell them with their own branding.
Blynk uses it's own server and library in order to make the service work, but it's the Blynk app that seems to be it's main strength.
Enter the Blynk App
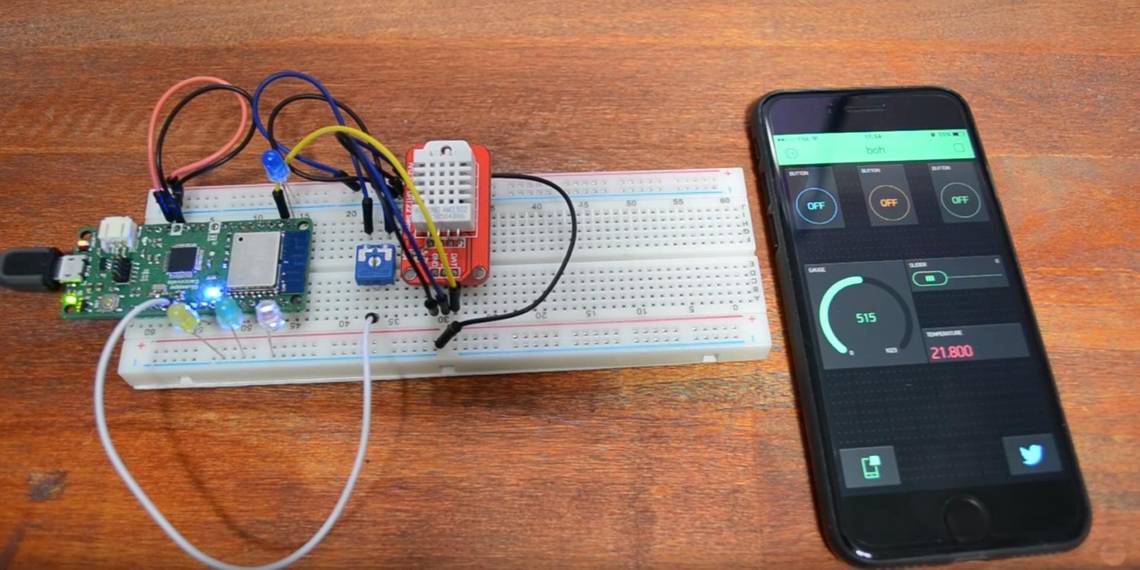
The Blynk app is available for free on Android and iOS. It's the starting point for your projects, featuring a simple to use drag and drop system for building custom controls for your IoT setup. The workflow is fast: when starting a new project you're prompted to choose your development board from an extensive list, and also your method of connection. The app then sends an authorization token via email for connecting to your device over the Blynk server.
Control elements are called Widgets: various types of input methods and output displays including buttons, sliders, a joystick, graphs and text feedback. There are also component specific widgets, with stylized controls for LEDS, LCD displays, and even live streamed video. Also notable are widgets that add features, like automatic posting to Twitter, and custom notifications.
While the app is free, it limits how many widgets you can use at once by giving them all an "Energy" cost. The app gives you a balance of 2,000 to play with, with the option to buy more if needed.
I found that the starting balance provided was more than enough for the example projects listed here, though if your setup is more complicated you might find yourself running out of juice quite quickly.

Each widget has an editing menu allowing you to change the name and color. You then choose which pin to affect (whether it be a pin on your board or one of Blynk's virtual pins) along with the range of values to send. For output displays such as graphs and text boxes, you can also choose how often you wish it to be updated, potentially saving precious bandwidth.
Blynk also features the ability to assign instructions to "virtual" pins, which are user configured connections between the app and the hardware. A single button in the app can therefore be used to trigger many different events on the device. We'll cover how to use these later in the article.
The app gives the option of sharing your project with others. A QR code is generated which can be sent via email or scanned directly, and used by anyone who also has the Blynk app. Whoever you share with cannot make changes to the project, making it a quick and convenient way to share control of your devices. It is worth noting however that your project in the app must be running for others to have access to the hardware.
You may also share the project without allowing access to your hardware, which is a great way to teach people how to use the app without letting them turn your lights on and off!
I found creating an app very quick and intuitive. Once created, you can start using it immediately by pressing the play symbol in the top right corner. If you need to make changes later you can simply press the same button to go back into editing mode.
The Blynk Server
Once you have created an app to control your device, you have two options for how to communicate with it.
The Blynk cloud server is quick, responsive, and free to use. Connecting to a Wi-Fi device is as easy as copying your generated authorization code into your Arduino sketch, and providing your Wi-Fi details. For Raspberry Pi, Blynk provide a test script which you can run with your authorization code to the same effect. Later in this article, we will create our own script using the Blynk library to connect to the service.
The second option is to host your own Blynk server. Blynk provide an open source Netty based Java server which can be run from your computer, or even a Raspberry Pi. This has various benefits for some users in terms of functionality and security, though for our examples here we will concentrate on using the Blynk cloud server provided.

The Blynk Library
The third and final element of Blynk is the Blynk library. This library works with a huge list of development boards to allow communication between the app and your hardware.
At its simplest, all that is required is to install the library, and load one of the well annotated example sketches provided.
Blynk: Initial Setup
Install the Blynk app on your smartphone, and create an account. Make sure you use an email address you can actually access as that is where your authorization tokens will be sent. Now create a project, selecting which board you will be using and how you will be connecting to it. Both examples here connect via Wi-Fi, though connections via Bluetooth, Ethernet, and even GSM are also possible.
Create your project. This will automatically send an authorization token. If you don't receive it, you can resend it by selecting the project settings icon (the little nut), selecting your device, and selecting "E-mail".
Next, install the Blynk libraries from the Blynk website. For Arduino, install the library by copying the files into your Arduino > libraries folder. If you are new to Arduino, here is a guide to get you started.
For Raspberry Pi, you'll need to make sure you have Node.js installed first. There is a guide to installed Node.js in this article should you need it.
Firstly, make sure your Pi is up to date, and has the build-essential package installed.
        sudo apt-get update
sudo apt-get upgrade
sudo apt-get install build-essential
Then install the Node Package Manager, the OnOff library, and the Blynk library by typing this into your Terminal window.
        sudo npm install -g npm
sudo npm install -g onoff
sudo npm install -g blynk-library
You can check everything has worked by running the Blynk test script:
blynk.js [YourAuthorizationTokenHere]
Provided all is working, it should look like this:

If you get any errors, make sure your Pi is up to date, and you have the most recent version of Node.js installed, before reinstalling the NPM, OnOff and Blynk libraries.
Quick Setup With NodeMCU
This first example shows how quick it is to set up simple systems using Blynk. It requires no coding, and once setup it's completely stand alone. As long as the board has access to your Wi-Fi connection, you can access it from anywhere using your smartphone.
To begin, set up a simple circuit on a breadboard. Connect pin D0 to the positive leg of an LED, and back to the GND pin through a 220 Ohm resistor.

Open your NodeMCU project in the Blynk app. On the right side, select the Button widget from the menu. Select your button in your project to open up it's properties menu. Here you can name it, and choose which pin on your NodeMCU board it should affect. Select pin D0 from the output list, and switch mode to make it an on and off switch, rather than a momentary push switch.
Press back (all changes are saved automatically), then press the play icon in the top right corner to start your app. You can press this same button at any time to go back to editing your project.
Next, open the Arduino IDE and choose your NodeMCU board and port from the tools menu. If you don't see your board in this menu, you may need to install the ESP8266 libraries (this guide should help).
Now open the ESP8266 standalone script Blynk provided in their library by navigating to File > Examples > Blynk > Boards_WiFi > ESP8266_Standalone. Replace the placeholder for the authorization token with the one you received via email, and enter your Wi-Fi details.
        char auth[] = "YourAuthToken";

char ssid[] = "YourNetworkName";
char pass[] = "YourPassword";
Save the sketch under a new name, and upload it to your board. Now when you press the button in the app, the LED should turn on and off. If it isn't working, check you have pressed the play icon in the app.
In simple cases like these, Blynk is incredibly fast to set up.

It is also worth noting that since this uses the Blynk server, you can control your board from anywhere, as long as the board has access to your home Wi-Fi connection, and your smartphone has mobile data access.
Blynk on the Raspberry Pi
You can use Blynk exactly the same way as in the above example on the Raspberry Pi by using the Blynk test script, but there are some deeper functionalities that Blynk's virtual pins provide, which we will look into now.
Blynk works using Node.js, so the code we will write today will be in Javascript. If you are a new to the language, this should be a great primer to get started.
We will use the Blynk library to create an app which reports whether a door sensor is open or closed, and sends an email and push notification to your mobile phone when the door opens.
You will need:
- Door magnet switch (also known as reed switch)
- 1x 1k? resistor
- 1x 10k? resistor
- 1x 220? resistor
- 1x LED
- Breadboard and hookup wires
Set up your breadboard like this:

Note that Blynk's library uses the GPIO numbers of the Pi's pins, so we will use them throughout this project. Connect the 5V and GND pins to the power rails on the breadboard. Connect GPIO pin 22 on the Raspberry Pi to the LED anode, and connect the cathode to the ground rail through the 220? resistor. Connect GPIO pin 17 to one side of the 1k? resistor, and connect the 10? resistor to the other side, and the 5V side of the power rail. Finally, connect your reed switch to the GND side of the power rail on one side, and on the line where the 1k? and 10k? resistors meet on the other. This pull-up resistor setup will cause the voltage on pin 17 to read high when the switch opens.
Create a new project in the Blynk app, and select your Raspberry Pi board. From the widget menu select a Labelled Value, Email, and a Notification widget
Select the Labelled Value, name it, and choose virtual pin V0 as it's input pin. You can also change how the information is displayed. In this case add "The door is " before /pin/ in the Label tab. We can leave the Reading Frequency value at it's default setting, though you can change this to send data to your app at a different rate.
It is worth noting that you don't actually have to enter an email address into the email widget as we'll be adding it into the code later, though the widget must be present for it to work.
Once you're happy with how your app looks, press the Play button in the top right corner.

Now create a new script called blynkdoor.js. The full code is available fully annotated here.
sudo nano blynkdoor.js
We need to start by importing the Blynk library, adding our authorization key, and creating an instance of Blynk to use in our script.
        var blynklib = require('/usr/local/lib/node_modules/blynk-library');

var AUTH ='PasteAuthorizationCodeHere'

var blynk = new blynklib.Blynk(AUTH);
We also need to import the OnOff library, and declare variables which setup our reed switch and LED. We'll also create a variable for the virtual pin we set up on the Blynk app.
        var Gpio = require('onoff').Gpio,
reed = new Gpio(17, 'in', 'both'), //register changes 'both' when switch is opened and closed
led = new Gpio(22, 'out');

var virtualPin = 0;
Now we are going to use the watch function from the OnOff library to watch for changes in our reed switch. The door switch is either at 0 or 1, and whenever that value changes we write that change to the LED pin.
        reed.watch(function(err,value){
	led.writeSync(value);
We can use the value to also send data to the Blynk app. If the door is closed, we want to be able to see that in your Labelled Value widget. If the door opens, we want to receive a notification and email telling us. We do this with an if statement, and using virtualWrite, notify, and email functions from the Blynk library. The full documentation for Blynk can be found here.
         if(value==0){
 blynk.virtualWrite(virtualPin,"Closed");
 console.log('Door Closed');
 };

 if(value==1){
 blynk.notify("The door just opened!");
 blynk.email("email@address.here", "Front Door", "The front door just opened.");
 blynk.virtualWrite(virtualPin,"Open");
 console.log('Door Open');
 };

});
Now whenever the reed switch registers a change of value, the data is sent to our virtual pin, and in the case of the door opening to the notification widget in the app, as well as writing to the console. Note that the final braces are from where we started the watch function above.
Finally, we need to reset the pin when the program ends. This is the same as the GPIO.cleanup() you are probably familiar with already.
        process.on('SIGINT', function () {
 led.unexport();
 reed.unexport();
});
Now save your code and exit. Run your script using node.
sudo node blynkdoor.js
Now when you move the magnet away from the reed sensor, you should get a notification telling you the door opened, and your labelled display should change. Close the switch again, and you will see that the labelled display changes again.

It is worth noting that the Blynk app must be running on your phone in order to receive the push notifications, though the emails work whether the app is running or not.
In the short time spent so far with Blynk, it seems a very easy service to use. At it's simplest allows people with no coding knowledge to build DIY home automation systems easily. With a little extra coding knowledge it becomes even more powerful, allowing for much more complex systems and multiple event triggers from single button presses in the app.
This project was a basic introduction to Blynk, though what we have covered here could be easily modified for almost any home automation or microcontroller project.
Have you used Blynk? Do you have a crazy complex system using the service that you'd like to share with us? Let us know in the comments below!
Image Credit: Giuseppe Caccavale via YouTube.com