To master photography, you have to master one critical element of nature—light.
Of course, there's the usual stuff of shutter speed, aperture, and ISO. But all three move around the pivot of light or exposure. There may be the good old golden hour, but in our opinion, there is no bad time to take a photo. A photographer has to make do with whatever light is available and construct the best shot out of it. After all, light not only varies during the day, it also varies throughout the year.
If you've overexposed your pictures, you can fix them in Photoshop. This guide shows you how to do so.
Understanding the Problem: Overexposure
In simple terms, an overexposed photo means it is too bright. A photo gets overexposed when too much light enters through the lens. It happens easily enough when you take a photo in direct sunlight or the light source is too strong for the subject. Photographers use the term "washed out" for such photos.
It is easy to recognize an overexposed photo; whites will appear too white and colors will be too bright and saturated beyond their normal tones. Many digital cameras have auto-bracketing, which is also called Automatic Exposure Bracketing (AEB). AEB helps to reduce overexposure to a certain extent provided your other settings are set right.
You should also get into the habit of checking the histogram at the back of your camera after every shot and correlating it with the scene. If you get the exposure right, you will have less to fix later. Of course, working with the histogram in a program like Lightroom during post-production will also be beneficial.
How to Fix Overexposure in Photoshop
While there are creative ways to use overexposure, it's usually something you'd want to avoid or fix. Photoshop gives you quite a few ways to fix overexposed photos. You can take your pick and try it out to see for yourself which one works best with your specific case of overexposure. Here are the easy three...
1. The Easiest Way: Choose Shadow/Highlight
If you are looking to adjust the exposure quickly, Photoshop (all CS versions) gives you a couple of sliders that make it a cinch to adjust the lightness in your photos.
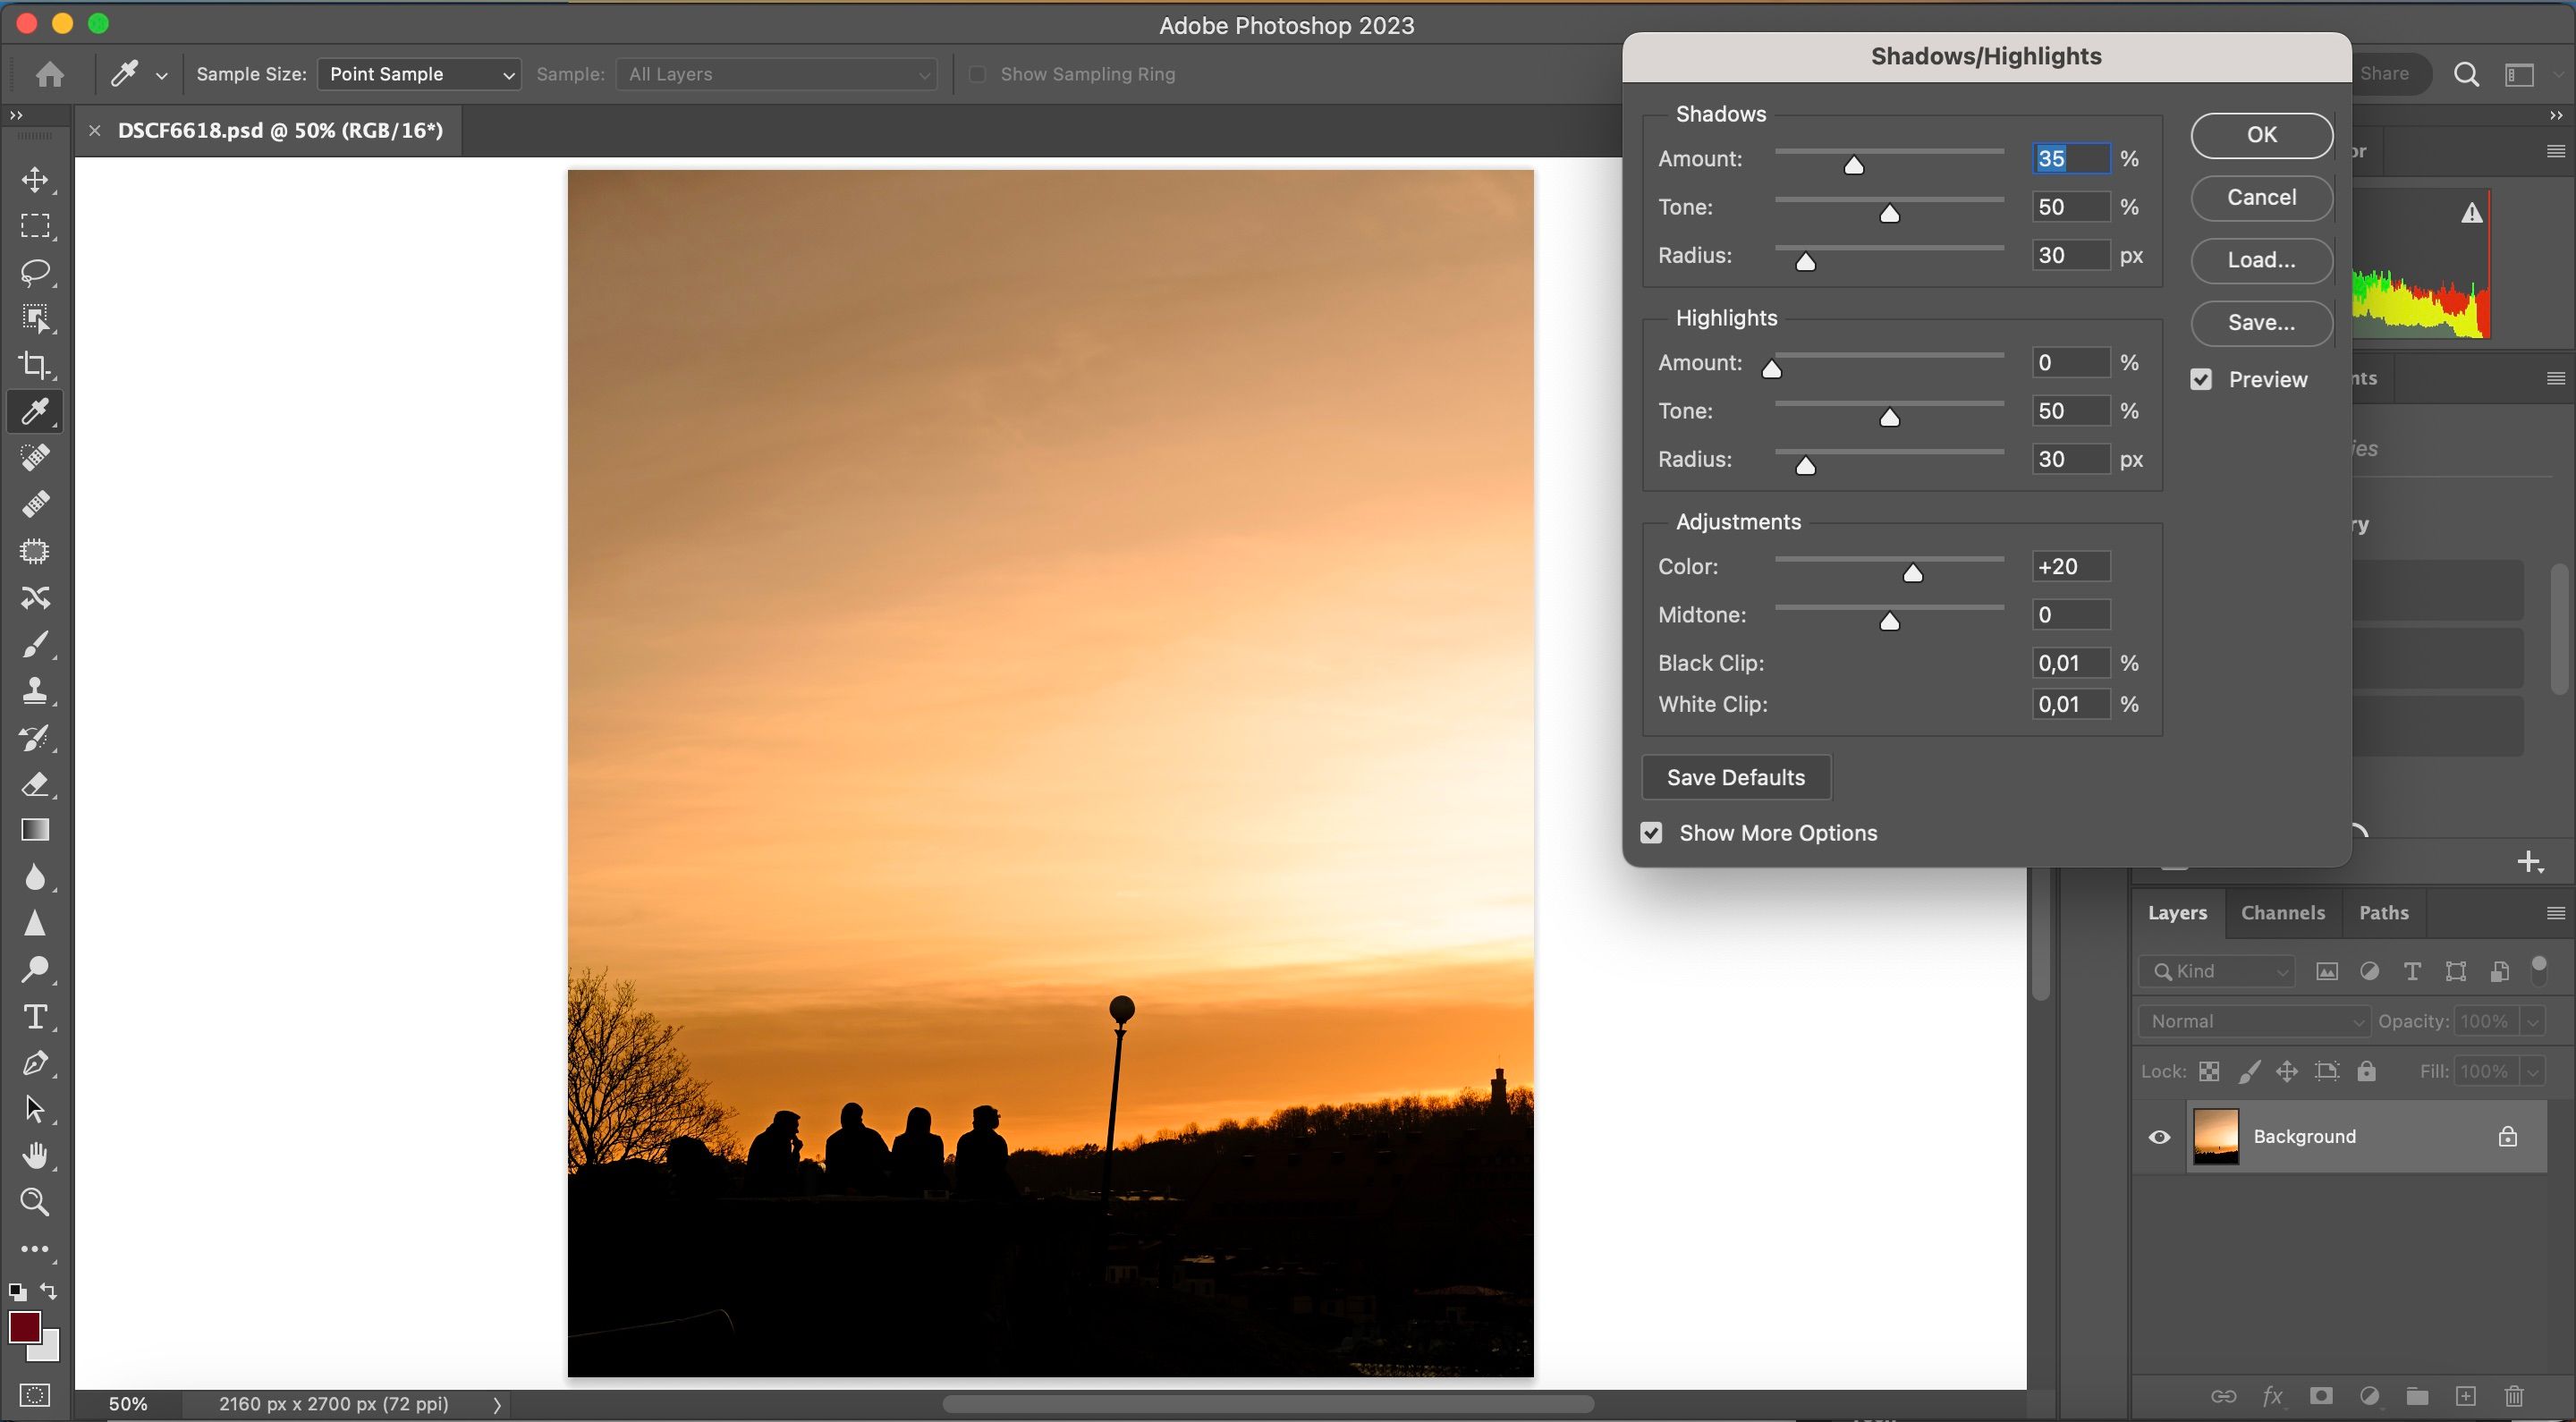
Go to Image > Adjustments > Shadows/Highlights. Here, you can drag multiple sliders until you achieve your desired results.
Remember, the higher the percentage, the lighter the shadows and the darker the highlights.
Using Shadow/Highlights is quick but destructive. You are working on the image layer itself, and all changes are committed to the image once you've given it the green light.
2. Being Non-Destructive: Creating a Layer
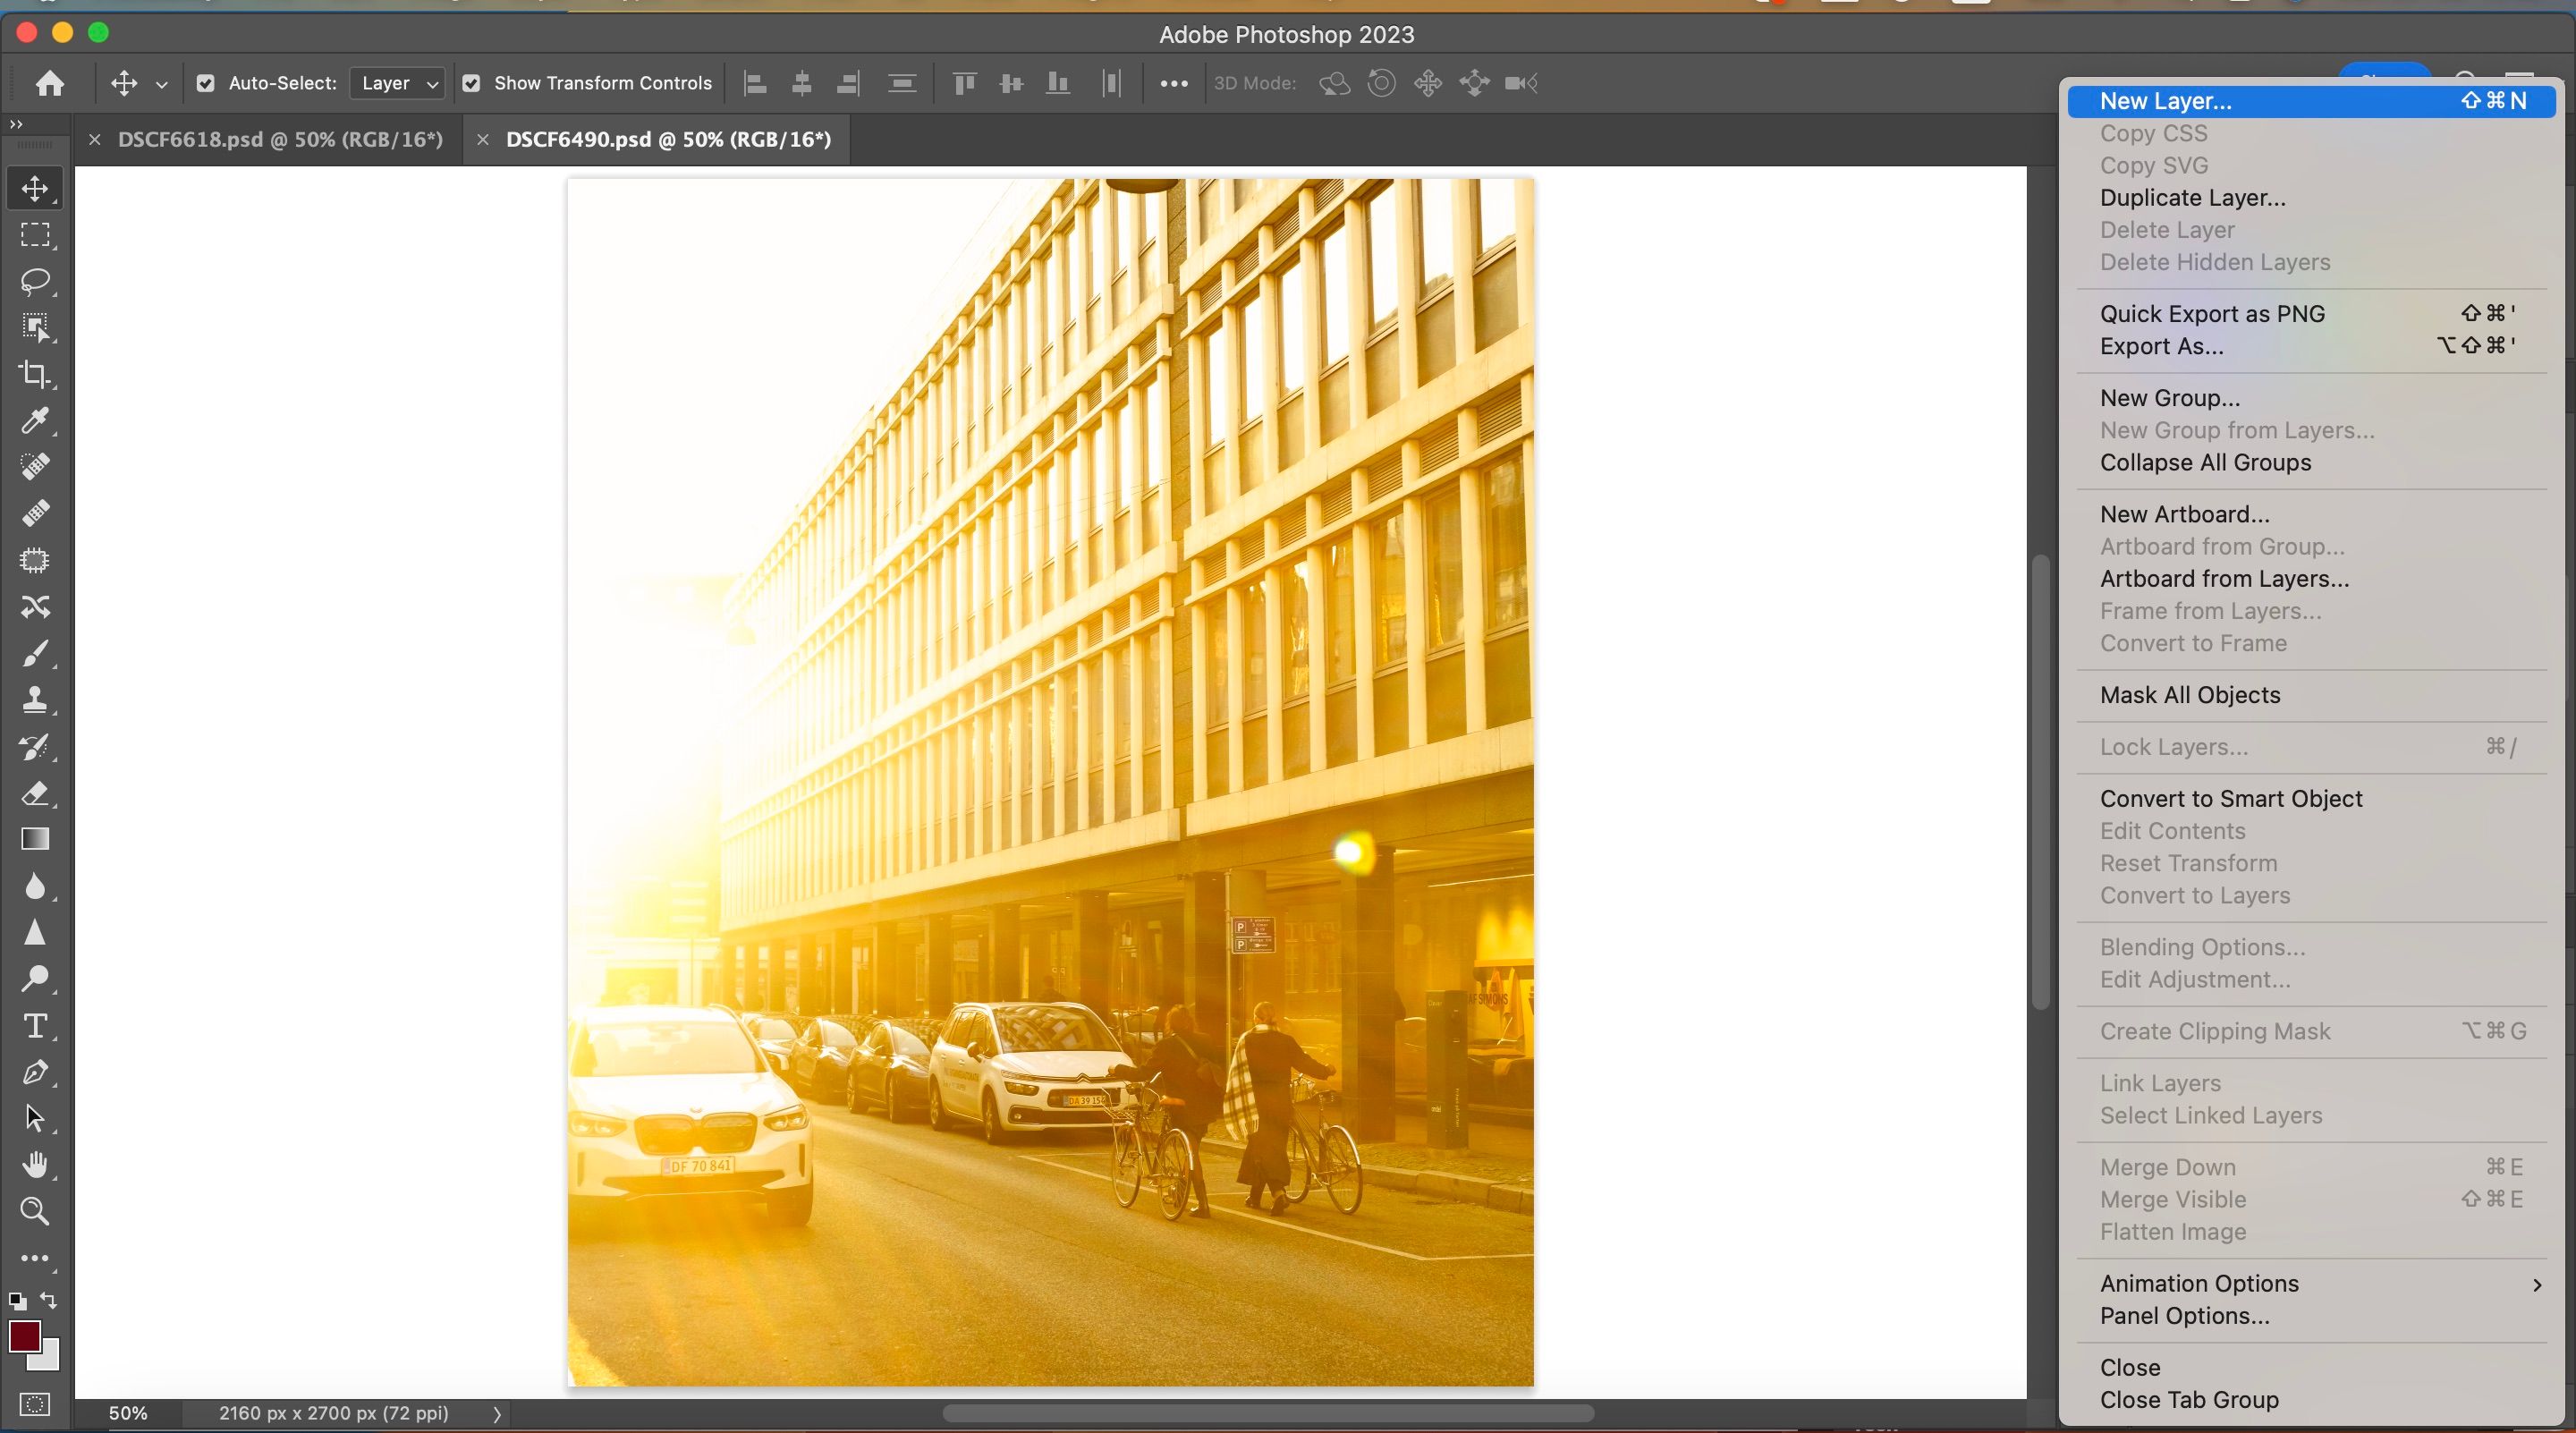
One of the best ways to ensure that you don't destroy your Photoshop edits is by creating a layer. Go to the Layers section in the bottom right, select the three lines icon, and choose New Layer.
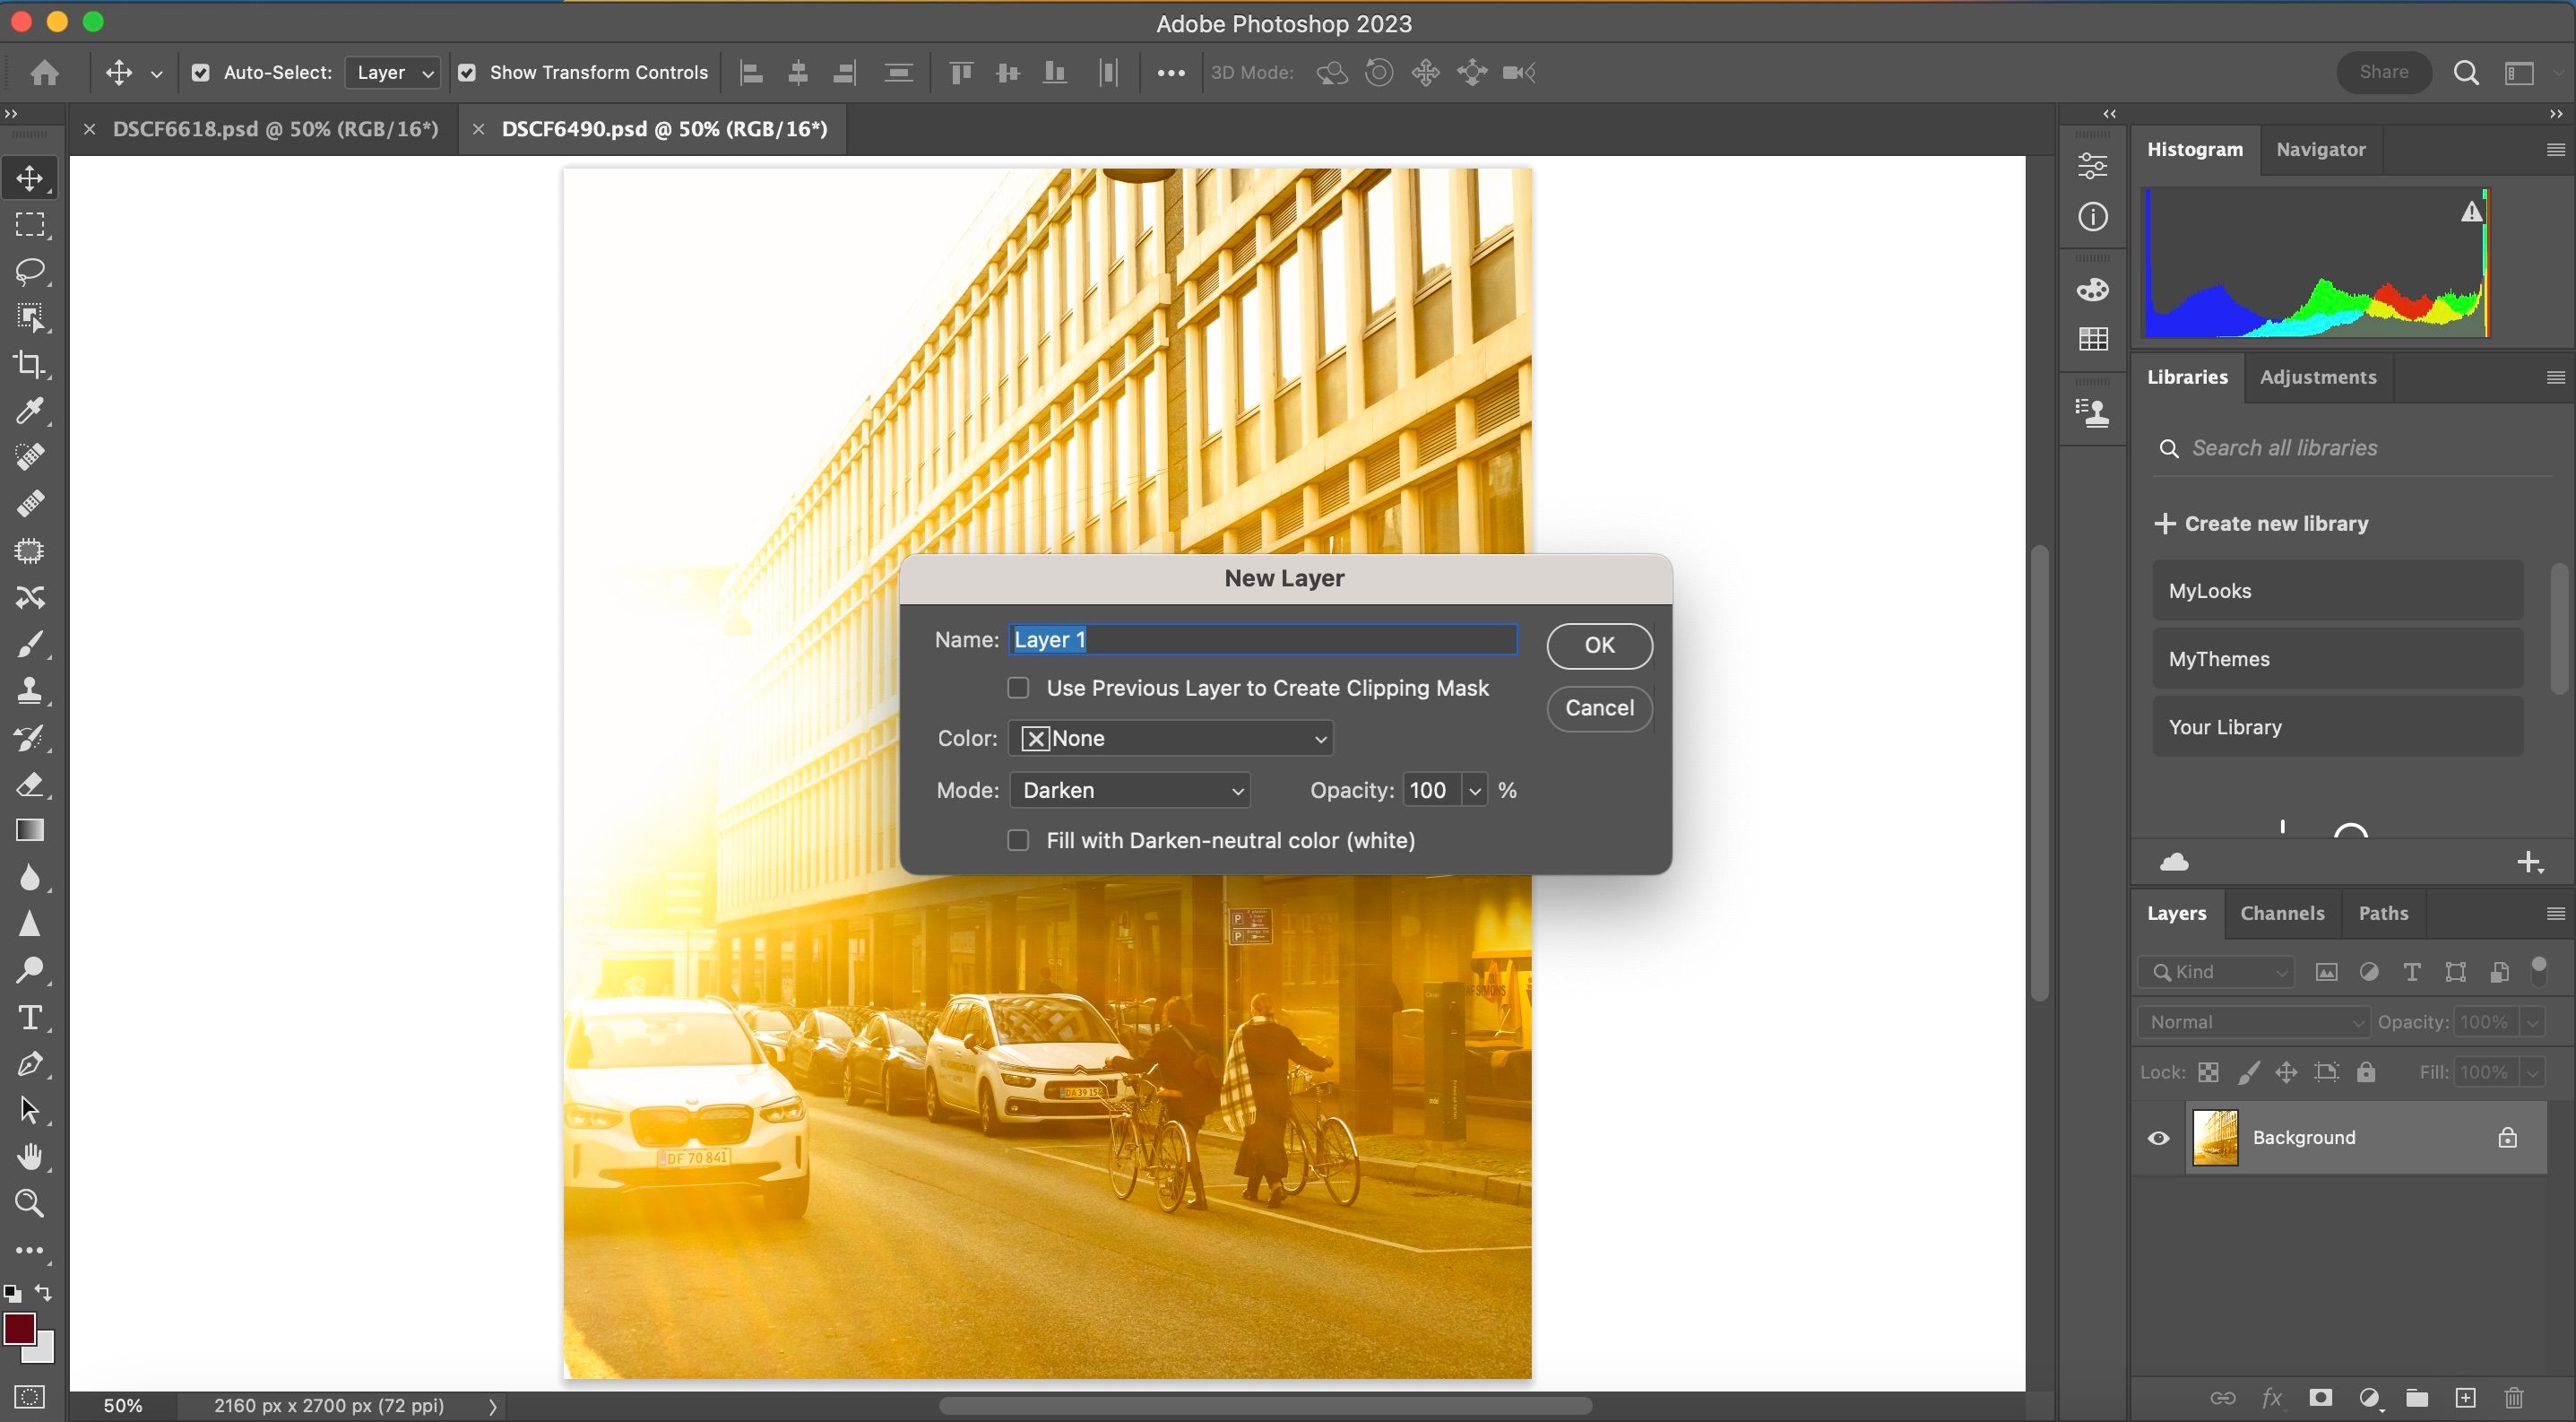
As we want to fix an overexposed image, go to Mode and select Darken.
You can use numerous tools to darken your image, including all of the below (which you can find by going to Image > Adjustments):
- Brightness/Contrast
- Curves
- Exposure
- Levels
If you can't change anything, hit the unlock icon next to your background layer.
Fixing Overexposure Using Camera RAW
Beginner photographers generally don't shoot in RAW, but shooting in the RAW format is advocated because it gives you a lot of flexibility with post-processing. Post-processing is compulsory when it comes to RAW. Higher-end good quality cameras (some compacts too) give you multiple format support like RAW, JPEG, and TIFF.
The RAW image format is uncompressed (i.e. an 18-megapixel camera will produce an 18 MB RAW file), and totally lossless (the complete data as captured by the sensor). So, you get all the data to work with, and you can choose to snip away in post-processing to create the perfect shot.
Camera RAW is a program that you'll find in Photoshop, and it has many similarities to Lightroom. But unlike editing in Lightroom and later importing your photos to Photoshop, you can edit everything in one place. If you've got an overexposed picture, consider using Camera RAW instead.
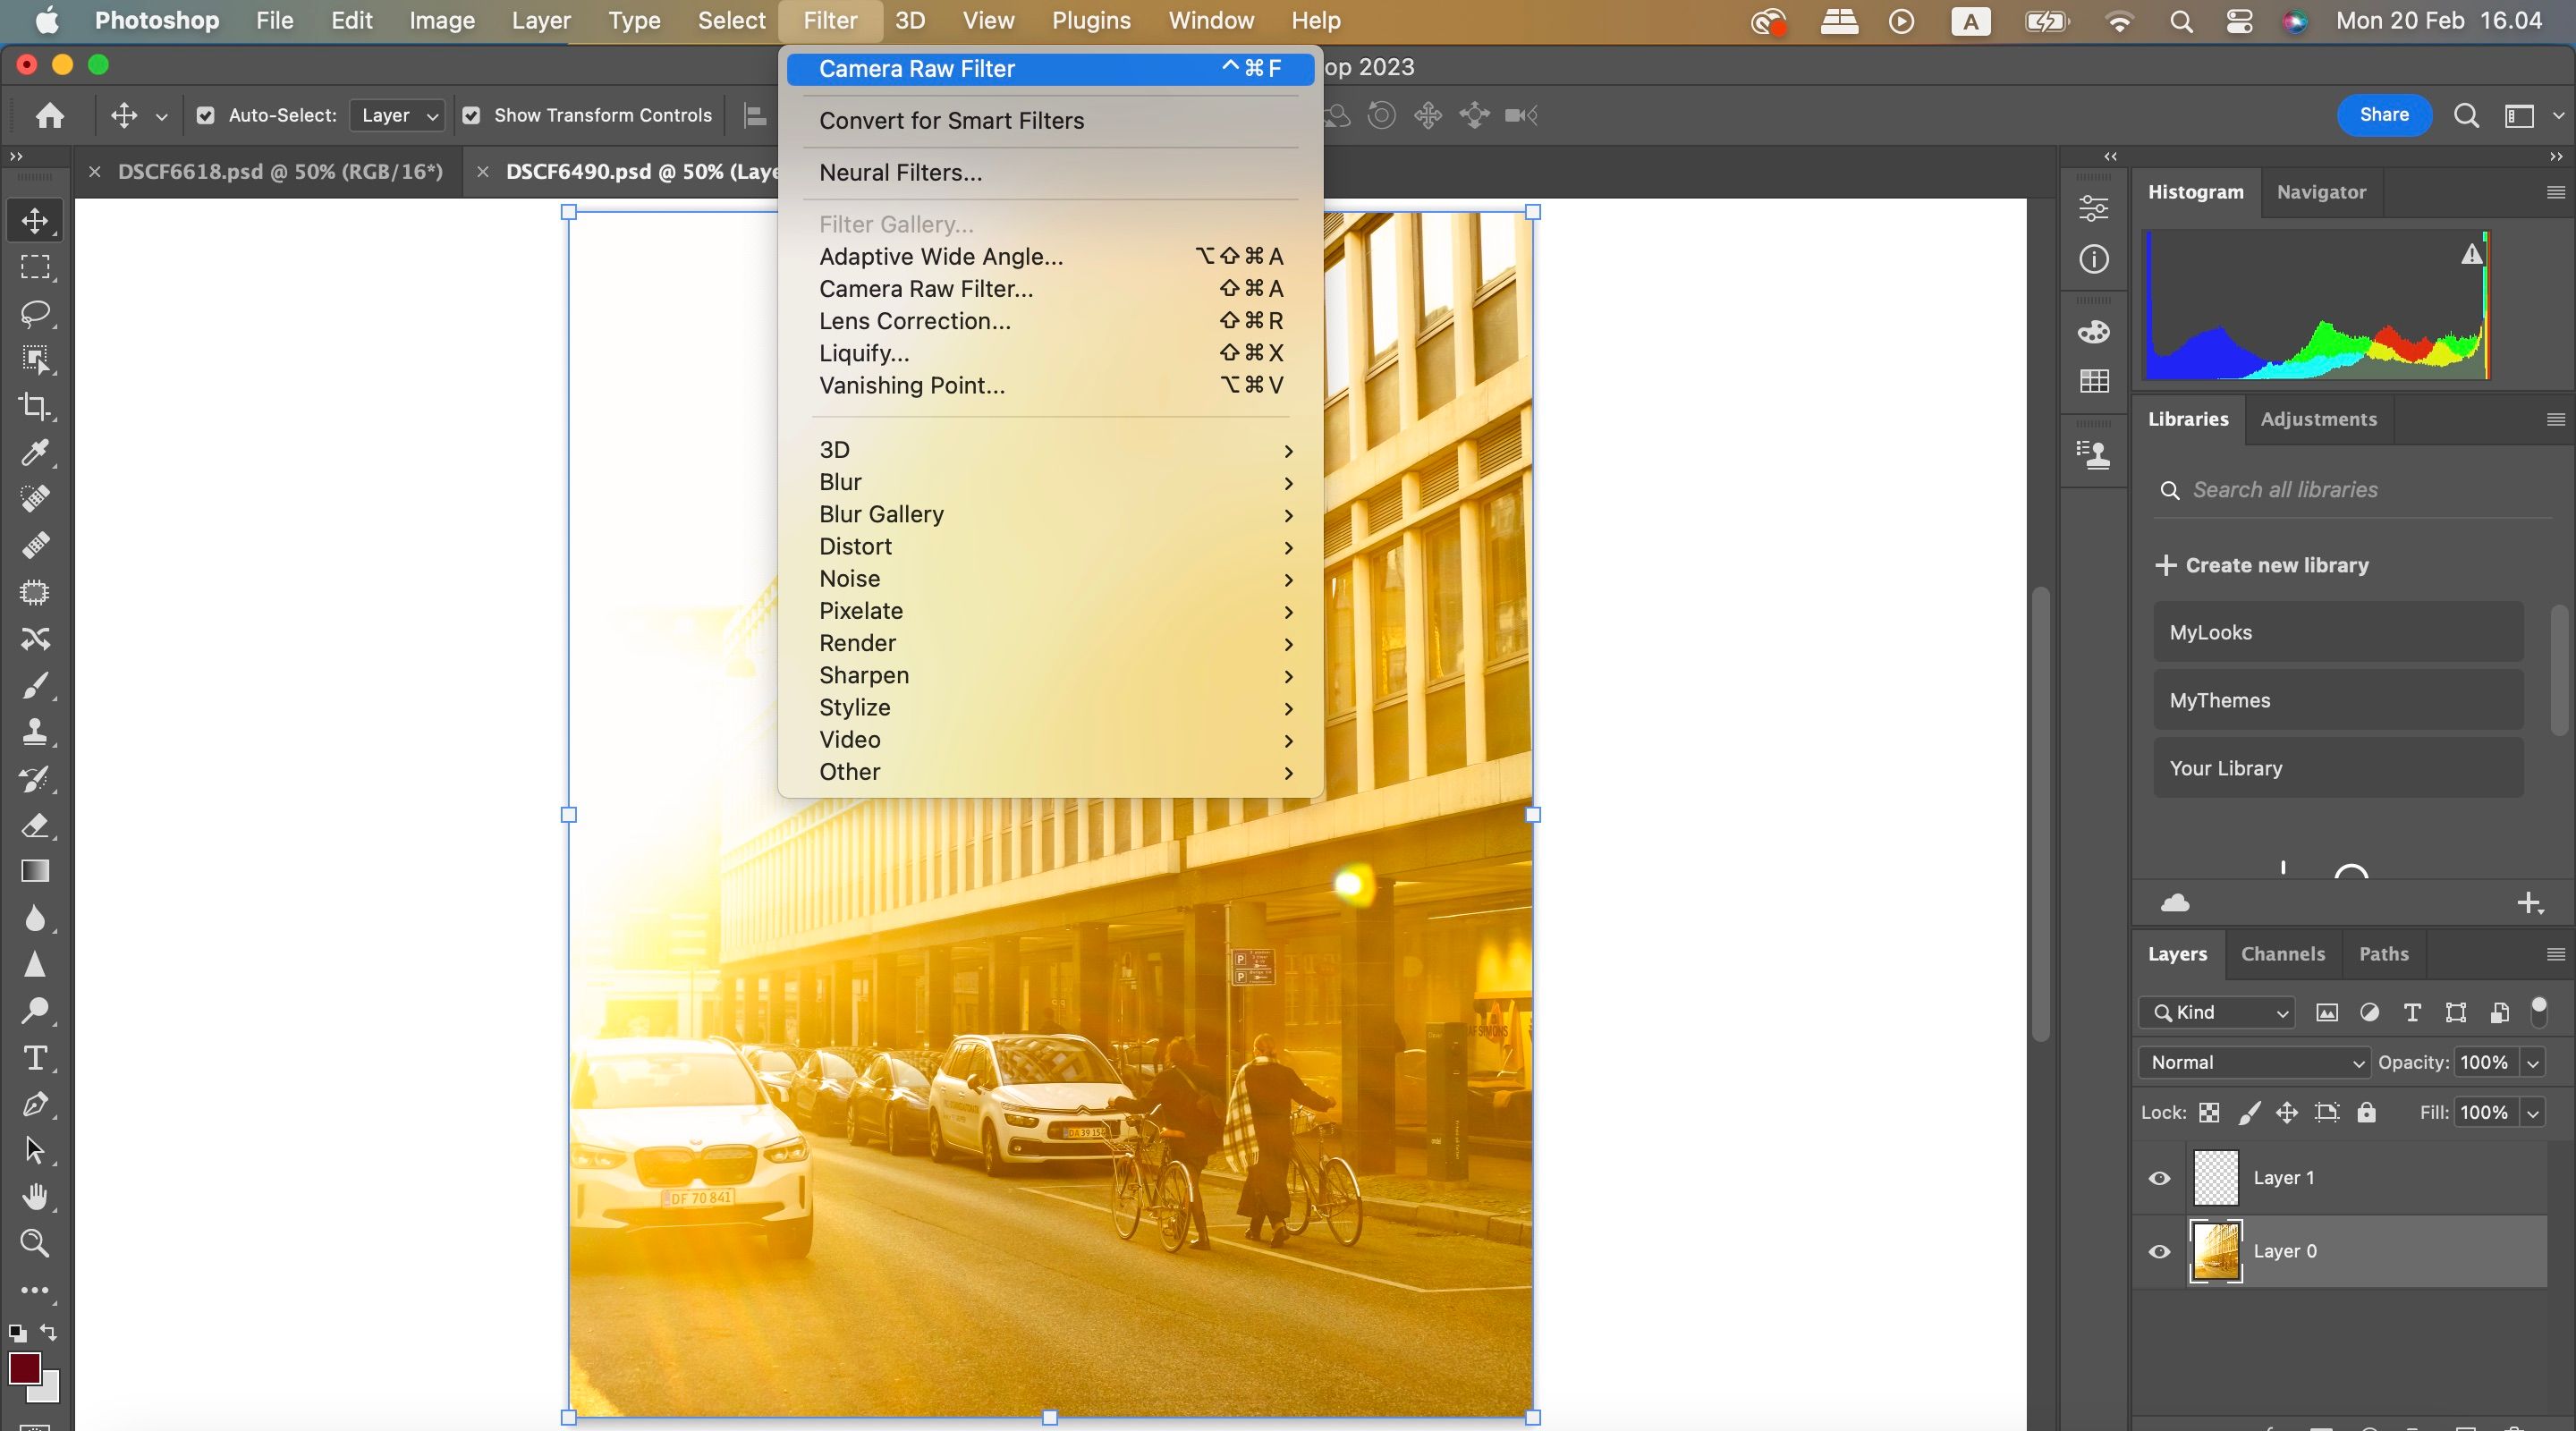
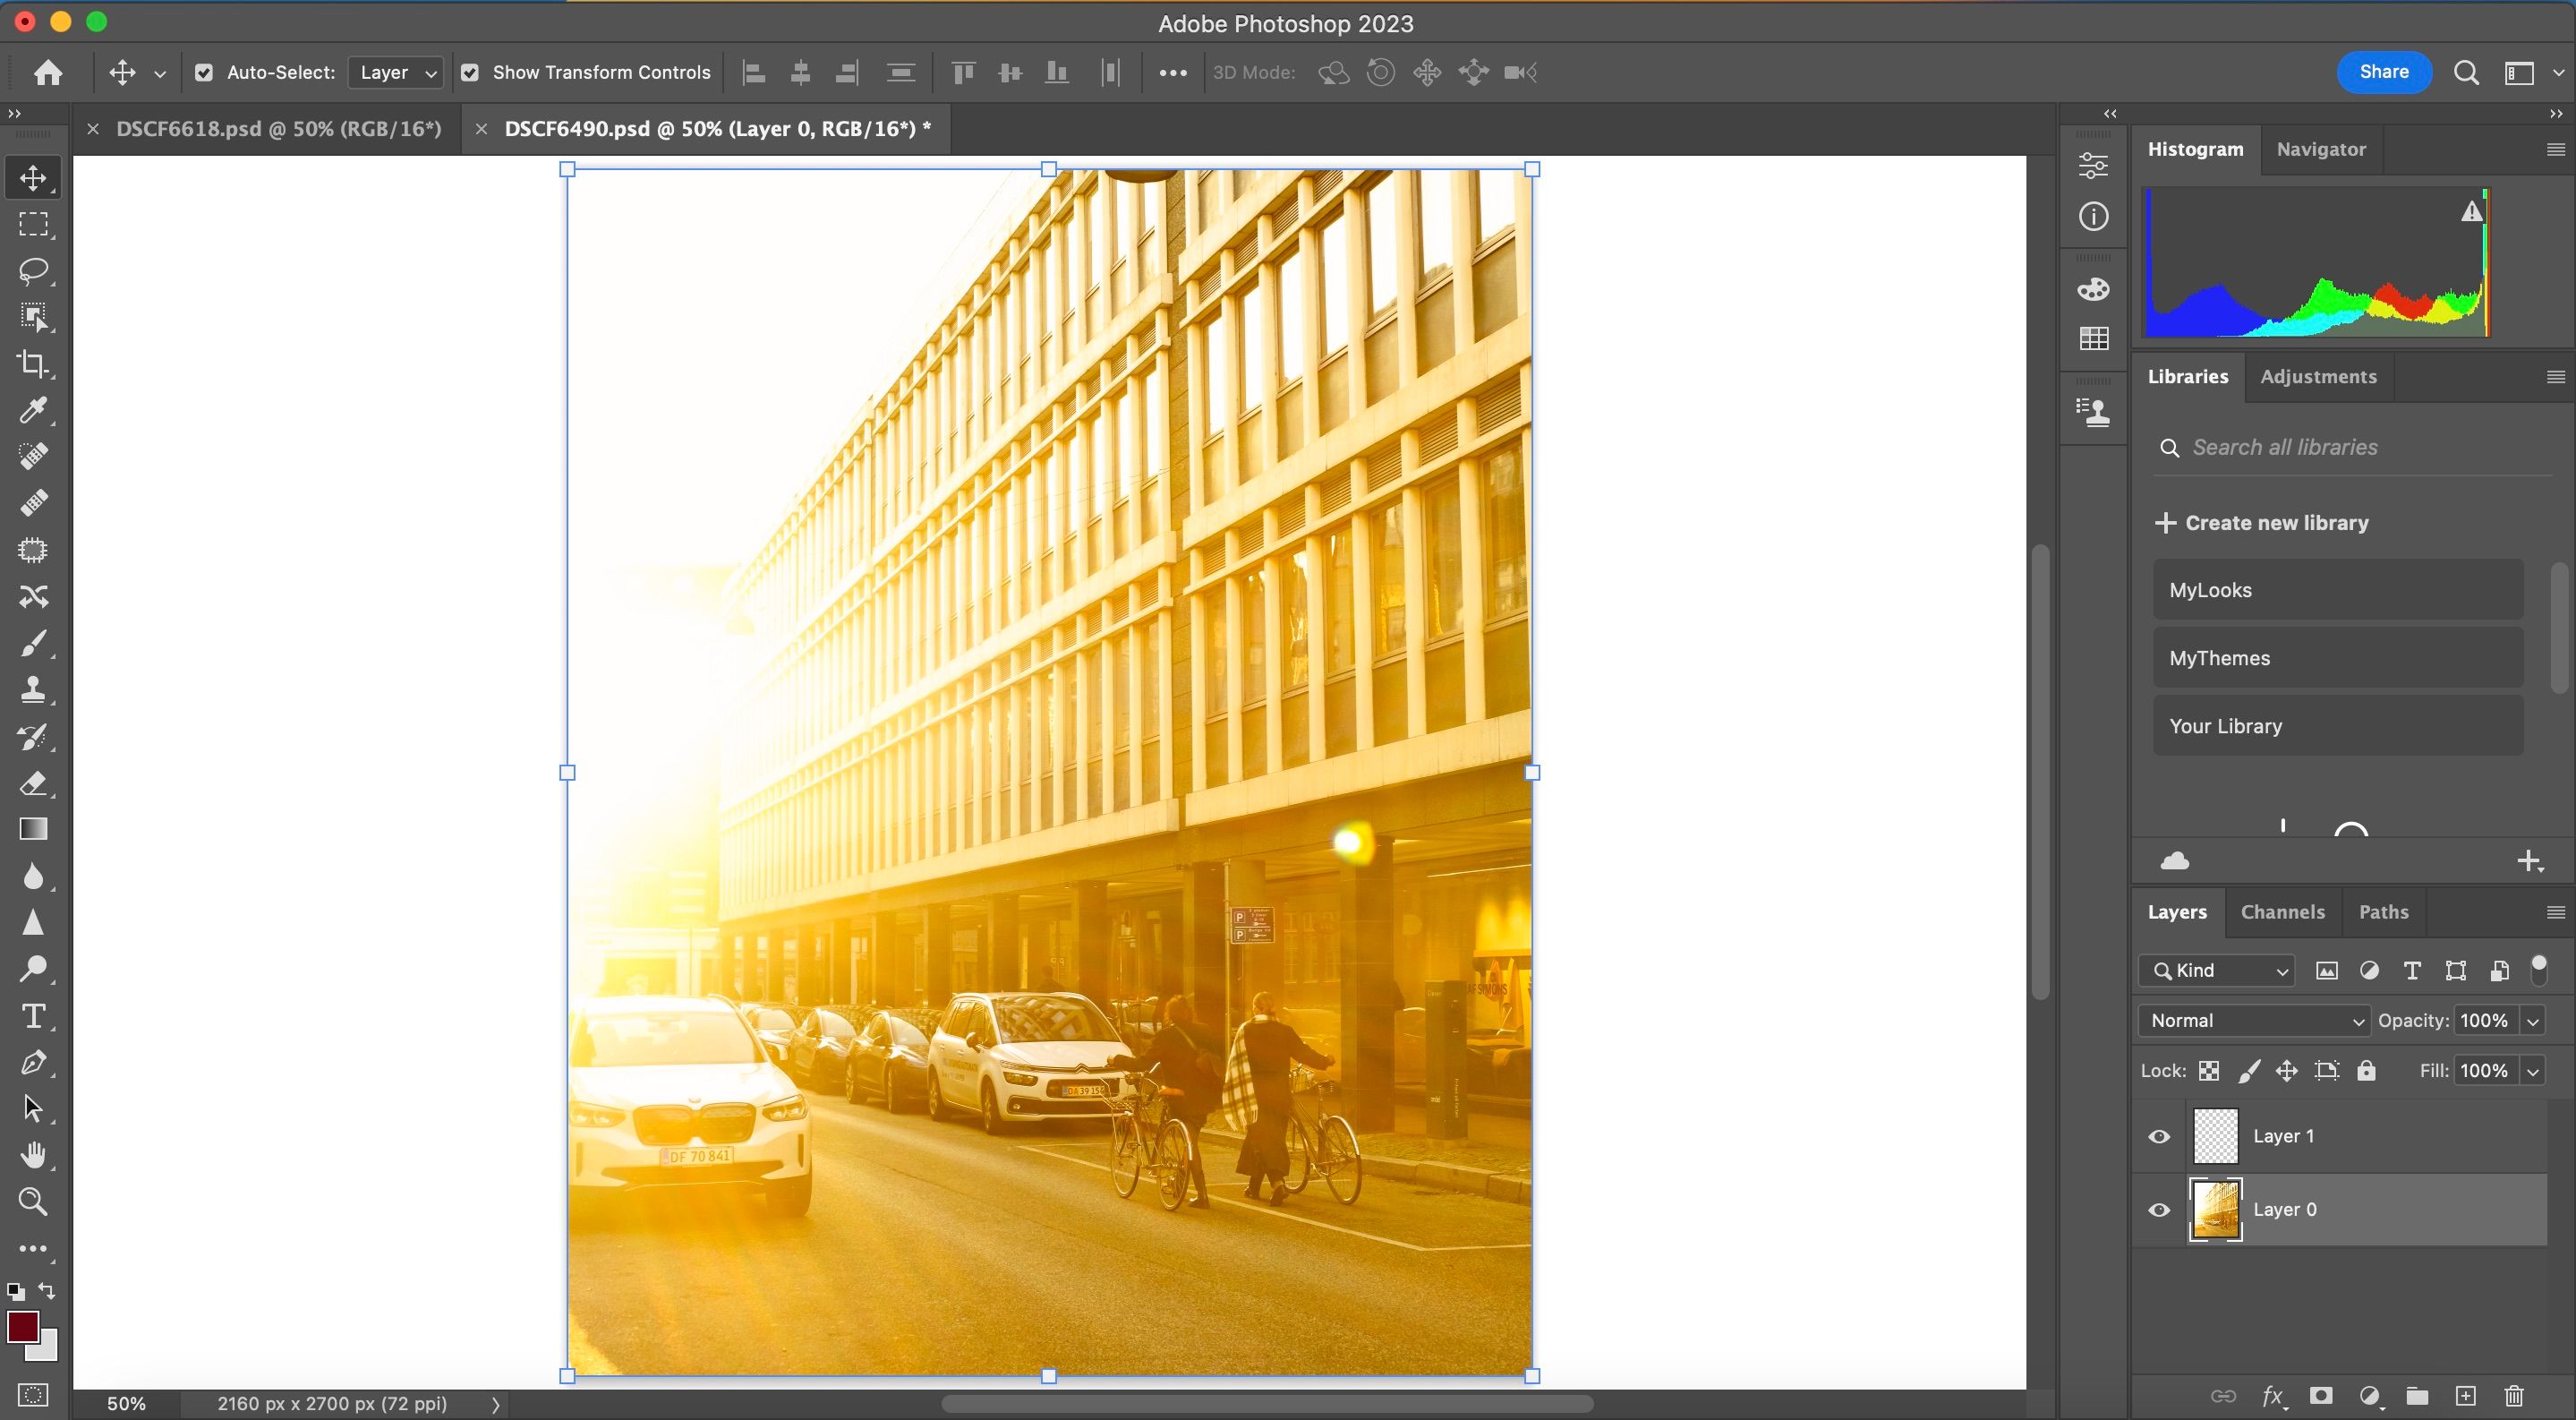
To access Camera Raw in Photoshop, open the file you want to edit. Then, go to the Filter option in the toolbar at the top of your screen. When the dropdown menu appears, select Camera Raw Filter.
Your photo will open in Camera Raw. Once you've done that, you can adjust your overexposed picture to ensure that it looks more like it should.
The histogram is our first destination. Click on the Highlight Clipping Warning symbol. Overexposed areas in your photo are now indicated in red.
To adjust the exposure, we have to use the sliders and carefully calibrate them. Moving the Exposure slider to the left reduces exposure, and the red in the photo gradually starts to reduce. Don't slide it too much to the left, though, because you want to retain your colors too.
You can also use the Whites and Blacks sliders to darken parts of the photo that you think need this treatment. And if you're worried that the lighting looks too inconsistent, you can always use these two sliders to fix that problem.
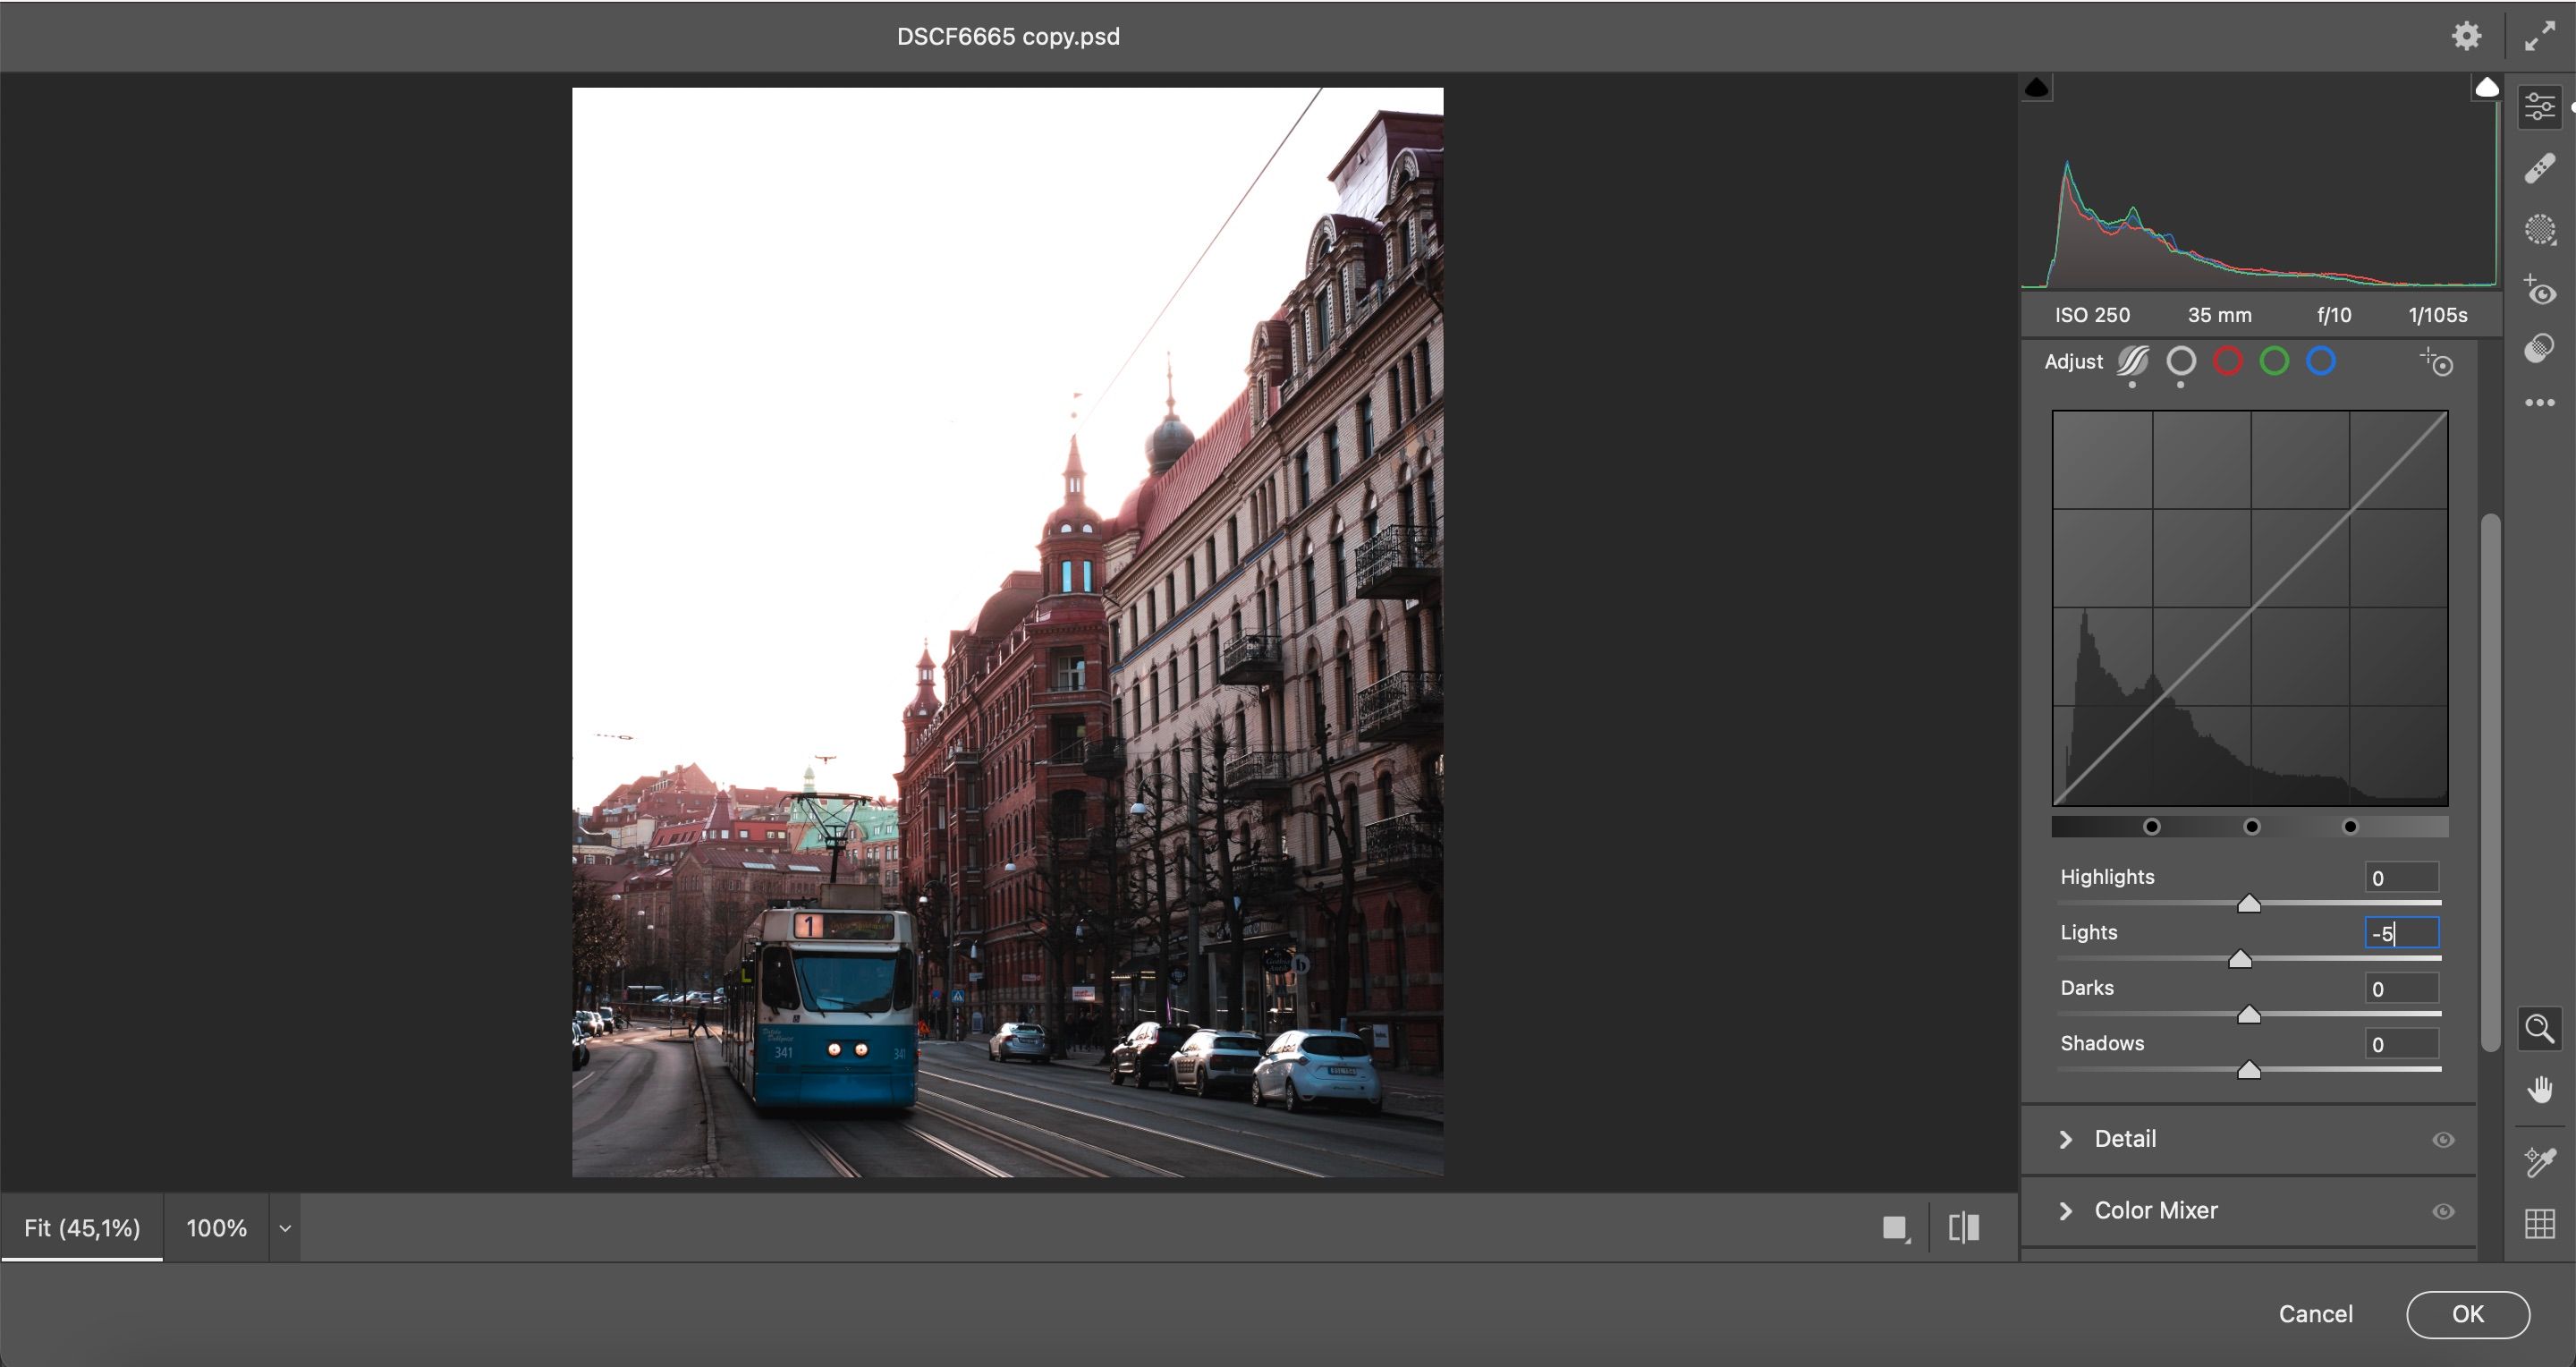
The Curve feature is also worth using if you want to fix an overexposed picture in Photoshop. You can adjust the Highlights, Lights, Darks, and Shadows to make your histogram more even and give you more of a solid base to edit everything else from.
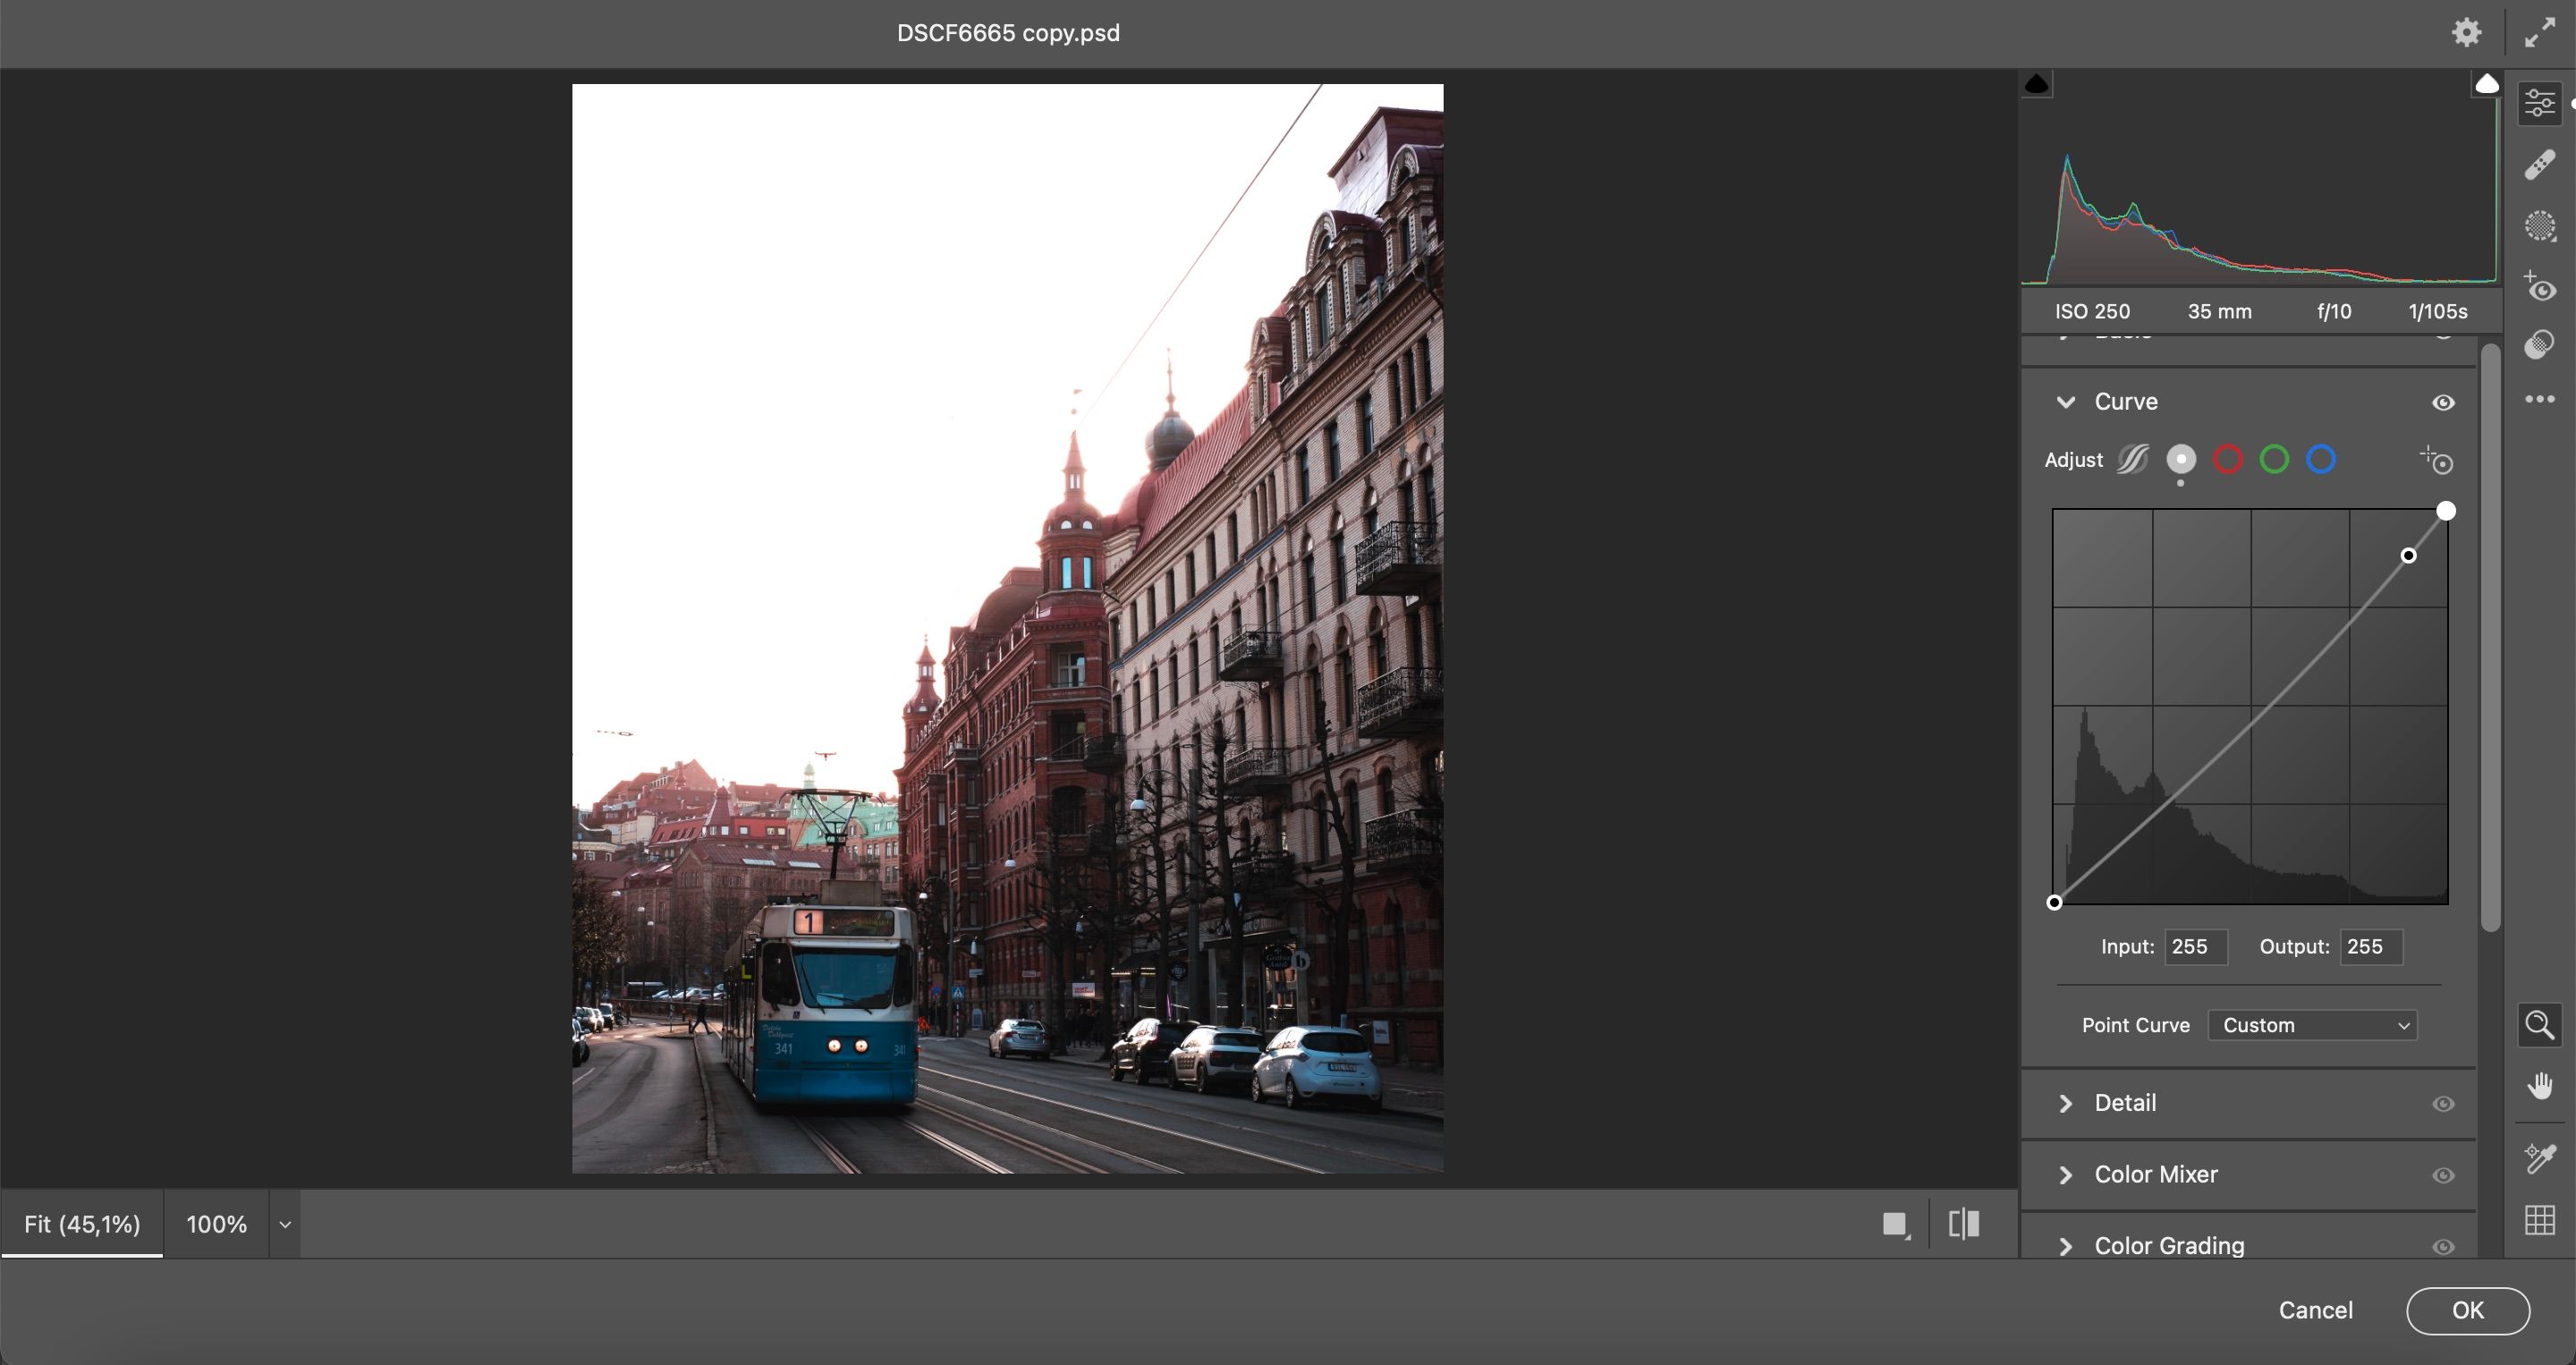
With the Tone Curve section, you can also add points to the line to brighten or darken certain parts of your picture. You'll need to click on the second icon in Curve to use this feature; it works in an identical way to what you might already be used to in Lightroom.
Save Your Overexposed Photos With Photoshop
Some people overexpose their photos for a specific artistic style, and there's nothing wrong with doing this. Sometimes, adding more light than your camera meter suggests can help you create warm and dreamy tones in your pictures. For many people, however, overexposure is usually an error that they didn't intend to happen.
It's not possible to save every overexposed photo; if you've taken things to the extreme, you might find that no amount of editing will make the picture look presentable. But if you're only a couple of marks over the recommended level of exposure, you might be able to fix the issue.
Photoshop has several tools that you can use to fix overexposed images. You can use Camera Raw to adjust the lighting in different parts of your picture, for example, and it's possible to adjust your photos' shadows and highlights in the main version of the app.

