If you want to customize your Mac and change how the operating system works, you'll need to spend a fair amount of time inside the Mac System Preferences.
It helps to have a go-to workflow for accessing your Mac's settings. Today we'll be we're exploring the many ways you can jump to the right preference pane, every single time. Find your favorites!
Note: In a couple of cases below, we'll access the System Library folder at Mac > System > Library. This folder contains important data that macOS requires to function and we usually recommend leaving it alone. In this instance though, we're taking the liberty to dig into it, since we'll only be creating shortcuts to a particular folder while leaving the original folder intact.
1. Use Spotlight
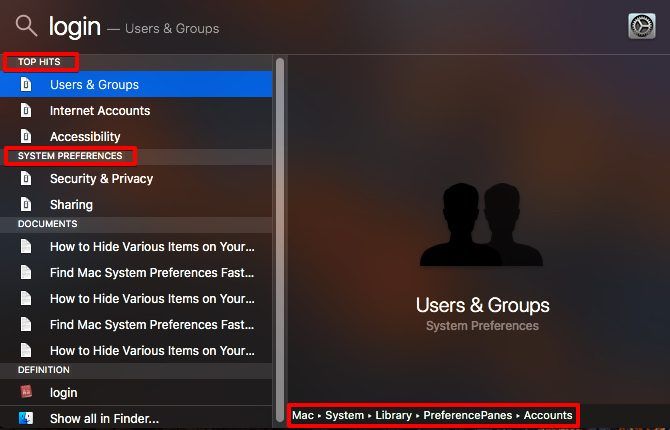
If you're used to accessing every corner of macOS from Spotlight, you might as well open System Preferences from there. You can also open individual panes (General, Dock, Trackpad, and so on) right away from Spotlight.
When you start typing in the name of a pane or a setting, Spotlight shows you a list of panes that match your query, under the System Preferences category. The closest matches show up in the Top Hits category. Hit the Command key with any pane selected and you'll see where it lives in Finder (this works for any search result in Spotlight).
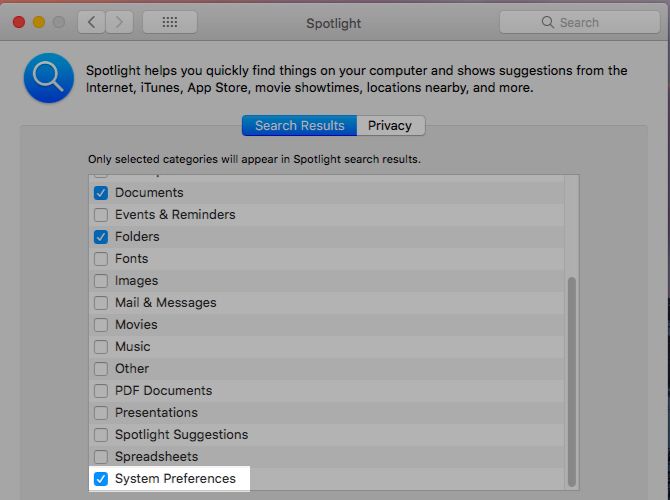
Can't see the System Preferences category at all in Spotlight? You might have disabled it in the past. Check the box for System Preferences under System Preferences > Spotlight > Search Results to force that category to show up.
2. Open From the Dock
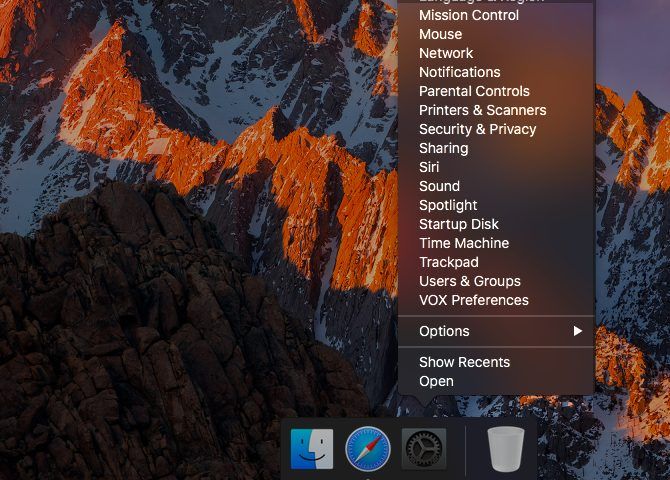
Right-click or click and hold the dock icon of the Mac System Preferences app and you'll see a popup menu with an alphabetical list of all the settings panes. You don't even need to have the app open to access this list, and from there it takes only one click to jump to the right pane.
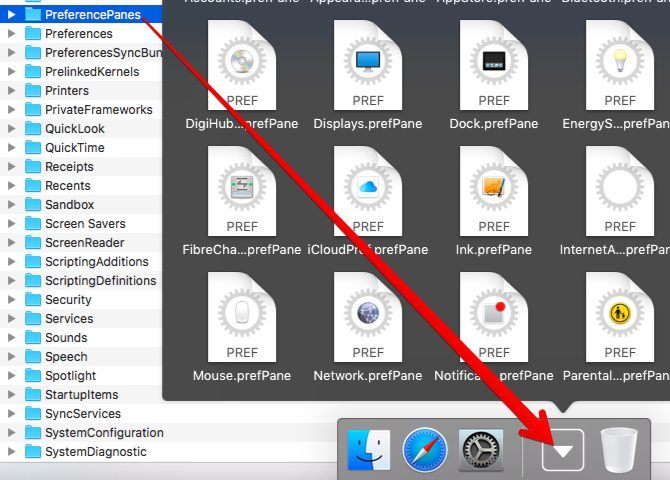
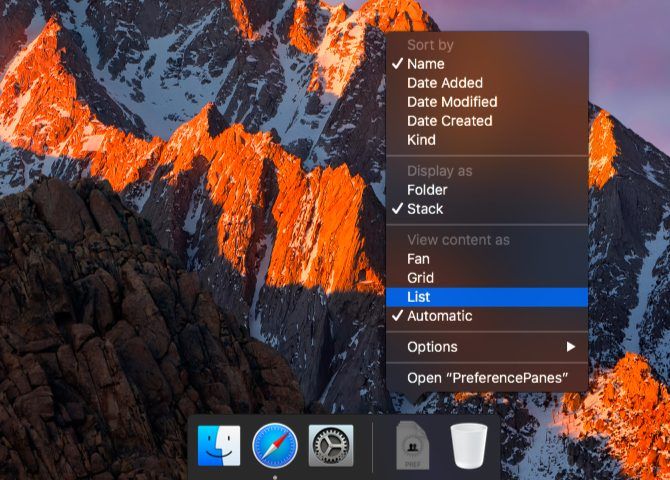
Instead of keeping System Preferences in the dock, you can keep its contents in a bookmarked folder in the dock. To do this, go to the System Library in Finder and drag the PreferencePanes folder onto the dock to the right-hand side of the separator. Now click on that dock folder and you'll see all the settings panes there.
The folder's context menu or right-click menu gives you options to display the panes in a grid, as a fan, or in a list.
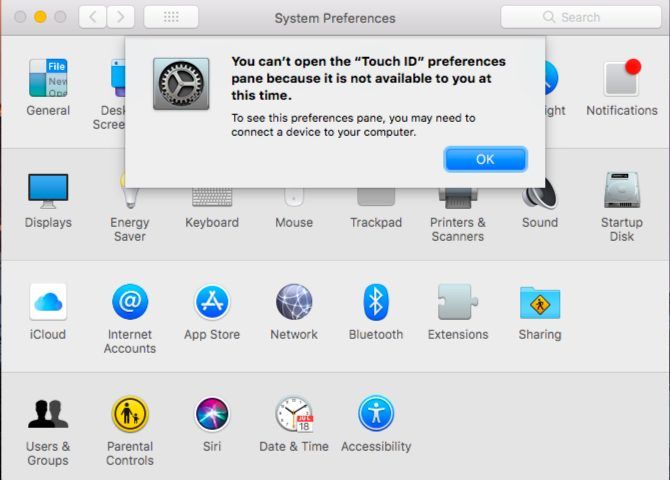
Do you see some panes you haven't seen before? Some panes may be of no help on your Mac because they're either linked to features that your device doesn't support right now, or they're missing key data. If that wasn't the case, those panes would have shown up in System Preferences by default.
Clicking on such panes in the dock menu throws up an error message in System Preferences or displays a blank pane.
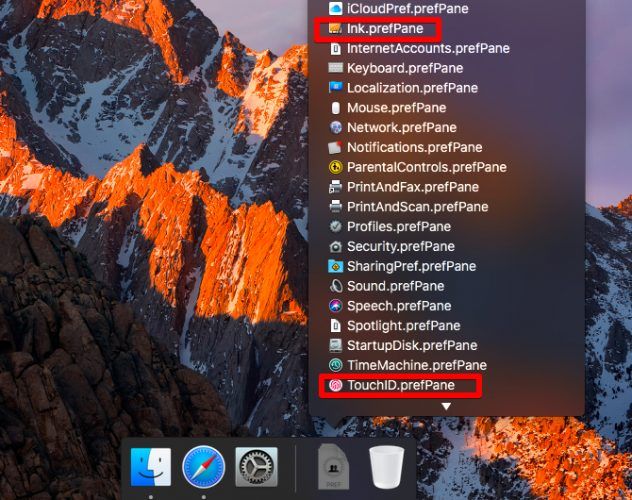
Speaking of unsupported panes, here are three examples:
- TouchID: Needs Touch Bar support
- Ink: Needs graphic tablet support
You don't have to drag the entire PreferencePanes folder to the dock. Instead, you can drag individual panes from the folder for one-click access. This can clutter up the dock though, so you might want to stick to 4-5 panes at the most.
3. Find From the Search Box
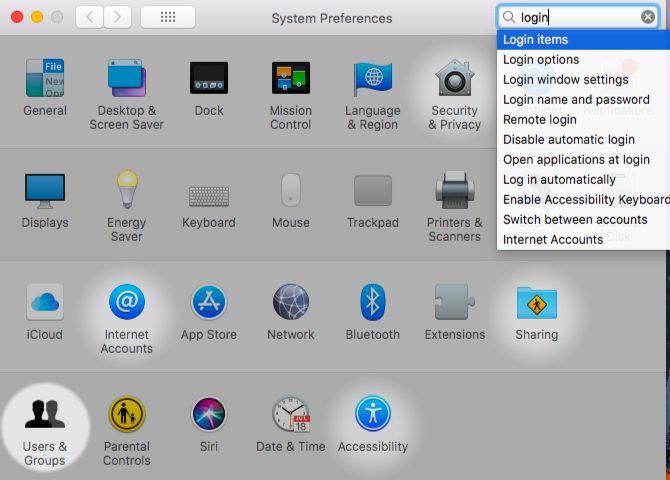
If you often forget which setting goes in which preference pane, the search box in System Preferences is here to rescue you. The standard keyboard shortcut associated with search across various Mac apps (Command + F) works here too. Start typing the name of the setting you're looking for into the search box and you'll see a drop-down list of potential matches.
The search box within the app is more powerful than Spotlight because it suggests individual settings when you start typing a query. What's more, it highlights the correct preference pane you need to click on and then takes you to the correct tab where you'll find the setting.
For example, if you need to add or remove login items, type login or log in in the search box. You'll then see settings suggestions you can pick from, and the associated panes will also appear highlighted. Now click on the Login items option or hit Enter when you have it selected. In an instant the view changes to the right section (Users & Groups > Login Items) from where you can edit login items.
4. Click From the View Menu
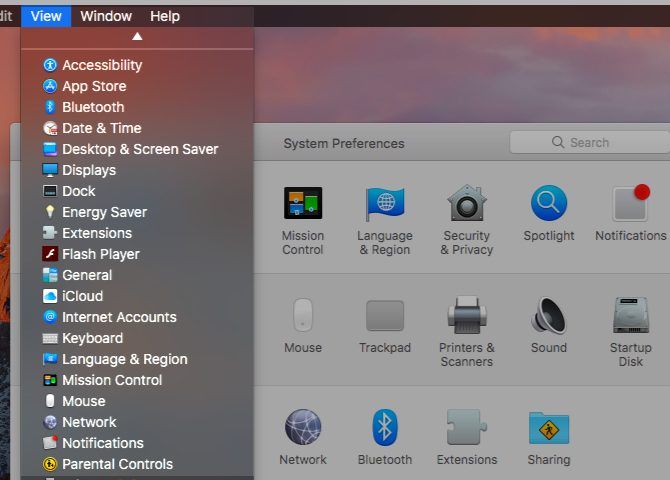
When you have System Preferences open, you can select the right pane from the alphabetical list in the View menu.
5. Click From the "Show All" Menu
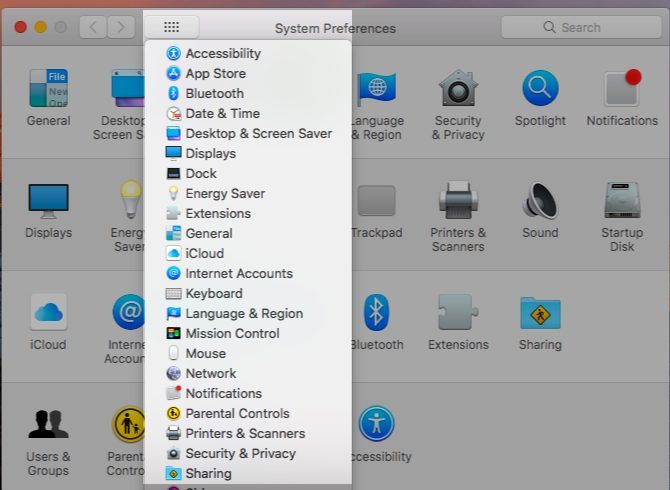
Wherever you happen to be within your Mac System Preferences, clicking on the Show All button in the title bar (Command + L) takes you to the main view or grid view right away. That button holds another tiny, useful feature that helps you switch panes without having to return to the main view every time. Click and hold the Show All button and you'll see a list of all available preference panes. Select one from this list to switch to it.
6. Open From the Menu Bar
Click on various system icons in the menu bar to find a direct link to the corresponding System Preferences pane. You can jump to the Network pane from the Wi-Fi icon, the Energy Saver pane from the battery icon, and the Bluetooth pane from the Bluetooth icon.
Of course, not all panes have a corresponding menu bar icon and not all menu bar icons lead you to settings panes. If you would like to access all System Preferences panes from the menu bar, install an app like XMenu (Free).
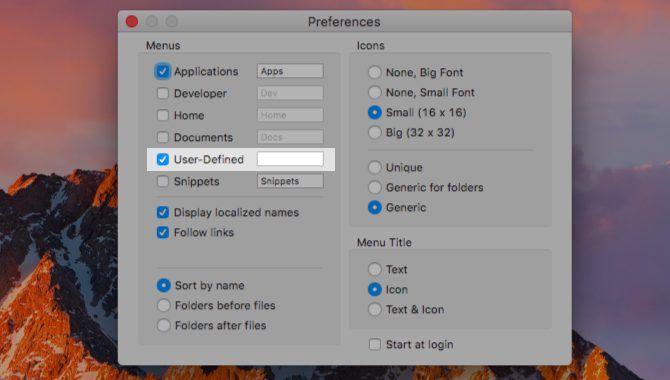
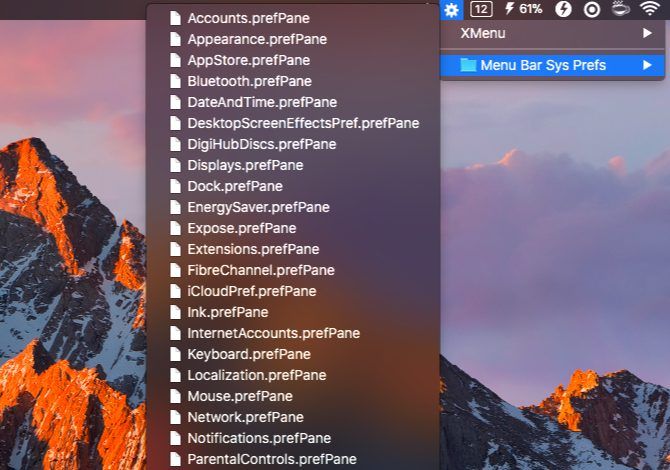
After you install XMenu, open its settings via the menu bar icon (XMenu > Preferences...). You'll see that while there are a few default menus you can enable, System Preferences isn't one of them. You can add it as a user-defined menu though. Select the User-Defined checkbox to display the new menu you create in the menu bar.
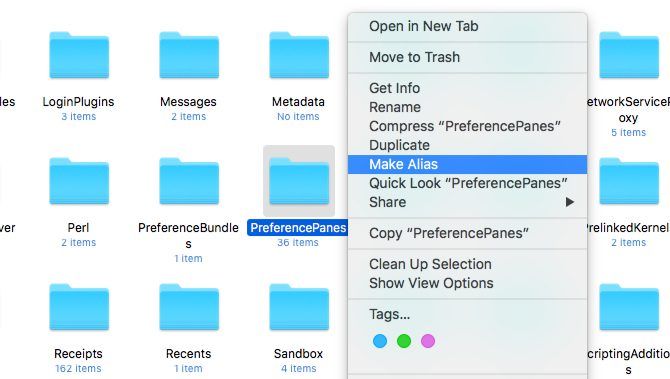
Now, let's see how to create that special menu for preference panes. First, head to the Mac System Library and create an alias or shortcut to the PreferencePanes folder there. You'll need admin credentials for this task. Look inside the right-click menu of the folder for the Make Alias option.
The alias shows up in the same folder as the original. You have to move it to this location in the User Library:
~/Library/Application Support/XMenu/Custom
. Feel free to rename the alias to anything you want, say, Menu Bar Sys Prefs -- but do not rename the original folder!
Now you'll see this new shortcut folder hidden behind the XMenu gear icon in the menu bar and you can use it to access all your System Preferences panes.
It's such a shame that the developers of MenuPrefs haven't updated it to work with modern macOS versions. The app turns system preferences into a menu bar list.
7. Try a Keyboard Shortcut
You can bring up some settings panes with keyboard shortcuts. These shortcuts involve the Option key in combination with the special keys at the top of your Mac's keyboard:
- Displays pane: Option + a screen brightness key (F1 or F2)
- Mission Control pane: Option + the Mission Control key (F3)
- Keyboard pane: Option + a keyboard brightness key (F5 or F6)
- Sound pane: Option + a volume key (F10, F11, or F12)
Clean Up System Preferences
Before we wrap up, let's look at three things you can do to optimize the macOS settings app.
Hide Unused Panes
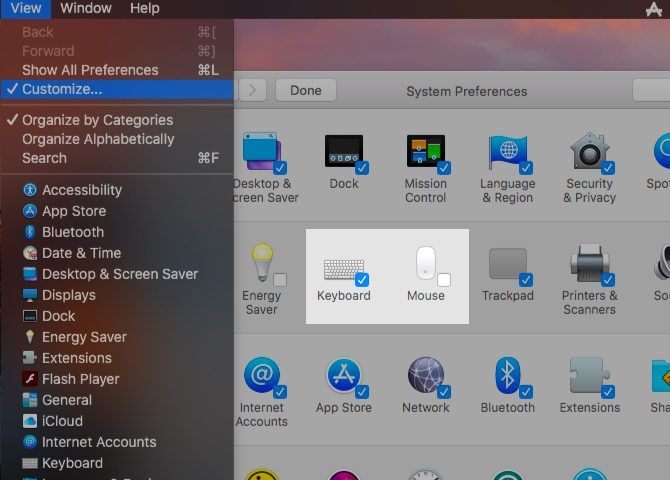
See that Customize... option in the View menu of System Preferences? It allows you to hide panes you don't find regular use for, such as Energy Saver or Startup Disk. Click on that menu option and you'll see checkboxes show up next to each pane.
Uncheck the boxes for the panes you would like to keep out of sight and hit the Done button to save the changes. Those panes are now gone! Only from the main view of the app though. They will still show up in Spotlight, the View menu, the search box, and so on.
List Panes Alphabetically
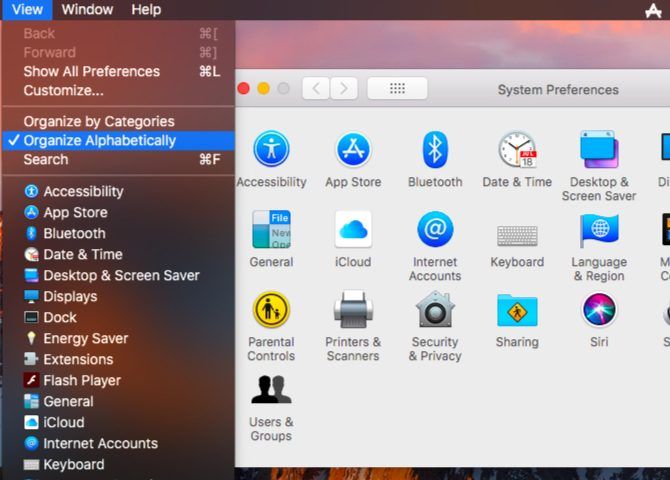
By default, System Preferences organizes the settings panes based on logical categories. If you don't find this helpful and would rather have the panes show up in alphabetical order, click on View > Organize Alphabetically.
Switching back to the default line-up in future is as easy as selecting Organize by Categories from the View menu.
Sync Settings With iCloud
You have probably spent a lot of time tuning your Mac just so. You have enabled/disabled features, customized notifications, set up text expansion shortcuts, and so on. If you lost all those tweaks to some unforeseen digital disaster, it would be painful to go through them all over again.
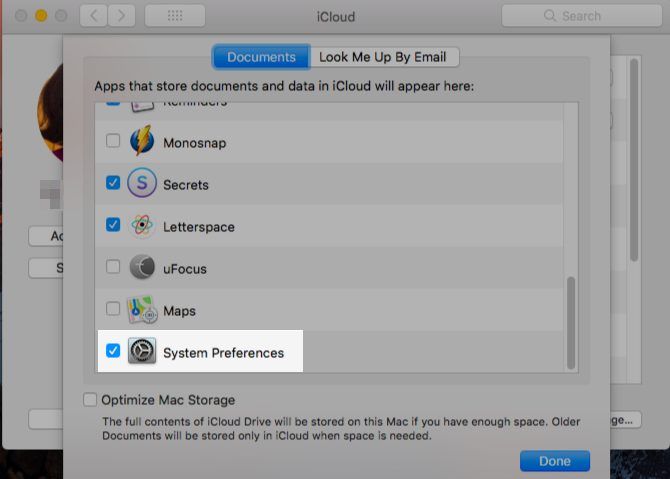
It's easy to restore settings if you sync the Mac System Preferences app with iCloud. You can do that from System Preferences > iCloud > iCloud Drive > Options... Select the checkbox for System Preferences to enable the backup.
What's your preferred method for finding your Mac System Preferences panes? Are there any shortcuts or tricks that we have overlooked? Tell us in the comments!

