
eCards are probably still one of the easiest ways to send a creative holiday greeting to a loved one, friend, or colleague. You can simply select a holiday or occassion, choose a template, do some tweaking to customize it, and you have an eCard ready to email within seconds.
GotFreeCards, a popular eCard service, has a fun feature called Face eCards. This lets you upload a picture of your face, and place it on a pre-designed animated eCard to make it more personal.
Here's how to use GotFreeCards to create your very own eCard.
How to Send a Face eCard With GotFreeCards
With GotFreeCards, you can choose from various eCard templates covering different occasions. It's a great way to give your friend or a family member a fun greeting!
To create a Face eCard, you can select your template, upload your photo, and fit your face to the area of the eCard by resizing and rotating your picture as desired.
Here's how to create a free customized animated eCard with your face on it.
- Go to GotFreeCards.
- Click on Face eCards at the top right corner of the page.
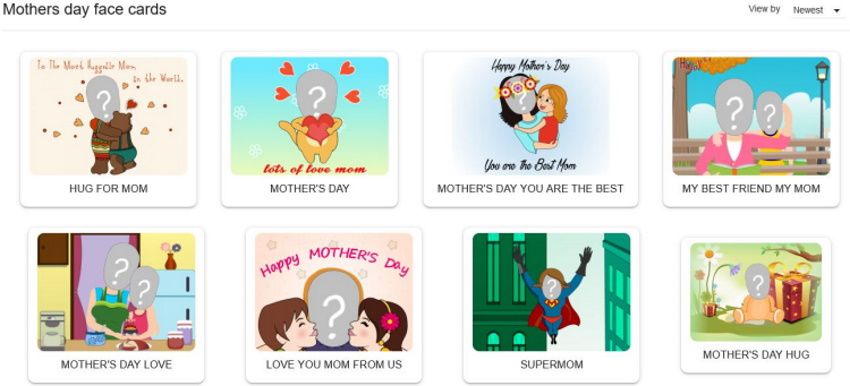
- Click on the hamburger menu on the left side of the screen to select any of the categories on display. There are currently ten categories, including Mother's Day, Father's Day, Thanksgiving, Christmas, Halloween, and more.
-
Once you select your category, choose the card you want to use by clicking on it.
-
On the popup page, click Personalize. This is where you can add a picture of your face, type a personalized message, preview your card, and share it. You can also click the play button to preview the card's audio.
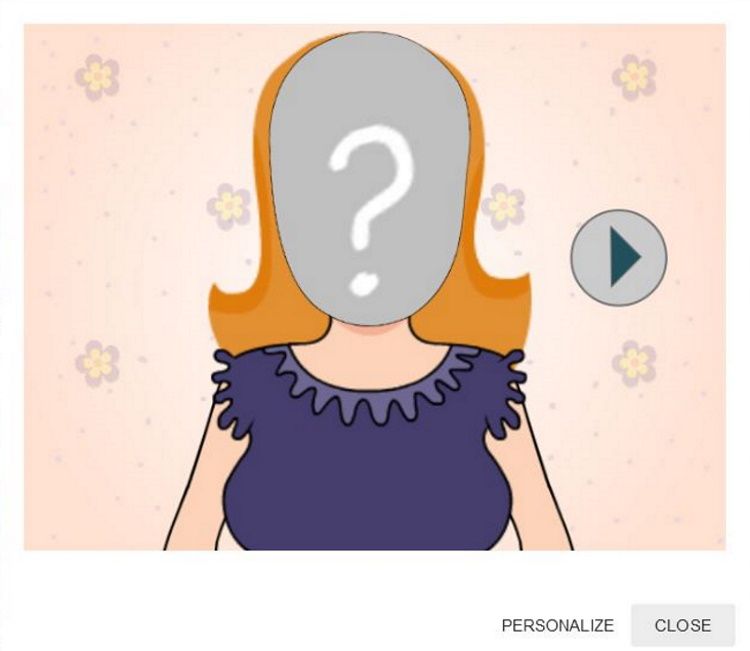
- To upload an image, click on the Face button to your top left. Alternatively, click the question mark icon that represents the face inside the picture.
- From the dialog box, search for and select the photo on your computer. Then, click on Open to upload your picture.
- You can scale and rotate the image inside the frame to get the best fit.
- Click Save when done, or Cancel to upload another picture. You will need to repeat steps nine through 12 if you're adding multiple faces to your eCard.
-
Upon clicking Save, your picture will now be inserted into the card as seen below.

- Next, click on the Message icon at the top left to type a personal message. When you're finished writing your message, click Done.
- Select Preview on to watch an animated preview of your face eCard.
- Click on the Share button to share your face eCard to Facebook or via email.
- If you're sharing your card via email, type in your name and email address, as well as that of the recipient. Click Send when done.
- If you're sharing your card on Facebook, you'll be redirected to Facebook. After signing into your Facebook account, you'll be able to share your card just like any other post.


No matter the occasion, your recipient is bound to be surprised by the unique eCard that they'll receive.
Easily Send a Free Animated Card With Your Face
Why send a plain old card in the mail when you can send an animated card with your face on it? That's why you should go ahead and send personalized face eCards to your friends, family, and loved ones. It's fast, simple, and best of all, free.