One of the advantages of using WordPress is its sheer flexibility. It's not just for posts and pages: custom post types can extend the core features to virtually anything.
Let's take a look today at what you could do with custom post types, as well as a quick practical example of how to create an event listing using a custom post type called Event.
Note: This tutorial should be considered for educational purposes only, so you can learn the code used to create custom post types. If you actually want a great events listing plugin for your WordPress site, try The Events Calendar, which is well developed and free.
What Are Custom Post Types in WordPress?
Typically, a WordPress site consists of two types of content: dated blog posts, and static pages. Most of us who have set up a WordPress blog are familiar with the fact that pages should be used for things like "About me" or "Contact information", while regular posts go to your blog.
But beyond that, what if you want to add another special kind of content that doesn't really fit into the chronological order of the blog and certainly isn't static? That's where custom post types come in.
A fairly common request for club or group sites is to have some kind of events calendar. One solution that could be applied is to create a separate Events category of posts. The problem with this is they'll be displayed in the main blog timeline, and we really ought to separate the two concepts entirely.
For that purpose, let's create a new post type called event, which will have its own separate section of the admin interface.
How to Create a Custom Post Type in WordPress
We'll do this by adjusting your theme files directly. You could achieve the same effect through a plugin, but to demonstrate the concept and practice it's just easier to write them directly. If you're not comfortable doing this, consider using the My Custom Functions plugin, which allows you to add code non-destructively.
https://en-gb.wordpress.org/plugins/my-custom-functions/
Open up your theme's functions.php file, stored in the theme folder inside wp-content/themes; or use the My Custom Functions plugin, which you'll find at Settings > PHP Inserter. At the end of the file, add this code:
        add_action('init', 'events_init');

function events_init() {
	$args = array(
		'labels' => array(
			'name' => __('Events'),
			'singular_name' => __('Event'),
		),
		'public' => true,
		'has_archive' => true,
		'rewrite' => array("slug" => "events"),
		'supports' => array('thumbnail','editor','title','custom-fields')
	);

	register_post_type( 'events' , $args );
}
Be sure to do this before the closing php (?>) tag, if there is one in your functions.php file.
Take a while to read over the code. It's declaring some properties (like labels for the interface), and how the URLs (rewrites) should be handled, as well as what features this post-type supports. You can, for instance, add a custom field to your custom post type with the supports property.
In this case, we've declared our event type to support thumbnails, a content editor for the event description, an event title, and custom fields. We've also added has_archive, so that navigating to the events page will bring up an archive of all events, similar to a blog.
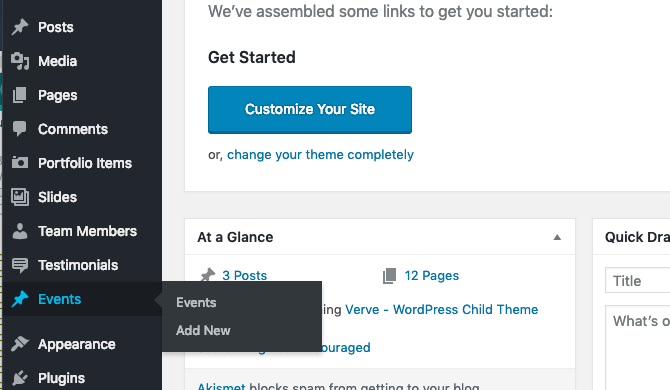
That's it, now if you save your theme and reload your blog, assuming you don't have any errors you should now see a new events section on your admin sidebar. Yay!
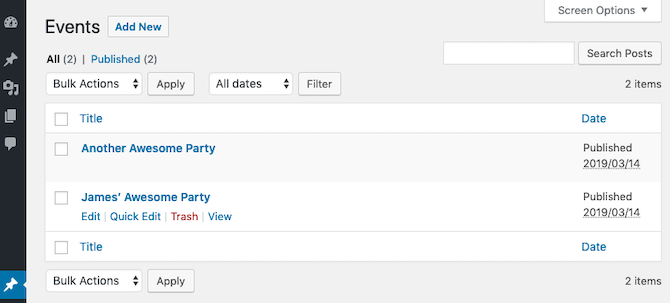
Add some example events now.
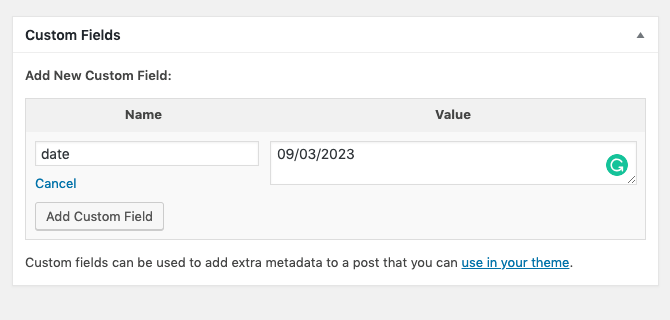
Then since this is an event, create a custom field called date to indicate when the event will occur. Use mm/dd/yyyy format.
Note that we need to use custom fields to specify the actual date of the event rather than the date of the post, because the date of the post represents when the notice is published. Since you'd presumably be adding events that will occur in the future, setting the publishing date to the actual event date would be useless.
If you try to view the event at this point, you may get a 404 error. This is because WordPress needs to regenerate your Permalink URL structure to account for this new post type. Head over to the Settings > Permalinks page, and hit save again.
You should now be able to view the individual event post. Note that the first part of the URL, after your domain name, is /events/. We chose this in this line of code:
'rewrite' => array("slug" => "events"),
Customize the Events Listing Page
Now that you have all these fantastic events in your blog, it would be nice to actually list them somewhere. For that, we will create a special page template, so you can then add that page to your regular menu items alongside About or Contact.
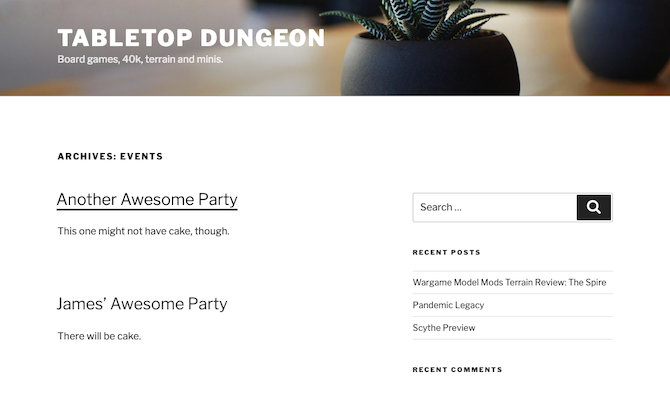
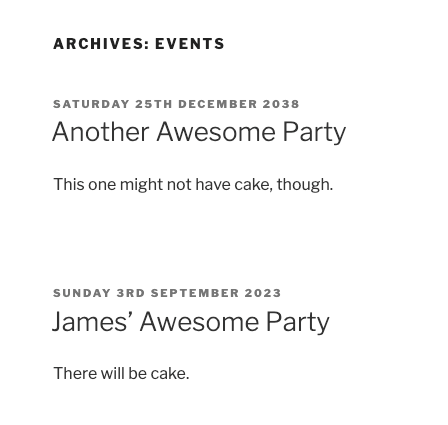
Since we already specified that the Event post type should have an archive, you can go ahead and see what the default is by visiting /events/. On the standard Twenty-Seventeen theme on my test site, I got this:
Customizing this output is going to depend on what theme you're using, and covering the entire WordPress templating system is well out of the scope of this article. However, for the sake of this tutorial, I'll assume you're using Twenty-Seventeen.
Start by creating a copy of archive.php, and rename it to archive-events.php. This is a standard naming convention that means WordPress will automatically use this template to display the archive for the events post type.
Upon examining the file, the Twenty-Seventeen authors have provided a post format mechanism, which is too complex for our needs:
        /*
* Include the Post-Format-specific template for the content.
* If you want to override this in a child theme, then include a file
* called content-___.php (where ___ is the Post Format name) and that will be used instead.
*/
get_template_part( 'template-parts/post/content', get_post_format() );
Note: A child theme is recommended since any updates to the original theme will overwrite your changes. This WordPress support article describes the process of creating a child theme for Twenty-Seventeen. For brevity, I'm just going to work on the original theme and not care if my work is lost in a later update.
Cut that entire block out, and paste in the following instead. This is just a simplified copy of what's in those post format templates, for the sake of learning:
        <article>
<header class="entry-header">
<?php echo '<div class="entry-meta">'.twentyseventeen_time_link().'</div>';
the_title( '<h2 class="entry-title"><a href="' . esc_url( get_permalink() ) . '" rel="bookmark">', '</a></h2>' );?>
</header>

<?php if ( '' !== get_the_post_thumbnail() && ! is_single() ) : ?>
<div class="post-thumbnail">
<a href="<?php the_permalink(); ?>">
<?php the_post_thumbnail( 'twentyseventeen-featured-image' ); ?>
</a>
</div>
<?php endif; ?>

<div class="entry-content">
<?php the_content(sprintf('Continue reading<span class="screen-reader-text"> "%s"</span>',get_the_title()));?>
</div>

</article>
If you save and preview the Events page again, you'll notice it now has dates. But they're wrong. They're currently showing the publish date instead of the event date. As a last step, let's change that to the actual date the event will be held. Find the bit that generates the time,
twenty_seventeen_time_link()
, and replace it with the following:
date('l jS F Y',strtotime(get_post_meta(get_the_ID(), 'date', true)))
This is getting the date from the post meta field we set, then using the PHP date() function to format it to something more readable.
Next steps?
If you're unhappy with your current web host, we highly recommend using a managed WordPress host like WP Engine, which we ourselves use for our sister sites. Otherwise, InMotion Hosting offers affordable plans, which are even cheaper with our special discount when you use this link.
Then, note that when we created the event post type, we coded support for featured thumbnails already. Use our guide to featured images and post thumbnails to grab and display a featured image on the events listing archive.

