Digital privacy is becoming more important for everyday users. Today, all of us have crucial files that need safekeeping. File encryption tools like VeraCrypt are key to protecting our precious data. Here's how you can create and use a VeraCrypt volume to encrypt and protect your files.
What Is VeraCrypt?
VeraCrypt is a free and open-source program that encrypts your files. To protect your sensitive data, VeraCrypt creates encrypted volumes, i.e. secured containers for storing your files. VeraCrypt also allows you to encrypt entire system drives or partitions.
We'll take a look at the Windows version in this tutorial. But these steps will work for macOS and Linux users too, since VeraCrypt works the same way across platforms.
To get started, head to the VeraCrypt downloads page to install VeraCrypt. You can accept the default settings during installation.
How to Create a VeraCrypt Volume
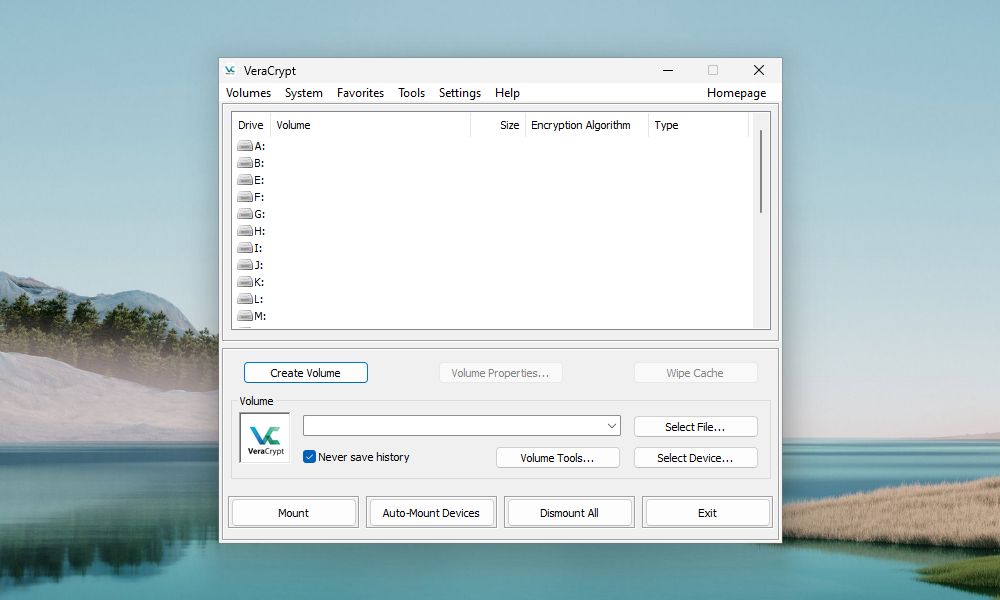
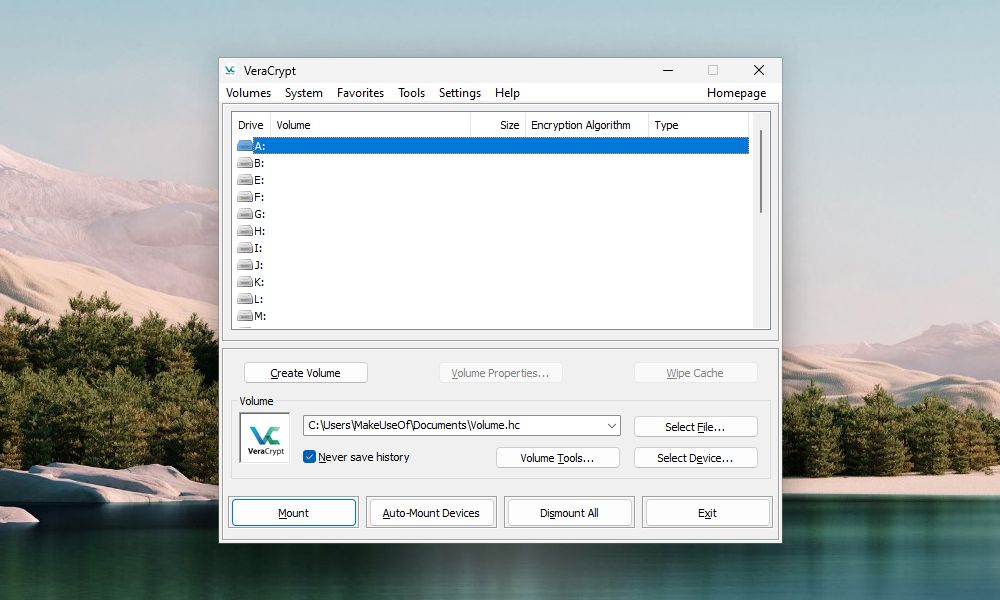
When opening VeraCrypt, the program's main user interface lets you mount and access VeraCrypt volumes. You can create new volumes from the main window.
To create a VeraCrypt volume, click Create Volume.
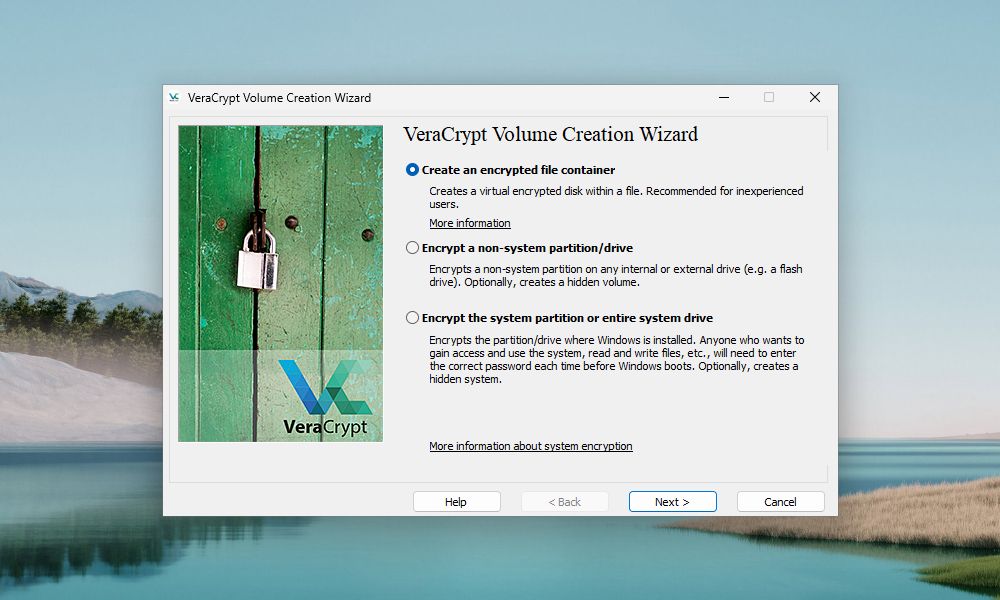
On the first step of the VeraCrypt Volume Creation Wizard, select the type of volume you want to create. We're going to create a container volume, so select the Create an encrypted file container option.
From this window, you can also choose to encrypt an external drive or partition. You can even encrypt an entire system partition or drive from here. To learn more about these options, click the More information about system encryption link.
Click Next to proceed.
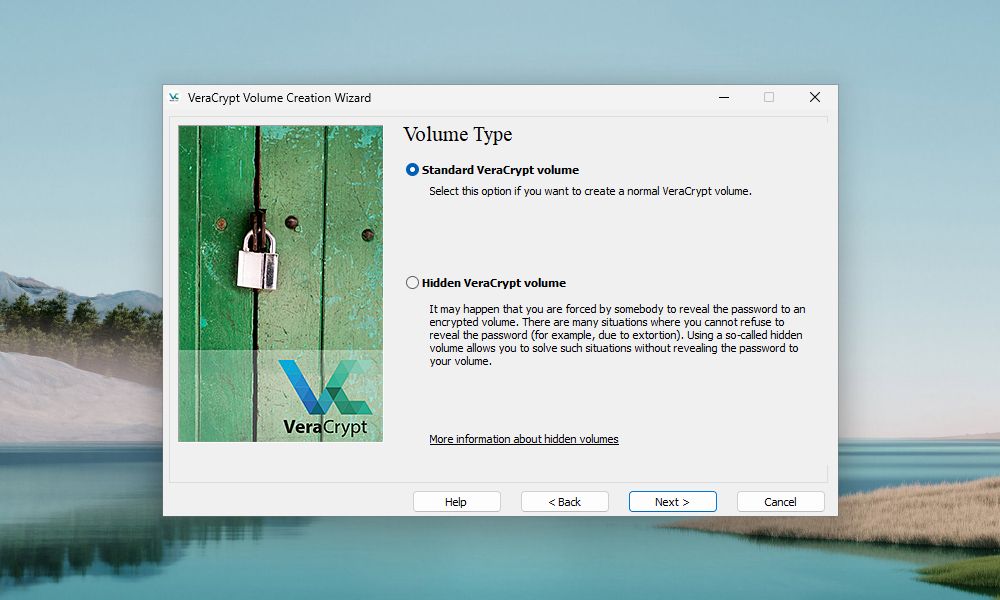
The default volume type is a Standard VeraCrypt volume. With a strong password to encrypt it, even a normal VeraCrypt volume will be hard to crack.
You may have concerns about someone forcing you to reveal your volume's password. If so, you can also choose to create a Hidden VeraCrypt volume. Learn more about hidden volumes by clicking the More information about hidden volumes link.
Click Next.
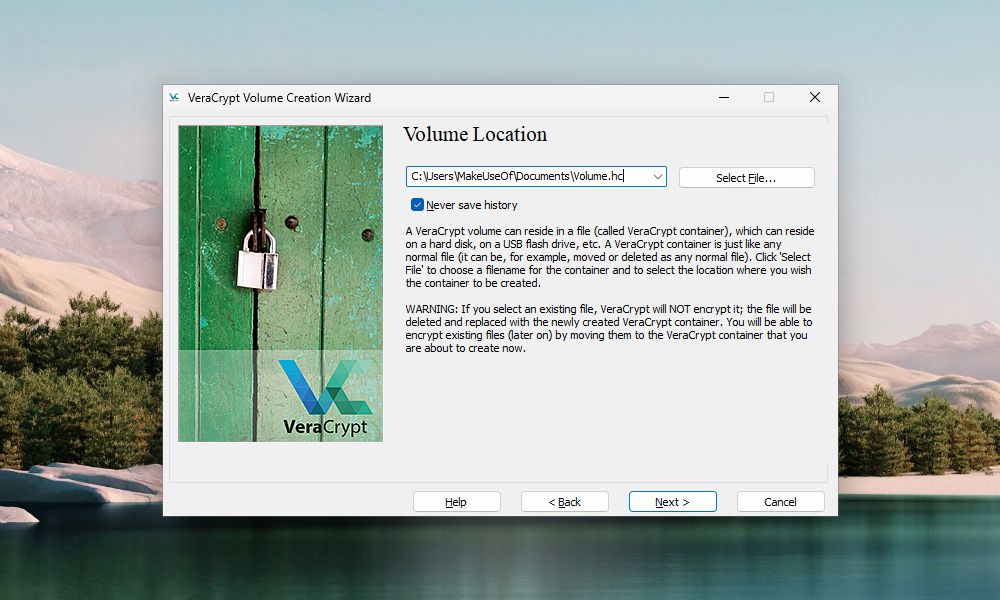
On the "Volume Location" screen, click Select File. Then, use the "Specify Path and File Name" dialog box to enter a name and choose a location for the VeraCrypt volume file.
One of VeraCrypt's install settings allows you to have the computer associate .hc files with VeraCrypt. This enables users to double-click on a volume file to load it in VeraCrypt. To take advantage of this feature, be sure to add ".hc" to the end of your volume file name.
As an alternative, you can give your volume a name that hides it in plain sight. You are free to set your volume to any file name and type to give it the appearance of a usual file in your file manager. Only VeraCrypt will be able to detect that the file is an encrypted VeraCrypt volume.
If you want the "Volume Location" dropdown list to contain a history of volumes you attempted to mount, uncheck the Never save history box. This allows you to select a volume from the list instead of using the Select File button. But saving your history comes with risks. It can provide easy VeraCrypt volume access to threat actors who might get a hold of your computer. Only uncheck the box if your computer isn't at reasonable risk.
Once again, click Next.
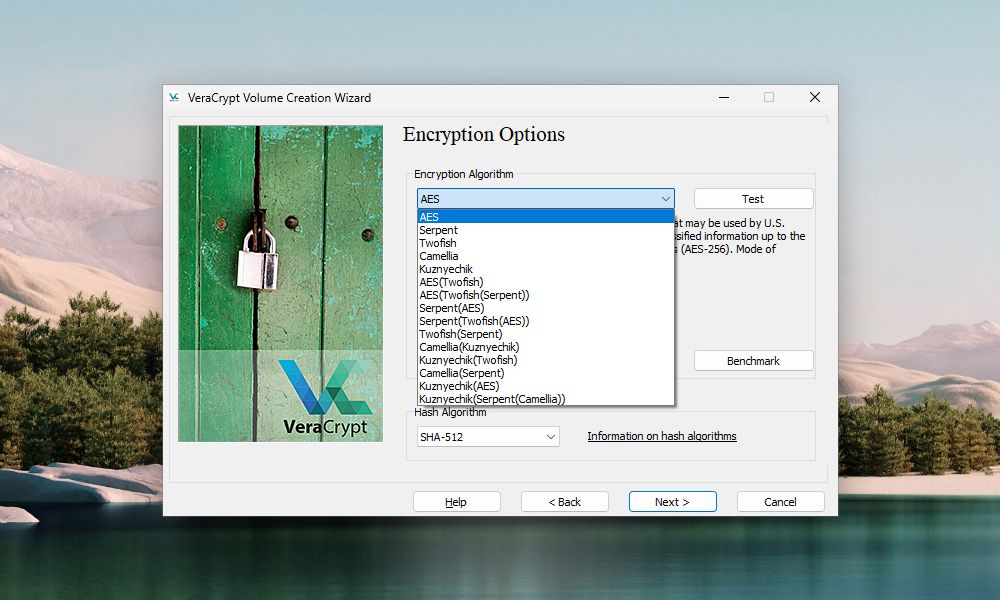
On the "Encryption Options" screen, choose an Encryption Algorithm and Hash Algorithm. These algorithms determine how VeraCrypt will encrypt your volume. If you're not sure which algorithms to pick, both defaults are secure.
If you need extra security, VeraCrypt has the option to add layers of encryption to a volume.
Click Next.
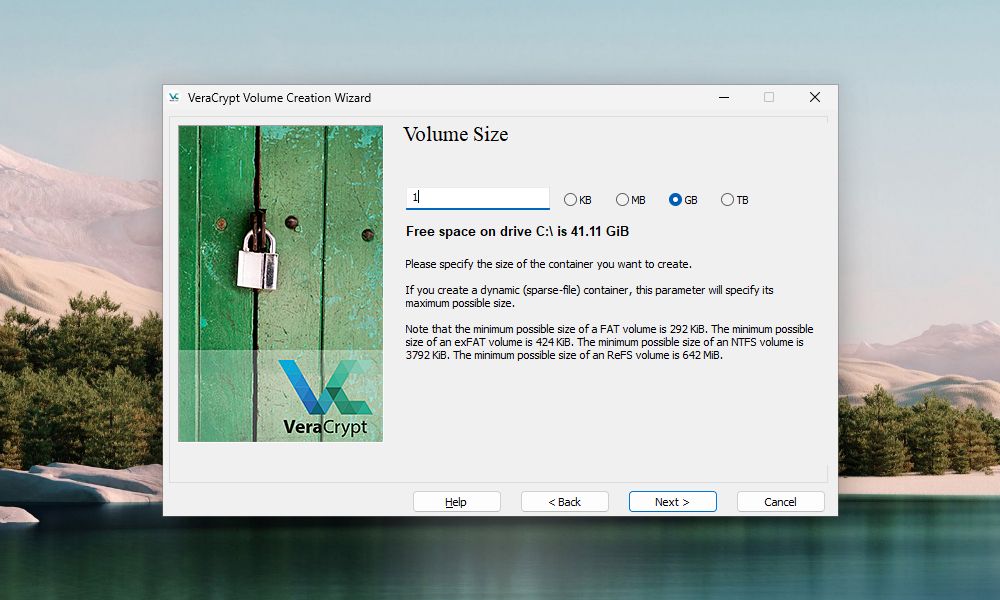
Enter the size you want for the VeraCrypt volume in the edit box and select whether that size is in KB, MB, GB, or TB. Make sure that the volume that you're creating is big enough for the files you intend to keep in it.
Move on to the next screen by clicking Next.
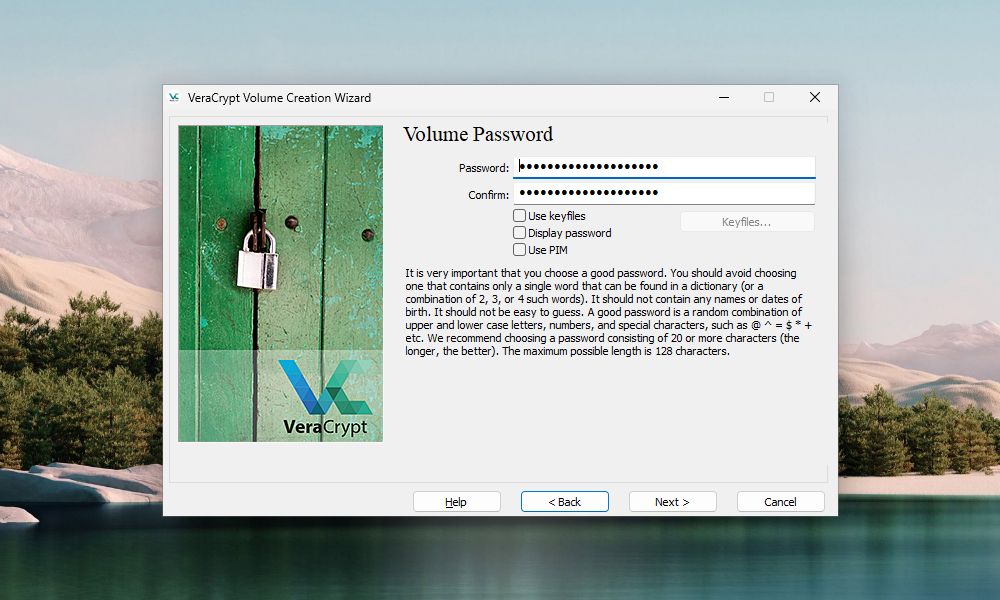
Choose a strong password for your volume and enter it in the Password box, and again in the Confirm box.
Using keyfiles and a PIM will add extra layers of protection to your volume. Check the VeraCrypt documentation page to learn more about using keyfiles and PIMs.
If you enter 20 or fewer characters for your password, you'll see a warning dialog. Always remember that short passwords are easier to crack using brute force attacks. Click No to return to the Volume Password screen and enter a longer, more secure password.
The Next button is only available once you've entered the same password in both boxes.
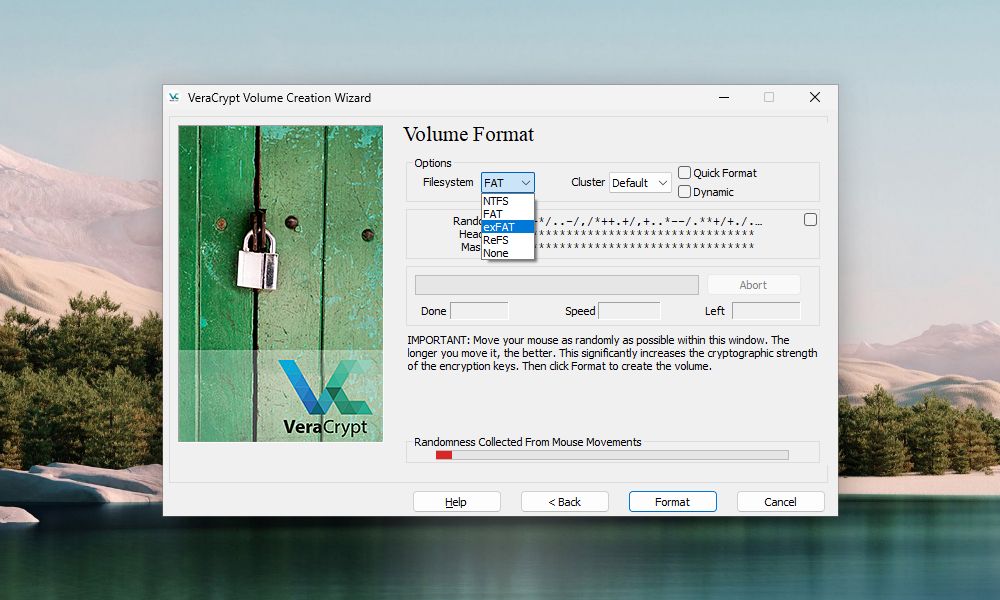
On the Volume Format screen, select the type of Filesystem you want to use. If you're going to access the volume from different operating systems, select FAT or exFAT.
Leave Cluster as Default, and leave Dynamic and Quick Format unchecked.
Move your mouse randomly over the Volume Format screen. You should do this until the progress bar under "Randomness Collected From Mouse Movements" at least turns green. The more you move the mouse, the stronger the encryption on the volume.
Once VeraCrypt has collected enough randomness, click Format. If the User Account Control dialog box pops up, click Yes to continue.
VeraCrypt will create the volume file in the location you specified. This may take a while, depending on the size of your volume.
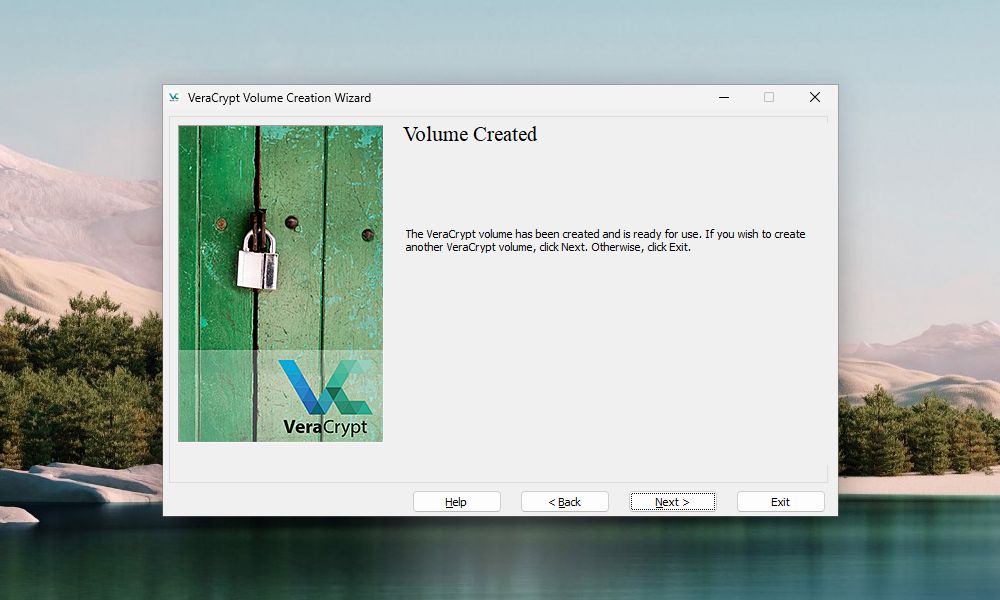
Once VeraCrypt successfully creates the volume, a dialog box will pop up Click OK on the dialog box.
On the "VeraCrypt Volume Creation Wizard" window, click Next if you want to create another volume. Or click Exit to close the wizard.
How to Mount a VeraCrypt Volume
Now that we've created the VeraCrypt volume, you need to mount the volume to use it.
On the main VeraCrypt window, select an unused drive letter you want to use for your volume.
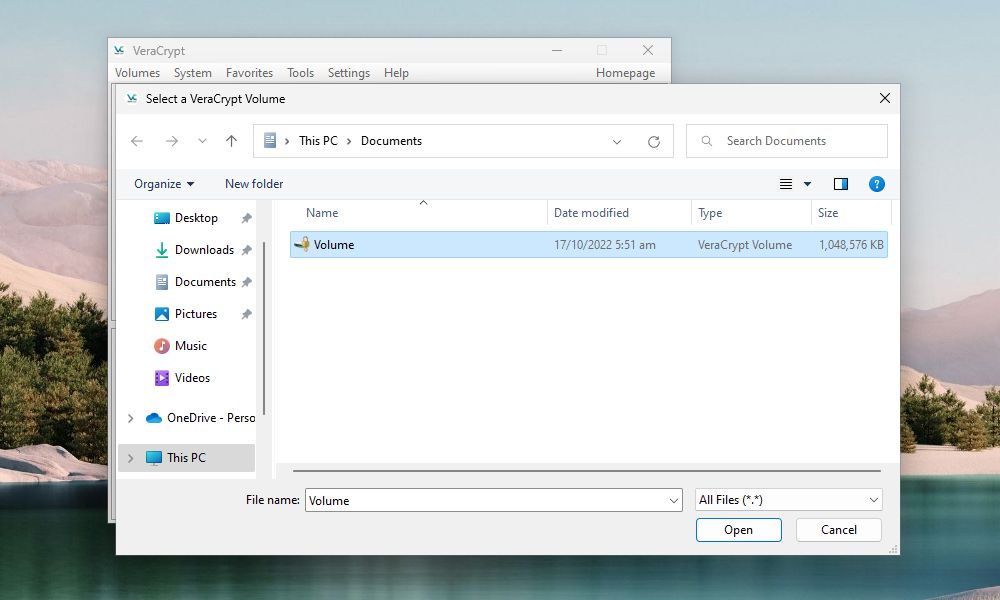
Then, click Select File. Use the "Select a VeraCrypt Volume" dialog box to navigate to and select a VeraCrypt volume file.
If the computer associates .hc files with VeraCrypt, you can also use File Explorer to load the VeraCrypt volume. Go to where you saved the VeraCrypt volume file and double-click the file.
The path to the VeraCrypt volume file displays in the dropdown list box. Click Mount.
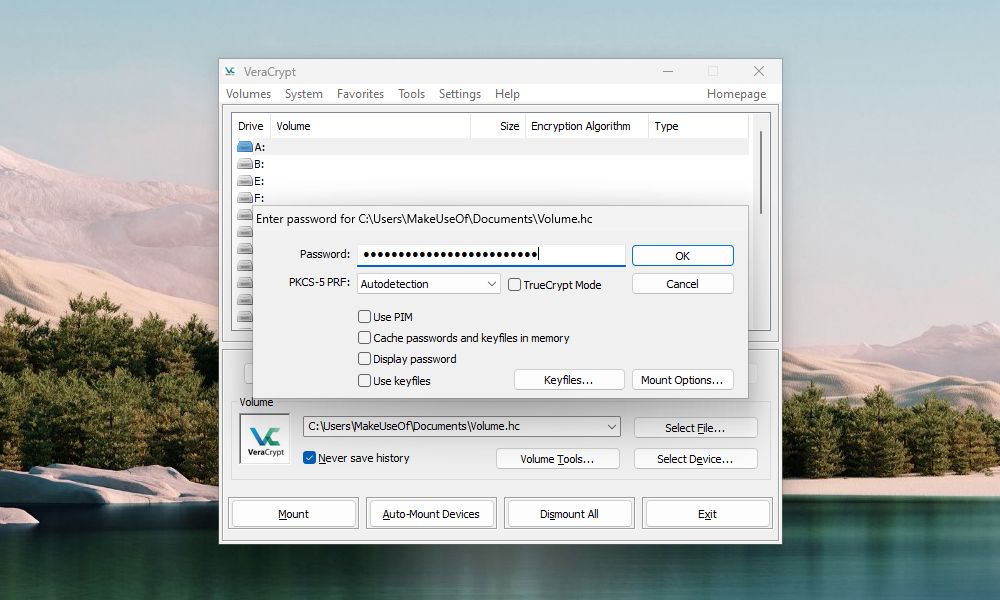
Enter your password. If you remember the Hash Algorithm you selected when you created the volume, select it from the "PKCS-5 PRF" dropdown list. If not, don't worry. You can use the default Autodetection option. It will just take a bit longer for the volume to decrypt and mount.
If you used one or more keyfiles when you set up your volume, make sure you check the Use keyfiles box. Then, click Keyfiles and select the same file(s) you used when creating the volume. If you used a PIM when you set up your volume, you will also need to enter the correct PIM on the Volume PIM box.
Click OK.
A progress dialog box displays while the VeraCrypt decrypts the volume. Depending on how big your VeraCrypt volume is, this may take a while.
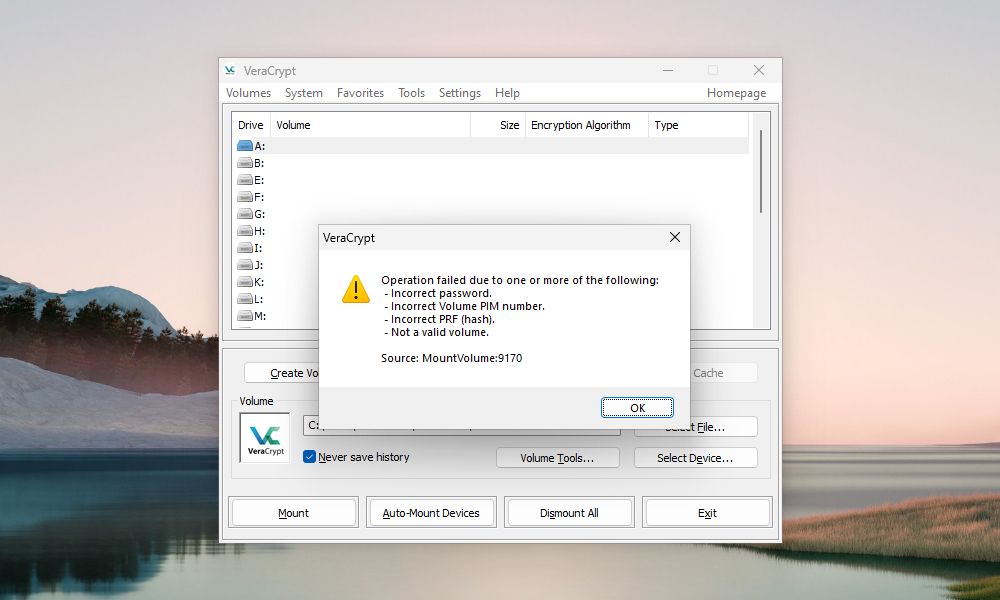
If you entered a wrong password, you'll see the error dialog box above. The box may also pop up if you entered an incorrect PIM number or forgot to select the right keyfiles (if you used them when creating the volume).
Click OK to go back to the "Enter Password" dialog box and enter the correct password. If necessary, you should also enter the correct PIM number and select the correct keyfiles.
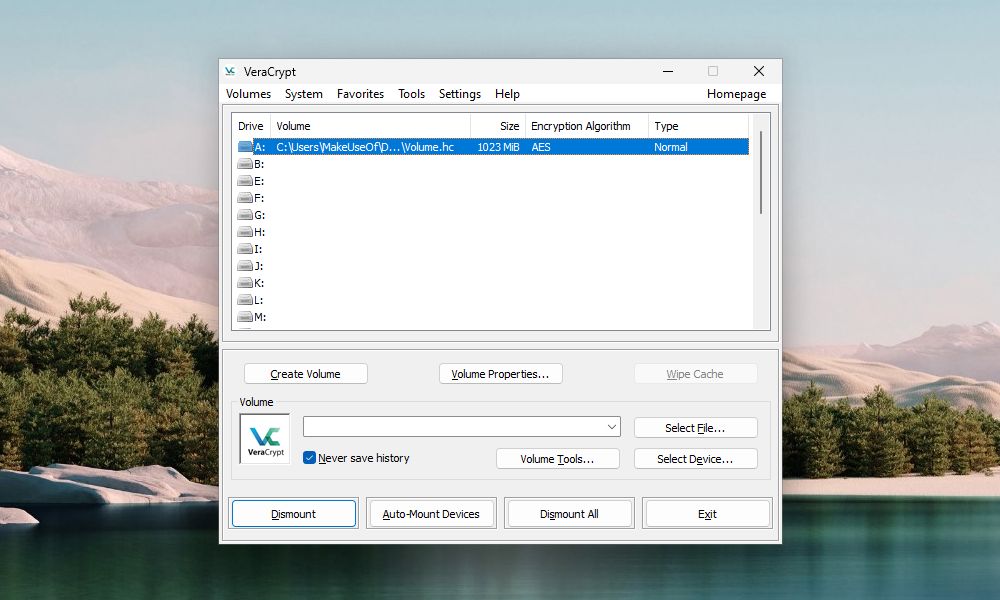
Once the volume is mounted, you'll see it next to the drive letter you selected. The encrypted volume will now appear as a virtual disk assigned to that drive letter.
To access the volume, double-click on the drive letter in VeraCrypt.
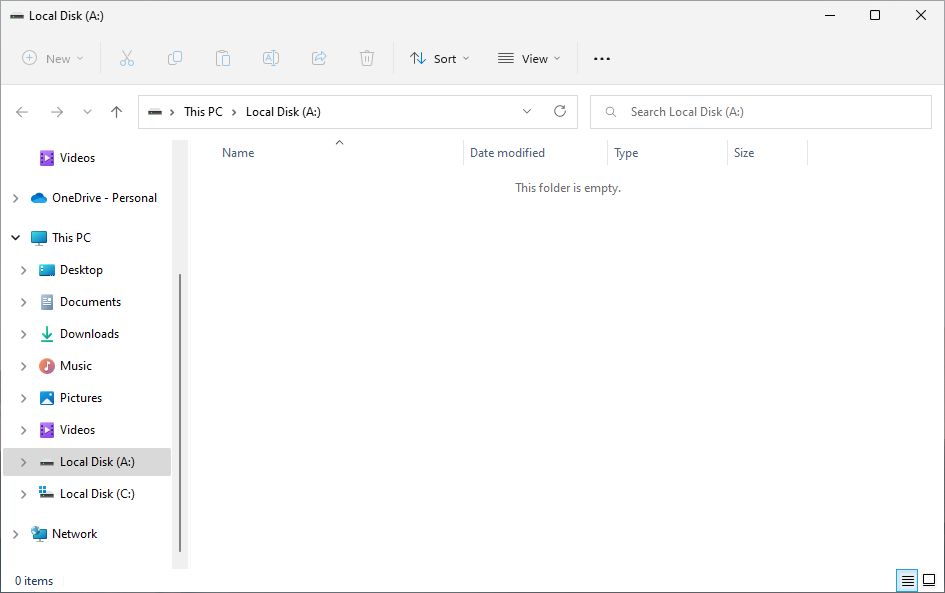
You can also navigate to the mounted volume in File Explorer the way you normally browse to any other drive. In this tutorial, we mounted our VeraCrypt volume using the drive letter A:. The volume shows up with that drive letter in File Explorer.
VeraCrypt never saves any decrypted data to disk—only in memory. It encrypts files in the volume, even when mounted. As you work with your files, VeraCrypt decrypts and encrypts them on the fly.
How to Dismount a VeraCrypt Volume
When you're done working with the files in your VeraCrypt volume, you can close, or dismount, the volume.
Select the volume you want to dismount in the list of drive letters. Then, click Dismount.
VeraCrypt removes the volume from the drive letter list. When a volume is dismounted, you can move the .hc file anywhere you want. You can back the file up to an external drive. You can also upload it to a cloud storage service for easy access on another computer.
Start Using VeraCrypt to Encrypt Your Private Data
Computers play an integral part in your daily life. Any sensitive data stored on them (as well as data in the cloud and on external media) must be secured. VeraCrypt is an easy and reliable way to secure and encrypt your most precious files. It's also one of many free Windows tools that can keep your computer more private and secure.

